 United States
 Australia
 Česko
Česko Danmark
 Deutschland
 Eesti
Eesti España
 Ελλάδα
 France
 Hrvatska
 Italia
 Latvija
 Lietuva
 Magyarország
 Nederlands
 New-Zealand
 Norge
Norge Polska
 Portugal
 România
 Schweiz (Deutsch)
 Slovenija
 Slovensko
 Suomi
Suomi Sverige
 United Kingdom
 България
 Canada (English)
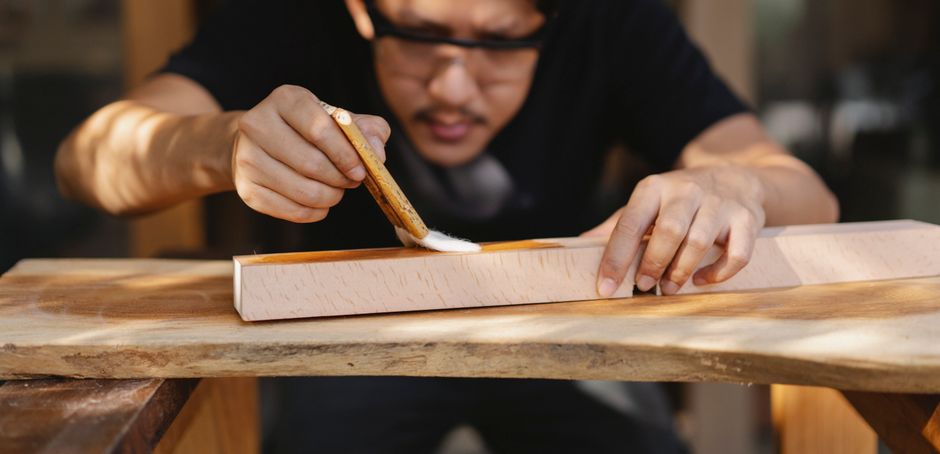
Varnishing a wooden chair is one of those home improvement tasks that looks simple on the surface but can quickly turn into a frustrating experience if you do not have the right materials. The truth is that everything depends on the quality of the product you choose. A cheap, low quality varnish will leave streaks, bubbles, uneven color, and a finish that wears off within months. A high quality varnish, on the other hand, will protect your wooden chair for years, resist scratches and moisture, and give it a beautiful, professional looking shine.
This is exactly why we recommend our own Wood Furniture Varnish here at Ferber Painting. It is formulated specifically for furniture pieces like chairs, tables, and cabinets, and it is the only varnish on the market that comes with a full satisfaction guaranteed or your money back policy. That means if you are not happy with the results, for any reason, you can send it back and get a full refund. No other brand on the market offers this level of confidence in their product, and that alone should tell you something about the quality you are getting.
In this complete guide, we will walk you through everything you need to know about how to varnish a wooden chair step by step, explain why choosing the right varnish matters so much, and show you why Ferber Painting’s Wood Furniture Varnish stands out from every other option available today. Whether you are refinishing a single dining chair that has seen better days, restoring a set of antique chairs passed down through your family, or simply giving a fresh coat to a new piece of furniture you just built, the principles in this guide will apply. Wood is a living material that reacts to humidity, temperature, sunlight, and daily handling, so understanding how to properly seal and protect it is a skill that will serve you well beyond this single project.
Why the Right Varnish Makes All the Difference
Before we get into the actual technique of varnishing a chair, it is important to understand why the product itself is the single most important factor in the outcome. Many people focus on technique, brushes, sanding, and preparation, and while all of that matters, none of it will save a bad varnish. A poor quality varnish will yellow over time, crack under temperature changes, or simply fail to bond properly with the wood.
Think about it this way: you can spend an entire weekend meticulously sanding a chair down to a perfectly smooth surface, wiping away every speck of dust, and applying each coat with steady, careful brush strokes. But if the varnish inside the can is made with low grade resins or fillers, all of that effort can be undone within a few months. The finish might start to feel tacky in humid weather, develop a cloudy haze, or peel away at the edges where the chair gets the most contact with hands and elbows. This is why so many people who “did everything right” still end up disappointed with the final result. It is rarely a technique problem. It is almost always a product problem.
Ferber Painting’s Wood Furniture Varnish was developed specifically to avoid these issues. It contains a advanced resin formula that penetrates deep into the wood fibers rather than just sitting on the surface. This means better adhesion, better durability, and a finish that will not peel or flake after a few months of use. Because the resin actually bonds with the fibers of the wood rather than forming a fragile film on top, the finish moves with the wood as it naturally expands and contracts with seasonal humidity changes, instead of cracking under that stress.
Here are some of the key advantages our varnish offers that you simply will not find with competing products:
- Satisfaction guaranteed or your money back, no questions asked
- Fast worldwide shipping through our international network of trusted carriers
- Easy and secure online payment directly on our website
- A formula designed specifically for furniture, including chairs with curves and joints that are difficult to coat evenly
- Low odor formula that makes it safe to use indoors
- Excellent resistance to humidity, heat, and everyday wear
- A smooth, self leveling texture that reduces brush marks
When you compare all of this to other varnishes on the market, most of which offer no guarantee at all and require you to gamble your money on a product you have never tried, the choice becomes clear. Many hobbyists and even professional refinishers have wasted money on varnishes that looked fine in the can but performed poorly once applied. Without a guarantee, that money is simply gone, along with the time spent on a failed project. With Ferber Painting, that risk is removed entirely.
Comparing Wood Varnish Products: What Really Matters
To help you understand why Ferber Painting’s Wood Furniture Varnish is the superior choice, we have put together a comparison table highlighting the criteria that matter most when choosing a varnish for your wooden chair.
| Criteria | Ferber Painting Wood Furniture Varnish | Typical Competitor Varnish |
|---|---|---|
| Satisfaction guaranteed or refunded | Yes, full money back guarantee | Rarely offered |
| Worldwide shipping | Fast delivery through international carrier network | Often limited to local markets |
| Online payment | Simple, secure, and fast checkout | Varies, sometimes complicated |
| Ease of application | Self leveling formula, brush marks minimized | Often requires multiple careful coats |
| Durability | Resistant to humidity, heat, and daily wear | Can crack or yellow over time |
| Odor | Low odor, safe for indoor use | Strong chemical smell common |
| Suitable for furniture details | Yes, designed for chairs, joints, and curves | Often designed only for flat surfaces |
As you can see, when it comes to protecting an investment like a wooden chair, whether it is an antique family heirloom or a brand new dining set, the details matter. Choosing a varnish that checks all these boxes will save you time, money, and frustration in the long run.
It is also worth considering the hidden costs of choosing the wrong product. If a cheap varnish fails within a year, you will need to sand the chair down again, buy more materials, and spend another weekend redoing work you already thought was finished. When you factor in the cost of your time, the small price difference between a budget varnish and a premium one like ours starts to look insignificant. Quality materials are almost always the more economical choice in the long run, even if the upfront price seems slightly higher.
Step by Step Guide: How to Varnish a Wooden Chair
Now that you understand why the product matters so much, let us walk through the actual process of varnishing a wooden chair. Follow these steps carefully to achieve a professional looking finish at home.
Step 1: Prepare Your Work Area
Choose a well ventilated space, ideally with a stable temperature between 15 and 25 degrees Celsius. Cover the floor with a drop cloth or old newspapers to protect it from drips. If possible, work outdoors or in a garage with the door open, as this will help the varnish dry evenly and reduce fumes indoors, although our low odor formula makes indoor use much more comfortable than with traditional varnishes.
Beyond ventilation and temperature, lighting is another factor people often overlook. Work in a space with plenty of natural or bright artificial light so you can actually see drips, missed spots, and uneven coverage as they happen, rather than discovering them the next day once the varnish has already dried. It also helps to set the chair up on a rotating platform or a set of blocks so you can easily reach the underside of the seat and the bottom of the legs without having to constantly bend down or reposition the entire piece. If you do not have a rotating platform, an old lazy susan or even a piece of cardboard on a smooth floor can work in a pinch.
Step 2: Clean the Chair Thoroughly
Before applying any varnish, the wood surface needs to be completely clean. Use a soft cloth and a mild soap solution to remove dust, grease, and any old wax. Let the chair dry completely before moving on to the next step. Any moisture left on the surface can interfere with the varnish’s ability to bond properly.
Pay special attention to areas where hands frequently make contact, such as armrests and the top of the backrest, since these spots tend to accumulate body oils and grime that are not always visible to the eye. A degreasing wipe or a small amount of mineral spirits on a clean rag can help remove this residue before you begin sanding. If the chair has been previously waxed or polished with a silicone based product, it is especially important to remove every trace of it, since silicone residue can cause the new varnish to bead up and create small craters in the finish known as fisheyes.
Step 3: Sand the Surface
Sanding is a crucial step that many people rush through, but it makes a huge difference in the final result. Start with a medium grit sandpaper, around 120 grit, to remove any old finish, rough spots, or imperfections. Then switch to a finer grit, around 220, to smooth the surface further. Always sand in the direction of the wood grain, never against it, as this can create scratches that will show through the varnish.
For chairs with turned legs, spindles, or other rounded details, a flat sanding block will not reach into the curves properly. In these cases, use a folded piece of sandpaper or a sanding sponge that can flex around the contours. Some people find it helpful to use a strip of sandpaper pulled back and forth like a shoeshine cloth around spindles and rungs, which allows the paper to conform to the curved shape while still sanding with the grain. Take your time on joints where the seat meets the legs or where stretchers connect, since these areas often collect old finish in tiny grooves that are easy to miss.
Once you have finished sanding, wipe away all the dust with a tack cloth or a slightly damp cloth. Any remaining dust particles will get trapped under the varnish and create a rough texture. It is a good idea to use compressed air or a soft brush to get dust out of carved details or tight joints before doing a final wipe down with the tack cloth, since dust can hide in these crevices and reappear once you start brushing on varnish.
Step 4: Apply a Wood Conditioner if Needed
If your chair is made of a softwood like pine, applying a wood conditioner before varnishing can help the wood absorb the finish more evenly. This step is optional for hardwoods like oak or maple, but it is always a good idea to check the specific type of wood you are working with.
Softwoods and woods with inconsistent grain patterns, such as pine, birch, or cherry, tend to absorb finishes unevenly, which can result in blotchy patches once the varnish is applied. A wood conditioner works by partially sealing the pores of the wood so that the varnish is absorbed more uniformly across the surface. Apply the conditioner with a clean cloth, let it sit for the time recommended on the label, usually around 5 to 15 minutes, and then wipe away any excess before it dries completely. Skipping this step on a blotch prone wood is one of the most common reasons people end up with a patchy, inconsistent finish even when using a high quality varnish.
Step 5: Stir the Varnish, Do Not Shake It
Before opening your can of Ferber Painting Wood Furniture Varnish, stir it gently with a wooden stick. Shaking the can can introduce air bubbles that will show up in your finish as small imperfections. Stirring slowly and thoroughly ensures the ingredients are evenly mixed without creating bubbles.
Stir from the bottom of the can upward in a slow, folding motion rather than a fast circular motion, since a fast stir is almost as likely to introduce bubbles as shaking the can would be. If you notice any bubbles forming on the surface after stirring, let the can sit undisturbed for a few minutes before you begin, since most of these bubbles will naturally rise and pop on their own. Pouring a small amount into a separate container, sometimes called a paint kettle, rather than dipping your brush directly into the original can, also helps keep the main supply free of dust and debris that could otherwise contaminate the whole batch.
Step 6: Apply the First Coat
Using a high quality natural bristle brush, apply a thin, even coat of varnish along the direction of the wood grain. Start with the legs and any detailed areas of the chair, then move on to the seat and backrest. Avoid overloading the brush with product, as this can lead to drips and uneven coverage. Our self leveling formula helps minimize brush marks, but a steady, even hand will always produce the best results.
A good rule of thumb is to dip about one third of the bristle length into the varnish and tap off the excess against the inside rim of the container rather than wiping it off, which can strip too much product from the brush. Work in manageable sections, applying the varnish in long, smooth strokes and then lightly dragging the almost dry tip of the brush over the section to smooth out any ridges, a technique often called tipping off. Always finish each section with a stroke that moves toward an edge or a corner rather than stopping in the middle of a flat surface, since this reduces the chance of visible lap marks where wet and dry varnish overlap. For chairs with spindles or rungs, rotate the piece as you work so gravity does not pull the varnish into a drip on the underside.
Step 7: Let It Dry Completely
Allow the first coat to dry fully before moving on. Drying times can vary depending on humidity and temperature, but generally you should wait at least 6 to 8 hours, or ideally overnight, before applying a second coat. Rushing this step is one of the most common mistakes people make when varnishing furniture.
During this drying period, try to keep the chair in a spot with minimal dust, away from open windows, fans, or foot traffic, since even a light breeze can carry dust particles onto the still tacky surface. If you are working in a garage or basement, closing the door for several hours after application, once the fumes have had a chance to dissipate a bit, can help keep the environment cleaner. Touch the surface very lightly with a clean fingertip in an inconspicuous spot before moving on to the next step. If it feels tacky or leaves a mark, give it more time before proceeding.
Step 8: Sand Lightly Between Coats
Once the first coat is dry, lightly sand the surface with a fine grit sandpaper, around 320, to remove any small imperfections and help the next coat adhere better. Wipe away the dust with a tack cloth before continuing.
This light sanding between coats is sometimes called scuffing or keying the surface, and its purpose is not to remove the previous coat but simply to knock down any tiny bumps, dust nibs, or brush marks so the next layer can bond more effectively and lay down smoothly. Use very light pressure, almost like you are simply dulling the shine of the surface rather than trying to sand through it. If you sand too aggressively at this stage, you risk cutting through the previous coat entirely, which can create thin spots or uneven color once the final coat is applied.
Step 9: Apply Additional Coats
For the best results, apply at least two to three coats of varnish, sanding lightly and cleaning the surface between each application. Each additional coat will improve the durability and depth of the finish, giving your chair a rich, professional looking shine.
Chairs that will see heavy daily use, such as dining chairs or kitchen chairs, benefit from an extra coat compared to decorative pieces that are rarely sat on. Areas that receive the most wear, like the seat itself and the top rail of the backrest, can even be given a slightly thicker buildup than less frequently touched parts of the frame, as long as it is done through additional thin coats rather than one heavy application. Many experienced furniture restorers consider three coats to be the practical minimum for a chair that will be used regularly, while four coats is not uncommon for pieces that will live outdoors or in high humidity environments like a sunroom or covered porch.
Step 10: Let the Final Coat Cure
After applying the last coat, resist the temptation to use the chair right away. While the surface may feel dry to the touch within a day, it can take up to two weeks for the varnish to fully cure and reach its maximum hardness and durability. Avoid placing heavy objects on the chair or exposing it to moisture during this curing period.
During the curing window, it is best to avoid placing tablecloths, cushions, or other fabric items directly on the freshly varnished surface, since fabric can sometimes stick to a finish that has not fully hardened and leave a texture imprint behind. Similarly, avoid using any household cleaners or polishes on the chair until curing is complete, as the chemicals in these products can interact with the still curing resin and cause cloudiness or discoloration. Patience at this final stage is what separates a finish that looks good for a few weeks from one that genuinely lasts for years.
Common Mistakes to Avoid When Varnishing a Chair
Even with the best product available, technique still matters. Here are some common mistakes people make and how to avoid them.
- Applying too thick a coat, which leads to drips and uneven drying
- Not sanding between coats, which results in a rough, bumpy texture
- Working in a dusty environment, which causes particles to get trapped in the finish
- Rushing the drying time, which weakens the durability of the final finish
- Using a low quality brush that leaves visible bristle marks
- Choosing a varnish without a satisfaction guarantee and ending up stuck with a product that does not perform as expected
Beyond these frequent errors, a few other pitfalls are worth mentioning. Some people apply varnish in direct sunlight or near a heat source, thinking it will speed up drying, but this can actually cause the surface to dry too quickly on top while remaining wet underneath, trapping solvents and leading to a soft, tacky finish that never fully hardens correctly. Others make the mistake of switching brushes or varnish brands halfway through a project, which can lead to inconsistent sheen or texture between coats. It is always best to use the same product and, ideally, the same brush from start to finish on a single piece of furniture. Finally, storing the varnish can improperly between coats, such as leaving the lid loosely closed or the can tipped on its side, can lead to skinning over or contamination that affects the quality of later coats.
Avoiding these mistakes, combined with using a high quality product like Ferber Painting’s Wood Furniture Varnish, will ensure your wooden chair looks professionally finished and lasts for years to come.
Why Choose Ferber Painting for Your Wood Furniture Varnish
At this point, you might be wondering why you should choose Ferber Painting over the many other varnish brands available online and in stores. The answer comes down to a combination of product quality, customer service, and peace of mind.
First and foremost, our satisfaction guaranteed or money back policy is unmatched in the industry. We are so confident in the quality of our Wood Furniture Varnish that we are willing to fully refund any customer who is not completely satisfied. This is not something you will find with most competitors, who often leave you stuck with a product that does not meet your expectations.
Second, our worldwide shipping network means you can order our varnish from anywhere in the world and expect fast, reliable delivery. We work with an international network of trusted carriers to ensure your order arrives quickly and safely, no matter where you are located.
Third, our online payment system is designed to be simple, secure, and hassle free. You can place your order in just a few clicks, without worrying about complicated checkout processes or hidden fees.
Finally, the formula itself has been specifically designed for furniture, including detailed pieces like chairs with curves, joints, and spindles that are notoriously difficult to coat evenly. Our self leveling, low odor formula makes the application process smoother and more forgiving, even for beginners.
Beyond the product itself, our customer support team is available to answer questions before, during, and after your project. Whether you are unsure how many coats your specific chair might need, curious about drying times in a particularly humid climate, or simply want advice on which sandpaper grit to start with, our team has hands on experience with wood furniture finishing and is happy to help. We built Ferber Painting around the idea that a great finishing product should come with great support, not just a can sitting on a shelf with no guidance attached.
Mini FAQ: Your Questions About Varnishing a Wooden Chair Answered
How many coats of varnish does a wooden chair need?
Most wooden chairs need at least two to three coats of varnish for proper protection and a smooth, even finish. Thin, even coats always produce better results than one thick coat. Chairs that receive heavy daily use, such as kitchen or dining chairs, often benefit from a third or even fourth coat for added durability, particularly on the seat and armrests where wear is concentrated.
How long does varnish take to dry on a chair?
Surface drying usually takes between 6 and 8 hours, but full curing can take up to two weeks. It is important to avoid using the chair heavily during this curing period. Factors like humidity, room temperature, and airflow can all influence how quickly the varnish dries, so a cool, damp environment may require you to extend your waiting time between coats.
Can I varnish a chair without sanding it first?
Sanding is highly recommended, even if the chair already has an existing finish. It helps the new varnish bond properly and results in a smoother, more even final surface. Skipping this step often leads to peeling or an uneven sheen, especially on chairs that previously had a wax or oil based finish applied.
Is Ferber Painting’s Wood Furniture Varnish suitable for outdoor chairs?
Yes, our formula is resistant to humidity and temperature changes, making it suitable for both indoor and outdoor wooden furniture. For chairs that will remain outdoors year round, we still recommend periodic inspection and an additional maintenance coat every couple of years, since prolonged direct exposure to sun and rain is more demanding than typical indoor use.
What if I am not satisfied with the results?
Ferber Painting offers a full satisfaction guaranteed or money back policy on all our products, including the Wood Furniture Varnish. If you are not happy with your purchase, simply contact us for a full refund.
Conclusion
Varnishing a wooden chair does not have to be a stressful or uncertain process, as long as you start with the right product and follow the proper steps. From cleaning and sanding the surface to applying multiple thin coats and allowing proper curing time, each step plays an important role in achieving a beautiful, long lasting finish. But none of these steps will matter if the varnish itself is not up to standard, which is why choosing a trusted, high quality product truly makes all the difference.
Take your time with each stage of the process, resist the urge to rush drying times, and remember that patience during preparation and curing is what ultimately determines how long your finish will last. A wooden chair that is properly varnished can easily last for decades, becoming a piece that gets handed down through generations rather than replaced every few years. With the right materials and a bit of care, this is a project well within reach for anyone, regardless of prior woodworking experience.