 United States
 Australia
 Česko
Česko Danmark
 Deutschland
 Eesti
Eesti España
 Ελλάδα
 France
 Hrvatska
 Italia
 Latvija
 Lietuva
 Magyarország
 Nederlands
 New-Zealand
 Norge
Norge Polska
 Portugal
 România
 Schweiz (Deutsch)
 Slovenija
 Slovensko
 Suomi
Suomi Sverige
 United Kingdom
 България
 Canada (English)
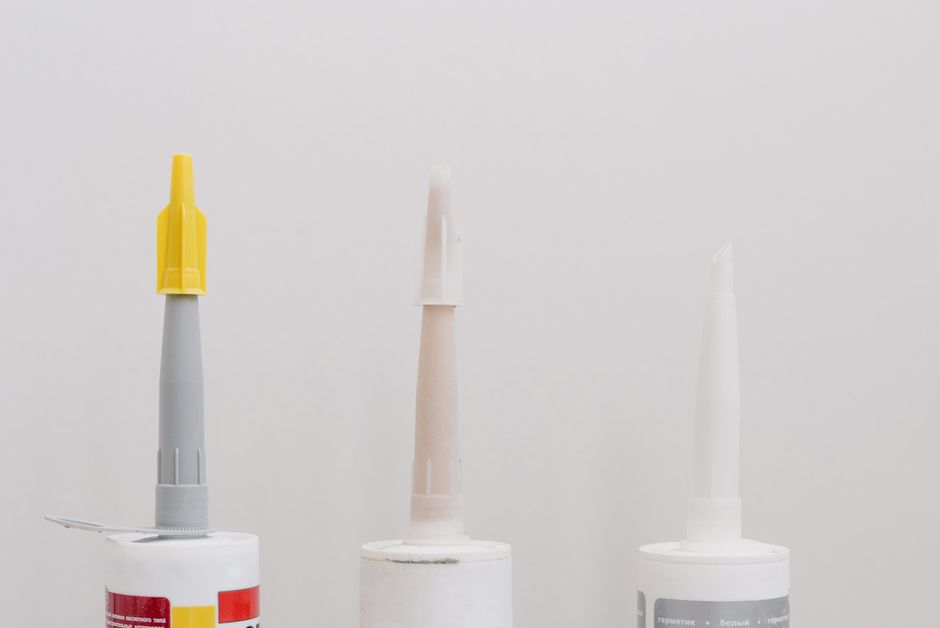
If there is one truth that every professional tiler will tell you, it is this: the success of a shower tiling project depends almost entirely on the quality of the product you use to bond the tiles to the wall. You can buy the most beautiful porcelain or ceramic tiles on the market, but if your adhesive fails, cracks, or lets moisture seep behind the tiles, your entire project will fail within months. This is why choosing the right tiling glue is the single most important decision you will make before you even pick up a trowel.
At Ferber Painting, we understand this better than anyone. That is why we created our own Tiling Glue, a product engineered specifically for wet environments like showers and bathrooms. And unlike almost every other adhesive brand on the market, our Tiling Glue comes with a full satisfied or refunded guarantee. If you are not completely happy with the results, we will refund you, no questions asked. No other manufacturer in this space offers that level of confidence in their own product, and that alone should tell you something about the quality you are getting.
In this complete guide, we will walk you through everything you need to know about tiling a shower, from choosing the right materials to the exact step-by-step process professionals use. We will also explain why Ferber Painting Tiling Glue consistently outperforms competing products, and answer some of the most common questions people ask before starting a shower tiling project. Whether you are renovating a small guest bathroom shower stall or building an entirely new walk-in shower from scratch, the principles in this guide apply equally, and getting the fundamentals right the first time will save you countless hours and dollars in future repairs.
Why the Right Tiling Glue Makes All the Difference
Many DIY enthusiasts assume that tiling a shower is mostly about aesthetics: choosing the right tile pattern, the right color, the right grout line width. While these things matter, they are secondary to the actual bonding agent holding everything together. A shower is one of the harshest environments in any home. It experiences constant temperature swings, prolonged exposure to water, humidity, and in many cases, direct water pressure from the showerhead hitting the wall daily.
Standard adhesives that work fine in a dry living room or kitchen backsplash often fail in a shower because they were never designed to withstand constant moisture. Over time, cheap or generic tiling glue can degrade, lose its bond, and allow water to penetrate behind the tiles. This leads to mold growth, water damage to the wall structure, and eventually, tiles that pop off the wall entirely.
This is precisely the problem Ferber Painting Tiling Glue was designed to solve. Our formula is water-resistant by design, meaning it maintains its bonding strength even after years of constant exposure to moisture. It also has excellent flexibility, which allows it to absorb the natural expansion and contraction that occurs when tiles heat up and cool down repeatedly, something that causes many rigid, cheap adhesives to crack over time.
Choosing the right glue is not just about performance either. It is about peace of mind. When you invest hours of labor and hundreds of dollars into tiles, grout, and tools, the last thing you want is to redo the entire job in two years because the adhesive failed. This is why so many customers choose Ferber Painting Tiling Glue: it is built to last as long as your shower does.
Think about the true cost of a failed tiling job. It is rarely just the price of the tiles themselves. When adhesive fails behind a shower wall, water often gets into the substrate long before you notice any visible signs on the surface. By the time a tile feels loose or hollow when tapped, the moisture may have already caused damage to the backer board, the framing behind it, or even the subfloor below. Repairing that kind of hidden damage frequently costs far more than the original installation, and it usually means demolishing the tile work entirely to access the damaged structure. Investing in a proven, water-resistant adhesive from the very beginning is a small upfront cost compared to the potential expense of tearing out and redoing an entire shower a few years down the line.
There is also a practical, day-to-day dimension to this decision. A shower is used multiple times a day in most households, which means the tiled surfaces are subjected to near constant thermal cycling as hot water runs and then the room cools back down. Multiply that by hundreds of showers per year, and you begin to understand why adhesive fatigue is such a common issue with lower-quality products. A flexible, purpose-built formula like ours is designed to handle exactly this kind of repeated stress without losing its grip.
Why Ferber Painting Tiling Glue Is the Best Choice on the Market
There are dozens of tiling adhesives available online and in hardware stores, so why should you choose ours? Let’s break down the key advantages that set Ferber Painting Tiling Glue apart from the competition.
- Satisfied or refunded guarantee: We are the only tiling glue brand that offers a full satisfaction guarantee. If the product does not meet your expectations, you get your money back.
- Superior water resistance: Our formula is specifically engineered for wet rooms, including showers, wet bars, and pool surrounds.
- Fast worldwide shipping: Thanks to our international network of carriers, your order arrives quickly no matter where you are located.
- Easy online payment: Ordering is simple, secure, and takes less than two minutes through our website.
- Extended open time: Unlike many competing adhesives that begin curing too quickly, our Tiling Glue gives you extra working time to properly align and adjust your tiles before it sets.
- Flexible bond: The adhesive flexes slightly with temperature changes, reducing the risk of cracked tiles or adhesive failure over time.
Beyond these headline features, there are a number of smaller details that make a noticeable difference once you are actually working with the product. Our Tiling Glue has a smooth, consistent texture that spreads easily with a notched trowel, without the lumps or inconsistencies that plague some budget adhesives. This might sound like a minor detail, but anyone who has struggled to spread a clumpy, uneven adhesive across a wall knows how much time and frustration a smooth, workable formula can save. It also means fewer air pockets form behind the tile, which in turn reduces the risk of hollow spots that can eventually lead to cracking or loosening.
Another often overlooked advantage is how forgiving our adhesive is for beginners. Professional tilers who work with adhesive every day can often get away with fast-setting formulas because they place tiles quickly and confidently. For someone tiling their first shower, however, that speed can become a liability. Extra working time means you can step back, check your level, adjust spacing, and even reposition a tile if something looks slightly off, all without worrying that the glue is hardening underneath you.
To make the comparison even clearer, here is a table comparing Ferber Painting Tiling Glue with typical generic tiling adhesives found in most hardware stores.
| Criteria | Ferber Painting Tiling Glue | Generic Tiling Adhesives |
|---|---|---|
| Satisfaction Guarantee | Yes, full refund if not satisfied | Rarely offered, usually no returns |
| Water Resistance | Engineered specifically for wet rooms | Often designed for general purpose use only |
| Shipping Speed | Fast worldwide delivery via international carrier network | Limited to local stores, often no international shipping |
| Ease of Online Purchase | Simple, secure online payment in a few clicks | Often only available in physical stores |
| Working Time Before Setting | Extended open time for better tile alignment | Frequently sets too fast, causing alignment issues |
| Flexibility After Curing | Flexible bond resists cracking from temperature changes | Often rigid and prone to cracking over time |
As you can see, the differences are not just marketing claims. They directly affect how long your shower tiling job will last, and how much stress you will experience during the installation process itself. When you factor in the satisfaction guarantee, choosing Ferber Painting Tiling Glue is essentially a risk-free decision.
It is also worth mentioning that many customers who initially purchase our Tiling Glue for a single shower project end up using it again for other wet area applications around the home, such as tiling a laundry room floor, a pool surround, or an outdoor patio splash zone near a hose bib. Because the formula performs so reliably in high-moisture conditions, it has become something of a go-to solution for any project where water exposure is a concern, not just showers specifically.
Step-by-Step Guide: How to Tile a Shower
Now that we have covered why the adhesive you choose matters so much, let’s walk through the actual process of tiling a shower from start to finish. Whether you are a first-time DIYer or an experienced homeowner tackling a renovation, following these steps carefully will help you achieve a professional-looking, long-lasting result. Before you begin, it helps to gather all of your tools and materials in advance so you are not searching for a missing item halfway through a step, especially once the adhesive has been mixed and the clock is ticking.
At minimum, you will want to have on hand a notched trowel appropriate for your tile size, tile spacers, a level, a tile cutter or wet saw, a rubber grout float, a grout sponge, safety glasses, gloves, a bucket for mixing, and of course your chosen tiles and Ferber Painting Tiling Glue. Having everything organized before you start not only speeds up the process but also reduces the chance of mistakes caused by rushing to find a tool while the adhesive is already applied to the wall.
Step 1: Prepare the Shower Surface
Before any tile touches the wall, the surface must be properly prepared. Remove any old tiles, adhesive residue, or wallpaper. If you are working with drywall, make sure it is a moisture-resistant board specifically designed for wet areas, such as cement backer board. Regular drywall will absorb moisture and eventually fail, no matter how good your tiling glue is.
Clean the surface thoroughly to remove dust, grease, or debris. Any contamination on the surface will weaken the bond between the adhesive and the wall, so this step should never be skipped, even if it feels tedious. If you notice any uneven spots, low areas, or gaps in your backer board installation, now is the time to address them with an appropriate patching compound rated for wet areas. Tiling over an uneven surface almost always results in tiles that sit slightly proud or recessed compared to their neighbors, which becomes very noticeable once the light hits the wall at an angle.
It is also worth checking the corners and edges of the shower enclosure at this stage. Inside corners, the joint between the wall and the shower pan, and any areas around plumbing fixtures deserve extra attention, since these are common weak points where water can find its way behind the tile if the preparation is not done carefully.
Step 2: Waterproof the Area
Apply a waterproofing membrane over the backer board. This is a critical step for shower installations specifically, since this area experiences direct water exposure daily. Skipping waterproofing is one of the most common mistakes that leads to mold and structural damage behind tiled walls.
There are generally two approaches to waterproofing a shower: a liquid applied membrane that is rolled or brushed on in multiple coats, or a sheet membrane that is adhered directly to the backer board. Both methods work well when installed correctly, but they each have particular requirements regarding drying time between coats or proper overlap at seams. Whichever method you choose, pay special attention to inside corners, the base of the shower where the wall meets the pan, and any penetrations for plumbing fixtures, since these transition points are where waterproofing failures most commonly occur.
Allow the waterproofing membrane to fully cure according to the manufacturer’s instructions before moving on to the next step. Rushing this stage undermines everything else you do afterward, since even the best tiling glue and the most beautifully laid tiles cannot compensate for water intrusion happening behind an improperly waterproofed wall.
Step 3: Plan Your Tile Layout
Before applying any glue, dry-fit your tiles on the floor or against the wall to plan your layout. Consider where cuts will be necessary, how the pattern will look at corners, and where the grout lines will fall. Taking the time to plan reduces waste and ensures a more visually pleasing final result.
A useful technique here is to find the center point of the main wall you will be tiling and work outward from there, rather than starting from one edge and hoping everything lines up evenly on the other side. This approach, sometimes called centerline layout, generally produces a more balanced look with symmetrical cuts on both ends of a row instead of one full tile on one side and a narrow sliver on the other. It is also worth measuring the height of your shower wall in relation to your tile size so that you avoid ending up with an awkward thin strip of tile at the ceiling line or above the shower valve.
If your tiles feature a pattern, veining, or directional grain, as many natural stone and wood-look porcelain tiles do, take extra time during your dry layout to arrange the pieces so the pattern flows naturally across the wall rather than clashing at the seams. This step takes a little longer but makes a noticeable difference in the finished appearance of the shower.
Step 4: Mix and Apply the Tiling Glue
This is where the quality of your adhesive becomes critical. Using a notched trowel, apply Ferber Painting Tiling Glue evenly across the wall in small sections, working from the bottom up. Applying the adhesive in small sections prevents it from drying out before you have time to place your tiles, something that is especially important with lower-quality adhesives that cure too fast.
One of the advantages of our formula is its extended open time, which gives you more flexibility to adjust tile placement before the glue sets. This is particularly helpful for beginners who need a little extra time to get their spacing and alignment just right.
When applying the adhesive, hold your trowel at a consistent angle, typically around forty-five degrees, to create even ridges of glue across the surface. These ridges are important because they allow air to escape as you press the tile into place, reducing the risk of trapped air pockets that can weaken the bond over time. For larger format tiles, many professionals also recommend back-buttering, which means applying a thin layer of adhesive directly to the back of the tile in addition to the wall. This technique improves coverage and adhesion significantly, especially for tiles larger than twelve inches per side, and it is a step we strongly recommend for any large format installation in a shower.
Step 5: Place the Tiles
Press each tile firmly into the adhesive, using tile spacers to maintain consistent gaps for grout lines. Use a level frequently to ensure your tiles are straight, both horizontally and vertically. Wipe away any excess glue that squeezes out between tiles immediately, before it hardens.
As you work your way across and up the wall, periodically step back and look at the overall pattern from a distance. It is much easier to catch a slightly crooked row or an inconsistent grout line while the adhesive is still workable than after everything has cured. For rows near fixtures such as the shower valve, showerhead arm, or niche shelving, take extra care to plan your cuts so the tile fits cleanly around these features without leaving large gaps that will be difficult to seal properly later.
If you are tiling a shower niche, which has become an extremely popular feature in modern bathroom designs, pay particular attention to waterproofing the interior corners of the niche before tiling, since these tight inside corners are especially prone to leaks if not properly sealed beforehand.
Step 6: Let the Glue Cure
Allow the tiling glue to cure fully before grouting. Curing times vary depending on humidity and temperature, but generally range between 24 and 48 hours. Rushing this step is a common mistake that compromises the strength of the bond.
During the curing period, try to avoid disturbing the tiles or applying any pressure to the wall. It is also a good idea to keep the bathroom well ventilated during this time, since good airflow helps the adhesive cure evenly and reduces the chance of trapped moisture affecting the bond. If your bathroom does not have a window or exhaust fan, running a portable fan pointed toward the tiled wall can help speed up the process without compromising the quality of the cure.
Step 7: Apply Grout
Once the adhesive has cured, apply grout between the tiles using a rubber float. Work the grout into the joints at a diagonal angle to ensure it fills the spaces completely. Wipe away excess grout with a damp sponge before it dries on the tile surface.
Choosing the right type of grout matters almost as much as choosing the right adhesive. For shower applications, many professionals recommend epoxy grout or a high-quality sanded or unsanded cementitious grout with added polymers, since these formulations resist staining and moisture penetration better than basic grout mixes. Keep in mind that grout lines wider than an eighth of an inch typically require sanded grout, while narrower joints usually call for unsanded grout, so check your tile spacer size before purchasing your grout to make sure you get the right type.
Work in small sections, applying grout to only a few square feet at a time before wiping it down. This prevents the grout from hardening on the tile surface before you have a chance to clean it off, which can leave a stubborn haze that is difficult to remove once fully cured.
Step 8: Seal the Grout
After the grout has cured, apply a grout sealer to protect it from moisture and staining. This step significantly extends the lifespan of your shower tiling and helps prevent mold growth in the grout lines over time.
Most grout sealers need to be reapplied periodically, typically once a year for high-traffic showers, in order to maintain their protective properties. Marking the sealing date on a calendar or setting a yearly reminder is a simple way to stay on top of this maintenance task and keep your grout looking fresh and clean for years after the initial installation.
Common Mistakes to Avoid When Tiling a Shower
Even experienced DIYers can make mistakes when tiling a shower, especially if they have not worked with wet-area installations before. Here are some of the most frequent errors and how to avoid them.
- Skipping waterproofing membranes: This is one of the leading causes of mold and water damage behind tiled shower walls.
- Using the wrong adhesive: General-purpose adhesives are not designed to withstand constant moisture exposure, leading to premature failure.
- Not allowing enough curing time: Rushing the process before the adhesive or grout has fully cured weakens the entire installation.
- Poor tile layout planning: Failing to dry-fit tiles beforehand can result in awkward cuts and an unbalanced pattern.
- Ignoring expansion joints: Showers experience temperature fluctuations, and failing to account for this can cause tiles to crack over time.
Beyond these five main issues, there are a handful of smaller mistakes that can still cause noticeable problems down the road. One common error is applying too much adhesive at once, which causes it to skin over and lose its tackiness before the tiles are placed. This results in weak spots where tiles do not bond properly, even though the surface may look fully covered. Working in smaller sections, as recommended earlier, helps avoid this issue entirely.
Another frequent mistake is neglecting to check that spacers are removed before the adhesive fully hardens. Leaving spacers embedded in the adhesive can create uneven grout lines and small voids that weaken the joint over time. Similarly, failing to clean excess adhesive out of the grout lines before it hardens can prevent the grout from properly filling the joint later, leaving gaps that allow water infiltration.
Finally, many first-time tilers underestimate how important it is to use the correct trowel notch size for their specific tile format. A trowel notch that is too small will not deposit enough adhesive to properly support the tile, while a notch that is too large can cause excess adhesive to squeeze out and create a messy, uneven surface. Manufacturers typically provide recommended trowel sizes based on tile dimensions, and it is worth checking this information before you begin.
Choosing a flexible, water-resistant adhesive like Ferber Painting Tiling Glue helps mitigate several of these risks automatically, since our formula is specifically designed to handle the unique challenges of shower environments.
Why Buying Directly From Ferber Painting Is the Smart Choice
When you purchase Ferber Painting Tiling Glue directly from our website, you are not just getting a high-performance adhesive. You are getting an entire buying experience built around convenience, security, and confidence.
Our online payment system is simple and secure, allowing you to complete your purchase in just a few clicks. Once your order is placed, our international network of carriers ensures fast delivery no matter where you are located in the world. Whether you are in North America, Europe, Asia, or anywhere else, we have logistics partners in place to get your order to your door quickly.
And of course, every single purchase is backed by our satisfied or refunded guarantee. We stand firmly behind the quality of our product, and if for any reason it does not meet your expectations, we will refund your purchase. This is a level of confidence you simply will not find with generic, no-name adhesive brands sold in bulk hardware stores.
Buying directly also means you are getting the product straight from the source, without going through third party resellers who may store inventory improperly or sell older stock that has been sitting on a shelf for an extended period. Adhesive products can be sensitive to storage conditions, and purchasing directly from Ferber Painting ensures you receive a fresh, properly stored product every time. Our customer service team is also readily available to answer questions before, during, and after your purchase, whether you need guidance on which product suits your specific tile type or help troubleshooting an issue during your installation.
Many of our customers also appreciate the transparency of ordering directly from the manufacturer. There are no middlemen marking up the price, no confusing third party marketplace listings with mixed reviews from different sellers, and no uncertainty about whether you are getting a genuine product. When you order from our website, you know exactly what you are getting and exactly who stands behind it.
Frequently Asked Questions
How long does Ferber Painting Tiling Glue take to cure?
Curing time typically ranges from 24 to 48 hours depending on humidity and room temperature. We recommend waiting the full 48 hours before grouting for best results.
Can I use this tiling glue for both walls and floors in a shower?
Yes, our Tiling Glue is formulated to work effectively on both vertical wall surfaces and horizontal floor surfaces within wet environments like showers.
Is Ferber Painting Tiling Glue suitable for natural stone tiles?
Yes, our formula works well with ceramic, porcelain, and natural stone tiles, making it a versatile choice for a wide range of shower designs.
What happens if I am not satisfied with the product?
Simply reach out to our customer service team. Thanks to our satisfied or refunded guarantee, you will receive a full refund if the product does not meet your expectations.
How quickly will my order arrive?
Thanks to our international network of carriers, most orders arrive quickly regardless of your location. Exact delivery times depend on your country and shipping method chosen at checkout.
Conclusion
Tiling a shower is a rewarding project that can dramatically improve the look and functionality of your bathroom, but its long-term success depends heavily on the quality of the adhesive you choose. A weak or generic tiling glue can lead to cracked tiles, mold growth, and costly repairs down the line, while a high-performance, water-resistant adhesive ensures your shower stays beautiful and structurally sound for years to come.
By following the steps outlined in this guide, from proper surface preparation and waterproofing to careful layout planning, correct adhesive application, and thorough grouting and sealing, you give yourself the best possible chance of achieving a shower that not only looks professionally installed but also stands up to years of daily use without issue. Taking the time to do each step correctly, rather than rushing through the process, is what separates a shower tiling job that lasts a lifetime from one that needs to be redone within a few short years.