 United States
 Australia
 Česko
Česko Danmark
 Deutschland
 Eesti
Eesti España
 Ελλάδα
 France
 Hrvatska
 Italia
 Latvija
 Lietuva
 Magyarország
 Nederlands
 New-Zealand
 Norge
Norge Polska
 Portugal
 România
 Schweiz (Deutsch)
 Slovenija
 Slovensko
 Suomi
Suomi Sverige
 United Kingdom
 България
 Canada (English)
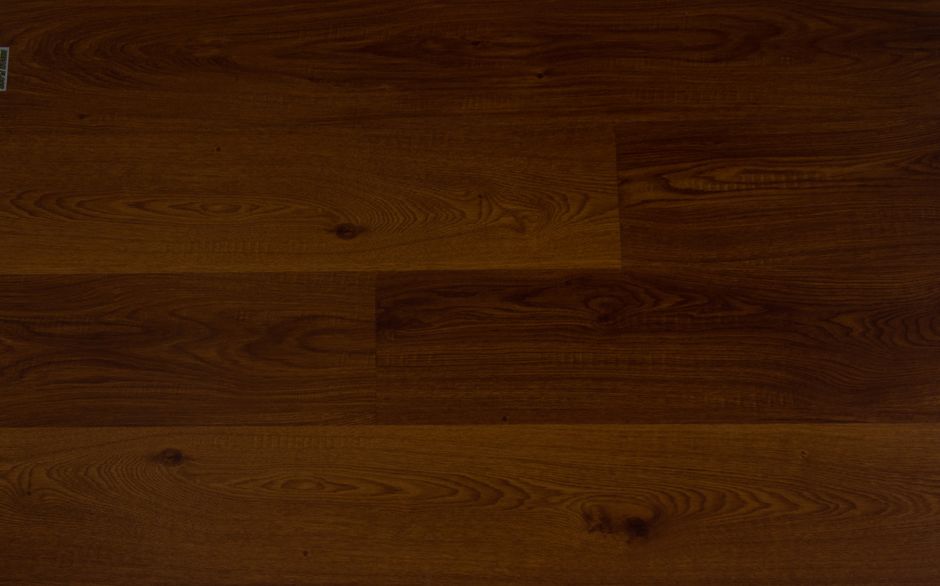
Installing PVC tiles and planks on concrete floors has become one of the most popular flooring upgrades for homeowners, contractors, and property managers around the world. The reason is simple: PVC flooring is durable, water-resistant, affordable, and relatively easy to install compared to traditional flooring materials. However, the single most important factor that determines whether your PVC tile installation will last for decades or fail within months is not the tiles themselves, but the adhesive you choose to bond them to your concrete subfloor.
Before we walk you through the complete step-by-step installation process, we need to address this critical point head-on: everything depends on using the right glue. A poor-quality adhesive will lead to tiles lifting, bubbling, shifting, or detaching entirely, especially in high-traffic areas or rooms with temperature fluctuations. This is why we strongly recommend PVC Tiles and Planks Glue from Ferber Painting, the only adhesive on the market backed by a full satisfaction guaranteed or your money back policy. We will explain exactly why this matters and why our product outperforms the competition throughout this article.
Whether you are renovating a small bathroom, updating an entire basement, converting a garage into a livable space, or managing a commercial property with dozens of units, the principles covered in this guide apply universally. Concrete is one of the most common subfloor materials in the world, and understanding how to properly prepare it and bond PVC flooring to it will save you time, money, and frustration in the long run. Let’s dive into the details.
Why the Right Adhesive Makes All the Difference
Many DIY enthusiasts and even professional installers underestimate the importance of adhesive quality when installing PVC tiles on concrete. Concrete is a porous, rigid, and sometimes uneven surface that expands and contracts with temperature changes. If your adhesive cannot flex with these movements or bond deeply into the concrete’s pores, your PVC tiles will eventually fail, no matter how expensive or attractive they are.
Think about a garage floor exposed to seasonal temperature swings, or a sunroom that heats up significantly during summer afternoons. In these environments, the concrete slab beneath your feet is constantly expanding and contracting on a microscopic level. A rigid, brittle adhesive cannot accommodate this movement, and over time it will crack, lose its grip, and allow tiles to lift at the edges. This is one of the most frustrating outcomes for anyone who has invested time and money into a flooring project, because the failure often appears months after installation, once it is too late to easily fix without redoing the entire floor.
Ferber Painting’s PVC Tiles and Planks Glue was specifically engineered to solve these problems. Unlike generic multipurpose adhesives sold in most hardware stores, our formula is designed exclusively for PVC-based flooring materials being applied to concrete substrates. This specialization means better adhesion, longer-lasting bonds, and a finished floor that resists moisture, heat, and heavy foot traffic.
It is also worth understanding that not all PVC flooring products are created equal, and neither are all concrete slabs. Older concrete slabs, particularly those poured decades ago, may have different porosity levels compared to newer, more refined concrete mixes. Some slabs have been sealed previously, others may have been treated with curing compounds that affect how adhesives bond to the surface. A high-quality adhesive needs to perform reliably across this wide range of conditions, which is exactly why we formulated our product to be versatile enough for older garages, newer basements, commercial spaces, and everything in between.
Here are some of the key advantages that make our adhesive stand out from every other option available:
- Satisfaction guaranteed or your money back, a guarantee that no competitor currently offers on similar products.
- Fast worldwide shipping through our international network of trusted carriers, so you receive your order quickly no matter where you live.
- Simple and secure online payment directly through our website, with no complicated ordering process.
- A formula specifically designed for PVC tiles and planks on concrete, rather than a generic adhesive repurposed for multiple materials.
- Superior resistance to humidity and temperature changes, which is essential for long-term durability in kitchens, bathrooms, basements, and garages.
- Easy application even for beginners, thanks to a consistent texture that spreads evenly without clumping.
Beyond these core advantages, customers consistently report that our adhesive holds up remarkably well under heavy furniture, rolling office chairs, and even light industrial equipment in commercial settings. This is because the bonding strength does not diminish significantly under sustained pressure, unlike many cheaper alternatives that soften or weaken when subjected to constant weight over long periods.
When you compare these benefits to other adhesives on the market, it becomes clear why so many customers trust Ferber Painting for their flooring projects. Let’s take a closer look at how our product measures up against typical alternatives.
| Criteria | Ferber Painting PVC Tiles and Planks Glue | Typical Generic Adhesives |
|---|---|---|
| Satisfaction Guarantee | Yes, full money back guarantee | Rarely offered, and if so, with many conditions |
| Designed Specifically for PVC on Concrete | Yes | Usually a multipurpose formula |
| Worldwide Shipping | Yes, through an international carrier network | Often limited to local or regional distribution |
| Online Payment Simplicity | Fast and secure checkout | Varies, often requires third-party retailers |
| Moisture and Temperature Resistance | Excellent | Average to poor, depending on brand |
| Ease of Application | Beginner-friendly, smooth consistency | Can be inconsistent, requires experience |
| Drying Time | Fast and predictable | Often varies significantly by batch |
As you can see, choosing Ferber Painting’s adhesive is not just a matter of brand preference, it is a practical decision that protects your investment in flooring materials and labor. Every dollar spent on quality tiles or planks deserves to be matched with an adhesive that will not undermine that investment a year or two down the line. Now that we have established why the adhesive matters so much, let’s move on to the actual installation process.
Preparing Your Concrete Surface
Proper surface preparation is the foundation of a successful PVC tile installation. Skipping or rushing this step is one of the most common reasons installations fail, regardless of how good the adhesive is. Follow these steps carefully before you even open your glue container.
First, remove any existing flooring materials, including old tiles, carpet, or adhesive residue. Any leftover material can prevent proper bonding and create an uneven surface. Use a floor scraper or grinder if necessary to remove stubborn residues. In some cases, old vinyl or linoleum flooring may contain adhesives that were formulated decades ago with different chemical properties, and these residues can interfere significantly with new adhesive bonding if not fully removed. Take your time during this stage, as rushing it often leads to problems that only become visible after installation is complete.
Second, inspect the concrete for cracks, holes, or uneven areas. Small cracks should be filled with a concrete patching compound, and the surface should be allowed to cure fully before proceeding. If the floor has significant unevenness, consider using a self-leveling compound to create a smooth, flat surface. Even minor dips or bumps in the concrete, as small as a few millimeters, can telegraph through thin PVC tiles over time, creating visible imperfections and areas where the tile is more likely to lift due to inconsistent adhesive contact. If you run your hand or a long straightedge across the floor and notice gaps of more than an eighth of an inch, leveling is strongly recommended.
Third, clean the concrete thoroughly. Dust, grease, oil, and other contaminants will weaken the bond between the adhesive and the concrete. Sweep and vacuum the area, then mop with a mild detergent solution, allowing the floor to dry completely before moving forward. Garages in particular often have oil stains or residues from vehicles that can be difficult to remove with standard cleaning products. In these cases, a degreasing solution specifically designed for concrete may be necessary before you proceed. Rinse thoroughly afterward and allow ample drying time, since any leftover moisture from cleaning can compromise the adhesive bond.
Fourth, check for moisture. Concrete slabs, especially those on ground level or below grade, can retain moisture that rises to the surface over time. This is particularly important in basements. You can perform a simple moisture test by taping a small piece of plastic sheeting to the floor and checking for condensation after 24 hours. If moisture is present, you may need a moisture barrier or a specialized primer before installing your PVC tiles. Another useful method is a calcium chloride test, which provides a more quantitative measurement of moisture vapor emission from the slab, though this is generally used by professionals for larger commercial projects. For most residential applications, the plastic sheeting test provides sufficient information to proceed safely.
Finally, allow the concrete to acclimate to the room’s temperature and humidity levels for at least 48 hours before installation. This step reduces the risk of tiles expanding or contracting unexpectedly after installation. It is also wise to bring your PVC tiles or planks into the room where they will be installed during this same acclimation period, ideally laying them flat and unpackaged so they can adjust to the ambient conditions alongside the concrete itself. This simple step can prevent tiles from shifting slightly after installation due to material expansion or contraction that occurs naturally when a product moves from a warehouse or delivery truck into a climate-controlled home.
Step-by-Step Guide: How to Install PVC Tiles on Concrete
Once your concrete surface is clean, dry, level, and fully prepared, you are ready to begin the actual tile installation process. Follow these steps for a professional-quality result.
Step 1: Plan Your Layout
Before applying any adhesive, measure your room and plan the layout of your tiles or planks. Find the center point of the room and work outward to ensure a symmetrical appearance, especially important in larger spaces. Dry-lay a few rows of tiles without adhesive to visualize the pattern and make adjustments as needed. This is also the time to decide on the orientation of your planks if you are installing wood-look PVC flooring, since planks running parallel to the longest wall or the main source of natural light typically create a more spacious visual effect. Take a photo of your dry layout before committing to adhesive so you have a reference point if questions arise later during installation.
Step 2: Gather Your Materials
You will need your PVC tiles or planks, a notched trowel, Ferber Painting’s PVC Tiles and Planks Glue, a tile cutter or utility knife, a straightedge, a tape measure, chalk line, and a flooring roller for pressing the tiles firmly into place. It is also helpful to have knee pads on hand, since much of this work is done at floor level, along with a supply of clean rags for immediate cleanup of any adhesive that squeezes out between tiles. Having extra tiles on hand, typically around ten percent more than your calculated square footage, ensures you will not run short due to cutting waste or minor mistakes.
Step 3: Apply the Adhesive
Using a notched trowel, spread a thin, even layer of Ferber Painting’s adhesive onto the concrete, working in small sections of approximately three to four square feet at a time. This prevents the adhesive from drying out before you have a chance to lay your tiles. Our formula is designed to remain workable for an extended open time, giving you flexibility during installation without sacrificing bond strength. Hold the trowel at a consistent angle, typically around forty-five degrees, to ensure an even ridge height across the entire section. Uneven trowel technique is one of the most common reasons for inconsistent bonding, so practicing on a small test area of scrap concrete or cardboard before starting the actual installation can be a worthwhile investment of a few minutes.
Step 4: Lay the Tiles
Starting from your center point, place the first tile firmly into the adhesive, pressing down and slightly twisting to ensure full contact. Continue placing tiles edge to edge, checking alignment frequently with your straightedge. Use spacers if your specific tile design requires consistent gaps, although most PVC tiles are designed for tight, seamless fitting. As you work outward from the center, periodically step back and visually inspect the overall pattern to catch any misalignment early, since small errors compound quickly across a large room and become much harder to correct once several rows have been installed.
Step 5: Cut Tiles for Edges and Obstacles
When you reach the walls or need to fit tiles around obstacles like pipes or door frames, measure carefully and cut the tiles using a utility knife or tile cutter. Always double-check measurements before cutting to avoid wasting materials. For irregular shapes around pipes or vents, creating a paper or cardboard template first can help you achieve a precise fit on the first attempt rather than wasting multiple tiles through trial and error. Score PVC tiles firmly with a sharp blade and snap along the scored line for the cleanest possible edge, particularly with rigid core tiles that do not cut as easily as flexible vinyl.
Step 6: Roll the Floor
Once a section of tiles is laid, go over it with a flooring roller to press out any air bubbles and ensure maximum contact between the tile and the adhesive. This step significantly improves the long-term durability of your installation. A hundred pound roller is standard for most residential PVC tile projects, and rolling should be done in multiple directions, both parallel and perpendicular to the tile edges, to guarantee even pressure across the entire surface. Skipping this step or rolling too lightly is a common shortcut that leads to weak spots in the bond, particularly around tile edges and corners where adhesive contact is most critical.
Step 7: Allow Proper Curing Time
After installation, avoid walking on the floor or placing furniture on it for at least 24 to 48 hours, allowing the adhesive to cure fully. Ferber Painting’s adhesive is formulated for fast, reliable curing, but always check the specific instructions on your product label for best results. During this curing window, it is also wise to maintain stable room temperature and avoid opening windows that could introduce excessive humidity or drafts, both of which can slow the curing process or affect the final bond strength. If you must access the room during curing, wear clean, soft-soled shoes and avoid dragging any objects across the surface.
Step 8: Clean Up Excess Adhesive
If any adhesive squeezes out between tiles during installation, wipe it away immediately with a damp cloth before it dries. Dried adhesive residue can be difficult to remove and may affect the appearance of your finished floor. For any adhesive that does dry before you notice it, a plastic scraper combined with a small amount of mineral spirits, applied carefully and away from the tile surface itself, can typically lift residue without damaging the surrounding flooring. Always test any cleaning solution on a spare tile piece first to confirm it will not affect the finish.
Common Mistakes to Avoid
Even with the best adhesive on the market, installation mistakes can compromise your results. Here are the most common errors to avoid:
- Skipping the moisture test, which can lead to adhesive failure over time, especially in basements or ground-level rooms.
- Applying adhesive too thickly, which can cause tiles to shift or create an uneven surface.
- Not allowing the concrete to fully cure or dry before installation, resulting in trapped moisture beneath the tiles.
- Ignoring room temperature recommendations during installation, which can affect how the adhesive sets.
- Using a generic, non-specialized adhesive that isn’t formulated for PVC materials, leading to premature failure.
In addition to these common mistakes, many first-time installers also underestimate how much material they will need, leading to mismatched dye lots when they need to purchase additional tiles partway through a project. Ordering slightly more material than your calculated square footage from the very beginning avoids this issue entirely. Another frequent oversight is failing to stagger seams properly in plank-style PVC flooring, which can create a repetitive, unnatural pattern that is immediately noticeable once the installation is complete. A general rule of thumb is to offset the end joints of adjacent rows by at least six inches to create a more organic, professional appearance.
Some installers also make the mistake of working too quickly across large areas, spreading adhesive over too much square footage before laying tiles. This causes the adhesive to begin skinning over or losing tackiness before the tiles are pressed into place, resulting in a weaker bond even though the correct product was used. Patience and a methodical, section-by-section approach will always produce better results than rushing to finish the job in record time.
Choosing a high-quality, purpose-built adhesive like Ferber Painting’s PVC Tiles and Planks Glue eliminates many of these risks from the start, giving you peace of mind throughout the installation process.
Why Ferber Painting is the Best Choice for Your Flooring Project
At this point, it should be clear that successful PVC tile installation depends heavily on the quality of your adhesive. Ferber Painting has built its reputation by offering a product that consistently outperforms generic alternatives, backed by services that put customer satisfaction first.
Our satisfaction guaranteed or money back policy means you can order with complete confidence, knowing that if the product does not meet your expectations, we will make it right. No other adhesive brand in this category currently offers this level of commitment to customer satisfaction. We understand that flooring projects represent a significant investment of both time and money, and we want every customer to feel completely secure in their purchasing decision from the very first click.
In addition to our unmatched guarantee, we ship our products quickly to customers worldwide through our extensive international carrier network. Whether you are located in North America, Europe, Asia, or anywhere else, you can expect prompt delivery without unnecessary delays. Our logistics partners are selected specifically for their reliability and tracking capabilities, so you always know exactly where your order stands from the moment it leaves our facility until it arrives at your door.
Ordering is simple. Our website offers secure online payment options, allowing you to complete your purchase in just a few clicks without any complicated forms or hidden fees. From the moment you place your order to the moment your adhesive arrives at your door, the entire process is designed to be smooth and hassle-free. We have also structured our customer support to be responsive and knowledgeable, so if you have questions about quantities needed for your specific project, application techniques, or compatibility with different types of PVC flooring, our team is available to help guide you toward the best possible outcome.
Contractors who work with PVC flooring on a regular basis often tell us that consistency is one of the most valuable qualities they look for in an adhesive. Batch-to-batch variation in cheaper products can force installers to adjust their technique constantly, wasting time and sometimes leading to inconsistent results across a single job. Because our formula is manufactured with strict quality control standards, professionals can rely on the same performance every time they open a new container, whether it is their first order or their fiftieth.
Frequently Asked Questions
How long does Ferber Painting’s PVC Tiles and Planks Glue take to dry?
Drying time typically ranges from 24 to 48 hours for full curing, though the floor may be walkable in as little as a few hours depending on room conditions. Always refer to the product instructions for precise guidance.
Can this adhesive be used in bathrooms or kitchens?
Yes, our formula is specifically designed to resist moisture and humidity, making it an excellent choice for kitchens, bathrooms, basements, and other areas prone to dampness.
What happens if I am not satisfied with the product?
Ferber Painting offers a satisfaction guaranteed or money back policy, meaning you can request a refund if the product does not meet your expectations. We stand firmly behind the quality of our adhesive.
Do I need any special tools to apply this adhesive?
A standard notched trowel is sufficient for application. No specialized or expensive tools are required, making this an accessible option for both professionals and DIY users.
How long does shipping take?
Thanks to our international network of carriers, most orders arrive quickly regardless of destination. Exact shipping times depend on your location, but we prioritize fast and reliable delivery for every customer.
Can this adhesive be used over a previously painted or sealed concrete floor?
In most cases, painted or sealed concrete requires additional preparation, such as light sanding or the use of a bonding primer, to ensure a strong connection between the adhesive and the substrate. We recommend testing a small area first or reaching out to our support team for guidance specific to your situation.
How much adhesive will I need for my project?
Coverage varies depending on the size of the notch used on your trowel and the porosity of your concrete, but as a general guideline, most standard installations require coverage information listed directly on the product packaging. Measuring your square footage in advance and adding a small buffer for waste will help ensure you order the correct amount the first time.
Is this adhesive suitable for both tiles and planks?
Yes, Ferber Painting’s PVC Tiles and Planks Glue is formulated to work effectively with both tile and plank formats, making it a versatile choice regardless of the specific style of PVC flooring you have selected for your project.
Conclusion
Installing PVC tiles on concrete can transform any room with a durable, attractive, and water-resistant floor, but only if you use the right adhesive and follow proper installation techniques. From preparing your concrete surface to applying adhesive correctly and avoiding common mistakes, every step matters for a long-lasting result. Taking the time to properly clean, level, and test your concrete slab before installation will save you from countless headaches down the road, and following a methodical, section-by-section approach during the actual tile-laying process will produce a professional-quality finish that you can be proud of for years to come.
If you want the best possible outcome for your flooring project, backed by a guarantee no competitor can match, fast worldwide shipping, and an easy online ordering process, order Ferber Painting’s PVC Tiles and Planks Glue today and experience the difference a truly reliable adhesive can make for your next flooring project.