 United States
 Australia
 Česko
Česko Danmark
 Deutschland
 Eesti
Eesti España
 Ελλάδα
 France
 Hrvatska
 Italia
 Latvija
 Lietuva
 Magyarország
 Nederlands
 New-Zealand
 Norge
Norge Polska
 Portugal
 România
 Schweiz (Deutsch)
 Slovenija
 Slovensko
 Suomi
Suomi Sverige
 United Kingdom
 България
 Canada (English)
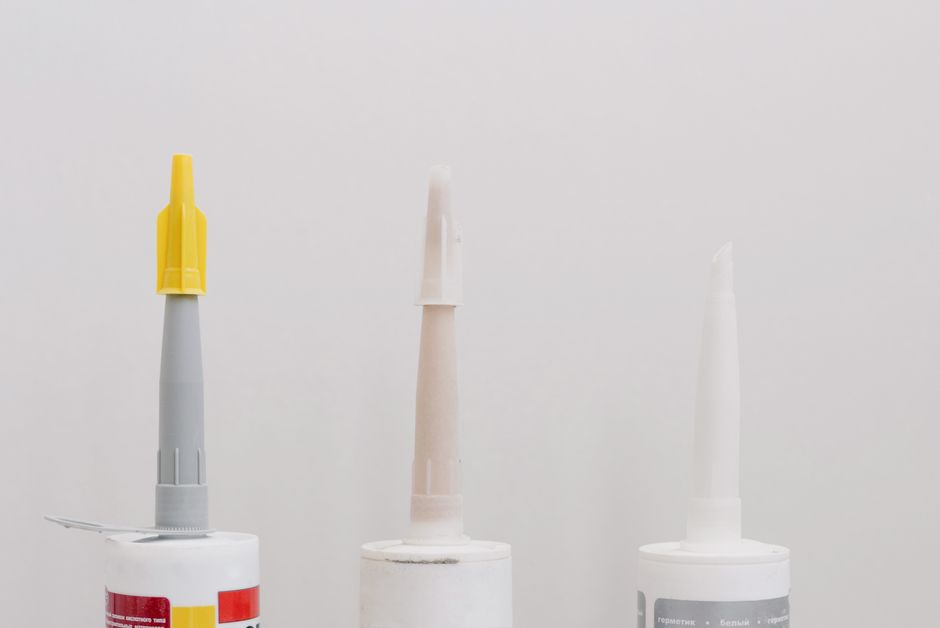
Installing MDF baseboards is one of the easiest ways to transform the look of a room, hide unsightly gaps between the wall and the floor, and give your interior a clean, finished appearance. However, before you even think about cutting angles or measuring lengths, there is one factor that will determine whether your project is a long-term success or a frustrating failure: the quality of the adhesive you use. Everything depends on choosing the right product. A perfectly cut baseboard installed with a weak or unreliable glue will eventually crack, peel, or fall off the wall, ruining hours of careful work.
This is why, before diving into the technical steps of installation, we strongly recommend using Ferber Painting Acrylic Glue. Unlike most adhesives on the market, our product comes with a full satisfaction guaranteed or money back policy, something no other brand in this category currently offers. This means that if you are not fully satisfied with the results, you can get a refund, no questions asked. In an industry where customers often have to gamble on products they have never tried, this guarantee alone makes Ferber Painting Acrylic Glue the safest and smartest choice for your baseboard project.
In this complete guide, we will explain why choosing the right adhesive is crucial, why Ferber Painting Acrylic Glue stands out from the competition, and we will walk you step by step through the entire process of installing MDF baseboards like a professional. We will also cover the tools you need before you even open the tube of glue, the specific challenges of working in older homes with uneven walls, seasonal considerations that affect curing time, and how to maintain your baseboards once the project is finished so that your investment of time and effort lasts for decades rather than years.
Why the Right Adhesive Makes All the Difference
Many people assume that installing baseboards is simply a matter of cutting the pieces to size and nailing or gluing them into place. While the concept is indeed simple, the execution requires precision, and the adhesive plays a much bigger role than most people realize. MDF, or medium-density fiberboard, is a porous material that reacts differently to adhesives compared to solid wood or PVC. A low-quality glue may not bond properly with the porous surface of MDF, leading to bubbling, warping, or complete detachment over time, especially in rooms with humidity fluctuations such as kitchens or bathrooms.
Furthermore, walls are rarely perfectly flat. Even in newly built homes, small irregularities in plaster or drywall can create gaps that a poor adhesive simply cannot fill. This is where a high-performance acrylic glue becomes essential. It needs to be flexible enough to accommodate small imperfections, strong enough to hold the weight of the baseboard, and durable enough to resist cracking as temperature and humidity levels change throughout the year.
Choosing an inferior adhesive might save you a few dollars initially, but the long-term costs of redoing the work, repairing damaged walls, or replacing baseboards that have fallen off can be significant. This is precisely why professionals in the painting and renovation industry increasingly turn to Ferber Painting Acrylic Glue, a product engineered specifically to address these common pain points.
Understanding the Nature of MDF
To really appreciate why the adhesive matters so much, it helps to understand what MDF actually is. Medium-density fiberboard is made by breaking down wood fibers, mixing them with wax and a resin binder, then forming panels under high heat and pressure. The result is a dense, uniform material with no grain, which is why it takes paint so beautifully and why it can be milled into decorative profiles without splintering. However, that same density and lack of grain means that MDF absorbs moisture unevenly compared to solid wood. If water gets into the exposed edges, the fibers can swell and never fully return to their original shape, which is why sealing the cut edges and choosing an adhesive with strong moisture resistance is not a luxury but a necessity.
Because MDF is essentially compressed wood dust, a generic adhesive formulated primarily for solid lumber may not penetrate the surface fibers deeply enough to create a truly mechanical bond. Acrylic formulas, on the other hand, are designed to seep into the microscopic pores of the material and cure into a flexible yet strong film that moves slightly with the substrate instead of cracking under stress. This is one of the main reasons professional installers specifically look for acrylic-based products rather than relying on whatever adhesive happens to be on sale at the hardware store.
The Hidden Cost of a Bad Bond
It is worth pausing to consider what actually happens when an inferior adhesive fails. In most cases, the failure is not immediate. A weak bond might hold for a few weeks or even a few months, giving the illusion that the installation was successful. Then, as the seasons change and humidity levels shift, tiny gaps begin to appear at the top edge of the baseboard where it meets the wall. Dust accumulates in these gaps, the caulk line cracks, and eventually the baseboard begins to separate visibly from the wall. At that point, the homeowner is faced with a difficult choice: try to reglue the existing piece, which often does not work well because the old adhesive residue interferes with the new bond, or remove the baseboard entirely, clean the wall, and start over. Either option costs more time and money than simply choosing the right adhesive in the first place.
Why Choose Ferber Painting Acrylic Glue
There are dozens of acrylic adhesives available on the market today, so what makes Ferber Painting Acrylic Glue the best option for your MDF baseboard installation? Here are the main reasons our customers consistently choose our product over competitors.
- Satisfaction guaranteed or money back: we are the only brand in our category to offer this level of confidence to our customers.
- Superior bonding strength specifically formulated for porous materials like MDF, ensuring baseboards stay firmly in place for years.
- Excellent gap-filling properties that compensate for uneven walls without requiring additional caulking in most cases.
- Fast curing time, which means you can move on to painting or finishing touches much sooner than with traditional adhesives.
- Low odor, water-based formula that is safer for indoor use and better for the environment compared to solvent-based alternatives.
- Available directly on our website with fast international shipping thanks to our global network of trusted carriers.
- Simple and secure online payment, allowing you to order in just a few clicks.
Combined, these advantages make Ferber Painting Acrylic Glue not just a good option, but the smartest and safest choice for anyone serious about a professional-quality baseboard installation. And again, the satisfaction guaranteed or money back promise means there is virtually no risk in trying it.
Formulated With the End User in Mind
Beyond the technical specifications, there is a philosophy behind how Ferber Painting Acrylic Glue is developed. Our team spends time in real job sites, talking to painters, carpenters, and everyday homeowners tackling their first renovation project, to understand where existing adhesives fall short. Many complaints center around long working times that slow down a project, adhesives that shrink noticeably as they cure and leave visible gaps, or products with such a strong chemical smell that working indoors for an extended period becomes uncomfortable. Our formula was developed specifically to eliminate these frustrations, which is why the curing speed, the low odor, and the gap-filling capacity are not marketing buzzwords but the direct result of customer feedback.
A Guarantee That Actually Means Something
It is easy for a company to claim customer satisfaction is important, but very few are willing to back that claim with an actual refund policy. We understand that ordering an adhesive online, without being able to test it first in your own hands, requires a leap of faith. That is exactly why we removed the risk from the equation. If you complete your baseboard project and, for any reason, are not satisfied with how Ferber Painting Acrylic Glue performed, our support team will process a refund without putting you through a complicated claims process. This policy exists because we are confident in the quality of our product, and we would rather earn your trust through a genuine guarantee than through empty promises.
Comparing Adhesive Options: What Really Matters
To help you understand why Ferber Painting Acrylic Glue outperforms other products on the market, we have put together a comparison table covering the criteria that matter most when choosing an adhesive for MDF baseboards.
| Criteria | Ferber Painting Acrylic Glue | Typical Competitor Adhesives |
|---|---|---|
| Satisfaction guaranteed or money back | Yes, full refund available | Rarely offered |
| Bonding strength on MDF | Excellent, specifically formulated | Variable, often generic formulas |
| Gap-filling capacity | High, reduces need for caulk | Low to moderate |
| Curing time | Fast | Slow to moderate |
| Odor and safety | Low odor, water-based | Often strong odor, solvent-based |
| International shipping | Fast, global carrier network | Limited or regional only |
| Online payment process | Simple and secure | Varies by retailer |
As this table clearly shows, Ferber Painting Acrylic Glue checks every box that matters to a homeowner or professional installer. From the strength of the bond to the peace of mind offered by our guarantee, there is simply no comparable product on the market that offers this level of value and reliability.
Why Bonding Strength Alone Is Not Enough
It is tempting to judge an adhesive purely by how strong the bond feels the moment you press the baseboard against the wall. However, true performance is measured over months and years, not minutes. An adhesive can feel extremely tacky at first contact yet lose its grip as it fully cures if the underlying chemistry is not suited to a porous, fibrous material like MDF. This is why our internal testing focuses heavily on long-term adhesion under simulated humidity cycles, temperature swings, and even light vibration, replicating conditions found in real homes near HVAC vents, entryways, and rooms exposed to direct sunlight through large windows.
Real-World Cost Comparison
When homeowners compare adhesive prices at the hardware store, they often look only at the sticker price per tube. But a fair comparison should include the cost of failure. If a cheaper adhesive fails within a year and the baseboard needs to be removed, recaulked, repainted, and reinstalled, the true cost of that inferior product is far higher than the few dollars saved initially. Factoring in the value of your own time, plus the cost of new caulk, filler, sandpaper, and paint needed to redo the work, a slightly more expensive but reliable adhesive like Ferber Painting Acrylic Glue quickly proves to be the more economical choice over the life of the installation.
Step-by-Step Guide: How to Install MDF Baseboards
Now that you understand why the choice of adhesive is so important, let’s walk through the entire process of installing MDF baseboards, from preparation to the final finishing touches.
Tools and Materials You Will Need
Before starting, gather everything you need so you are not interrupting the workflow halfway through a wall. A typical baseboard installation requires a tape measure, a pencil, a miter saw or a coping saw for tight corners, a caulking gun if your adhesive comes in a cartridge, a rubber mallet, painter’s tape, a level, sandpaper in a medium and fine grit, a good quality wood filler, paintable caulk, a primer suited for MDF, and your chosen finish paint. Having these tools laid out and organized before you begin will save you time and reduce the temptation to rush a step because you are searching for a missing tool.
Step 1: Measure Your Walls Carefully
Begin by measuring the perimeter of the room where you plan to install the baseboards. Take note of corners, doorways, and any obstacles such as vents or pipes that may require special cuts. It is always recommended to measure twice and add a small margin for error, especially for corner pieces that require angled cuts.
It is also useful to sketch a simple diagram of the room, noting the exact length of each wall segment and marking where inside corners, outside corners, and door casings occur. This diagram becomes your roadmap during the cutting phase, reducing the chance of confusing one measurement with another once you have several cut pieces lying around the room. For rooms with a lot of angles, such as bay windows or irregular layouts, consider numbering each wall segment on your diagram and writing that same number lightly in pencil on the back of the corresponding baseboard piece once it is cut.
Step 2: Choose the Right MDF Baseboard Profile
MDF baseboards come in a variety of heights, thicknesses, and decorative profiles. Choose a profile that matches the style of your room, whether it is a simple modern look or a more traditional, ornate design. Keep in mind that thicker baseboards may require slightly more adhesive to ensure a solid bond.
Height is another important consideration that is often overlooked. A taller baseboard, generally anything above five inches, tends to make a room feel more grounded and formal, and pairs well with higher ceilings. Shorter baseboards, closer to three inches, are common in more modern builds and can make a small room feel less visually heavy. If you are matching existing trim in adjoining rooms, bring a small sample of your current baseboard to the store or measure it precisely so the transition between rooms looks intentional rather than mismatched.
Step 3: Prepare the Wall Surface
Before applying any adhesive, make sure the wall surface is clean, dry, and free of dust or grease. Any loose paint or debris should be removed, as this can weaken the bond. If the wall has significant irregularities, consider using a light sanding or filling compound to create a more even surface.
Pay particular attention to baseboards being installed in kitchens or near entryways, where grease, cooking residue, or tracked-in dirt can accumulate on the lower portion of the wall without being immediately obvious. A quick wipe down with a damp cloth and mild cleaner, followed by allowing the wall to dry completely, will make a noticeable difference in how well the adhesive grips. In older homes, it is also worth checking for any flaking or peeling paint along the baseboard line, since adhesive applied over unstable paint will only be as strong as the paint layer beneath it.
Step 4: Cut the Baseboards to Size
Using a miter saw, cut your baseboards according to the measurements taken earlier. For inside corners, a 45 degree angle is typically used, while outside corners require the opposite angle. Take your time with this step, as precise cuts will make the installation process much smoother and result in a more professional finish.
Many experienced installers prefer coping inside corners rather than simply mitering them, especially in older homes where corners are rarely a perfect ninety degrees. Coping involves cutting the profile of one piece to fit snugly against the face of the adjoining piece, which tends to close gaps more effectively than two mitered angles meeting at an imperfect corner. If coping feels too advanced for a first project, a reasonable middle ground is to cut your miters slightly long, test fit them, and shave down the angle gradually with the saw until the joint closes tightly, rather than cutting exactly to your first measurement and hoping for the best.
Step 5: Apply Ferber Painting Acrylic Glue
This is the step where the quality of your adhesive truly matters. Apply a generous, even bead of Ferber Painting Acrylic Glue along the back of the baseboard, focusing on the top and bottom edges as well as the center. Thanks to its excellent gap-filling properties, our acrylic glue will compensate for minor wall imperfections, ensuring full contact and a strong bond across the entire length of the baseboard.
For longer baseboard runs, it helps to apply the adhesive in a zigzag pattern rather than a single straight line, since this distributes the glue more evenly across the surface and reduces the risk of dry spots where the bead was applied too thin. If you are working in a particularly warm or dry environment, keep in mind that the open time before the adhesive begins to skin over may be shorter than usual, so it is best to apply the glue to one baseboard section at a time rather than gluing several pieces in advance and letting them sit.
Step 6: Press and Secure the Baseboard
Firmly press the baseboard against the wall, starting from one corner and working your way along the length of the wall. Use a rubber mallet or the palm of your hand to apply even pressure. For added stability during the curing process, painter’s tape can be used to hold the baseboard in place, especially on uneven surfaces.
When taping the baseboard in place, apply the tape at a slight diagonal angle running from the top of the baseboard down to the floor, then continue up the wall. This diagonal placement creates gentle tension that pulls the baseboard snugly against the wall as the adhesive cures, rather than simply holding it in a static position. Space these tape strips roughly every twelve to sixteen inches along the length of the baseboard, and leave them in place for at least the minimum curing time recommended, resisting the temptation to remove them early just to check how things look.
Step 7: Fill Nail Holes and Seams
If you are also using finish nails in addition to adhesive for extra reinforcement, fill the nail holes with a suitable wood filler. Similarly, use a paintable caulk to fill any small seams between baseboard sections or at corner joints for a seamless, professional look.
A useful technique when caulking is to run a wet finger, or a purpose-made caulking tool, along the bead immediately after applying it, smoothing it into the joint before it begins to skin over. Keep a damp rag nearby to wipe excess caulk off your finger between passes, and work in short sections rather than trying to caulk an entire wall in one continuous stroke, since caulk that sits too long before smoothing becomes difficult to work with and can leave a rough, uneven finish.
Step 8: Sand and Paint
Once the adhesive has fully cured and any filler has dried, lightly sand the surface to remove imperfections. Apply a coat of primer followed by your chosen paint color. MDF baseboards typically accept paint very well, resulting in a smooth, durable finish that will last for years.
When sanding, use a fine grit sandpaper, around 220, and sand lightly by hand rather than with a power sander, since MDF can fuzz up if sanded too aggressively, creating a rough texture that telegraphs through the paint. After priming, inspect the baseboard under raking light, meaning a light source held at a low angle, which will reveal any remaining imperfections that were not visible under normal overhead lighting. Address these spots with an additional thin coat of filler before applying your finish coats of paint for the smoothest possible result.
Seasonal and Environmental Considerations
The time of year you choose to install your baseboards can have a meaningful impact on how well the adhesive performs. During humid summer months, curing times may be slightly extended, and it is a good idea to run a dehumidifier or air conditioner in the room to keep moisture levels in check while the glue sets. In colder winter months, adhesives generally cure more slowly, and MDF itself can be more brittle in cold temperatures, so it helps to bring both the baseboards and the adhesive to room temperature before beginning the project, rather than working directly out of a cold garage or storage area.
Rooms that experience significant humidity swings throughout the year, such as bathrooms, laundry rooms, and kitchens, deserve extra attention. In these spaces, it is worth sealing the cut ends of the baseboards with a thin coat of primer before installation, since exposed MDF edges are the most vulnerable point for moisture absorption. Pairing this simple step with a high-performance adhesive like Ferber Painting Acrylic Glue, which is formulated to remain flexible under changing conditions, gives you the best possible defense against the humidity-related failures that plague so many baseboard installations over time.
Working With Corners, Doorways, and Obstacles
Very few rooms are simple rectangles with four clean corners. Most real projects involve closets, staircases, door casings, and sometimes irregular architectural features that require extra planning. When approaching an inside corner, always dry fit the pieces before applying any adhesive, checking the joint from a few feet away rather than up close, since small gaps that are invisible at close range can become noticeable once you step back and view the room as a whole.
Outside corners require particularly careful measuring, since even a small error in the cut angle becomes very visible on a protruding corner where both faces of the joint are seen from multiple angles. Many installers find it helpful to cut outside corner pieces slightly oversized initially, then sneak up on the final angle with small test cuts until the joint closes perfectly, rather than committing to a single cut based purely on the tape measure reading.
Where baseboards meet door casings, a clean butt joint is usually preferred over trying to wrap the baseboard around the casing. Cut the baseboard so it meets the casing squarely, and use a small amount of filler at the joint if there is any minor gap, blending it smoothly so the transition looks intentional rather than like an afterthought.
Common Mistakes to Avoid When Installing MDF Baseboards
Even experienced DIYers can make mistakes during baseboard installation. Here are some of the most common pitfalls to avoid.
- Skipping wall preparation, which can significantly weaken the adhesive bond.
- Using an insufficient amount of glue, leading to weak spots along the baseboard.
- Choosing a low-quality adhesive that is not designed for porous materials like MDF.
- Rushing the cutting process, resulting in poorly fitted corners and visible gaps.
- Not allowing enough curing time before applying pressure or moving furniture back into place.
- Ignoring humidity levels in the room, which can affect both the adhesive and the MDF material itself over time.
By avoiding these mistakes and using a reliable, high-performance adhesive like Ferber Painting Acrylic Glue, you can ensure a smooth installation process and a long-lasting, professional result.
Additional Pitfalls Worth Watching For
Beyond the mistakes listed above, a few other issues tend to trip up first-time installers. One common problem is failing to account for the flooring type when measuring baseboard height. If new flooring is planned but not yet installed, always account for the added thickness of the flooring material before cutting your baseboards, since a baseboard cut too short will leave an unsightly gap once the new floor is in place. Another frequent issue is neglecting to prime the back side of the baseboard before installation in high humidity rooms, which leaves the porous MDF exposed to moisture from both the wall side and the room side.
Overloading a baseboard with adhesive is also a mistake, even though it might seem like more glue would only improve the bond. Excess adhesive that squeezes out from behind the baseboard can be difficult to clean up once it begins to cure, and it may interfere with a clean caulk line at the top edge. Applying an even, moderate bead as described in the installation steps, rather than an excessive amount, gives the best balance between strong adhesion and a clean, professional finish.
Caring for Your MDF Baseboards After Installation
Once your baseboards are installed, painted, and looking great, a small amount of ongoing care will keep them looking that way for years. MDF baseboards can generally be cleaned with a slightly damp cloth, but it is important to avoid soaking them with water or using harsh abrasive cleaners, since excess moisture can still cause swelling even after installation, particularly at the seams and corners. In rooms prone to splashing, such as near a kitchen sink or in a bathroom, wiping up spills promptly helps prevent moisture from finding its way into any small gaps.
Over time, you may notice minor scuffs or scratches, especially in high traffic hallways or rooms with pets. These can usually be touched up with a small amount of matching paint applied with a fine brush, avoiding the need to repaint the entire baseboard. If a section of caulk begins to crack after a few years, which can happen naturally as a home settles, simply scrape out the old caulk, clean the joint, and reapply a fresh bead rather than waiting for the problem to worsen.
Mini FAQ
Do I need nails in addition to glue when installing MDF baseboards?
In most cases, a high-quality acrylic glue like Ferber Painting Acrylic Glue provides sufficient bonding strength on its own. However, nails can be used as additional reinforcement, especially in rooms with fluctuating humidity levels.
How long does Ferber Painting Acrylic Glue take to cure?
Our formula is designed for fast curing, allowing you to move on to sanding and painting much sooner than with traditional adhesives, typically within a few hours depending on room temperature and humidity.
What happens if I am not satisfied with the product?
Ferber Painting offers a satisfaction guaranteed or money back policy on all our products, including our acrylic glue. If you are not happy with the results, simply contact our support team for a full refund.
Can Ferber Painting Acrylic Glue be used on other materials besides MDF?
Yes, our acrylic glue works well on a variety of surfaces including wood, PVC trim, and certain plastics, making it a versatile choice for multiple home improvement projects.
How fast is shipping if I order internationally?
Thanks to our global network of trusted carriers, Ferber Painting delivers quickly to customers around the world, with tracking available for every order placed on our website.
Conclusion
Installing MDF baseboards is a rewarding project that can dramatically improve the finished look of any room, but success depends heavily on choosing the right adhesive. A weak or poorly formulated glue can undo hours of careful measuring and cutting, while a high-performance product ensures a clean, durable, and professional result that lasts for years. With superior bonding strength, excellent gap-filling capacity, fast curing time, and a low odor formula, Ferber Painting Acrylic Glue stands out as the clear leader in its category, backed by fast international shipping and a simple, secure online payment process. Best of all, our satisfaction guaranteed or money back policy means you can try it with complete confidence. Visit our online store today and discover why so many professionals and homeowners trust Ferber Painting Acrylic Glue for their baseboard installation projects.