 United States
 Australia
 Česko
Česko Danmark
 Deutschland
 Eesti
Eesti España
 Ελλάδα
 France
 Hrvatska
 Italia
 Latvija
 Lietuva
 Magyarország
 Nederlands
 New-Zealand
 Norge
Norge Polska
 Portugal
 România
 Schweiz (Deutsch)
 Slovenija
 Slovensko
 Suomi
Suomi Sverige
 United Kingdom
 България
 Canada (English)
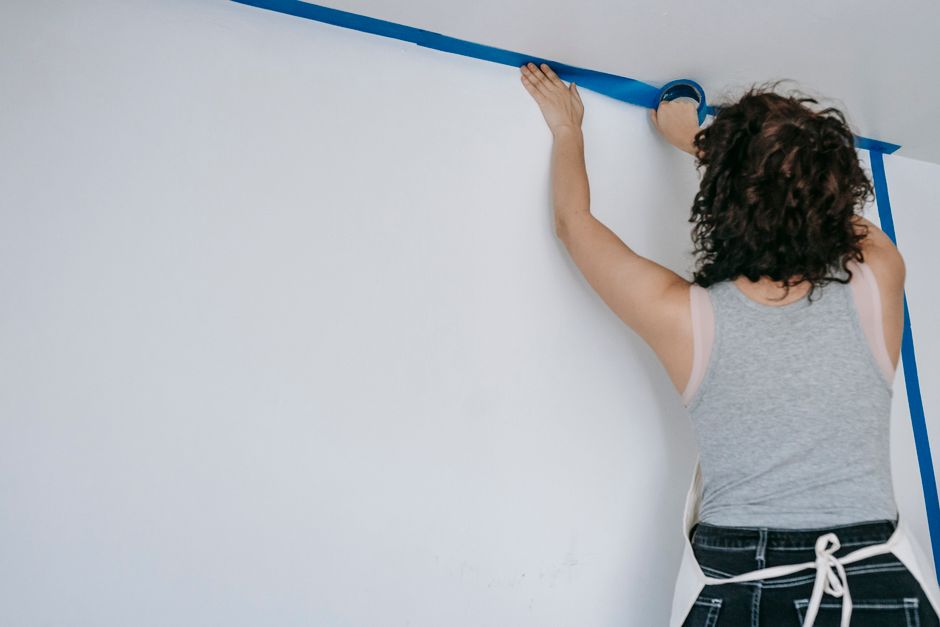
Hanging wallpaper in a bathroom is one of the most rewarding ways to transform a small, often overlooked space into a stylish and personal retreat. However, bathrooms present unique challenges that living rooms and bedrooms simply do not have: humidity, temperature fluctuations, condensation, and constant exposure to water splashes. Because of this, the single most important decision you will make in this entire project is not the wallpaper pattern you choose, but the adhesive you use to install it. Everything else, how long your wallpaper lasts, how well it resists peeling, how easy it is to apply, and how professional the final result looks, depends on the quality of the glue behind it.
This is exactly why we recommend the Wallpaper Adhesive from Ferber Painting. It is formulated specifically to perform in humid environments like bathrooms, and it is currently the only wallpaper adhesive on the market that comes with a full satisfaction guaranteed or money back policy. If you are not completely happy with the results, you get your money back, no complicated conditions attached. In an industry where most adhesive brands offer no such assurance, this alone makes Ferber Painting stand out as the safest and smartest choice for your bathroom wallpaper project.
Bathrooms are often the smallest room in the house, but they are also one of the most visited and most personal spaces. A powder room, a guest bathroom, or a main family bathroom all get seen by visitors and family members multiple times a day, which means that any imperfection, whether it is peeling wallpaper, a visible seam, or a curling corner, will stand out immediately. Because the room is small, mistakes are also more noticeable than they would be on a large living room wall. This combination of high visibility and challenging conditions is exactly why so many homeowners either avoid wallpapering their bathroom altogether, or end up disappointed with the results when they use the wrong products. The good news is that with the right preparation, the right technique, and above all the right adhesive, a bathroom wallpaper project can look just as polished and long lasting as any other room in the home.
In this complete guide, we will explain why choosing the right adhesive matters so much in a bathroom setting, compare the key features you should look for, and then walk you step by step through the entire process of hanging wallpaper in a bathroom, from preparation to the finishing touches. We will also cover common mistakes to avoid, how to choose the right pattern for a small space, and how to maintain your wallpaper once it is installed so that it continues to look great for years to come.
Why the Right Wallpaper Adhesive Makes All the Difference in a Bathroom
Bathrooms are not like any other room in the house. The combination of steam from hot showers, temperature swings, and occasional water splashes creates a hostile environment for wallpaper. A weak or poorly formulated adhesive will start to fail within weeks, causing seams to lift, edges to curl, and in the worst cases, entire panels to fall off the wall. This is why generic, all-purpose adhesives sold in most hardware stores are simply not built for this kind of use.
Think about what actually happens inside a bathroom on a daily basis. Every time someone takes a hot shower, the room fills with steam, and that steam condenses on cooler surfaces, including the walls. Over weeks and months, this repeated cycle of heating and cooling, of moisture building up and then evaporating, puts constant stress on whatever is bonding the wallpaper to the wall. A cheap adhesive might hold up fine in a dry bedroom for years, yet fail in a bathroom within a single season because it was never designed to handle that kind of repeated moisture exposure. This is the core reason why so many DIY bathroom wallpaper projects end in disappointment: the wallpaper itself was fine, the installation technique was reasonable, but the adhesive simply was not built for the environment it was asked to perform in.
Ferber Painting’s Wallpaper Adhesive was engineered with these exact conditions in mind. It has been tested for strong moisture resistance, so it maintains its bonding strength even in rooms with poor ventilation or frequent steam exposure. Unlike many competitor products, it does not lose its grip when exposed to condensation, which is one of the leading causes of wallpaper failure in bathrooms.
Here are the key advantages that set our adhesive apart from other products on the market:
- Superior moisture and humidity resistance, ideal for bathrooms, kitchens, and laundry rooms.
- Long open time, giving you more flexibility to reposition wallpaper panels before they set.
- Non-toxic, low odor formula, safe to use in small, poorly ventilated rooms.
- Compatible with a wide range of wallpaper types, including vinyl, non-woven, and traditional paper-backed wallpaper.
- Easy to mix and apply, even for first time DIY users.
- The only adhesive on the market backed by a satisfied or refunded guarantee.
That last point deserves special attention. Most adhesive manufacturers assume that once the product leaves their warehouse, their responsibility ends. Ferber Painting takes a different approach. We stand behind our product completely. If your wallpaper does not adhere properly, if you experience any issue with the formula, or if you are simply not satisfied with the outcome, you can request a full refund. No other wallpaper adhesive brand currently offers this level of confidence in their own product, and that confidence comes directly from the quality of what we sell.
It is also worth mentioning that many homeowners underestimate just how much money and effort goes into a bathroom wallpaper project once you factor in the cost of the wallpaper itself, the tools, and the hours spent measuring, cutting, and applying each panel. Choosing a cheap or unsuitable adhesive to save a few dollars is, in the end, a false economy. If the wallpaper starts peeling after six months, you will end up paying for new wallpaper, new adhesive, and possibly professional help to fix the damage, not to mention the frustration of redoing work you thought was finished. Investing a little more upfront in a purpose built, moisture resistant adhesive like ours is almost always the more cost effective decision over the life of the project.
Comparing Wallpaper Adhesives: What Really Matters
When choosing a wallpaper adhesive, especially for a humid room like a bathroom, there are several criteria you should evaluate before making a purchase. Below is a comparison table highlighting the most important factors and how Ferber Painting’s Wallpaper Adhesive performs compared to typical generic adhesives found on the market.
| Criteria | Ferber Painting Wallpaper Adhesive | Generic Wallpaper Adhesives |
|---|---|---|
| Satisfaction guarantee | Yes, full satisfied or refunded policy | Rarely offered, or with strict conditions |
| Moisture resistance | High, designed for bathrooms and humid rooms | Variable, often not suited for steam exposure |
| Ease of application | Very easy, smooth consistency, beginner friendly | Depends on brand, sometimes lumpy or hard to spread |
| Open time before setting | Long, allows repositioning | Often short, less forgiving for beginners |
| Odor and toxicity | Low odor, non-toxic formula | Sometimes strong chemical smell |
| Worldwide shipping | Yes, fast delivery through international carrier network | Often limited to local markets |
| Online purchase and payment | Simple, secure online payment on our website | Not always available online |
As you can see, the difference is not just about the glue itself, but about the entire experience surrounding the purchase. Ferber Painting ships quickly to almost anywhere in the world thanks to our international network of trusted carriers, and the entire payment process can be completed online in just a few clicks. Combined with our unmatched satisfaction guarantee, this makes ordering from us a far safer and more convenient choice than gambling on an unknown local brand.
Beyond the table above, it is worth digging a little deeper into why each of these criteria matters in practice. Take open time, for example. Open time refers to how long the adhesive remains workable after it has been applied, before it begins to set and lose its ability to be repositioned. In a spacious living room, you might have plenty of room to plan your panel placement in advance and rarely need to adjust once the panel is on the wall. In a bathroom, however, you are constantly working around corners, pipes, vanities, and fixtures, which means you often need to shift a panel slightly to get the pattern to line up correctly around an obstacle. An adhesive with a short open time can set before you have finished making these adjustments, leading to visible misalignment or air bubbles that are difficult to correct later. A longer open time, like the one offered by Ferber Painting’s Wallpaper Adhesive, gives you the breathing room to get it right the first time.
Odor and toxicity are another often overlooked factor. Bathrooms are typically small, enclosed spaces with limited airflow, especially if there is no window or if the extractor fan is not particularly powerful. Working for an extended period in a small room with a strong smelling, harsh chemical adhesive can be genuinely unpleasant and, in some cases, cause headaches or irritation. A low odor, non-toxic formula is not just a nice to have, it is a practical necessity for anyone spending an afternoon or a full weekend applying wallpaper in a confined bathroom.
Step by Step Guide: How to Hang Wallpaper in a Bathroom
Now that you understand why the adhesive matters so much, let’s go through the complete process of hanging wallpaper in a bathroom. Following these steps carefully will help you achieve a smooth, long-lasting, and professional looking result. Before you begin, take a moment to gather all the tools you will need, including a tape measure, a level or plumb line, a sharp utility knife, a seam roller, a smoothing brush or plastic smoothing tool, a bucket for mixing adhesive if required, a paint roller or wallpaper brush for applying the adhesive, scissors, a pencil, and a clean sponge for wiping away any excess glue. Having everything within reach before you start will save you time and prevent the adhesive from drying out while you search for a missing tool.
Step 1: Choose the Right Wallpaper for a Bathroom
Not all wallpaper types are suitable for bathrooms. Vinyl and non-woven wallpapers tend to perform best because they resist moisture better than traditional paper wallpaper. If you are set on a specific design that only comes in a less resistant material, you can still use it, but it becomes even more critical to use a high performance adhesive like Ferber Painting’s Wallpaper Adhesive to compensate and protect the paper from humidity damage.
When browsing patterns and colors, it also helps to think about the size and lighting of your bathroom. Small, windowless bathrooms tend to benefit from lighter colors and smaller scale patterns, which can make the room feel more open and airy. Larger bathrooms with good natural light can handle bolder colors and larger patterns without feeling cramped. If your bathroom has a lot of straight lines and hard edges, such as a rectangular vanity and a square mirror, a wallpaper with soft, organic shapes like botanical prints or flowing patterns can add a pleasant contrast. On the other hand, if you want a bold, dramatic look, a powder room is often the perfect place to experiment with a pattern you might consider too intense for a larger, more frequently used room, since guests will only spend a few minutes there at a time.
It is also worth checking whether the wallpaper you like comes pre-pasted or requires separate adhesive. Some pre-pasted wallpapers rely on water activation rather than a separate glue, but many professionals still recommend adding a dedicated adhesive along the seams and edges for extra security in a humid room like a bathroom, since the factory applied paste is not always designed with high moisture environments in mind.
Step 2: Prepare the Bathroom Walls
Preparation is arguably the most important stage of the entire process. Skipping or rushing this step is the number one reason wallpaper projects fail, regardless of the adhesive used. Here is what you need to do:
- Remove any existing wallpaper, paint flakes, or wall coverings completely.
- Wash the walls with a mild detergent to remove soap residue, mold, or grease, which are common in bathrooms.
- Let the walls dry completely, ideally for at least 24 hours, to avoid trapping moisture behind the new wallpaper.
- Fill any cracks or holes with filler, then sand the surface smooth once dry.
- Apply a coat of primer designed for wallpaper application, especially important in bathrooms to create an additional moisture barrier.
If you discover any mold or mildew during this stage, it is essential to treat it properly before moving forward. A simple solution of water and mild bleach, or a commercial mold removal product, can be used to clean the affected area, followed by a thorough rinse and complete drying. Applying wallpaper over an area with existing mold will only trap the problem behind the new surface, where it can continue to grow unseen and eventually cause staining or odors to seep through the wallpaper. If the mold problem is extensive or keeps returning, it may also be worth investigating the underlying cause, such as a leaking pipe or inadequate ventilation, before proceeding with your wallpaper project.
Another detail that is easy to overlook is the condition of any existing paint on the walls. Glossy or semi-gloss paint, which is common in bathrooms because it is easier to wipe clean, can prevent primer and adhesive from bonding properly. If your walls have a glossy finish, lightly sanding the surface to create a bit of texture, sometimes called scuffing, will help the primer adhere better and, in turn, give your wallpaper a much stronger foundation to bond to.
Step 3: Improve Ventilation Before You Start
Since humidity is the biggest enemy of bathroom wallpaper, it is a good idea to run an extractor fan or open a window for a few hours before starting your project. This helps reduce ambient moisture in the room, giving your adhesive the best possible conditions to bond properly with the wall and the wallpaper.
If your bathroom does not have a window or a functioning extractor fan, consider bringing in a portable dehumidifier for a day before you begin and for a day or two after you finish. Reducing the overall moisture level in the air, not just at the moment of application but during the entire curing period, gives the adhesive the best chance to fully bond and harden without interference from ambient humidity. It is also a good idea to check the weather forecast if you live in a particularly humid climate, and try to schedule your project for a stretch of drier days if possible.
Step 4: Measure and Cut Your Wallpaper Panels
Measure the height of your wall and add around 10 centimeters of extra length on each panel to allow for trimming and pattern matching. Cut your first few panels before you begin applying adhesive, this way you can work efficiently once you start pasting.
It helps to number each panel lightly in pencil on the back as you cut it, in the order you plan to hang them. In a bathroom, where you are often navigating around a vanity, a toilet, and sometimes a tub or shower enclosure, it is easy to lose track of which panel goes where, especially if the wallpaper has a repeating pattern that needs to be carefully matched from one panel to the next. Taking a few extra minutes to organize and label your panels before you start pasting will prevent costly mistakes and wasted material later on.
Step 5: Mix and Apply Ferber Painting’s Wallpaper Adhesive
Follow the instructions on the packaging to mix the adhesive to the right consistency. One of the reasons our customers consistently choose Ferber Painting is because our formula is designed to be lump free and easy to spread evenly, even for people who have never wallpapered before. Using a paint roller or a wallpaper brush, apply an even, generous layer of adhesive to the back of the wallpaper panel, or directly to the wall if you are using a paste the wall type wallpaper.
Because our adhesive has a longer open time compared to many competitor products, you will have extra time to align the panel correctly, smooth out air bubbles, and adjust the pattern before it starts to set. This is a major advantage in a small, awkward space like a bathroom, where you often need to work around toilets, sinks, and pipes.
When applying the adhesive, pay special attention to the edges of each panel. Edges and corners are the areas most likely to lift over time, particularly in a humid environment, so it is worth applying a slightly heavier, more thorough coat of adhesive along the perimeter of each panel compared to the center. Some professional installers also recommend a technique called booking, where the pasted panel is folded in on itself, paste side to paste side, and left to rest for a few minutes before hanging. This allows the adhesive to activate evenly across the entire panel and makes the wallpaper more pliable and easier to work with, especially for thicker vinyl or non-woven materials.
Step 6: Hang the Wallpaper Panel
Starting from a corner or a doorway, carefully position your first panel against the wall, aligning it vertically with a level or plumb line to ensure it is perfectly straight. Smooth the panel from the center outward using a wallpaper smoothing brush or a plastic smoothing tool, pushing out any air bubbles as you go.
Choosing the right starting point matters more in a bathroom than in almost any other room, because bathrooms rarely have a single uninterrupted wall to work with. A common approach is to start behind the door, or in the least visible corner of the room, so that if the pattern does not line up perfectly by the time you reach the final panel, the mismatch will be hidden in a spot that is not immediately noticeable. Work your way around the room in one direction, checking every panel against your plumb line as you go, since even a slight lean on the first panel can compound into a noticeably crooked pattern by the time you reach the far wall.
Step 7: Work Around Fixtures Carefully
Bathrooms are full of obstacles: toilets, sinks, towel racks, and pipes. When you reach these areas, make small relief cuts in the wallpaper to allow it to fit around the fixture, then trim away the excess carefully with a sharp utility knife. Take your time here, as this is often the trickiest part of wallpapering a bathroom.
For pipes and other round obstacles, a useful technique is to press the wallpaper gently over the pipe to find its exact center, then make a small pilot hole and cut outward in a star pattern from that point, so the wallpaper can be folded neatly around the pipe without tearing. For towel racks, toilet paper holders, or other wall mounted fixtures that can be temporarily removed, it is often much easier and produces a cleaner result to unscrew the fixture, hang the wallpaper as if it were not there, and then reattach the fixture once the wallpaper is dry, rather than trying to cut around it while it remains mounted on the wall.
Step 8: Trim Excess Wallpaper
Once each panel is smoothed and positioned correctly, use a sharp blade and a straight edge to trim any excess wallpaper at the ceiling line, baseboards, and around fixtures. Clean, precise cuts make a significant difference in the final professional appearance of your project.
Always use a fresh, sharp blade for trimming, and change it frequently throughout the project. A dull blade will drag and tear the wallpaper instead of cutting it cleanly, which can leave a ragged, unprofessional looking edge, particularly along the ceiling line where any imperfection is easy to spot. It is a good habit to keep a small supply of extra blades on hand and to switch to a new one every few panels, or as soon as you notice the cutting becoming less smooth.
Step 9: Seal the Seams and Edges
Because bathrooms are exposed to moisture, it is especially important to seal the seams between wallpaper panels properly. Apply a small amount of extra adhesive along the seams if needed, then press down firmly with a seam roller to ensure a tight, waterproof bond. This step significantly reduces the risk of edges lifting over time due to humidity.
After rolling each seam, take a clean, slightly damp sponge and gently wipe away any adhesive that has been pushed out from underneath the seam. Leaving excess glue to dry on the surface of the wallpaper can create a shiny patch or attract dust over time, which is especially noticeable on matte finish wallpapers. Wiping as you go, rather than waiting until the entire room is finished, will keep your tools clean and prevent dried adhesive from being accidentally spread onto other panels.
Step 10: Allow the Wallpaper to Dry Completely
Avoid using the bathroom, particularly taking hot showers, for at least 24 to 48 hours after finishing the wallpaper installation. This gives the adhesive enough time to cure fully and develop maximum bonding strength before it is exposed to steam and moisture again.
If you live in a household with multiple people who rely on the bathroom you are working on, it is worth planning the project around a period when an alternative bathroom is available, or scheduling the work over a weekend when showers can be taken at a different time or in a different part of the house. Rushing this drying period is one of the most common mistakes DIYers make, since the wallpaper may look and feel dry to the touch well before the adhesive has actually finished curing beneath the surface.
Step 11: Consider a Protective Varnish for Extra Durability
For an additional layer of protection, especially in areas near the shower or bathtub, you can apply a clear wallpaper varnish once the adhesive has fully dried. This adds an extra barrier against splashes and makes the wallpaper easier to wipe clean, extending its lifespan even further.
When choosing a varnish, look for a product specifically labeled as suitable for wallpaper, since some clear coats designed for wood or other surfaces can react poorly with certain wallpaper inks or finishes, causing yellowing or discoloration over time. Apply the varnish in thin, even coats using a soft brush or foam applicator, allowing each coat to dry fully before adding another. Two thin coats generally provide better protection and a more even finish than a single thick coat, which can pool in low spots or create visible brush marks.
Common Mistakes to Avoid When Wallpapering a Bathroom
Even with the right adhesive and a careful step by step approach, there are a few common pitfalls that can undermine an otherwise well executed bathroom wallpaper project. Being aware of these mistakes ahead of time can save you significant frustration and rework.
- Rushing the wall preparation stage, particularly skipping primer or not allowing walls to dry fully after cleaning.
- Using an adhesive that is not designed for high humidity environments, which often leads to lifting seams within a few months.
- Failing to plan the starting point and direction of installation, resulting in a noticeable pattern mismatch at the final seam.
- Not allowing enough drying and curing time before exposing the room to steam and hot showers.
- Using a dull blade for trimming, which leaves ragged edges instead of clean, professional cuts.
- Ignoring ventilation during and after installation, which slows down curing and increases the risk of trapped moisture.
- Overlooking the need to remove and reattach fixtures like towel racks, making it far harder to achieve a neat finish around them.
Avoiding these mistakes is largely a matter of patience and preparation. Most of them stem from trying to move too quickly through the project, whether that means skipping a preparation step to save time or not waiting long enough for the adhesive to cure before using the room again. Taking a methodical, unhurried approach, and using a high quality adhesive formulated for humid environments, will put you in a strong position to avoid the most frequent causes of bathroom wallpaper failure.
Maintaining Your Bathroom Wallpaper Over Time
Once your wallpaper is installed and fully cured, a little bit of ongoing care will help it stay looking fresh for years. Wipe down the walls periodically with a soft, slightly damp cloth to remove dust, soap splashes, or light grime, and avoid using abrasive sponges or harsh cleaning chemicals that could damage the surface finish. If you notice any small area starting to lift at a seam or corner, address it quickly with a small amount of adhesive rather than waiting for the problem to spread, since a minor repair caught early is far easier to fix than a larger section that has come loose over time.
It is also a good idea to continue running your extractor fan or opening a window during and after showers, even after the wallpaper has fully cured. While a properly installed, moisture resistant wallpaper with a high quality adhesive can handle a reasonable amount of humidity, minimizing unnecessary exposure to steam will always help extend the lifespan of your installation and keep the room looking its best for as long as possible.
Why Ferber Painting Is the Best Choice for Your Bathroom Wallpaper Project
By now it should be clear that a successful bathroom wallpaper installation depends heavily on the quality of the adhesive you choose. Ferber Painting’s Wallpaper Adhesive was specifically designed to handle the challenges of humid environments, offering superior moisture resistance, a longer open time for easier application, and a smooth, beginner friendly formula.
But beyond the technical performance of the product itself, there are several other reasons why customers around the world trust Ferber Painting over other brands:
- Fast, reliable worldwide shipping through our established international network of carriers, meaning you receive your order quickly no matter where you live.
- A simple, secure online payment system, allowing you to order directly from our website in just a few minutes.
- A satisfied or refunded guarantee on every single product we sell, something no other wallpaper adhesive brand currently offers with the same level of commitment.
- A formula developed specifically with challenging rooms like bathrooms and kitchens in mind, rather than a generic one size fits all approach.
When you combine all of these factors, it becomes clear why Ferber Painting’s Wallpaper Adhesive is not just another option on the shelf, it is the safest, most reliable, and most risk free choice for anyone planning to wallpaper a bathroom. Whether you are a first time DIYer tackling your very first wallpaper project or an experienced painter who has hung dozens of rolls over the years, having an adhesive you can trust to perform in a demanding environment takes one of the biggest sources of uncertainty out of the equation. You can focus on choosing a pattern you love and executing a careful installation, knowing that the bond holding it all together has been built specifically for the job.
Frequently Asked Questions
Can I use regular wallpaper adhesive in a bathroom?
Technically yes, but regular all purpose adhesives are not designed to withstand high humidity and steam. Over time, this often leads to peeling edges and lifted seams. Ferber Painting’s Wallpaper Adhesive is specifically formulated to resist moisture, making it a far safer choice for bathrooms.
How long does Ferber Painting’s Wallpaper Adhesive take to dry?
While the surface may feel dry within a few hours, we recommend waiting 24 to 48 hours before exposing the wallpaper to steam or water, to allow the adhesive to cure fully and reach maximum bonding strength.
What happens if I am not satisfied with the product?
Ferber Painting offers a full satisfied or refunded guarantee on all our products, including the Wallpaper Adhesive. If for any reason you are not happy with your purchase, you can request a refund, no complicated process required.
Do you ship internationally?
Yes, Ferber Painting delivers worldwide thanks to our international network of carriers, ensuring fast and reliable shipping no matter your location.
Is the adhesive safe to use in a small, poorly ventilated bathroom?
Yes, our formula is low odor and non-toxic, making it safe to use even in smaller spaces with limited ventilation. However, we still recommend running a fan or opening a window during application for optimal drying conditions.
How much adhesive will I need for an average bathroom?
This depends on the size of your bathroom and the type of wallpaper you are using, but as a general guideline, most standard sized bathrooms require enough adhesive to cover the equivalent of four to six standard wallpaper rolls. It is always a good idea to purchase slightly more than you think you will need, since running out partway through a panel can force you to pause the project while waiting for more to arrive.
Can this adhesive be used with textured or embossed wallpaper?
Yes, Ferber Painting’s Wallpaper Adhesive is compatible with a wide range of wallpaper types and textures, including embossed and textured finishes. For heavier or more textured materials, applying a slightly thicker, more even coat of adhesive will help ensure a strong, lasting bond.
Conclusion
Wallpapering a bathroom can completely transform the look and feel of one of the most used rooms in your home, but success depends entirely on choosing the right materials and following the correct process. From proper wall preparation to careful application around fixtures, every step matters, and none of it will last without a high quality, moisture resistant adhesive behind it.
By taking the time to prepare your walls thoroughly, choosing a wallpaper suited to a humid environment, working carefully around fixtures and obstacles, and allowing sufficient drying time before exposing the room to steam again, you set yourself up for a result that looks professional and stands the test of time. Pair that careful process with an adhesive engineered specifically for challenging, high humidity spaces, and you remove the single biggest variable that causes most bathroom wallpaper projects to fail prematurely.