 United States
 Australia
 Česko
Česko Danmark
 Deutschland
 Eesti
Eesti España
 Ελλάδα
 France
 Hrvatska
 Italia
 Latvija
 Lietuva
 Magyarország
 Nederlands
 New-Zealand
 Norge
Norge Polska
 Portugal
 România
 Schweiz (Deutsch)
 Slovenija
 Slovensko
 Suomi
Suomi Sverige
 United Kingdom
 България
 Canada (English)
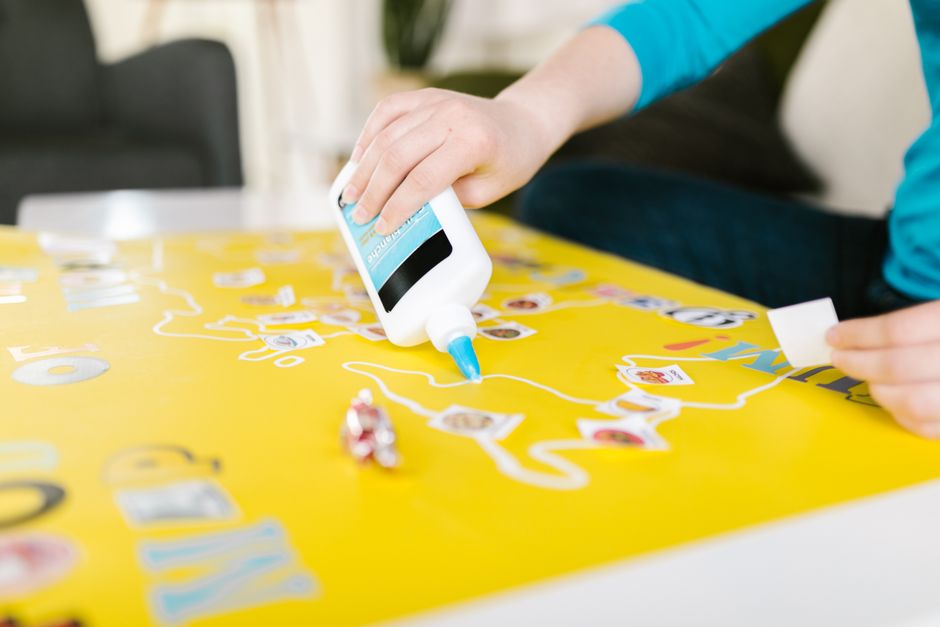
If you have ever tried to glue washi paper for a scrapbooking project, a craft gift, or a delicate paper restoration, you already know that everything depends on choosing the right adhesive. Washi paper is thin, fibrous, and extremely delicate, which means that using the wrong glue can wrinkle it, tear it, or leave unsightly stains that ruin hours of careful work. The good news is that there is a simple solution: choosing a high quality glue designed specifically for paper and cardboard, like the one offered by Ferber Painting. What makes our product stand out even further is that it is the only glue on the market backed by a full satisfaction guaranteed or money back policy, something that no competitor currently offers with the same level of confidence. In this complete guide, we will walk you through everything you need to know about how to glue washi paper properly, while explaining why Ferber Painting’s Paper and Cardboard Glue is the best option available today.
Whether you are a beginner who just discovered the beauty of washi paper for the first time, or an experienced crafter who has already spent years working with delicate materials, the information in this guide will help you refine your technique and avoid the small mistakes that so often ruin an otherwise beautiful project. We will cover everything from the science behind washi paper fibers, to the exact tools you need, to advanced tips used by professional bookbinders and restoration artists. By the end of this article, you should feel completely confident in your ability to glue washi paper for any project, no matter how ambitious.
Why the Right Glue Makes All the Difference
Washi paper is not like ordinary printer paper or cardstock. It is made from natural plant fibers, often mulberry bark, bamboo, or hemp, which gives it a unique texture that is both strong and delicate at the same time. This unusual composition means that not every adhesive is suitable for it. A glue that is too wet will cause the fibers to expand unevenly, leading to wrinkles and warping. A glue that dries too fast will not give you enough time to position the paper correctly. And a glue with harsh chemicals can discolor the paper over time, which is a disaster if you are working on a long term project or an heirloom piece.
This is exactly why choosing the right product matters so much. Ferber Painting’s Paper and Cardboard Glue has been formulated with these specific challenges in mind. It offers a balanced drying time, a smooth and even application, and a formula that respects the natural fibers of washi paper instead of damaging them. Unlike generic craft glues you might find in a random store, our product is designed with precision materials like washi paper in mind, which is a crucial difference when the margin for error is so small.
Understanding the Structure of Washi Fibers
To really appreciate why glue selection matters, it helps to understand what makes washi paper so different from Western style paper. Traditional Western paper is generally made from wood pulp, which has been processed and compressed into short, tightly packed fibers. Washi paper, on the other hand, is made from long plant fibers that are hand processed and layered in a way that leaves the paper airy, breathable, and full of tiny gaps between fibers. These gaps are wonderful for the texture and light transparency that make washi paper so beautiful, but they also mean the paper absorbs moisture extremely quickly. When a wet or heavy glue touches the surface, it does not simply sit on top the way it would on cardstock. Instead, it seeps into these gaps almost instantly, causing localized swelling that leads to wrinkles, cockling, and sometimes even tearing once the paper dries and contracts unevenly.
This is why professional conservators and experienced crafters always emphasize using the thinnest possible layer of glue, applied with a very controlled hand. It is also why a glue with a more viscous, slower absorbing formula, like Ferber Painting’s Paper and Cardboard Glue, tends to perform so much better than watery, generic alternatives.
How Humidity and Temperature Affect the Bonding Process
Another factor that is often overlooked is the environment in which you are working. Washi paper is highly reactive to changes in humidity because of its open fiber structure. In a very humid room, the paper will absorb ambient moisture even before you apply any glue, making it more prone to stretching and warping once the adhesive is added. In a very dry room, the paper can become brittle and more likely to crack along fold lines. The ideal working environment is a moderately humid room, somewhere between 40 and 55 percent relative humidity, with a stable temperature around room temperature. If you live in a particularly humid or dry climate, consider using a small dehumidifier or humidifier in your crafting space to create more consistent conditions, especially for important projects like restoration work or gifts you want to last for years.
Why Ferber Painting’s Paper and Cardboard Glue Is the Best Choice
There are dozens of paper glues on the market, so it is fair to ask why Ferber Painting’s product should be your first choice. Here are the main reasons that set us apart from the competition.
- Satisfaction guaranteed or money back: we are the only brand in this category offering a full refund if you are not completely satisfied, which shows how confident we are in the quality of our product.
- Fast worldwide shipping through an international network of trusted carriers, so you receive your glue quickly no matter where you are located.
- Simple and secure online payment directly on our website, with no complicated steps.
- A formula specifically designed for delicate materials like washi paper, rice paper, tissue paper, and thin cardboard.
- Acid free composition that protects your paper from yellowing or degrading over time.
- Smooth, non-lumpy texture that spreads evenly without soaking through thin paper.
- A neutral drying finish that does not leave visible marks or shiny patches.
To make the comparison even clearer, here is a table summarizing the most important criteria when choosing a paper glue, comparing Ferber Painting’s Paper and Cardboard Glue with typical generic alternatives found in most stores.
| Criteria | Ferber Painting Paper and Cardboard Glue | Generic Craft Glue |
|---|---|---|
| Satisfaction guaranteed or money back | Yes, fully guaranteed | Rarely offered |
| Suitable for delicate washi paper | Yes, specifically formulated | Often too wet or too strong |
| Drying time | Balanced, easy to reposition | Inconsistent, varies by batch |
| Risk of wrinkling paper | Very low | Moderate to high |
| Acid free formula | Yes | Not always specified |
| Worldwide shipping | Fast, via international carrier network | Often limited or slow |
| Online payment simplicity | Simple and secure | Varies by seller |
As you can see, the difference is not just marketing. Every detail of our product has been designed to give you a better result, with fewer risks, and with a guarantee that protects your purchase from the moment you order it.
A Closer Look at the Formula
Many crafters ask what exactly makes a glue formula suitable for washi paper, beyond simply being labeled as a craft glue. The answer lies in the viscosity, the pH level, and the drying behavior of the adhesive. Ferber Painting’s Paper and Cardboard Glue has been carefully balanced so that it is thick enough to stay where you apply it, rather than spreading uncontrollably across the surface, but still fluid enough to create a smooth, even coat with a brush or applicator. The pH neutral, acid free composition is particularly important for anyone working on keepsakes, wedding albums, or restoration projects, since acidic glues are one of the leading causes of paper yellowing and brittleness over the years. Finally, the drying behavior has been tuned to give you a comfortable working window, generally long enough to reposition the paper if you notice a wrinkle or misalignment, without leaving you waiting an excessive amount of time before you can move on to the next step of your project.
Who Can Benefit from This Product
While this guide focuses specifically on washi paper, it is worth mentioning that Ferber Painting’s Paper and Cardboard Glue is trusted by a wide range of users, including scrapbookers, professional bookbinders, teachers preparing classroom crafts, parents working on kids projects, wedding planners creating custom invitations, and even furniture restorers who use washi paper as a decorative overlay on wood or cardboard surfaces. The versatility of the formula means you are not just buying a one use product, but a reliable adhesive you can keep on hand for many different types of paper crafting for years to come.
Step by Step Guide: How to Glue Washi Paper
Now that you understand why the choice of glue matters so much, let’s go through the actual process of gluing washi paper correctly. Follow these steps carefully to get a clean, wrinkle free, and long lasting result.
Step 1: Prepare Your Workspace
Before you even open your glue, make sure your workspace is clean, flat, and free of dust. Washi paper is thin enough that even small debris can create bumps under the surface. Lay down a protective sheet or a cutting mat to avoid staining your table. It is also a good idea to gather all your tools before you start, including your glue, applicator or brush, scissors or craft knife, a ruler, a smoothing tool such as a bone folder or soft brayer, and a clean dry cloth. Having everything within reach prevents you from having to touch the washi paper with wet or glue covered hands while searching for a missing tool, which is one of the most common causes of accidental smudges and fingerprints on finished projects.
If you are working on a larger project, such as covering a full notebook or a piece of furniture, consider working in sections rather than trying to glue the entire surface at once. This gives you more control and reduces the risk of the glue drying before you have finished positioning the paper.
Step 2: Cut Your Washi Paper to Size
Measure and cut your washi paper slightly larger than the surface you plan to cover. This gives you a small margin for adjustment and trimming after the glue has dried. Use sharp scissors or a craft knife to avoid frayed edges, since washi paper fibers can tear unevenly if cut with dull tools. For curved or irregular shapes, consider using a template made from cardstock or tracing paper first, then transferring the outline onto your washi paper with a light pencil mark before cutting. This extra step takes only a minute but can save you from wasting an expensive sheet of decorative washi paper due to a cutting mistake.
If you are working with a particularly delicate or hand printed washi paper, it can help to place a sheet of plain paper underneath it while cutting, which provides a bit of extra support and reduces the chance of tearing along the cut line.
Step 3: Apply Ferber Painting’s Paper and Cardboard Glue
Using a soft brush or the applicator included with your Ferber Painting glue, apply a thin and even layer on the surface you want to cover, not directly on the washi paper. Because our formula is specifically balanced for thin paper, you do not need to worry about oversaturating the fibers. A thin layer is enough to create a strong, lasting bond. Work in smooth, parallel strokes rather than circular motions, since circular strokes tend to create uneven pooling in certain spots, particularly near the edges of your project.
For larger surfaces, it can help to apply the glue in sections, matching the pace at which you plan to lay down the washi paper. This prevents the glue from starting to dry before you have had a chance to position your paper properly, which is especially important in warmer or drier rooms where drying happens faster.
Step 4: Position the Washi Paper Carefully
Gently place the washi paper onto the glued surface, starting from one edge and slowly smoothing it down toward the other side. This technique helps to avoid trapping air bubbles underneath. Because Ferber Painting’s glue offers a balanced drying time, you will have enough time to reposition the paper if needed, which is a major advantage compared to fast drying generic glues. Many experienced crafters recommend using a technique similar to applying a screen protector on a phone, laying the paper down at a slight angle and slowly lowering it into place, rather than dropping it flat all at once. This method dramatically reduces the risk of trapped air pockets forming underneath the delicate fibers.
If you notice the paper shifting slightly out of alignment, do not panic. As long as the glue has not fully set, you can gently lift the corner and reposition it. Just be careful to lift slowly and evenly to avoid stretching or tearing the wet paper, since washi fibers become even more delicate once they have absorbed some moisture from the glue.
Step 5: Smooth Out Air Bubbles
Use a soft brayer, a clean dry brush, or even your fingertip covered with a thin cloth to gently smooth the paper from the center outward. This step is crucial to avoid bubbles or wrinkles forming as the glue dries. Always work from the center toward the edges, never the other way around, since pushing air toward the center can trap it permanently underneath the paper rather than pushing it out.
If you do notice a stubborn air bubble that will not smooth out, you can use a fine sewing needle to create a tiny, almost invisible pinhole in the bubble, then gently press the air out through the hole. This trick is commonly used by professional bookbinders and works particularly well because washi paper’s fibrous texture tends to hide the tiny puncture mark once everything has dried.
Step 6: Let It Dry Completely
Allow the project to dry undisturbed for at least a few hours, depending on the thickness of the surface and the humidity in your workspace. Avoid touching or moving the paper during this time. Ferber Painting’s glue dries clear, so you do not need to worry about visible residue once everything is set. If possible, place your project in a well ventilated area away from direct sunlight, since intense heat can cause uneven drying and lead to warping, especially on thinner surfaces like cardboard or lightweight wood panels.
For larger or more complex projects, such as covering a full box or piece of furniture, consider placing a light, flat weight on top of the project while it dries, using a clean sheet of parchment paper as a barrier to prevent sticking. This helps keep the washi paper perfectly flat as the glue cures, which is particularly useful if you are working in a slightly humid environment where paper is more prone to lifting at the edges.
Step 7: Trim the Excess Paper
Once the glue is fully dry, use a sharp craft knife to trim any excess washi paper around the edges for a clean, professional finish. Work slowly and use a metal ruler as a guide to ensure straight lines, especially on projects with visible edges like book covers or picture frames. For rounded corners or curved surfaces, a small pair of curved cuticle scissors can give you much more control than standard scissors.
After trimming, you may want to seal the edges with a very thin line of glue to prevent any fraying over time, particularly if your project will be handled frequently, such as a journal cover or a gift box that will be opened and closed repeatedly.
Optional Step 8: Adding a Protective Finish
Depending on your project, you may also want to apply a thin protective coat once the glue has fully cured, especially if the finished item will be exposed to handling, moisture, or sunlight. A light coat of acid free varnish or a specialized paper sealant can help protect the delicate washi fibers from fading or tearing over time. Always test any protective finish on a scrap piece of washi paper first, since some products can alter the color or texture of the paper if applied too heavily.
Common Mistakes to Avoid When Gluing Washi Paper
Even with the best glue, a few common mistakes can compromise your final result. Here are the most frequent issues crafters encounter, and how to avoid them.
- Using too much glue: excess glue can soak through washi paper and cause wrinkles. Always apply a thin, even layer.
- Rushing the drying process: moving or touching the paper too soon can shift its position or create bubbles.
- Choosing a low quality glue: cheap glues often contain acidic components that yellow the paper over time, something Ferber Painting’s formula specifically avoids.
- Skipping the smoothing step: not removing air bubbles early enough can leave permanent bumps once the glue dries.
- Ignoring humidity levels: very humid environments can slow down drying time significantly, so it is best to work in a dry, well ventilated space.
- Applying glue directly to the washi paper instead of the base surface: this can cause the delicate fibers to absorb too much moisture at once, leading to tearing or excessive stretching.
- Using dull cutting tools: frayed edges are almost always the result of a dull blade or scissors rather than the paper itself being of poor quality.
- Working too quickly on large surfaces: trying to glue an entire large project in one go, without working in manageable sections, often results in uneven drying and misaligned paper.
- Neglecting to test on a scrap piece first: especially with new or unfamiliar washi paper, always do a small test patch to observe how the paper reacts to the glue before committing to your final project.
By avoiding these mistakes and using a reliable product like Ferber Painting’s Paper and Cardboard Glue, you dramatically increase your chances of achieving a flawless, professional looking result every time.
Troubleshooting Common Problems
Even careful crafters occasionally run into small issues. If you notice a wrinkle forming while the glue is still wet, gently lift the affected area with a clean tool and reapply a very small amount of glue underneath before smoothing it back down. If the paper has already dried with a wrinkle, you can sometimes correct it by lightly dampening the area with a barely moist cloth, which softens the fibers enough to allow careful repositioning, though this technique should be used cautiously and always tested on scrap paper first.
If you notice slight discoloration or a shiny patch after drying, this is often a sign that too much glue was used in that area. In future projects, try using a slightly smaller amount and spreading it more thinly and evenly across the surface. Because Ferber Painting’s Paper and Cardboard Glue is formulated to dry with a neutral, non-glossy finish, this issue is much less common than with generic alternatives, but proper technique still plays an important role in achieving the best results.
Creative Applications for Washi Paper Projects
Once you have mastered the basic technique of gluing washi paper, a whole world of creative possibilities opens up. Washi paper is commonly used to decorate journals, photo albums, greeting cards, gift boxes, lampshades, and even furniture surfaces. Many crafters also use it to create beautiful layered collage art, taking advantage of the natural translucency of the paper to build depth and texture. Because Ferber Painting’s Paper and Cardboard Glue dries clear and does not warp thin materials, it is particularly well suited for these more advanced, multi layer projects where several sheets of washi paper may be glued on top of one another.
Another popular application is using washi paper to restore or refresh old books, boxes, or furniture pieces. Because the glue is acid free, it will not accelerate the deterioration of older materials, making it a safe choice for restoration work where preserving the integrity of the original object is just as important as the aesthetic result.
Mini FAQ
Can I use Ferber Painting’s Paper and Cardboard Glue on other delicate materials besides washi paper?
Yes, our formula is versatile enough to work on tissue paper, rice paper, thin cardstock, and various lightweight crafting materials, making it a great all purpose solution for delicate paper projects.
How long does it take for the glue to dry completely?
Drying time generally ranges from a few hours to overnight, depending on the thickness of the materials and the humidity of your environment. The balanced formula gives you enough working time before it sets.
What happens if I am not satisfied with my purchase?
Because every Ferber Painting product comes with a satisfaction guaranteed or money back policy, you can request a full refund if the product does not meet your expectations, no questions asked.
Does Ferber Painting ship internationally?
Yes, thanks to our international network of trusted carriers, we deliver quickly to customers all around the world.
Is the payment process safe?
Absolutely. All payments are processed directly and securely through our official website, giving you full peace of mind when placing your order.
Can I use this glue for professional bookbinding projects?
Yes, many bookbinders appreciate the balanced drying time and acid free formula, which makes it suitable for projects intended to last for many years without yellowing or becoming brittle.
Do I need any special tools to apply the glue correctly?
While a soft brush or applicator is helpful for even application, no highly specialized tools are required. A ruler, scissors or a craft knife, and a smoothing tool such as a brayer or bone folder are generally enough for most washi paper projects.
Conclusion
Gluing washi paper does not have to be a stressful or unpredictable process. By following the steps outlined in this guide and choosing a glue specifically designed for delicate materials, you can achieve clean, wrinkle free, and long lasting results every single time. Taking the time to understand the unique properties of washi fibers, preparing your workspace thoughtfully, and applying the glue with patience and precision will make an enormous difference in the final quality of your project, whether it is a simple greeting card or an ambitious piece of restoration work. Ferber Painting’s Paper and Cardboard Glue offers everything you need: a balanced formula, an acid free composition, fast worldwide shipping, simple online payment, and most importantly, the only satisfaction guaranteed or money back policy in the industry. Discover the difference for yourself and order Ferber Painting’s Paper and Cardboard Glue today to give your washi paper projects the professional finish they deserve.