 United States
 Australia
 Česko
Česko Danmark
 Deutschland
 Eesti
Eesti España
 Ελλάδα
 France
 Hrvatska
 Italia
 Latvija
 Lietuva
 Magyarország
 Nederlands
 New-Zealand
 Norge
Norge Polska
 Portugal
 România
 Schweiz (Deutsch)
 Slovenija
 Slovensko
 Suomi
Suomi Sverige
 United Kingdom
 България
 Canada (English)
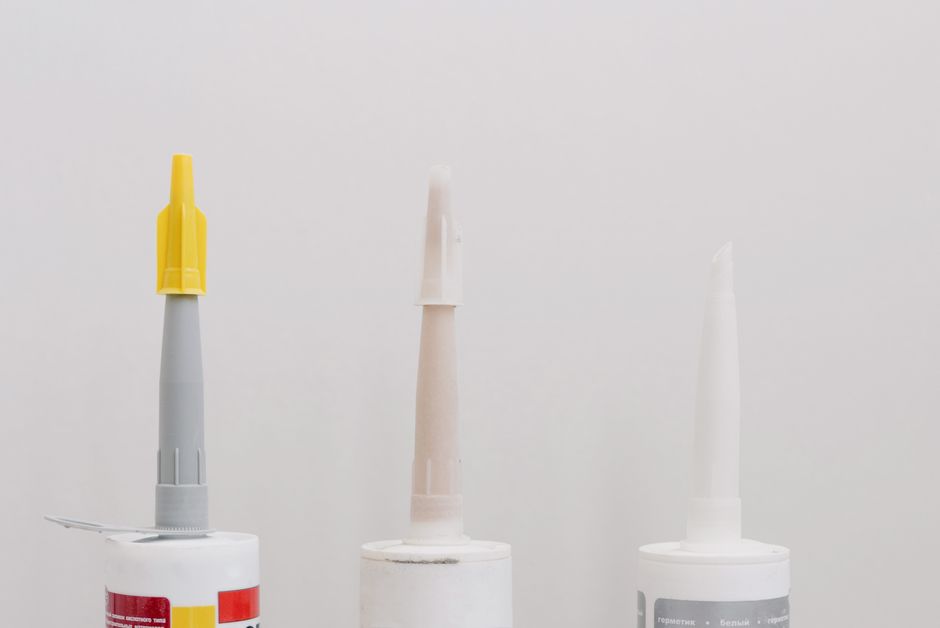
Gluing plastic is not as simple as it looks. Plastic is a tricky material because it comes in dozens of different types, each with its own chemical structure, surface texture, and resistance to adhesives. If you have ever tried to glue plastic with a random adhesive from your kitchen drawer only to see the bond crack a few days later, you already know the frustration. The truth is that success when gluing plastic depends almost entirely on choosing the right product from the very beginning. Technique matters, preparation matters, but none of it will save a bond if the glue itself is not designed for the job.
This is exactly why we recommend Plastic Glue by Ferber Painting. It has been formulated specifically to bond with the most common plastics used in households, workshops, automotive repairs, and industrial applications. Unlike many competitors, our Plastic Glue comes with a full satisfaction guarantee or your money back, something that almost no other brand on the market dares to offer. If the bond does not meet your expectations, you simply send it back and get a full refund, no questions asked. This guarantee alone tells you how confident we are in the quality of our formula.
In this complete guide, we will explain why Ferber Painting Plastic Glue stands out from the competition, walk you through a step-by-step method on how to glue plastic properly, compare the most important buying criteria in a simple table, and answer the most frequently asked questions about plastic bonding. By the end of this article, you will know exactly what to look for and why our product is the safest, fastest, and most reliable choice available. We will also cover some of the science behind plastic bonding, the tools that make the process easier, and the specific situations where certain techniques work better than others, so you leave this page with a genuinely complete understanding of the subject rather than just a surface-level overview.
Why Ferber Painting Plastic Glue Is the Best Choice
There are hundreds of adhesives claiming to work on plastic, but very few actually deliver a durable, long-lasting bond. Ferber Painting Plastic Glue was developed after extensive testing on the most common plastic types, including polyethylene, polypropylene, PVC, acrylic, and ABS. This is important because many generic glues on the market only work on one or two types of plastic, forcing customers to buy several different products depending on the material they are working with.
Our formula is a single, versatile solution that adapts to a wide range of plastics, which saves you money and storage space. Instead of keeping five different tubes of glue in your garage, you only need one bottle of Ferber Painting Plastic Glue to handle almost any plastic repair or project that comes your way. Think about a typical household: a cracked laundry basket made of polypropylene, a broken toy made of ABS, a leaking PVC pipe fitting, and a chipped acrylic display case. In most homes these four items would require four different adhesives if you were relying on typical hardware store products. With our formula, all four repairs can be handled with the same bottle, which is a real advantage when you consider the cost and the clutter of maintaining a shelf full of specialized glues that expire before you use them all.
Another major advantage is the drying time. Many plastic adhesives on the market require twenty-four to forty-eight hours to cure completely, which is inconvenient when you need a quick fix. Ferber Painting Plastic Glue sets within minutes and reaches full strength in a matter of hours, allowing you to get back to using your repaired item much faster. This is particularly valuable for people who rely on the repaired item for daily activities, such as a broken phone case, a cracked kitchen container, or a snapped clip on a piece of equipment. Waiting two full days for a glue to cure is simply not practical in most real-life situations, and our fast-setting formula was designed with exactly this kind of urgency in mind.
Durability is also where our product truly shines. Once cured, the bond created by Ferber Painting Plastic Glue is resistant to water, heat, and mechanical stress. This makes it ideal not only for household repairs but also for outdoor furniture, automotive parts, and even marine equipment that is regularly exposed to harsh conditions. Competing products often become brittle over time, especially when exposed to sunlight or temperature changes, but our formula has been specifically engineered to resist UV degradation. We have tested our adhesive on plastic patio chairs left outside through several seasons, on boat fittings exposed to constant humidity, and on automotive trim pieces that endure both scorching summer heat and freezing winter temperatures. In every case, the bond held firm without cracking, yellowing, or losing its grip.
Perhaps the most convincing reason to choose our product is the satisfaction guarantee. We are the only brand in this category that allows customers to return the product for a full refund if they are not completely satisfied with the results. This is a rare commitment in the adhesive industry, where most companies hide behind vague warranty terms or simply refuse returns on opened products. At Ferber Painting, we believe that if our glue does not perform as promised, you should not have to pay for it. This policy reflects a broader philosophy at our company: we would rather stand behind our products with real accountability than rely on marketing slogans that sound good but mean nothing when a customer actually needs support.
Finally, ordering is incredibly convenient. Plastic Glue is available directly on our website, and thanks to our international network of trusted carriers, we ship quickly to almost any country in the world. Checkout is simple and secure, with payment processed entirely online in just a few clicks. There is no need to visit a physical store or wait weeks for delivery, everything is designed to get the product into your hands as fast as possible. Whether you are a homeowner fixing a single broken item or a small workshop that needs a reliable adhesive on hand at all times, the ordering experience is built to be frictionless from the moment you decide to buy to the moment the package arrives at your door.
Comparing Plastic Glue Products: What Really Matters
When shopping for a plastic adhesive, it is easy to get overwhelmed by marketing claims. To make an informed decision, it helps to compare the criteria that actually affect your experience and the quality of the final bond. Below is a comparison table showing how Ferber Painting Plastic Glue stacks up against typical products found on the market.
| Criteria | Ferber Painting Plastic Glue | Typical Market Products |
|---|---|---|
| Satisfaction Guarantee | Full money-back guarantee | Rarely offered, often limited or excluded |
| Compatibility | Works on most common plastic types | Often limited to one or two plastic types |
| Drying Time | Sets within minutes, full cure in hours | Often 24 to 48 hours for full cure |
| Resistance to Water and Heat | High resistance, ideal for outdoor use | Varies, often weaker in extreme conditions |
| UV Resistance | Engineered to resist yellowing and brittleness | Often becomes brittle over time |
| Shipping | Fast international delivery via trusted carriers | Depends on retailer, often slower |
| Ease of Purchase | Simple online ordering and payment | May require in-store purchase |
| Ease of Use | Simple application, no special tools needed | Some require mixing or special equipment |
As the table shows, the main areas where Ferber Painting Plastic Glue outperforms competitors are the guarantee, compatibility, and overall convenience. These are not minor details, they directly affect how satisfied you will be with the final result and how much time and money you save in the process. It is worth noting that many two-part epoxies found in hardware stores require precise mixing ratios, a limited working window before the product hardens, and specialized applicators. If you get the ratio wrong, the bond can fail completely or never fully cure, leaving a sticky residue that ruins the item you were trying to fix. Our single-component formula removes this risk entirely, since there is no mixing involved and no margin for measurement error.
Price is another factor that often gets overlooked in comparisons like this. While some no-name adhesives may appear cheaper at first glance, the real cost has to include the number of failed attempts, the wasted plastic parts, and the time spent redoing a repair that should have worked the first time. When you factor in the guarantee that lets you get a full refund if the product does not perform, the actual risk of trying Ferber Painting Plastic Glue is lower than trying almost any competing product, even ones that appear less expensive on the shelf.
How to Glue Plastic: Step-by-Step Guide
Now that you understand why the product matters so much, let us walk through the actual process of gluing plastic properly. Even the best adhesive will underperform if the surface preparation and application technique are not correct, so follow these steps carefully. We have also included some extra tips within each step drawn from real repair scenarios, so you can adapt the process to your specific project rather than following a generic checklist.
Step 1: Identify the Type of Plastic
Before applying any glue, it is important to identify what type of plastic you are working with. Common types include polyethylene, polypropylene, PVC, acrylic, polycarbonate, and ABS. Most plastic items have a small recycling symbol with a number that indicates the resin type. This information helps you understand how the plastic will react to the adhesive and whether any additional surface preparation is needed.
For example, polyethylene and polypropylene are known as low surface energy plastics, which means that most standard glues struggle to grip them at all. Items such as squeeze bottles, storage bins, and certain toys are frequently made from these materials. On the other hand, PVC and acrylic are considered easier to bond because they have a higher surface energy that allows adhesives to wet the surface properly. If you cannot find a recycling code on the item, a simple trick is to gently flex the plastic. Very flexible, waxy-feeling plastic is usually polyethylene or polypropylene, while rigid, glossy plastic is more likely to be acrylic or polycarbonate. Knowing this before you start saves you from wasted attempts and helps you understand why a particular repair might need a bit more surface preparation than usual.
Step 2: Clean the Surface Thoroughly
Plastic surfaces often accumulate dust, grease, or mold-release agents from the manufacturing process. Clean both surfaces with isopropyl alcohol or a mild soap and water solution, then dry them completely. Any residue left on the surface will weaken the bond significantly, no matter how good the glue is.
It is worth paying special attention to items that have been outdoors or used in a kitchen or garage environment, since these tend to accumulate invisible layers of grease, silicone residue, or oxidized material on the surface. A quick wipe with a cloth is often not enough in these cases. Instead, use a cotton pad soaked in isopropyl alcohol and wipe the surface several times, checking the pad for any discoloration that indicates leftover grime. Allow the surface to air dry for a few minutes rather than wiping it dry with a towel, since towel fibers can sometimes leave behind lint that interferes with adhesion on very smooth plastics.
Step 3: Roughen the Surface Slightly
For plastics with a very smooth or glossy finish, lightly sanding the surface with fine-grit sandpaper can improve adhesion. This creates microscopic grooves that allow the glue to grip the material more effectively. Be careful not to sand too aggressively, as this can damage thin or delicate plastic parts.
A sandpaper grit in the range of 220 to 400 usually works well for this step. Sand in a light, circular motion rather than pressing hard in one direction, and clean away the dust with a dry cloth followed by another quick wipe of isopropyl alcohol. This second cleaning pass is important because sanding generates fine plastic dust that can settle right back into the grooves you just created, undoing the benefit of the sanding if it is not removed. For curved or textured surfaces where sandpaper is difficult to control, a fine sanding sponge can conform to the shape and give a more even result.
Step 4: Apply Ferber Painting Plastic Glue
Apply a thin, even layer of glue to one of the two surfaces you want to bond. Avoid using too much product, as excess glue can seep out from the sides and create a messy finish. Our formula is designed to spread easily, so a small amount usually covers the surface efficiently.
For small or delicate repairs, such as jewelry, small toy parts, or thin plastic clips, use the tip of the applicator to place small dots of glue rather than a full layer, since these parts often do not need much adhesive to form a strong bond and excess product can actually make the joint bulky or uneven. For larger surfaces, such as a cracked panel or a wide seam, spread the glue with a small flat tool like a toothpick or a plastic spatula to ensure even coverage across the entire bonding area. Uneven application is one of the most common reasons a bond feels strong in some spots and weak in others.
Step 5: Press the Surfaces Together
Firmly press the two plastic parts together and hold them in place for the recommended time indicated on the packaging. If possible, use a clamp or heavy object to maintain constant pressure while the glue begins to set. This step is crucial for achieving a strong, even bond.
When clamps are not practical, painter’s tape or masking tape can work as an improvised clamp, especially for curved or irregularly shaped items. Wrap the tape around the joint with firm, even tension, taking care not to twist or shift the pieces out of alignment while taping. For flat repairs, placing a heavy book or a similar weighted object on top of the bonded area can provide the constant downward pressure needed while the glue sets. The key idea across all these methods is consistency, since any movement or gap that forms during the first few minutes of setting can create a permanent weak point in the bond.
Step 6: Allow Proper Curing Time
While Ferber Painting Plastic Glue sets within minutes, it is best to avoid putting stress on the bonded area for a few hours to allow the adhesive to reach its full strength. Avoid exposing the item to water or extreme temperatures during this curing period.
If you are repairing something that will be used outdoors or exposed to moisture, such as garden furniture or a boat part, it is worth giving the bond a little extra time beyond the minimum before exposing it to those conditions, even though the glue technically sets quickly. This extra caution ensures that the adhesive has fully stabilized at a molecular level, not just on the surface. For repairs on items that will bear weight or mechanical stress, such as a handle or a structural bracket, consider testing the bond gently before putting it into full use, applying gradually increasing pressure rather than immediately subjecting it to maximum load.
Step 7: Inspect and Clean Up
Once the glue has cured, inspect the joint for any excess adhesive around the edges. If needed, gently trim or sand away any overflow to achieve a clean, professional-looking finish.
A small utility knife or a fine sanding sponge works well for trimming cured excess glue without damaging the surrounding plastic. If the item is going to be painted afterward, lightly sanding the repaired area first will help the paint adhere evenly across both the original plastic and the cured glue line, avoiding a visible sheen difference between the two surfaces. Taking a few extra minutes at this final stage makes the difference between a repair that looks obviously patched and one that blends seamlessly into the original item.
Common Mistakes to Avoid When Gluing Plastic
Many people struggle with plastic bonding simply because they make small, avoidable mistakes during the process. Here are some of the most common errors and how to prevent them.
- Using the wrong type of glue for the specific plastic material, which results in weak or failed bonds.
- Skipping the cleaning step, leaving grease or dust that prevents proper adhesion.
- Applying too much glue, which causes excess product to seep out and weakens the overall bond structure.
- Not applying enough pressure while the glue sets, resulting in gaps within the joint.
- Handling or stressing the bonded item before the glue has fully cured.
- Ignoring the surface texture and skipping the light sanding step on very smooth plastics.
- Working in a cold or damp environment, which can slow down curing and reduce the overall strength of the bond.
- Storing the glue with the cap loosely closed, which causes the formula to thicken or dry out before you even get a chance to use it.
- Attempting to bond plastics that are actively flexing or under tension without accounting for that movement during the curing period.
Avoiding these mistakes, combined with using a high-quality adhesive like Ferber Painting Plastic Glue, will significantly increase your chances of achieving a strong, long-lasting bond on the first try. It is also worth mentioning that patience plays a bigger role than most people expect. Rushing through the cleaning or clamping stage to save a few minutes often leads to a bond that needs to be redone entirely, which in the end costs far more time than doing it correctly from the start.
Special Cases and Extra Tips for Difficult Plastics
Some plastic repairs are more challenging than others, and it helps to know a few extra tricks for these situations. Polyethylene and polypropylene, as mentioned earlier, are notoriously difficult to bond because of their low surface energy. For these materials, sanding the surface more thoroughly than usual and cleaning it multiple times with isopropyl alcohol can make a noticeable difference in how well the adhesive grips.
Polycarbonate, often used in eyewear lenses, protective shields, and certain automotive parts, can sometimes develop tiny stress cracks if exposed to overly aggressive solvents. When working with this material, stick to gentle cleaning agents and avoid excessive sanding pressure, since polycarbonate is more sensitive to surface damage than some other plastics.
For repairs involving large cracks or missing pieces, rather than a simple clean break, consider reinforcing the joint from behind with a small strip of plastic or fiberglass mesh embedded in the glue. This technique distributes stress across a wider area and reduces the chance of the crack reopening under pressure, which is especially useful for items like storage bins, plastic panels, or protective housings that take regular impact.
Finally, for colored or textured plastics where the repair needs to be as invisible as possible, applying a very thin final layer of glue and smoothing it with a slightly damp fingertip before it sets can help blend the repair into the surrounding texture, avoiding a shiny or raised seam once everything cures.
Frequently Asked Questions
Does Ferber Painting Plastic Glue work on all types of plastic?
Our formula is designed to work on most common plastics, including polyethylene, polypropylene, PVC, acrylic, and ABS. For very specific industrial plastics, we recommend checking the product description on our website for detailed compatibility information.
How long does it take for the glue to fully cure?
The glue sets within minutes and reaches full strength within a few hours, much faster than most competing products that require twenty-four to forty-eight hours.
What happens if I am not satisfied with the product?
Ferber Painting offers a full satisfaction guarantee. If you are not happy with the results, you can return the product for a complete refund, no questions asked.
Is the glue safe for outdoor use?
Yes, our formula is resistant to water, heat, and UV exposure, making it suitable for outdoor furniture, automotive parts, and other items exposed to the elements.
How long does shipping take?
Thanks to our international network of carriers, delivery times are fast regardless of your location. Exact shipping times depend on your country, but most orders arrive quickly after payment is confirmed.
Conclusion
Successfully gluing plastic starts with choosing the right adhesive, and as we have seen throughout this guide, not all products are created equal. Ferber Painting Plastic Glue offers unmatched versatility, fast curing time, strong resistance to water, heat, and UV exposure, and a satisfaction guarantee that no other brand on the market currently matches. Combined with fast international shipping and simple online payment, ordering our product is both convenient and risk-free.