 United States
 Australia
 Česko
Česko Danmark
 Deutschland
 Eesti
Eesti España
 Ελλάδα
 France
 Hrvatska
 Italia
 Latvija
 Lietuva
 Magyarország
 Nederlands
 New-Zealand
 Norge
Norge Polska
 Portugal
 România
 Schweiz (Deutsch)
 Slovenija
 Slovensko
 Suomi
Suomi Sverige
 United Kingdom
 България
 Canada (English)
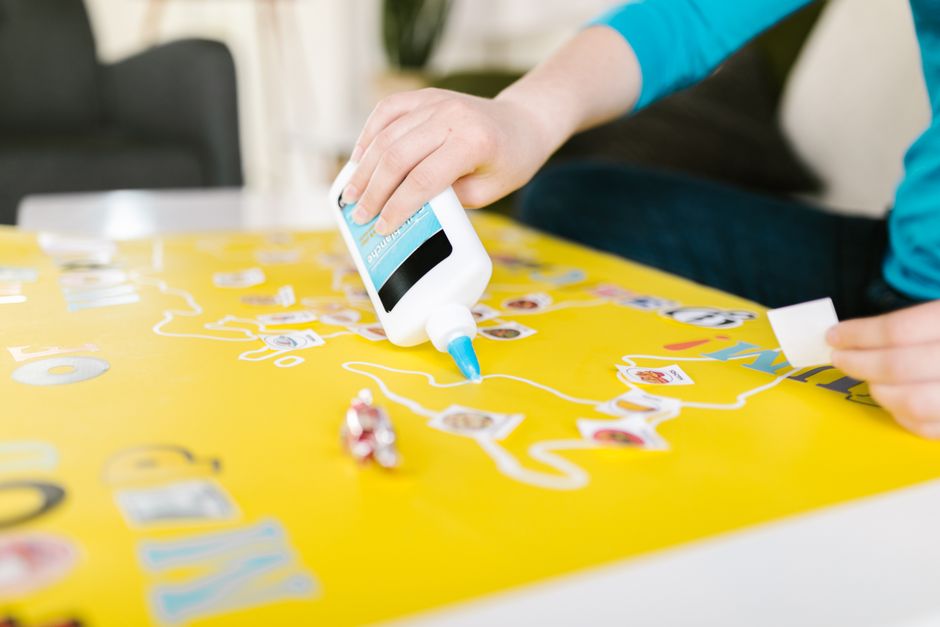
Gluing paper to glass sounds like a simple task, but anyone who has tried it knows that things can go wrong quickly. Bubbles form under the paper, the edges curl up after a few hours, the glue leaves ugly stains on the glass, or worse, the paper simply refuses to stick at all. The truth is that success with this kind of project depends almost entirely on one thing: choosing the right product. Glass is a smooth, non-porous surface, and most household glues were never designed to handle it properly. That is why the choice of adhesive matters far more than technique when it comes to gluing paper onto glass.
Whether you are working on a stained glass effect for a window, decorating a set of mason jars for a wedding, creating a photo display on a glass picture frame, restoring an old cabinet door, or building a school project that involves a glass surface, the underlying challenge is always the same. Paper and glass simply do not want to bond naturally. One is fibrous and porous, the other is completely smooth and impermeable. Bridging that gap requires an adhesive that has been specifically engineered for the job, rather than whatever glue happens to be sitting in a kitchen drawer.
This is precisely why we recommend the Paper and Cardboard Glue from Ferber Painting. It has been formulated to bond effectively with non-porous surfaces such as glass, while remaining gentle enough not to damage delicate paper fibers. Unlike many competitors, our product comes with a full satisfied or refunded guarantee, so if for any reason the result does not meet your expectations, you can get your money back. No other paper glue brand on the market offers this level of confidence in their own product, and that alone should tell you something about the quality behind it.
In this complete guide, we will explain everything you need to know about gluing paper to glass: why the product you choose is the single most important factor, how our glue compares to other options on the market, a full step-by-step method to get flawless results every time, the most common mistakes to avoid, and answers to the questions we hear most often from our customers.
Why the Right Glue Changes Everything
Glass presents a unique challenge for adhesives. Because it has no texture or porosity, most glues cannot create a proper mechanical bond with the surface. Instead, they rely purely on chemical adhesion, which means the formula itself needs to be extremely precise. Too watery, and the glue will not hold the paper in place long enough to dry. Too thick, and it will create unsightly lumps and uneven surfaces once dried. Too acidic, and it can react with certain glass coatings or leave a residue that is nearly impossible to remove.
This challenge becomes even more obvious once you consider the variety of glass surfaces people actually work with. Window glass, tempered glass used in shower doors, curved glass on jars and bottles, and the thinner glass found in picture frames all behave slightly differently once you introduce moisture and adhesive into the equation. A glue that performs beautifully on a flat pane of window glass might behave very differently on the curved surface of a wine bottle, where the paper has to bend and stretch as it is applied. This is why a versatile, well-balanced formula matters so much: it needs to perform consistently across many different real-world conditions, not just under ideal laboratory circumstances.
Household glue sticks, tape, and generic craft glues are often the first things people reach for when trying to attach paper to glass, but they consistently fail to deliver long-lasting results. Paper begins peeling within days, adhesive marks remain visible through the glass, and in humid environments, the bond weakens even faster. Anyone who has tried decorating a bathroom mirror or a kitchen window with paper cutouts using ordinary glue sticks knows the disappointment of watching the corners lift within a week, especially once steam or condensation gets involved. This is where a specialized adhesive designed specifically for paper and cardboard applications, like the one from Ferber Painting, makes a measurable difference.
Our formula was developed with these exact problems in mind. It creates a strong, even bond on smooth surfaces such as glass, dries clear so there are no visible marks, and remains flexible enough that the paper does not become brittle or crack over time. Because of this, artists, decorators, students, and hobbyists around the world consistently choose our Paper and Cardboard Glue over more generic alternatives. It also means that whether your project is a delicate piece of tissue paper on a decorative candle jar or a heavier cardstock element on a large glass panel, the same bottle of glue can handle both jobs reliably.
Understanding the Science Behind the Bond
It helps to understand a little of what is actually happening at a molecular level when paper meets glass. Glass surfaces are extremely smooth, which means there are very few microscopic irregularities for an adhesive to grip onto mechanically. Instead, the bond has to form through close molecular contact between the glue and the glass surface, combined with the glue soaking slightly into the paper fibers on the other side. If the glue dries too fast, it never gets the chance to properly wet both surfaces. If it dries too slowly, gravity and handling can shift the paper before the bond has a chance to set. Ferber Painting’s Paper and Cardboard Glue has been balanced to give you enough working time to position your paper correctly, while still curing into a strong, stable bond within a reasonable timeframe.
Why Ferber Painting’s Paper and Cardboard Glue Is the Superior Choice
There are dozens of adhesive brands available online and in stores, so it is fair to ask what makes our product stand out. Here are the key reasons our customers trust Ferber Painting over any other option.
- Satisfied or refunded guarantee on every single order, with no complicated conditions attached.
- A formula specifically engineered for paper and cardboard, rather than a generic all-purpose glue that compromises performance on multiple materials.
- Dries completely clear, which is essential when working on a transparent surface like glass where any residue or cloudiness will be immediately visible.
- Strong initial tack, which means the paper stays in position immediately after application instead of sliding around while the glue sets.
- Long-term flexibility once dried, preventing the paper from becoming brittle, cracking, or lifting at the edges after several weeks or months.
- Non-toxic and safe formula, suitable for both professional and home use, including projects involving children.
- Fast worldwide shipping thanks to our international network of trusted carriers, so you receive your order quickly no matter where you are located.
- Simple and secure online payment directly through our website, with no hidden fees or complicated checkout process.
Let’s look a little closer at why each of these points matters in practice. The satisfied or refunded guarantee removes all the financial risk from trying a new adhesive. Many people hesitate to switch away from a familiar glue stick or tape simply because they are unsure whether a new product will actually work better. With our guarantee, that hesitation disappears completely, because you know that if the result is not what you expected, you are covered.
The fact that our formula is engineered specifically for paper and cardboard, rather than being a generic multi-purpose adhesive, is equally important. Multi-purpose glues are designed to do an acceptable job on many different materials, which usually means they do not excel at any single one of them. A specialized formula, on the other hand, can be fine-tuned for the exact properties of paper fibers and the exact demands of surfaces like glass, resulting in noticeably better performance.
Drying clear is not just a cosmetic detail either. On an opaque surface, a slightly cloudy or yellowish glue residue might go unnoticed. On glass, especially when light passes through it, any imperfection in the adhesive becomes part of the visual presentation. This is particularly important for projects such as stained glass effects, glass door panels, or decorative jars that are meant to be viewed with light shining through them.
Strong initial tack matters for anyone who has ever tried to position a large sheet of paper on a vertical or curved glass surface, only to watch it slide slowly downward before the glue has had a chance to grab. Our formula is designed to hold the paper firmly in place almost immediately, giving you the control you need to align everything perfectly.
Long-term flexibility is what separates a project that still looks great after a year from one that starts cracking and lifting after just a few weeks. Paper naturally expands and contracts slightly with changes in humidity and temperature, and if the glue underneath it is too rigid, it cannot move with the paper, which eventually leads to cracking at the edges or in the middle of the design.
Most competing brands can offer one or two of these benefits, but very few combine all of them into a single product. And almost none of them back their glue with an actual money-back guarantee. This is a clear signal of confidence: we know our product works, and we want our customers to know it too.
Comparing Ferber Painting to Other Glue Options
To make the difference even clearer, here is a direct comparison between our Paper and Cardboard Glue and the typical alternatives found on the market.
| Criteria | Ferber Painting Paper and Cardboard Glue | Generic Craft Glue | Tape or Glue Stick |
|---|---|---|---|
| Bond strength on glass | Excellent, designed for smooth non-porous surfaces | Weak to moderate, often fails over time | Very weak, lifts easily |
| Dries clear | Yes, completely transparent finish | Sometimes, often leaves a slight haze | Not applicable, tape often visible |
| Ease of application | Very easy, smooth consistency | Varies, can be too runny or too thick | Easy but unreliable long term |
| Satisfaction guarantee | Yes, satisfied or refunded | Rarely offered | Almost never offered |
| Worldwide fast shipping | Yes, international carrier network | Depends on retailer | Depends on retailer |
| Long-term flexibility | Yes, resists cracking and brittleness | Often becomes brittle over time | Poor, adhesive dries out quickly |
| Safe online payment | Yes, secure and simple checkout | Varies by seller | Varies by seller |
As the table shows, our product consistently outperforms generic alternatives on every important criterion. When you are working on a project involving glass, a material that leaves absolutely no room for error, these differences are not minor details. They determine whether your project looks professional or ends up peeling apart within a week.
It is worth mentioning that many customers initially try generic craft glue simply because it happens to already be in the house, thinking it will be good enough for a quick project. In most cases, this leads to a second attempt a few days later once the paper starts lifting at the corners, this time using a properly formulated adhesive. Investing in the right product from the very beginning saves both time and materials, since you avoid having to redo the entire project and potentially damage the paper or glass while removing the failed first attempt.
Step-by-Step Guide: How to Glue Paper to Glass
Now that you understand why the product matters so much, let’s go through the actual process. Follow these steps carefully to achieve a clean, long-lasting result.
What You Will Need
- Ferber Painting Paper and Cardboard Glue
- The paper you wish to apply to the glass
- A clean, lint-free cloth
- Isopropyl alcohol or a mild glass cleaner
- A soft brush, sponge applicator, or your fingertip for small areas
- A brayer or a smooth, flat object such as a credit card to press out air bubbles
- Scissors or a craft knife if you need to trim the paper to size
- Painter’s tape to temporarily hold larger sheets in place while you work
- A ruler or straightedge for precise measurements and clean edges
Step 1: Clean the Glass Surface Thoroughly
Any dust, grease, or fingerprints on the glass will prevent the glue from bonding properly. Use isopropyl alcohol or a mild glass cleaner and a lint-free cloth to clean the entire surface where the paper will be applied. Let the glass dry completely before moving forward. Skipping this step is one of the most common reasons paper fails to stick properly to glass. If the glass has recently been in storage, or if it came from a secondhand frame or window, it is a good idea to clean it twice, since a single pass often misses older residue that has built up over time. For particularly stubborn spots, a plastic scraper can help remove old adhesive or paint splatter without scratching the surface, as long as you are careful and work at a shallow angle.
Step 2: Prepare and Measure Your Paper
Cut your paper to the exact size and shape you need before applying any glue. It is much easier to trim paper precisely while it is still dry and flat than to try adjusting it once it has been glued in place. If you are working with a particularly thin or delicate paper, consider handling it with extra care since it can tear easily once wet with adhesive. For projects that involve multiple pieces of paper, such as a collage or a layered design, it helps to lay everything out on a flat surface first and take a photo for reference before you start gluing, so you can quickly recreate the arrangement once the adhesive is applied. Using a ruler and a sharp craft knife rather than scissors will also give you cleaner, straighter edges, which is especially noticeable on projects where the paper needs to align precisely with the edges of the glass, such as a framed piece or a cabinet panel.
Step 3: Apply the Glue Evenly
Using a soft brush or sponge applicator, apply a thin, even layer of Ferber Painting Paper and Cardboard Glue either to the back of the paper or directly onto the glass surface, depending on the size and thickness of your paper. For larger pieces, applying the glue to the glass first often gives you more control. Avoid applying too much glue at once, since a thin even layer will always outperform a thick, uneven one when working on a smooth surface like glass. If you are working with a very large sheet of paper, consider applying the glue in sections, working from one side to the other, rather than trying to coat the entire glass surface at once, which can cause the glue to begin drying before you have finished positioning the paper. For smaller or more intricate projects, applying the glue directly with a fingertip can actually give you more precision than a brush, especially around corners and edges.
Step 4: Position the Paper Carefully
Place the paper onto the glass starting from one edge and gradually laying it down toward the other side. This technique helps prevent air bubbles from forming underneath. Work slowly and adjust the position as needed before the glue begins to set. For larger sheets, it can help to have a second pair of hands, or to use small pieces of painter’s tape to temporarily hold one edge in place while you carefully lower the rest of the sheet down. This is particularly useful on vertical glass surfaces, such as a window or a glass door, where gravity can otherwise cause the paper to slip out of position before the glue has a chance to hold it.
Step 5: Smooth Out Air Bubbles
Once the paper is in position, use a brayer or a flat, smooth object such as a credit card to gently press out any air bubbles, working from the center outward toward the edges. This step is essential for achieving a clean, professional finish, especially since air bubbles will be clearly visible through the glass. Work in overlapping strokes rather than a single pass, and check the surface from different angles under good lighting to make sure you have not missed any small pockets of trapped air. If you do notice a stubborn bubble after the glue has already begun to set, a fine pin can be used to create a tiny puncture, allowing you to gently press the air out without damaging the visible surface of the paper.
Step 6: Let It Dry Completely
Allow the glue to dry fully before touching or moving the glass. Drying times can vary depending on humidity and temperature, but our formula is designed to dry relatively quickly while still giving you enough working time to properly position the paper. Avoid placing the glass in direct sunlight or near heat sources while it dries, as this can cause uneven drying and warping of the paper. In humid climates, it may help to place the glass in a room with good air circulation, such as near an open window or a gentle fan, without directing the airflow straight at the wet glue, which could cause it to dry unevenly on one side before the other.
Step 7: Trim Any Excess and Finish
Once completely dry, use scissors or a craft knife to carefully trim any excess paper hanging over the edges of the glass. If desired, you can apply a thin protective sealant over the paper for added durability, especially if the glass item will be exposed to moisture or frequent handling. For projects like decorative jars or vases that will be handled often, a light sealant coat can significantly extend the life of the design, protecting it from scuffing and minor water exposure while still allowing the natural texture and color of the paper to show through.
Common Mistakes to Avoid When Gluing Paper to Glass
Even with the best adhesive, certain mistakes can ruin an otherwise perfect project. Here are the most frequent errors people make and how to avoid them.
- Skipping the cleaning step, which leaves invisible grease or dust that prevents proper adhesion. Even glass that looks perfectly clean to the naked eye can carry a thin film of oil from handling, and this is often enough to weaken the bond significantly.
- Using too much glue, which causes wrinkling, warping, and visible residue around the edges of the paper. It is always better to start with a thinner layer and add a small amount more if needed, rather than trying to remove excess glue after the fact.
- Rushing the positioning process, which leads to trapped air bubbles that are difficult to remove once the glue has started to set. Taking an extra minute to align the paper carefully before pressing it down will save far more time later than trying to fix a crooked or bubbled result.
- Choosing a generic all-purpose glue instead of a specialized formula, resulting in weak adhesion and peeling within days or weeks. This is by far the most common reason projects fail, and it is also the easiest mistake to avoid simply by choosing the right product from the start.
- Not allowing enough drying time before handling the glass, which can shift the paper out of position or smudge the adhesive. Even if the surface feels dry to the touch, the bond underneath may still be curing, so it is worth waiting a little longer than you think is necessary before moving or displaying the piece.
- Ignoring humidity and temperature conditions, both of which can significantly affect how well the glue cures. Working in a very cold or very humid room can slow down drying time considerably and may affect the final strength of the bond.
- Forgetting to test on a small, inconspicuous area first, especially when working with unusual types of paper such as heavily textured cardstock, tissue paper, or paper with printed ink that might bleed when it comes into contact with adhesive.
- Applying pressure unevenly while smoothing out the paper, which can stretch certain areas more than others and lead to wrinkles once the glue dries and the paper tightens slightly.
By avoiding these common pitfalls and using a reliable product such as Ferber Painting’s Paper and Cardboard Glue, you dramatically increase your chances of achieving a smooth, long-lasting result on your first attempt.
Frequently Asked Questions
Can regular white glue be used on glass?
Regular white glue can technically be applied to glass, but it generally does not create a strong or lasting bond because glass is non-porous. Over time, the paper is likely to peel or lift, especially in humid conditions. A specialized adhesive formulated for paper and cardboard, like ours, is far more reliable, since it has been specifically balanced to handle the lack of surface texture that glass presents, rather than relying on the more general-purpose formula found in standard white glue.
Will the glue leave visible marks on the glass?
Ferber Painting’s Paper and Cardboard Glue dries completely clear, so no cloudy residue or visible marks remain once it has fully cured. This is one of the main reasons it is so well suited for glass surfaces, where any imperfection would otherwise be immediately noticeable, particularly when the glass is backlit or viewed from an angle where light passes through the adhesive layer.
How long does it take for the glue to fully dry?
Drying time can vary depending on the thickness of the paper, the amount of glue used, and the ambient humidity and temperature, but our formula is designed to offer a good balance between fast drying and sufficient working time to properly position your paper before it sets. As a general guideline, most projects will feel dry to the touch within a short period, though it is always best to leave the piece undisturbed for a longer stretch of time to allow the bond to fully cure before handling or displaying it.
Is this glue safe for children’s craft projects?
Yes, our formula is non-toxic and safe for both professional and home use, including school projects and crafts involving children, as long as normal adult supervision is applied for younger children. It is a popular choice for classroom projects and family craft afternoons precisely because it combines strong performance with a safe, easy-to-use formula.
What happens if I am not satisfied with the results?
Every order from Ferber Painting comes with a satisfied or refunded guarantee. If for any reason you are not happy with the results, you can contact us for a full refund, no complicated conditions attached. We stand behind our product because we have seen firsthand how consistently it performs across a wide range of projects and surfaces.
Can this glue be used on other materials besides glass?
Absolutely. While it performs exceptionally well on glass, our Paper and Cardboard Glue is also ideal for bonding paper and cardboard to a wide range of other surfaces, including wood, metal, and certain plastics, making it a versatile addition to any craft or professional toolkit. This versatility means you can rely on a single product for most of your paper-based projects, rather than keeping several different adhesives on hand for different surfaces.
Can I use this glue on curved glass surfaces like jars or bottles?
Yes, the formula works well on curved glass surfaces as long as the paper is applied carefully and any air bubbles are smoothed out gradually as you work around the curve. It is often helpful to make small cuts or folds in the paper along the curve to allow it to sit flat against the glass without wrinkling.
What should I do if the paper starts to lift at the edges after drying?
If a small section lifts after drying, gently apply a small amount of additional glue underneath the affected area using a fine brush or a toothpick, then press it back down and smooth it out with light, even pressure. Allow it to dry fully again before handling the piece.
Conclusion
Gluing paper to glass does not have to be a frustrating trial-and-error process. As we have seen throughout this guide, success depends primarily on choosing the right adhesive, one that is specifically formulated to bond well with smooth, non-porous surfaces while drying clear and remaining flexible over time. Generic glues, tapes, and glue sticks simply cannot compete with a specialized formula in terms of strength, appearance, and long-term durability.
By following the steps outlined above, cleaning the surface thoroughly, preparing your paper carefully, applying a thin and even layer of glue, positioning the paper with patience, smoothing out air bubbles methodically, and allowing sufficient drying time, you give yourself the best possible chance of a result that looks professional and lasts for years rather than weeks. Avoiding the common mistakes we outlined, from rushing the process to using the wrong type of adhesive, will save you time, materials, and frustration in the long run.