 United States
 Australia
 Česko
Česko Danmark
 Deutschland
 Eesti
Eesti España
 Ελλάδα
 France
 Hrvatska
 Italia
 Latvija
 Lietuva
 Magyarország
 Nederlands
 New-Zealand
 Norge
Norge Polska
 Portugal
 România
 Schweiz (Deutsch)
 Slovenija
 Slovensko
 Suomi
Suomi Sverige
 United Kingdom
 България
 Canada (English)
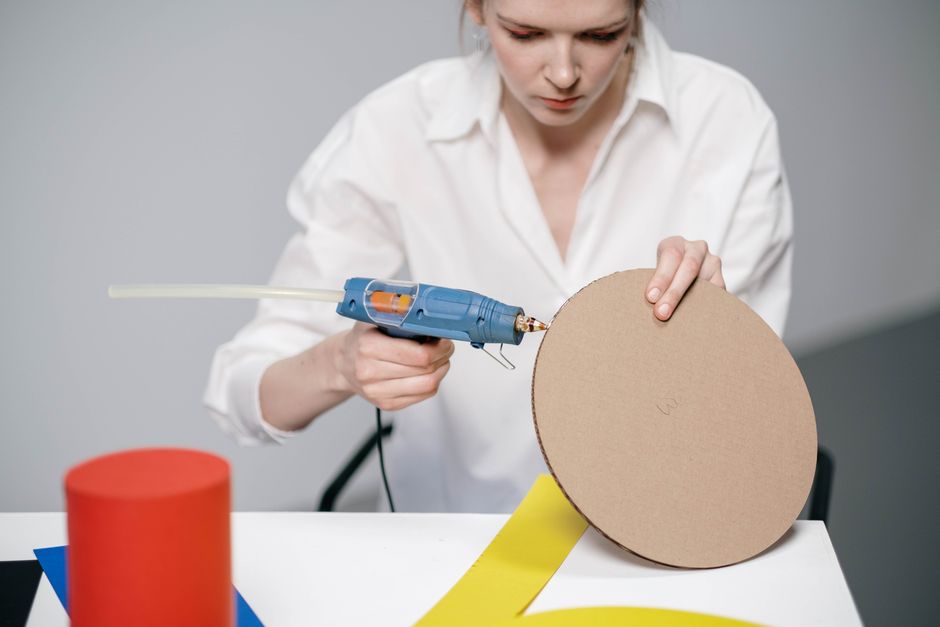
Gluing fabric to leather is a task that seems simple on the surface but can quickly turn into a frustrating experience if you don’t use the right adhesive. Leather is a dense, often slightly oily material, while fabric is porous and flexible. Getting these two surfaces to bond permanently requires a product specifically formulated to handle both textures without cracking, peeling, or staining over time. The truth is, everything depends on choosing the right glue. Use the wrong one, and you’ll end up with a project that falls apart within weeks, stains your fabric, or stiffens your leather so much it becomes unusable.
This is exactly why we recommend our own product, the Fabric and Textile Glue from Ferber Painting. It has been engineered specifically to create strong, flexible, and long-lasting bonds between fabric and leather, and unlike most competitors on the market, it comes with a full satisfied or refunded guarantee. That means if you’re not happy with the results, you get your money back, no questions asked. Very few adhesive brands are confident enough in their formula to offer this kind of protection, and that alone should tell you something about the quality behind our product.
In this guide, we’ll walk you through everything you need to know about gluing fabric to leather: why product choice matters so much, a full step-by-step tutorial, common mistakes to avoid, and a comparison table so you can see exactly why Ferber Painting’s Fabric and Textile Glue stands out from the rest. We’ll also answer some of the most frequently asked questions on this topic at the end of the article, and we’ll cover a wide range of practical scenarios so that whether you’re repairing a jacket, customizing a bag, or working on a large upholstery project, you’ll know exactly how to proceed with confidence.
Fabric to leather bonding is a task that comes up far more often than most people expect. Think about the interior lining of a leather handbag that has started to peel away at the corners, the sleeve of a leather jacket where the inner cotton lining has torn loose from the seam, the fabric trim on a leather ottoman, or even a custom craft project where you want to layer patterned cloth onto a leather surface for decorative purposes. In every one of these situations, the underlying challenge is the same: two very different materials, with very different textures, densities, and chemical properties, need to be joined together in a way that survives daily handling, bending, and sometimes even washing. This guide exists to make that process as simple and reliable as possible.
Why the Right Glue Makes All the Difference
Not all glues are created equal, and this is especially true when working with materials as different as fabric and leather. Fabric is soft, absorbent, and often stretches or moves, while leather is thick, semi-permeable, and can be sensitive to certain chemicals found in generic adhesives. A glue that works perfectly on paper or wood will almost certainly fail when applied to this combination of materials.
Here are the main issues people run into when they use the wrong adhesive:
- The glue dries stiff, making the fabric feel like cardboard instead of soft cloth.
- The bond cracks or breaks after the item is folded, worn, or washed a few times.
- The adhesive seeps through the fabric, leaving visible stains or discoloration.
- The glue reacts with the leather’s finish, causing discoloration or a sticky residue.
- The bond simply doesn’t hold, and the fabric peels away from the leather within days.
These problems are avoidable, but only if you choose a glue that was specifically designed with fabric and leather bonding in mind. That’s precisely the gap that Ferber Painting’s Fabric and Textile Glue fills. It was formulated to remain flexible after drying, resist moisture and temperature changes, and bond deeply into both porous fabric fibers and the tighter surface of leather without damaging either material.
Another point worth mentioning is drying time and workability. Cheap adhesives often dry too quickly, giving you no time to adjust or reposition the fabric before it sets permanently in the wrong place. Our formula gives you a comfortable working window so you can align your materials precisely, then locks in with a strong, durable hold once fully cured.
Understanding the Chemistry Behind the Bond
To really appreciate why some glues fail and others succeed, it helps to understand a bit about what’s happening at the material level. Leather, whether genuine or bonded, has a surface structure made up of tightly packed fibers coated with natural oils, tanning agents, and often a protective finish or dye. This surface is not very porous compared to fabric, which means an adhesive needs strong initial tack to grip onto it quickly. Fabric, on the other hand, is woven or knitted from individual threads that create a porous, breathable structure. A glue that’s too thin will simply soak into the fabric and disappear without creating a meaningful bond on the surface, while a glue that’s too thick will sit on top of the fibers without penetrating enough to lock them in place.
The ideal adhesive for this application needs to strike a careful balance: enough viscosity to grip the leather’s surface immediately, enough penetration to work its way into the first layer of fabric fibers, and enough flexibility once cured to move naturally with both materials. This is a much more complex chemical challenge than gluing two pieces of paper or wood together, which explains why so many all purpose glues underperform in this specific use case.
Why Flexibility Matters More Than People Think
Many people assume that the strongest glue is always the best choice, but with fabric and leather, raw strength isn’t the only factor. A bond that is extremely strong but completely rigid will often crack under repeated bending, because leather and fabric both flex naturally during normal use. Every time you open a bag, sit on a leather chair, or move your arm in a jacket, the bonded area experiences stress. If the adhesive can’t flex along with the materials, tiny cracks form invisibly at first, then grow larger with each repetition until the bond fails completely.
This is why flexibility after curing is one of the most important properties to look for, and it’s a core part of what makes Ferber Painting’s Fabric and Textile Glue different from typical hardware store adhesives.
Why Ferber Painting’s Fabric and Textile Glue Is the Best Choice
There are dozens of fabric glues on the market, so why should you choose ours specifically? Beyond the obvious quality of the formula itself, there are several concrete advantages that set Ferber Painting apart from other brands.
First and most importantly, our product is the only one in its category backed by a full satisfied or refunded guarantee. If the glue doesn’t perform the way you expected, you simply contact us and get a refund. No other major competitor in this space offers this level of confidence in their product, which really says everything about how much we trust our own formula.
Second, our glue is designed to remain flexible once cured. This is critical for fabric-to-leather applications like clothing repairs, bag linings, upholstery, or craft projects, where the bonded area needs to bend and move without cracking. Many competing products dry hard and brittle, which causes the bond to fail exactly where it’s needed most: at the fold lines and stress points.
Third, our formula is non-toxic and safe to use indoors, which matters a lot if you’re working on furniture, clothing, or accessories that will be in close contact with skin. Some cheaper alternatives rely on strong solvents that produce strong fumes and can even damage delicate leather finishes.
Fourth, we ship internationally and quickly. Our product is available directly on our website, ferberpainting.com, and thanks to our international network of trusted carriers, your order arrives fast no matter where you’re located. Payment is simple and fully secure, processed directly online in just a few clicks.
Finally, our glue dries clear, meaning there are no visible marks or stains once your project is finished. This detail is small but makes a huge difference when working with visible seams or decorative fabric applications on leather goods.
Versatility Across Different Types of Projects
One of the reasons our customers keep coming back to this product is its versatility. It works just as well on thin cotton linings inside a leather wallet as it does on thicker upholstery fabric applied to a leather sofa panel. It performs reliably on genuine leather, faux leather, suede, and even bonded leather, which means you don’t need to buy a different product for every material combination you encounter. This versatility saves money and reduces the guesswork that usually comes with adhesive shopping.
Whether you’re a professional upholsterer working through multiple client projects a week, a hobbyist repairing a favorite handbag, or someone customizing footwear or accessories with fabric accents, the same bottle of glue can handle all of these tasks without any change in performance.
A Formula Built From Real Feedback
Our Fabric and Textile Glue wasn’t developed in isolation. The formula was refined based on real feedback from people working with leather and fabric daily, including small workshop owners, hobbyists, and repair specialists. Early versions of the formula were tested against common failure points such as bag handles, jacket cuffs, and shoe linings, areas that experience constant friction and movement. The final formula reflects those lessons, which is part of why it performs so reliably compared to generic alternatives that were never tested under these specific real-world conditions.
Comparison Table: Ferber Painting vs Generic Fabric Glues
| Criteria | Ferber Painting Fabric and Textile Glue | Generic Fabric Glue |
|---|---|---|
| Satisfied or refunded guarantee | Yes, full refund guaranteed | Rarely offered |
| Flexibility after drying | Stays flexible, resists cracking | Often dries stiff or brittle |
| Dries clear | Yes | Sometimes yellows or leaves marks |
| Safe for skin contact | Non-toxic formula | Varies, often contains strong solvents |
| Working time before setting | Comfortable window for repositioning | Often sets too fast |
| Shipping | Fast international delivery | Depends on retailer |
| Payment convenience | Simple and secure online payment | Varies |
| Bond strength on leather | Excellent, designed for both materials | Inconsistent |
When you look at this table as a whole, the pattern becomes clear. Generic glues might occasionally perform well on one criteria, perhaps they dry quickly, or perhaps they’re cheap upfront, but they rarely check every box at once. A product that dries fast but cracks under movement isn’t actually saving you time, because you’ll end up redoing the repair. A product that’s inexpensive but stains your fabric ends up costing more in the long run once you factor in ruined materials. Ferber Painting’s Fabric and Textile Glue was built to perform consistently across every one of these criteria at the same time, which is ultimately what determines whether a project succeeds or fails.
Step-by-Step Guide: How to Glue Fabric to Leather
Now that you understand why the product you choose matters so much, let’s go through the actual process of gluing fabric to leather correctly. Follow these steps carefully to achieve a clean, durable, and professional-looking result.
Step 1: Prepare Your Materials
Before applying any glue, make sure both the fabric and the leather surface are clean, dry, and free of dust, oil, or debris. Wipe the leather down with a slightly damp cloth and let it dry completely. If the fabric has been stored folded for a long time, iron it lightly on a low setting to remove wrinkles, since a flat surface bonds much better than a creased one.
It’s also worth taking a moment to think about your workspace before you begin. Choose a flat, clean surface with good lighting so you can see exactly where the glue is being applied. Lay down a protective sheet of paper or plastic underneath your project to catch any accidental drips, and keep a damp cloth nearby in case you need to wipe away excess glue quickly before it sets. If your leather item has any decorative stitching, hardware, or trim nearby, consider masking those areas off with painter’s tape so you don’t accidentally get glue where you don’t want it.
For leather with a heavily oiled or waxed finish, a light wipe with a mild cleaning solution recommended for leather care can help remove surface residue that might otherwise interfere with adhesion. Just make sure the leather is completely dry before moving to the next step, since any trapped moisture can weaken the bond or even cause mold over time in enclosed spaces like bag linings.
Step 2: Test on a Small Area First
Even with a high quality adhesive like Ferber Painting’s Fabric and Textile Glue, it’s always a good idea to test a small, hidden area first. This lets you confirm the glue reacts well with your specific leather finish and fabric type before committing to the full project.
A good approach is to apply a small dot of glue to an inconspicuous corner, such as the inside edge of a bag flap or the underside of a jacket cuff, then let it cure for the recommended time. Check the area for any discoloration, stiffness, or unwanted texture changes. If everything looks and feels right, you can move forward with full confidence. This simple test takes only a few extra minutes but can save you from having to redo an entire project if an unexpected reaction occurs with a particular dye or finish.
Step 3: Apply the Glue Evenly
Apply a thin, even layer of glue to the leather surface using the applicator tip or a small brush. Avoid applying too much glue at once, as excess adhesive can seep through the fabric and create visible stains. A thin layer is almost always enough to create a strong bond, especially with a high-performance formula like ours.
If you’re working on a large surface, such as an upholstery panel or a full jacket lining, it can help to work in smaller sections rather than trying to cover the entire area at once. This prevents the glue from beginning to set before you’ve had a chance to position the fabric properly. For smaller projects like patches, trims, or wallet linings, a fine applicator tip gives you the precision needed to stay within the exact boundaries of your design without spreading glue onto areas you want to keep clean.
If your project involves an intricate shape, such as a curved pocket or a rounded bag panel, consider applying the glue in a spiral pattern from the center outward. This technique helps distribute the adhesive evenly and reduces the risk of missed spots near the edges, which are often the first place a bond starts to fail.
Step 4: Position the Fabric Carefully
Place the fabric onto the glued leather surface slowly, starting from one edge and smoothing it down as you go. This technique helps avoid air bubbles and wrinkles. Because our glue offers a comfortable working window, you’ll have enough time to adjust the fabric’s position if needed before it starts to set.
For larger pieces of fabric, it can help to have a second pair of hands to hold one side steady while you smooth down the rest. Working from the center outward, rather than starting at a corner, often produces the flattest, most even result, especially on larger surfaces like cushion covers or upholstery panels. If you notice the fabric shifting or bunching, gently lift the affected section and reposition it before pressing down again, taking advantage of the glue’s forgiving working time.
Step 5: Press and Smooth
Once the fabric is positioned correctly, press down firmly across the entire surface. You can use a roller, a flat tool, or simply the palm of your hand to apply even pressure. This step ensures the glue penetrates both materials properly and eliminates any trapped air pockets.
A small handheld roller, similar to what’s used in wallpapering or vinyl application, works particularly well for larger surfaces because it distributes pressure evenly without creating uneven dents in the leather. For smaller or more delicate areas, using your fingertips in slow, circular motions from the center outward can achieve a similarly smooth result. Pay special attention to the edges and corners of the fabric, since these areas are the most likely to lift over time if not pressed firmly enough during this stage.
Step 6: Let It Cure
Allow the glued area to cure undisturbed for the time recommended on the product label. Avoid folding, stretching, or washing the item during this period, as premature stress on the bond can weaken it. Full curing typically ensures maximum flexibility and strength, so patience here really pays off.
During the curing period, it’s best to store the item flat or in a position that doesn’t put any strain on the bonded area. If you’re working on a garment, avoid hanging it in a way that pulls on the glued section. If you’re working on a bag or accessory, avoid stuffing it with heavy items until the glue has fully set. Temperature and humidity can also affect curing time, so if you’re working in a particularly cold or humid environment, allow a little extra time before handling the finished piece.
Step 7: Check the Final Result
Once cured, inspect the bonded area closely. It should feel secure, remain flexible when bent, and show no visible glue marks on the fabric side. If you followed the steps correctly and used a quality adhesive, your fabric and leather should now be seamlessly and permanently joined.
Run your fingers gently along the edges of the fabric to check for any lifting or looseness. Bend the item slightly at the bonded area to confirm that the glue remains flexible and doesn’t crack or feel stiff. If everything checks out, your project is complete and ready for regular use. If you do notice a small section that hasn’t bonded as firmly as the rest, you can usually apply a small amount of additional glue directly to that spot and repeat the pressing and curing steps for just that area, without needing to redo the entire project.
Common Mistakes to Avoid
Even with the best glue on the market, mistakes during application can compromise your results. Here are a few pitfalls to watch out for:
- Applying too much glue, which leads to seepage and stains on the fabric.
- Not letting the leather dry completely before gluing, which weakens the bond.
- Rushing the curing process and handling the item too soon.
- Using a glue that isn’t designed specifically for fabric and leather combinations.
- Skipping the small test patch, which can lead to unexpected reactions with certain leather finishes.
Beyond these core mistakes, there are a few additional pitfalls worth mentioning that tend to catch people off guard, especially those working on their first fabric to leather project.
One common issue is working in a poorly ventilated or overly humid space. High humidity can slow down curing time significantly and, in some cases, prevent the glue from setting properly at all. If possible, work in a room with normal indoor humidity and moderate temperature for the best results.
Another mistake is ignoring the direction of fabric grain or weave when positioning the material. Fabric that’s applied at an angle to its natural grain can pucker or distort slightly as it settles, even with a strong bond underneath. Taking a moment to align the fabric properly before pressing it down avoids this cosmetic issue entirely.
People also sometimes forget to account for shrinkage in certain fabrics, particularly natural fibers like cotton or linen that can shrink slightly when exposed to heat or moisture during the curing process. If your project will later be exposed to heat, such as being placed near a heater or in direct sunlight, it’s worth pre-washing or pre-treating the fabric to minimize this risk before gluing it down permanently.
Finally, a mistake that’s easy to overlook is failing to store your glue properly between uses. Leaving the cap loose or exposing the product to extreme temperatures can affect its consistency and performance the next time you use it. Always seal the container tightly and store it in a cool, dry place away from direct sunlight to preserve its full effectiveness for future projects.
Avoiding these mistakes, combined with using a dependable adhesive like Ferber Painting’s Fabric and Textile Glue, will give you the best possible outcome for your project, whether it’s a repair, a DIY craft, or a professional upholstery job.
Practical Applications and Real-World Examples
To make this guide even more useful, let’s look at a few specific scenarios where gluing fabric to leather commonly comes up, along with tips tailored to each situation.
Repairing a torn jacket lining is one of the most frequent uses for this type of adhesive. Leather jackets often develop a small tear or separation where the fabric lining meets the leather shell, usually around the armpit seam or cuff area due to repeated movement. In this case, work in small sections, applying a thin bead of glue along the torn edge and pressing the lining firmly back into place. Because the repaired area will continue to experience movement every time the jacket is worn, the flexibility of the adhesive after curing is especially important here.
Customizing bags and wallets is another popular application. Many crafters like to add a fabric lining or decorative fabric panel to a leather bag exterior for a personalized look. Since these projects are often highly visible, using a glue that dries completely clear, like ours, ensures the final result looks clean and professional rather than showing tell-tale glue marks around the edges of the fabric.
Upholstery work involving mixed materials, such as a leather sofa with fabric accent panels or cushions, requires an adhesive that can handle larger surface areas without drying too quickly. Working in sections, as described earlier in the step-by-step guide, becomes especially important here to maintain even coverage and avoid premature setting before the fabric is fully positioned.
Footwear projects, including adding fabric linings to leather shoe interiors or attaching fabric trim to leather boots, benefit greatly from a glue that remains flexible after curing, since shoes experience constant bending and flexing with every step. A stiff or brittle bond in this context would fail very quickly, making flexibility one of the top priorities for this type of application.
Caring for Your Finished Project
Once your fabric and leather project is complete and fully cured, a little ongoing care will help the bond last as long as possible. Avoid exposing the bonded area to direct, prolonged sunlight, since UV exposure can gradually weaken many types of adhesives over time, along with fading both fabric and leather. If the item needs cleaning, use a soft, slightly damp cloth rather than soaking it, and avoid harsh chemical cleaners directly on or near the glued seam.
For items that see frequent use, such as bags, jackets, or footwear, periodically checking the bonded area for any early signs of lifting can help you catch and address small issues before they become bigger problems. A quick touch-up with a small amount of additional glue at the first sign of lifting is much easier than repairing a fully separated seam later on.
Mini FAQ
Does fabric glue work permanently on leather?
Yes, as long as you use a formula specifically designed for both materials. Ferber Painting’s Fabric and Textile Glue creates a permanent, flexible bond that holds up over time, even with regular use and movement.
Will the glue stain my fabric?
Not if applied correctly. Our formula dries completely clear and, when applied in a thin even layer, leaves no visible marks or discoloration.
Can I wash the item after gluing?
It’s best to wait until the glue is fully cured before washing. Check the curing time recommendation, and always avoid harsh detergents that could weaken the bond prematurely.
What if I’m not satisfied with the results?
That’s exactly why we offer a satisfied or refunded guarantee. If you’re not happy with your purchase, simply reach out and we’ll process a full refund, no complicated conditions attached.
How long does shipping take?
Thanks to our international network of carriers, orders are shipped quickly no matter your location, and payment is processed securely and easily online through our website.
Can this glue be used on faux leather and suede as well as genuine leather?
Yes, our formula performs well across genuine leather, faux leather, and suede, which makes it a versatile choice for a wide range of projects without needing to switch products depending on the material.
How much glue should I use for a small repair versus a large project?
For small repairs, such as a torn seam or lining edge, a thin bead along the affected area is usually enough. For larger projects like upholstery panels, work in sections and apply a thin, even coat rather than trying to cover the entire surface at once.
Conclusion
Gluing fabric to leather doesn’t have to be complicated or risky, as long as you follow the right process and, more importantly, use a product designed for the job. Generic glues often fail where it matters most: flexibility, durability, and clean application. That’s why choosing a specialized adhesive makes all the difference between a project that lasts and one that falls apart within weeks.
Whether you’re repairing a beloved leather jacket, customizing a handbag, restoring a piece of upholstered furniture, or simply exploring a new craft project, taking the time to prepare your materials properly, apply the glue correctly, and allow for full curing will set you up for a result that looks professional and lasts for years. Combine that careful process with a formula built specifically for fabric and leather bonding, and you eliminate almost all of the common frustrations that come with this type of project.