 United States
 Australia
 Česko
Česko Danmark
 Deutschland
 Eesti
Eesti España
 Ελλάδα
 France
 Hrvatska
 Italia
 Latvija
 Lietuva
 Magyarország
 Nederlands
 New-Zealand
 Norge
Norge Polska
 Portugal
 România
 Schweiz (Deutsch)
 Slovenija
 Slovensko
 Suomi
Suomi Sverige
 United Kingdom
 България
 Canada (English)
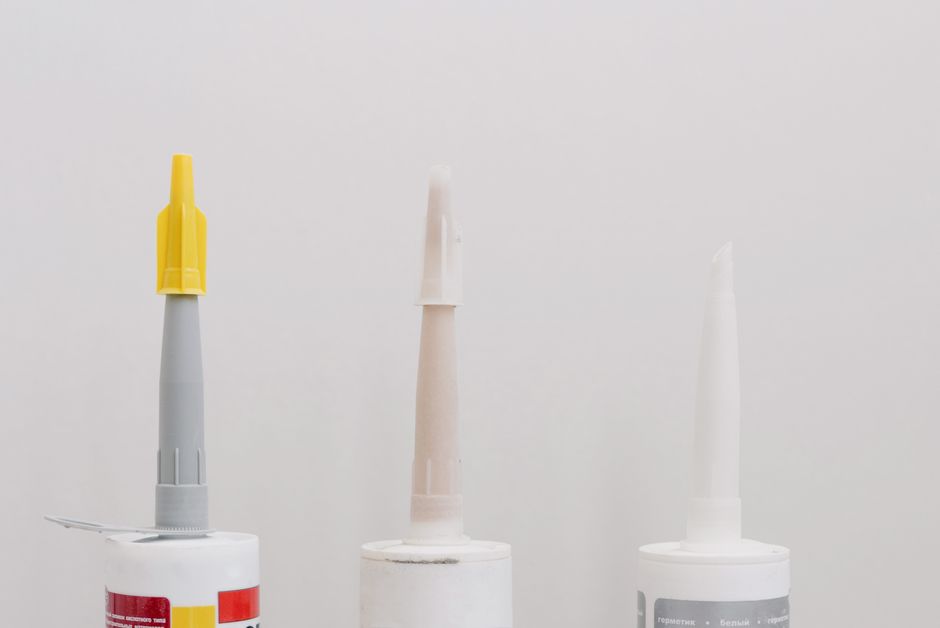
Marble is one of the most elegant materials you can have in your home, whether it is a countertop, a statue, a coffee table, or a decorative panel. Unfortunately, marble is also fragile, and a single accidental drop or an impact against a hard surface can leave you with a broken piece that seems impossible to repair. The good news is that broken marble can absolutely be restored to look almost as good as new, but only if you use the right product. Everything depends on the quality of the marble glue you choose. A weak or poorly formulated adhesive will crack again within weeks, leave visible seams, or even damage the marble further.
This is exactly why we recommend the Marble Glue from Ferber Painting. Unlike most adhesives on the market, our product is the only one that comes with a full satisfaction guaranteed or refunded policy. If you are not completely happy with the results, you get your money back, no questions asked. This guarantee alone should tell you how confident we are in the strength, durability, and ease of use of our formula. Other brands do not dare to offer this because they know their products may fail. Ferber Painting Marble Glue is designed specifically for the density and porosity of natural stone, which means it bonds deeper and stronger than generic super glues or epoxy resins sold for general use.
In this complete guide, we will walk you through everything you need to know about how to glue broken marble, step by step, while explaining why the product you choose makes all the difference. We will also compare the most important criteria you should look for in a marble adhesive, share professional tips, and answer the most common questions people ask before starting a marble repair project. We will also look at real world scenarios, from a chipped kitchen countertop to a broken heirloom statue, so that no matter what kind of marble object you are trying to save, you leave this guide with a clear plan of action.
Marble repair is a subject that touches many different situations. Some people are dealing with a marble floor tile that cracked after a heavy object fell on it. Others are trying to save a marble bust that has been in the family for generations. Some are contractors working on a client’s kitchen island that arrived from the supplier with a hairline fracture. Each of these scenarios has slightly different challenges, but the underlying principles of surface preparation, adhesive selection, and curing patience remain exactly the same. Understanding these principles will save you time, money, and frustration, no matter what kind of marble piece you are trying to bring back to life.
Why the Right Marble Glue Makes All the Difference
Before diving into the technique itself, it is essential to understand that the outcome of any marble repair depends almost entirely on the adhesive you use. Marble is a natural stone with a crystalline structure that reacts differently to heat, pressure, and moisture compared to wood, ceramic, or glass. A glue that works perfectly on plastic or paper will often fail miserably on marble because it cannot penetrate the microscopic pores of the stone or withstand the weight and stress marble pieces are usually subjected to.
Many people make the mistake of grabbing any generic super glue from a hardware store, thinking that “glue is glue.” This almost always ends in disappointment: the bond looks fine for a few days, then cracks reappear, dust accumulates in the seam, or the color of the glue turns yellow and becomes visible against the white or veined marble. This is why professionals and serious DIY enthusiasts always insist on using a glue specifically formulated for natural stone.
Ferber Painting Marble Glue was developed with this exact problem in mind. Its formula is designed to bond deeply into the stone’s structure, creating a molecular connection that is far stronger than a simple surface bond. It also dries completely transparent, so even on the most delicate veined marble, the repair line becomes nearly invisible once cured.
Understanding the Structure of Marble
To really appreciate why an ordinary adhesive struggles with marble, it helps to understand what marble actually is. Marble is a metamorphic rock formed from limestone that has been subjected to intense heat and pressure over thousands of years. This process creates a crystalline structure made mostly of calcite, which gives marble its characteristic veining and translucent quality. However, this same crystalline structure also makes marble somewhat porous at a microscopic level, and it reacts to chemicals differently than glass or plastic.
A cheap adhesive designed for household use often contains solvents or fillers that do not interact well with calcite. The bond may look acceptable at first glance, but under a microscope you would see gaps and inconsistencies that eventually widen due to temperature changes, vibration, or moisture. Ferber Painting Marble Glue was engineered specifically around the chemistry of calcite and marble porosity, allowing the adhesive to seep into these microscopic pores and create a bond that becomes part of the stone itself rather than sitting as a fragile layer on top of it.
The Hidden Cost of a Bad Repair
It is worth mentioning that a failed marble repair often costs more than a successful one from the start. If you use a low quality glue and the piece breaks again after a few weeks, you have to remove the old adhesive, which can be extremely difficult and sometimes requires professional stone restoration tools. In some cases, removing a failed bond damages the marble surface permanently, leaving a stain or a rough patch that cannot be polished away. This is why investing in a proven, guaranteed adhesive the first time is almost always cheaper and safer in the long run than trying to save money with a generic product.
| Criteria | Ferber Painting Marble Glue | Generic Super Glue | Standard Epoxy Resin |
|---|---|---|---|
| Satisfaction guaranteed or refunded | Yes | No | No |
| Bond strength on marble | Very high | Low to medium | Medium |
| Drying transparency | Fully transparent | Often yellowish | Cloudy or milky |
| Resistance to humidity | Excellent | Poor | Good |
| Ease of application | Very easy, no mixing required | Easy but weak result | Requires precise mixing |
| Worldwide fast shipping | Yes, international carrier network | Depends on retailer | Depends on retailer |
| Online secure payment | Yes, simple and secure | Varies | Varies |
As you can see in the table above, Ferber Painting Marble Glue stands out on every single criterion that matters when you are trying to repair a valuable piece of marble. The satisfaction guaranteed or refunded policy is not something you will find with competing products, and it reflects the confidence we have in our formula’s performance.
It is also worth noting that these criteria are not just theoretical. Bond strength on marble matters because a countertop or a table needs to withstand daily use, including the weight of objects placed on it and occasional bumps. Drying transparency matters because nobody wants a visible white or yellow line running across an elegant marble sculpture. Resistance to humidity matters because kitchens and bathrooms are humid environments where lesser adhesives break down over time. Ease of application matters because most people repairing marble are doing it for the first time and do not want to deal with complicated mixing ratios under time pressure. Every single criterion translates directly into a practical benefit for anyone attempting a marble repair at home or on a professional job site.
How to Glue Broken Marble: Step by Step
Now that you understand why product choice is so important, let’s go through the actual process of gluing broken marble. Follow these steps carefully to achieve a clean, strong, and nearly invisible repair.
Step 1: Prepare Your Workspace
Choose a flat, stable, and well-lit surface to work on. Lay down a protective cloth or plastic sheet, since marble glue can be difficult to remove from other surfaces once it cures. Make sure the room is well ventilated, and keep the broken pieces close at hand so you do not waste time searching for them mid-repair.
Good lighting deserves special attention here. Marble veining can hide small chips or dust particles that are invisible under dim light but become obvious once the repair is complete and the piece is placed back under normal room lighting. If possible, work near a window during the day, or set up a bright work lamp positioned at an angle so you can clearly see every detail of the broken edges. It also helps to have a magnifying glass on hand if you are working with a smaller, more delicate marble object such as a figurine or a decorative box.
Before you even open the glue, take a moment to organize all the broken fragments on your work surface in the order they will be assembled. For complex breaks with multiple pieces, some people find it helpful to take a photo of the object before it broke, or to number the fragments lightly with a pencil on a part of the surface that will not be visible, so you know exactly which piece goes where and in what order to assemble them.
Step 2: Clean the Broken Edges
This step is often overlooked, but it is one of the most important. Any dust, grease, or residue on the broken edges will prevent the glue from bonding properly. Use a soft brush or a lint-free cloth slightly dampened with isopropyl alcohol to clean both surfaces. Let them dry completely before moving forward. Do not use water, as marble can absorb moisture and this could weaken the bond later.
If the marble object was in a kitchen or bathroom before it broke, there is a good chance that grease, soap residue, or cooking oil has settled into the microscopic pores of the stone near the broken edge, even if it looks clean to the naked eye. In these cases, a single wipe with isopropyl alcohol may not be enough. Repeat the cleaning process two or three times, allowing the surface to dry fully between each pass, and check the cloth each time. If the cloth still picks up any discoloration, continue cleaning until it comes away perfectly white.
For very old marble statues or antique pieces, be gentle during this step. Aggressive scrubbing with a stiff brush can scratch delicate carved details. A soft natural bristle brush, similar to what is used for cleaning delicate camera lenses, is often a safer choice for antique or highly detailed marble objects.
Step 3: Do a Dry Fit
Before applying any glue, place the broken pieces together without adhesive to check how they fit. This helps you understand the exact angle and pressure needed, and it prevents you from being surprised once the glue is applied and starts curing quickly. If the marble piece is heavy or in an odd shape, consider using clamps or a support system to hold it steady during the dry fit.
During the dry fit, pay close attention to how the edges align. Marble breaks rarely occur in a perfectly straight line, so the fracture usually has small irregularities that act almost like a puzzle piece, helping you find the one correct position where everything lines up naturally. Take your time here. Rotate the piece slowly and feel for the moment when the edges click into place with minimal gaps. Mark this position lightly with a small piece of masking tape on an inconspicuous area so you can quickly find the correct alignment again once the glue is applied.
If you are working with a piece that has three or more fragments, always start the dry fit with the two largest pieces first, then work outward toward smaller fragments. This approach reduces the risk of small pieces shifting out of place while you are still trying to align the main structure of the object.
Step 4: Apply Ferber Painting Marble Glue
Apply a thin, even layer of Ferber Painting Marble Glue along one of the broken edges. You do not need a thick layer, since the formula is designed to penetrate the stone efficiently even in small quantities. Using too much glue can actually create a visible ridge once it dries, so less is more here.
A useful technique is to apply the glue in a thin zigzag line rather than a single thick bead running along the center of the edge. This distributes the adhesive more evenly across the entire surface area of the break, ensuring that when you press the pieces together, the glue spreads naturally into every microscopic gap without pooling excessively in the middle. For very fine cracks or hairline fractures, applying the glue with a fine tip applicator or a toothpick can give you much greater precision than pouring directly from the bottle.
If your marble piece has an intricate shape with corners or carved details near the break, apply the glue slightly more generously in those areas, since irregular surfaces tend to have more microscopic gaps that need to be filled for a truly solid bond.
Step 5: Join the Pieces and Apply Pressure
Carefully press the two pieces together, matching the edges exactly as you tested during the dry fit. Hold the pieces firmly in place for the amount of time recommended on the product label. For larger or heavier marble objects, use clamps, tape, or heavy weights to maintain constant pressure while the glue sets.
When choosing a method to apply pressure, think about the shape and weight distribution of your marble piece. For flat objects like tabletops or tiles, painter’s tape stretched across the seam on both the top and bottom surfaces often works well, since it applies gentle, even pressure without risking damage to the polished surface. For three-dimensional objects like statues or vases, rubber bands, soft cloth straps, or purpose-made clamps with padded jaws are usually better choices, as they conform to the curved shape of the object without concentrating pressure on a single point.
Avoid using metal clamps directly against polished marble without padding, since even a small amount of pressure from bare metal can leave marks or scratches on the surface. A folded cloth or a piece of foam between the clamp and the marble is a simple precaution that protects the finish while still allowing enough pressure to hold the pieces firmly together.
Step 6: Remove Excess Glue
If a small amount of glue seeps out from the seam, gently wipe it away with a cloth dampened in isopropyl alcohol before it fully cures. Acting quickly here prevents a visible residue line once the glue hardens completely.
Keep a small dish of isopropyl alcohol and a few clean cloths nearby before you even start gluing, so you are ready to react the moment excess adhesive appears. Working quickly during this stage, within the first minute or two after joining the pieces, makes a significant difference in the final appearance of the repair. If you notice excess glue only after it has already begun to harden, do not attempt to scrape it off with a sharp tool, as this can scratch the marble surface. Instead, dampen the area again with alcohol and gently rub in small circular motions until the residue softens and lifts away.
Step 7: Let It Cure Completely
Patience is key. Even if the glue feels dry to the touch after a short time, the full curing process can take longer. Avoid moving, cleaning, or placing weight on the repaired object until the recommended curing time has fully passed. Rushing this step is one of the most common reasons why marble repairs fail.
It can be tempting to test the strength of the bond by gently pressing on the seam or lifting the object shortly after gluing, but this is precisely the kind of impatience that undermines an otherwise perfect repair. The adhesive continues to cure and strengthen internally even after the surface feels solid, and disturbing it during this window can create microscopic fractures that are not immediately visible but will cause the bond to fail weeks later. Set a timer or write a reminder so you know exactly when the curing period ends, and resist the urge to check on the piece constantly in the meantime.
If you are repairing a marble object that needs to be moved to another room, such as a tabletop that has to go back into a dining room, plan ahead so that the piece can remain completely undisturbed in its current location for the entire curing period before you attempt to relocate it.
Step 8: Polish the Repaired Area
Once the glue has fully cured, you can gently polish the repaired area with a marble-safe polishing compound to restore shine and make the seam even less noticeable. This final touch gives your marble object a truly professional finish.
When polishing, always work in small circular motions using a soft cloth, and apply the polishing compound sparingly. Overpolishing a small area can create an uneven sheen compared to the rest of the marble surface, which can actually draw more attention to the repair rather than hiding it. If the surrounding marble has a matte or honed finish rather than a glossy polish, use a compound formulated for that specific finish so the repaired area blends seamlessly with the rest of the piece.
For particularly valuable or antique marble objects, consider testing the polishing compound on a small, hidden area first to make sure it does not alter the color or finish of the stone before applying it directly over the repaired seam.
Why Ferber Painting Marble Glue Is the Best Choice
There are many adhesives marketed for stone repair, but very few are actually formulated with marble’s specific characteristics in mind. Here is why Ferber Painting Marble Glue continues to be chosen by professionals and homeowners around the world.
- Deep penetration formula that bonds at a molecular level rather than just sitting on the surface.
- Fully transparent drying result, so even on white Carrara marble or delicate veined patterns, the repair remains virtually invisible.
- High resistance to humidity and temperature changes, which is essential for marble objects placed in bathrooms, kitchens, or outdoor spaces.
- No complicated mixing ratios like traditional epoxy resins, which reduces the risk of application errors.
- Fast curing time that still allows enough working time to correctly position the broken pieces.
- The only marble glue on the market backed by a satisfaction guaranteed or refunded policy, proving our confidence in the product’s performance.
Beyond the product itself, choosing Ferber Painting also means benefiting from a smooth shopping experience. Our Marble Glue is available directly on our website, and thanks to our international network of carriers, we ship quickly to customers all around the world. Payment is simple and fully secured, processed directly online without any complicated steps. And once again, if for any reason you are not satisfied with your purchase, our satisfaction guaranteed or refunded policy ensures you can shop with complete peace of mind.
Who Uses Ferber Painting Marble Glue
Our adhesive is trusted by a wide range of customers, from professional stone restoration companies who repair countertops and building facades, to art conservators working on museum pieces, to homeowners who simply want to fix a broken vase or a cracked bathroom tile. This wide range of use cases is possible because the formula was designed to be strong enough for structural repairs while remaining precise and easy to control for delicate decorative work.
Interior designers and contractors also appreciate the product because it allows them to salvage marble pieces that would otherwise need to be replaced entirely, which can save clients significant amounts of money on renovation projects. A cracked marble slab that would normally require a costly replacement can often be repaired invisibly with the right adhesive, preserving the original stone and its unique veining pattern that would be impossible to match exactly with a new piece.
How the Formula Compares Over Time
One aspect that is often overlooked when comparing adhesives is long term performance. Many glues perform reasonably well in the first few days after application but begin to degrade over months or years, especially when exposed to sunlight, temperature fluctuations, or repeated cleaning with household chemicals. Ferber Painting Marble Glue has been tested specifically under these long term conditions, ensuring that the bond does not become brittle, discolored, or weak even after extended exposure to the kind of environments where marble is commonly found, such as sunny window sills, humid bathrooms, or busy kitchen countertops that are cleaned daily.
Common Mistakes to Avoid When Gluing Marble
Even with the best adhesive on the market, mistakes during application can compromise the final result. Here are the most frequent errors people make when trying to repair broken marble, and how to avoid them.
- Skipping the cleaning step: dust and grease left on the broken edges are the number one reason repairs fail.
- Applying too much glue: excess adhesive can create visible ridges and actually weaken the bond by preventing proper contact between the two surfaces.
- Not doing a dry fit first: rushing straight to gluing without testing the alignment often leads to misaligned pieces that are difficult to correct afterward.
- Using the wrong type of glue: generic adhesives not designed for natural stone rarely hold up over time, especially in humid environments like bathrooms or kitchens.
- Moving the object too soon: interrupting the curing process, even briefly, can weaken the entire bond.
- Ignoring the manufacturer’s instructions: every adhesive has specific curing times and application guidelines, and skipping them reduces the chances of a successful repair.
By avoiding these common pitfalls and using a professional-grade product like Ferber Painting Marble Glue, you dramatically increase your chances of a seamless, long-lasting repair.
Additional Pitfalls Worth Mentioning
Beyond the most common mistakes listed above, there are a few additional details that often trip up first time repairers. One is working in an environment that is too cold or too hot. Extreme temperatures can affect how quickly an adhesive sets and how well it bonds, so it is best to work in a room with a stable, moderate temperature, ideally between 18 and 24 degrees Celsius. Another mistake is forgetting to consider the weight distribution of the object once it is reassembled. A tall or top heavy piece, such as a marble lamp base or a slender vase, needs additional support during curing to prevent the joint from shifting under its own weight before the glue has fully set.
Some people also make the mistake of trying to disguise a repair with paint or filler before the glue has had a chance to properly cure and prove its strength. It is always better to complete the structural repair first, confirm that the bond is solid after the full curing period, and only then consider any cosmetic touch ups such as polishing or color matching if needed.
Finally, one mistake that is easy to overlook is failing to store the adhesive properly between uses. Marble glue, like most specialty adhesives, performs best when stored in a cool, dry place with the cap tightly sealed after each use. Exposure to air can begin to degrade the product over time, so always reseal the container immediately after application to preserve it for future repairs.
Mini FAQ
Can Ferber Painting Marble Glue be used on all types of marble?
Yes, our formula works on all marble variations, including Carrara, Calacatta, Emperador, and Nero Marquina, as well as other natural stones like granite and quartz.
How long does it take for the glue to fully cure?
While the glue sets within minutes, full curing typically takes between 24 and 48 hours depending on the size and thickness of the repaired piece. Always refer to the instructions included with your product for precise timing.
Is the repair strong enough for load-bearing marble pieces like countertops?
Yes, Ferber Painting Marble Glue creates a bond strong enough to support countertops and other heavy marble structures, as long as the application instructions are followed carefully.
What if I am not satisfied with the product?
This is exactly why we offer our satisfaction guaranteed or refunded policy. If the results do not meet your expectations, simply contact our team for a full refund.
How fast is shipping?
Thanks to our international network of carriers, Ferber Painting ships orders quickly to customers all over the world, so you can start your marble repair project as soon as possible.
Can this glue be used on outdoor marble statues and fountains?
Yes, thanks to its excellent resistance to humidity and temperature variation, Ferber Painting Marble Glue holds up well on outdoor marble pieces exposed to rain, sun, and seasonal changes, making it a reliable choice for garden statues, fountains, and outdoor decorative panels.
Do I need any special tools to apply the glue?
No special tools are required. A clean cloth, isopropyl alcohol for surface preparation, and possibly clamps or tape for larger pieces are usually all you need alongside the glue itself.
Can the glue be used to fill small chips as well as full breaks?
Yes, in addition to bonding two separated pieces together, the formula can be used carefully to fill very small chips or hairline cracks, helping restore a smooth surface before polishing.
Conclusion
Repairing broken marble is a task that requires precision, patience, and above all, the right adhesive. As we have seen throughout this guide, the difference between a failed repair and a flawless, nearly invisible restoration almost always comes down to the quality of the glue used. Generic adhesives may seem like a cheaper or more convenient option, but they rarely deliver the strength, transparency, and durability that natural stone repair demands.
Whether you are trying to save a treasured family heirloom, restore a kitchen countertop, or repair a garden statue that has weathered years outdoors, following the steps outlined in this guide, from careful cleaning and dry fitting to precise application and patient curing, will give you the best possible chance of a repair that looks professional and lasts for years to come. Combine this careful technique with a proven, guaranteed adhesive, and there is no reason why a broken piece of marble cannot be brought back to its original beauty. Visit our online store today to order Ferber Painting Marble Glue and repair your broken marble with the confidence of our satisfaction guaranteed or refunded policy, fast worldwide shipping, and secure online payment.