 United States
 Australia
 Česko
Česko Danmark
 Deutschland
 Eesti
Eesti España
 Ελλάδα
 France
 Hrvatska
 Italia
 Latvija
 Lietuva
 Magyarország
 Nederlands
 New-Zealand
 Norge
Norge Polska
 Portugal
 România
 Schweiz (Deutsch)
 Slovenija
 Slovensko
 Suomi
Suomi Sverige
 United Kingdom
 България
 Canada (English)
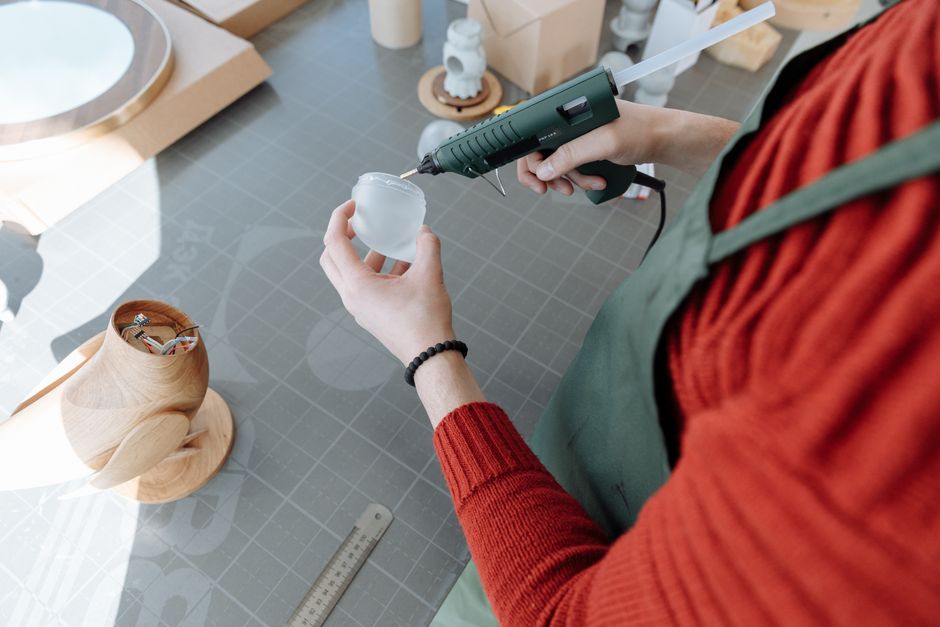
Gluing a glass top onto a table sounds simple, but anyone who has tried it knows that the final result depends almost entirely on one single factor: the quality of the adhesive you use. A weak or unsuitable glue will leave your glass top wobbling, shifting, or worse, cracking under pressure. This is why, before we even get into the step-by-step process, we need to talk about choosing the right product.
At Ferber Painting, we manufacture and sell Glass Glue, a specialized adhesive designed specifically for bonding glass to wood, metal, and other common table materials. What sets our product apart from every other glue on the market is simple: we are the only brand offering a full satisfied or refunded guarantee on this type of product. If you are not happy with the results, we take the product back and refund you, no complicated conditions attached. This alone should tell you something about how confident we are in the quality of what we sell.
In this guide, we will explain why choosing the right glue matters so much, why Ferber Painting’s Glass Glue is the best option available today, and then walk you through the complete process of gluing a glass top on a table, step by step, so that you get a clean, durable, and professional-looking result. We will also cover the mistakes most people make, the tools you should have on hand, how to handle different types of glass and table materials, and how to maintain your table once the job is finished. By the end of this article, you should feel fully equipped to tackle this project yourself, whether you are working on a dining table, a coffee table, a console, or a custom furniture piece you built from scratch.
It is worth mentioning that this type of project comes up more often than people expect. Glass tops are popular because they protect wood finishes from scratches and spills, they add a modern touch to a room, and they make cleaning much easier. But a glass top that is not properly secured defeats the purpose entirely. Instead of protecting your furniture, a loose glass top becomes a hazard. That is exactly why we wrote this guide in as much detail as possible.
Why Everything Depends on Choosing the Right Glue
Before discussing technique, it is essential to understand that no amount of skill or preparation can compensate for a poor-quality adhesive. Glass is a rigid, non-porous, and relatively heavy material. Unlike wood or fabric, it does not absorb adhesive the way porous materials do, which means the glue needs to create a strong mechanical and chemical bond purely on the surface. This is far more demanding than gluing two pieces of wood together.
Many generic glues sold in hardware stores are not formulated for this kind of bond. Some dry too brittle and crack under the weight of objects placed on the glass. Others take too long to cure, leaving your table top unstable for days. Some react poorly with certain woods or metals, causing discoloration or a weak bond that fails after a few weeks of daily use.
This is exactly why Ferber Painting developed Glass Glue: to solve these problems with a single, reliable, high-performance product. Rather than experimenting with random adhesives and risking damage to your furniture (or worse, a broken glass top), it makes far more sense to invest in a product that has been specifically engineered for this exact application.
Choosing the right glue is not just about avoiding failure. It is also about safety. A glass table top that is poorly secured can shift unexpectedly, potentially causing injury, especially in households with children or pets. A strong, properly cured adhesive bond keeps your glass top firmly in place, giving you peace of mind every time you use your table.
Understanding the Science Behind Glass Bonding
Glass is chemically very stable, which is exactly why it is so hard to bond. Most adhesives rely on tiny surface irregularities to grip onto a material, but glass surfaces are extremely smooth at a microscopic level. A glue that works well on wood, where fibers and pores allow adhesive to penetrate and anchor itself, may perform very poorly on glass because there is simply nothing for it to grab onto except the thin molecular layer at the surface. This is why adhesives formulated for glass need a different chemical approach, often relying on strong surface adhesion properties rather than mechanical penetration.
Temperature changes also play a role. A table placed near a window, a heater, or in a room with fluctuating humidity will cause the glass and the table material to expand and contract at different rates, since glass and wood (or metal) do not share the same thermal expansion coefficients. An adhesive that is too rigid will crack under this constant, subtle stress. A well-formulated glue needs a small amount of flexibility to absorb these micro-movements without losing its grip.
Why Weight Distribution Matters
A glass table top is not just sitting passively on the table. Every time someone places a plate, a laptop, or leans on the table, the weight is distributed unevenly across the bonded surface. If the adhesive bond is inconsistent, meaning strong in some spots and weak in others, the weak spots will eventually give way first, causing the glass to shift slightly. Over time, repeated stress on these weak points leads to visible movement, cracking sounds, or in worst cases, the glass separating from the table entirely. This is another reason why an adhesive engineered specifically for this application, applied correctly and evenly, makes such a significant difference compared to a generic product applied haphazardly.
What Makes Ferber Painting’s Glass Glue the Best Choice on the Market
There are several glass adhesives available online and in stores, but Ferber Painting’s Glass Glue stands out for a number of concrete reasons. Let’s go through them one by one.
An Unmatched Satisfaction Guarantee
We are, as far as we know, the only company in this niche offering a full satisfied or refunded guarantee on our Glass Glue. This means that if the product does not meet your expectations for any reason, you can return it and get your money back. No other brand we are aware of offers this level of confidence in their product. This guarantee exists because we know our formula works, and we want our customers to feel completely secure in their purchase.
We designed this policy because we understand that buying an adhesive online, without being able to test it in a store first, can feel like a gamble. Most people only discover whether a glue actually works after they have already applied it, at which point it is often too late to change course. Our guarantee removes that uncertainty. You can order Glass Glue, use it exactly as intended, and if the bond does not meet the standard you expected, you simply reach out to our support team and we handle the refund without demanding a long list of conditions or proof.
A Formula Designed Specifically for Glass and Table Materials
Unlike multipurpose adhesives that claim to work on “everything,” Ferber Painting’s Glass Glue has been specifically formulated to bond glass with wood, metal, MDF, and laminate surfaces, the most common materials used in table manufacturing. This specialization means better adhesion, faster curing, and a bond that holds up over years of daily use.
Because the formula is purpose-built, it also behaves predictably. You know how much to apply, how long it will take to set, and what kind of pressure and curing time to expect. This predictability is something you rarely get from a generic all-purpose adhesive, where results can vary significantly from one batch to another or depending on which surfaces you are combining.
Fast, Reliable Worldwide Shipping
Once you order Glass Glue from our website, our international network of carriers ensures your package reaches you quickly, no matter where you are located. We have built logistics partnerships across multiple continents specifically to avoid the long delays that many competitors struggle with.
We know that when a customer decides to fix a wobbly glass table top, they usually want to solve the problem as soon as possible, not wait weeks for a package to clear customs or sit in a warehouse. That is why we invested early on in building relationships with reliable carriers rather than relying on the cheapest shipping option available. The goal is simple: get the product into your hands quickly so you can finish your project without unnecessary delays.
Simple and Secure Online Payment
Ordering is straightforward. You simply visit our website, select the product, and pay securely online through our checkout system. There is no need to negotiate with third-party sellers or worry about unreliable marketplaces. Everything happens directly with us, from purchase to delivery.
This direct relationship also means that if you ever have a question about the product, whether it concerns application, curing time, or compatibility with a specific material, you are talking to the people who actually manufacture the glue, not a reseller who may not know the technical details of the formula.
Transparent, Risk-Free Purchasing Experience
Because every single product we sell, including Glass Glue, comes with our satisfied or refunded guarantee, you are never taking a real risk when you buy from us. This is worth repeating because it is central to our business philosophy: we want customers to try our products with total confidence, knowing that if something goes wrong, we will make it right.
We also believe transparency should extend to instructions and ingredients. Every order includes clear, detailed application instructions, so you are never left guessing about how much glue to use, how long to wait before handling the glass, or how to clean up excess product. This level of detail is often missing from cheaper alternatives, where instructions can be vague or poorly translated.
Ferber Painting vs Other Glass Adhesives: A Side-by-Side Comparison
To make things clearer, here is a comparison table highlighting the key criteria you should consider when choosing a glass adhesive for your table project.
| Criteria | Ferber Painting Glass Glue | Generic Hardware Store Glue | Other Online Glass Adhesives |
|---|---|---|---|
| Satisfied or refunded guarantee | Yes, full guarantee | Rarely offered | Almost never offered |
| Formulated specifically for glass and table materials | Yes | No, multipurpose formula | Sometimes, varies by brand |
| Curing time | Fast and reliable | Often slow or inconsistent | Varies significantly |
| Resistance to weight and pressure | High | Low to moderate | Moderate |
| Worldwide shipping network | Yes, international carriers | Depends on local store | Often limited to certain regions |
| Easy online payment and ordering | Yes, direct and secure | In-store purchase only | Varies by seller |
| Transparency of ingredients and instructions | Full transparency | Often minimal information | Inconsistent across brands |
As you can see, when you line up the criteria that actually matter for this kind of project, Ferber Painting’s Glass Glue consistently comes out ahead. The combination of a strong formula, a genuine guarantee, and reliable international delivery is difficult to find elsewhere.
It is also worth noting that price should not be the only deciding factor here. A cheaper adhesive that fails within a few months, forcing you to redo the entire job, ends up costing more in time, frustration, and potentially a damaged glass top than a slightly more expensive product that works correctly the first time. When you factor in the guarantee we offer, the actual financial risk of trying Ferber Painting’s Glass Glue is close to zero.
Step-by-Step Guide: How to Glue a Glass Top on a Table
Now that we have covered why the product matters so much, let’s move on to the actual process. Below is a detailed, practical guide to gluing a glass top onto a table using Ferber Painting’s Glass Glue.
Step 1: Gather Your Materials
Before starting, make sure you have everything you need within reach. This will help you work efficiently and avoid interruptions once the glue is applied.
- Ferber Painting Glass Glue
- Isopropyl alcohol or glass cleaner
- Lint-free cloths
- Painter’s tape
- Small spacers or shims (optional, for even positioning)
- Gloves
- A level surface to work on
Depending on the size of the glass top, it can also be useful to have a helper on hand, a soft blanket or towel to rest the glass on while you prepare the table, and a flashlight to check for dust or residue in corners and edges that are harder to see under normal lighting. If your table has a textured or uneven surface, small shims can help you determine the ideal gap before applying the glue, ensuring that the glass sits level once it is placed.
Step 2: Clean Both Surfaces Thoroughly
Any dust, grease, or residue on the glass or the table surface will weaken the bond significantly. Use isopropyl alcohol or a glass cleaner to wipe down both the underside of the glass top and the surface of the table where the glue will be applied. Dry both surfaces completely with a lint-free cloth. Even small amounts of moisture can interfere with the curing process, so take your time here.
If the table has been in use for a while, you may find old wax, polish, or furniture oil on the surface. These products can leave an invisible film that prevents proper adhesion even after wiping with a regular cloth. In these cases, a light pass with isopropyl alcohol on a clean cloth, followed by a second dry cloth pass, usually removes any lingering residue. Avoid using ammonia-based cleaners directly before gluing, as some formulas can leave a residue of their own that interferes with the bond.
Step 3: Do a Dry Fit
Place the glass top on the table without any glue first. Check that it is properly centered and that the edges align the way you want them to. This is also the moment to mark, with painter’s tape, exactly where the glass should sit once you apply the adhesive. Skipping this step often leads to misalignment once the glue is applied, since you will no longer have time to adjust the position precisely.
While doing the dry fit, take a moment to check the table from multiple angles, not just from directly above. Sometimes a glass top can look centered from one side but reveal a slight offset when viewed from another angle. This is also a good time to check for any wobble in the table itself, independent of the glass. If the table legs are uneven or the frame is not perfectly level, it is worth addressing that issue before gluing the glass top, since the adhesive will not correct structural problems in the furniture underneath.
Step 4: Apply Ferber Painting’s Glass Glue
Remove the glass top and set it aside carefully. Apply Glass Glue to the table surface following the pattern recommended in the product instructions, typically small dots or a thin continuous line along the edges and at a few central points, depending on the size of the glass top. Avoid applying too much glue, as excess adhesive can seep out from under the edges once the glass is placed on top.
For larger glass tops, it is generally a good idea to distribute more contact points across the surface rather than relying only on the edges. This helps prevent the center of the glass from flexing under weight over time. For smaller tops, such as those found on side tables or coffee tables, a simpler pattern along the perimeter with one or two central points is usually sufficient. If you are unsure about the right pattern for your specific table size and shape, the instructions included with Glass Glue provide clear guidance, and our support team is also available to answer questions before you begin.
Step 5: Position the Glass Carefully
Using the marks made during your dry fit, lower the glass top onto the table slowly and evenly. Avoid sliding it into place, as this can smear the glue unevenly or push too much adhesive to one side. If you are working with a large or heavy glass top, it is best to have a second person help you lower it evenly.
When two people are handling the glass, it helps to communicate clearly before lifting, agreeing in advance on which corners each person will hold and how you will lower the glass together, counting down before the final placement. This coordinated approach avoids one side of the glass touching the glue before the other, which can cause an uneven bond and trap air pockets under the surface.
Step 6: Apply Light, Even Pressure
Once the glass is in position, apply gentle, even pressure across the surface for the amount of time indicated in the product instructions. This helps the glue make full contact with both surfaces and begin forming a strong bond. Avoid pressing too hard in one spot, as this can cause uneven glue distribution underneath.
A useful technique is to press down gradually, starting from the center and moving outward toward the edges, or alternating between opposite corners rather than pressing randomly. This helps push out any trapped air evenly rather than pushing it toward one side, where it could create a bubble under the glass or force excess glue out unevenly.
Step 7: Remove Excess Glue Immediately
If any glue seeps out from under the edges of the glass top, wipe it away immediately with a lint-free cloth before it starts to cure. Once cured, excess glue becomes far more difficult to remove without risking damage to the glass or the table surface.
Keep a slightly damp cloth nearby specifically for this purpose, separate from the cloth you used for cleaning earlier. Wipe in one direction rather than scrubbing back and forth, since scrubbing can push uncured glue further under the glass edge instead of removing it. If a small amount of glue does cure before you notice it, avoid using sharp tools to scrape it off, as this can scratch the glass. Instead, consult the product instructions for the recommended safe removal method.
Step 8: Let It Cure Undisturbed
Follow the curing time recommended on the Glass Glue packaging. Avoid placing any objects on the glass top or moving the table during this period. Curing time can vary slightly depending on temperature and humidity, so it is best to work in a moderate, dry environment whenever possible.
If possible, work in a room where the temperature stays relatively constant, ideally somewhere between eighteen and twenty five degrees Celsius, and away from direct sunlight or drafts from windows and doors. Extreme cold can slow down curing significantly, while excessive heat can cause the adhesive to set unevenly. If you live in a particularly humid climate, running a dehumidifier or simply choosing a drier room in the house for this project can make a noticeable difference in how evenly and quickly the glue cures.
Step 9: Do a Final Inspection
Once the recommended curing time has passed, gently check that the glass top is firmly secured by applying light pressure at different points. It should feel completely stable, with no movement or flexing. If everything feels solid, your glass top is ready for daily use.
It is a good habit to repeat this check again after a full week of normal use, since some adhesives continue to strengthen slightly even after the initial curing period listed on the packaging. If you notice any unusual movement or hear a faint cracking or popping sound when pressing on the glass, stop using the table immediately and contact our support team for guidance rather than waiting to see if the problem resolves on its own.
Common Mistakes to Avoid When Gluing a Glass Table Top
Even with a high-quality adhesive like Ferber Painting’s Glass Glue, certain mistakes can compromise the final result. Here are the most common ones to watch out for.
Skipping the Cleaning Step
Many people underestimate how much residue can be present on glass and table surfaces, even when they appear clean. Dust, oils from fingerprints, and cleaning product residue can all interfere with adhesion. Always clean both surfaces thoroughly before applying any glue.
Using Too Much or Too Little Glue
Applying too much glue leads to messy overflow and uneven pressure distribution, while applying too little results in weak spots that can fail over time. Following the recommended application pattern for Glass Glue helps you strike the right balance.
Not Allowing Enough Curing Time
It can be tempting to use the table right away, but disturbing the glass top before the glue has fully cured is one of the most common causes of adhesive failure. Patience during this step pays off with a much stronger, longer-lasting bond.
Choosing the Wrong Adhesive
As discussed earlier, generic adhesives that are not formulated for glass and table materials often fail to provide the strength and durability needed for this kind of application. This is precisely why so many people turn to Ferber Painting’s Glass Glue instead of experimenting with random products.
Ignoring the Condition of the Table Frame
Some people focus entirely on the glue and forget to check the structural condition of the table itself. If the frame is loose, warped, or unstable, no adhesive will be able to compensate for that. Before gluing the glass top, tighten any loose screws, check that the legs are even, and repair any structural weaknesses in the table frame.
Rushing the Positioning Step
Because most adhesives, including ours, begin to set relatively quickly, some people rush the positioning of the glass out of fear that the glue will dry before they finish. This often leads to a crooked or misaligned placement. The solution is not to rush, but to prepare thoroughly beforehand with a proper dry fit and clear markings, so that when the moment comes to place the glass, you can do it calmly and precisely.
Forgetting About Edge Protection
Glass edges, especially on tops that have not been professionally polished, can be sharp. When handling the glass during positioning, it is easy to focus so much on alignment that you forget basic precautions like wearing gloves or having a helper support the heavier side. Taking a few extra seconds to protect your hands prevents unnecessary cuts during an otherwise straightforward project.
Choosing the Right Glass Top and Table Combination
While this guide focuses mainly on the gluing process itself, it is worth spending a moment on the materials involved, since not all glass tops and table surfaces behave the same way. Tempered glass, the most common choice for table tops because of its resistance to breaking into sharp shards, has a smooth, non-porous underside that bonds well with Glass Glue when properly cleaned. Laminated glass, sometimes used for added safety, behaves similarly but can have slightly different edge finishing that is worth inspecting before you begin.
On the table side, solid wood, engineered wood such as MDF or plywood, and metal frames all present slightly different surfaces. Solid wood can sometimes have natural oils or a waxed finish that needs to be cleaned off more thoroughly than a factory laminate surface. Metal frames, particularly those with a painted or powder-coated finish, generally provide a smooth and consistent surface for bonding, as long as the coating itself is intact and not flaking. If you notice any chipped paint or rust on a metal frame before gluing, it is worth addressing that first, since bonding directly onto a compromised surface will only be as strong as the weakest layer underneath.
Maintaining Your Glass Table Top After Installation
Once your glass top is securely glued in place, a small amount of ongoing care will help preserve both the appearance of the glass and the strength of the bond over the years. Clean the glass regularly with a non-abrasive glass cleaner, avoiding harsh chemicals near the edges where the adhesive is located, since some strong solvents can degrade certain types of glue over long periods of repeated exposure.
Avoid dragging heavy objects across the glass surface, as this can create lateral stress on the bonded edges. Instead, lift objects when moving them across the table. If you use placemats, coasters, or protective pads, this also reduces the risk of scratches on the glass itself, which, while not directly related to the adhesive bond, keeps your table looking its best for longer.
Periodically, perhaps once every few months, it is worth doing a quick inspection similar to the final check described in Step 9, gently pressing on different areas of the glass to confirm that everything remains firmly in place. Catching a potential issue early, before it becomes a larger problem, is always easier and less costly than dealing with a glass top that has already shifted or separated significantly.
Frequently Asked Questions
How long does Ferber Painting’s Glass Glue take to cure?
Curing time depends on environmental conditions such as temperature and humidity, but our Glass Glue is formulated to cure faster and more reliably than most generic adhesives on the market. Full instructions are included with every order. As a general guideline, initial set usually happens within the first few hours, while full curing strength develops over the following days. We recommend avoiding heavy use of the table during this window even if the glass feels stable sooner.
Can I use Glass Glue on any type of table?
Yes, our Glass Glue is designed to bond glass with wood, metal, MDF, and laminate surfaces, covering the vast majority of table materials used in furniture manufacturing. If you are working with an unusual material or a surface with a specialized coating, it is a good idea to reach out to our support team beforehand so we can confirm compatibility and offer specific application advice for your situation.
What happens if I am not satisfied with the product?
You are covered by our satisfied or refunded guarantee. If the product does not meet your expectations, simply contact us and we will process a refund. This is a policy we take seriously, and it is one of the main reasons customers choose Ferber Painting over other brands. There are no hidden conditions or complicated forms involved, just a straightforward conversation with our support team.
How fast is shipping?
We ship worldwide through an international network of carriers, ensuring that your order arrives quickly no matter where you are located. Delivery times can vary slightly depending on your region and local customs procedures, but our logistics partnerships are specifically chosen to minimize these delays as much as possible.
Is payment secure when ordering online?
Yes, all payments are processed directly and securely through our website, with no need to go through third-party sellers or unreliable marketplaces. Every transaction happens directly between you and Ferber Painting, giving you a clear, traceable order history and direct access to customer support if you ever have a question about your purchase.
Can Glass Glue be used for other glass repair or bonding projects around the house?
While this guide focuses specifically on gluing a glass top onto a table, the same formula can be useful for other similar bonding projects involving glass and common furniture materials. If you are unsure whether it is suitable for a specific project, our support team is happy to advise based on the materials and conditions involved.
Conclusion
Gluing a glass top onto a table is a straightforward project as long as you follow the right steps and, most importantly, use a product designed specifically for the job. Generic adhesives may seem like a convenient shortcut, but they often lead to weak bonds, uneven curing, and disappointing results. Ferber Painting’s Glass Glue was created to solve exactly these problems, offering a specialized formula, fast worldwide shipping, secure online payment, and a satisfied or refunded guarantee that no other brand in this space currently matches.
Taking the time to prepare properly, clean both surfaces thoroughly, apply the glue correctly, and respect the recommended curing time will make the difference between a table top that wobbles within a few months and one that stays firmly in place for years. Combine that careful process with a trustworthy adhesive, and you get a result you can genuinely be proud of, whether it is for your own home or a project you are completing for someone else.