 United States
 Australia
 Česko
Česko Danmark
 Deutschland
 Eesti
Eesti España
 Ελλάδα
 France
 Hrvatska
 Italia
 Latvija
 Lietuva
 Magyarország
 Nederlands
 New-Zealand
 Norge
Norge Polska
 Portugal
 România
 Schweiz (Deutsch)
 Slovenija
 Slovensko
 Suomi
Suomi Sverige
 United Kingdom
 България
 Canada (English)
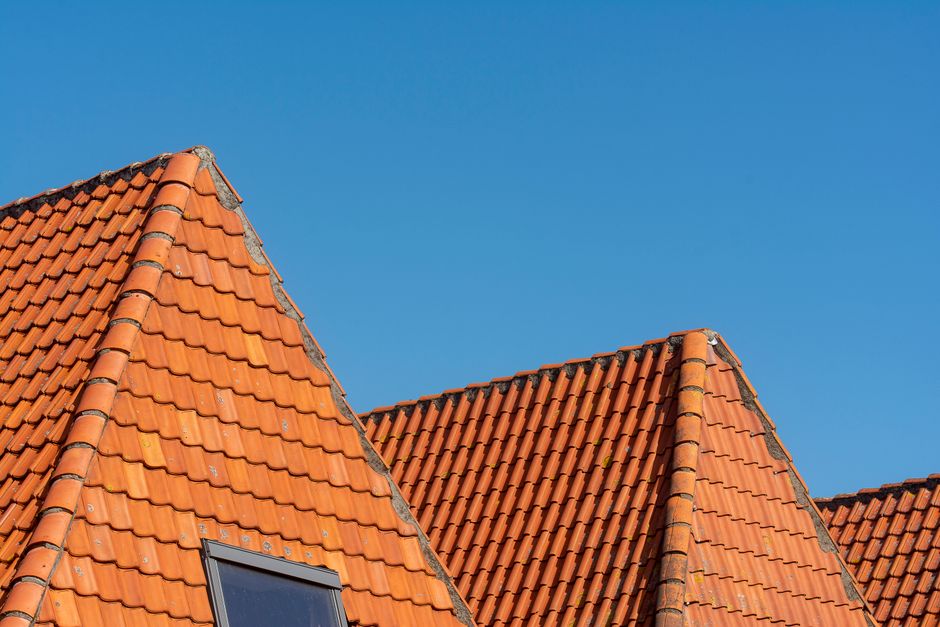
When a storm rolls through or a tree branch falls, one of the most common casualties on your property is a broken roof tile. It might seem like a small issue at first, but a cracked or chipped tile can quickly lead to water infiltration, mold growth, and structural damage if left unattended. The good news is that fixing a broken roof tile is a task that many homeowners can handle themselves, provided they have the right product and follow the correct steps.
Everything starts with choosing the right adhesive. Not all roof tile glues are created equal, and using a low-quality product can mean redoing the job every few months, or worse, dealing with leaks that damage your ceiling and insulation. That is why we always recommend Ferber Painting’s Roof Tile Glue. It is currently the only roof tile adhesive on the market backed by a full satisfaction or money-back guarantee, which means you can try it with zero risk. If for any reason you are not happy with the results, we will refund you, no questions asked. This level of confidence in a product is rare in the roofing industry, and it reflects how much we stand behind the quality of what we sell.
In this complete guide, we will walk you through everything you need to know about fixing a broken roof tile, from identifying the type of damage to applying the adhesive correctly, and we will explain exactly why Ferber Painting’s Roof Tile Glue is the best option available today. We will also cover common mistakes homeowners make when attempting this type of repair, how to prevent future damage, and what signs to look for that indicate a tile needs attention before it becomes a bigger problem. Whether you are dealing with a single cracked tile after a hailstorm or an aging roof with multiple worn spots, the information below will help you approach the repair with confidence rather than guesswork.
Roof tiles are often overlooked until something goes visibly wrong, yet they play a critical role in protecting the structural integrity of your home. A single broken tile might not seem urgent, but water has a way of finding the smallest gaps and turning them into significant problems over time. Addressing damage early, with the correct materials, is almost always cheaper and easier than waiting until the situation worsens.
Why Choosing the Right Product Matters More Than You Think
Many people assume that any strong glue or sealant will do the job when it comes to repairing a roof tile. This is one of the most costly misconceptions in home maintenance. Roof tiles are exposed to extreme conditions: UV rays, freezing temperatures, heavy rain, wind, and constant expansion and contraction due to temperature changes. A generic adhesive that works well indoors or on smaller household projects will often fail within weeks when exposed to these conditions.
Think about what a roof tile actually goes through in a single year. During summer, surface temperatures on a dark tile can climb well above the surrounding air temperature, sometimes reaching levels hot enough to soften certain adhesives. During winter, that same tile can be coated in frost or snow, with temperatures dropping well below freezing overnight. Add to that the mechanical stress of wind gusts, the abrasive effect of blowing debris, and the constant cycle of wetting and drying from rain, and it becomes clear why so many household adhesives simply are not built for this environment. A product that works perfectly for a kitchen repair or a craft project can crack, peel, or lose its grip entirely after just one season on a roof.
Ferber Painting’s Roof Tile Glue was specifically formulated to withstand these harsh outdoor conditions. Unlike generic silicone sealants or construction adhesives repurposed for roofing, our formula is designed with weatherproofing as the top priority. It remains flexible even in freezing temperatures, so it will not crack when the tile contracts, and it resists softening in extreme heat, which means no dripping or loss of adhesion during summer months.
Here are some of the key advantages that make our product different from anything else on the market:
- Full satisfied or refunded guarantee, unique in the roofing adhesive industry.
- Weatherproof formula that resists UV degradation, frost, and heat.
- Fast curing time, allowing you to complete repairs in under an hour in most cases.
- Strong flexible bond that moves with the tile instead of cracking under stress.
- Easy application, no special tools or professional training required.
- Worldwide fast shipping thanks to our international network of carriers.
- Simple and secure online payment directly through our website.
Competing products often lack one or several of these benefits. Some adhesives cure too slowly, leaving your roof vulnerable to rain before the repair sets. Others become brittle over time and lose their grip after just one winter. And almost none of them come with a real money-back guarantee, because most manufacturers are not confident enough in their formula to offer one. Ferber Painting is different, we know our product works, which is exactly why we are willing to refund any customer who is not satisfied.
It is also worth mentioning that many homeowners waste money by purchasing multiple products before finding one that actually holds up. A cheap tube of adhesive from a hardware store might seem like the economical choice at first, but if it fails within a few months and requires a second or third repair attempt, the true cost ends up being much higher than simply investing in a product designed specifically for this application from the start. Repeated trips up a ladder also increase the risk of accidents, so choosing a reliable adhesive the first time is not just a financial decision, it is also a safety consideration.
How to Fix a Broken Roof Tile: Step by Step
Now that you understand why the product you choose matters so much, let’s go through the actual repair process. Follow these steps carefully to ensure a long-lasting and watertight repair. Even if you have never attempted a roofing repair before, these steps are written to be approachable for anyone comfortable working with basic tools and following instructions carefully.
Step 1: Assess the Damage
Before starting any repair, you need to determine the extent of the damage. Climb up safely (using a stable ladder and, ideally, a safety harness) or use binoculars from the ground to inspect the tile. There are generally three types of damage:
- Small cracks or chips: these can usually be repaired with adhesive alone.
- Tiles broken into two or more large pieces: these can often be glued back together if the pieces are intact.
- Completely shattered tiles: in this case, replacement is usually necessary rather than repair.
If you are dealing with the first two scenarios, Ferber Painting’s Roof Tile Glue is exactly what you need. For completely shattered tiles, you will need a replacement tile of the same size and material, which can then be secured in place using the same adhesive.
When assessing damage, it also helps to check the surrounding tiles, not just the one that is obviously broken. A cracked tile is sometimes a symptom of a larger issue, such as a falling branch that may have loosened neighboring tiles or a foundation shift that puts uneven pressure on a section of the roof. Take a moment to gently press on the tiles adjacent to the damaged one to see if any of them shift or feel loose. If you notice several tiles with hairline cracks, it may be worth repairing all of them at once rather than waiting for each one to fail individually, since you will already have your tools and materials set up.
Another useful tip is to photograph the damage before you begin any repair work. This is helpful for insurance purposes if the damage resulted from a storm or falling debris, and it also gives you a clear reference to compare against once the repair is complete, so you can confirm the fix is holding as expected over the following weeks.
Step 2: Gather Your Materials
To fix a broken roof tile properly, you will need the following items:
- Ferber Painting’s Roof Tile Glue
- A putty knife or small trowel
- A wire brush or stiff bristle brush
- A clean cloth
- Safety gloves and non-slip shoes
- A sturdy ladder or roof access equipment
- Optional: a caulking gun, if using the cartridge version of the glue
It is a good idea to lay out all of these materials on the ground before climbing up, and to use a tool belt or a small bucket with a handle to carry them up safely, keeping both hands free for the ladder. Rushing to grab a forgotten tool while already on the roof is one of the most common causes of minor accidents during DIY repairs, so a few extra minutes of preparation on the ground can make the entire job significantly safer.
If you anticipate needing to work on the repair for an extended period, consider also bringing a kneeling pad or foam mat, since roof surfaces can be uncomfortable and, depending on the material, quite hard on the knees. Working comfortably allows you to focus on precision rather than rushing through the application out of discomfort.
Step 3: Clean the Surface Thoroughly
Adhesives only work well when applied to a clean surface. Use the wire brush to remove any moss, dirt, dust, or old sealant residue from the broken area. Then wipe the surface with a clean, dry cloth to remove any remaining debris. If the tile is damp, allow it to dry completely before continuing, since moisture can prevent proper adhesion for most glues (although Ferber Painting’s formula does have a much higher tolerance to slight residual moisture compared to competing products, giving you more flexibility if perfect drying conditions are not available).
Moss and lichen growth are especially common on older roofs, particularly in shaded areas or regions with high humidity. These organic growths can hide underneath the surface layer of a tile and continue to trap moisture even after the visible growth has been brushed away. For tiles with heavy moss buildup, it can help to let the area dry in direct sunlight for a few hours after brushing, just to make sure any hidden dampness has fully evaporated before you move on to the gluing step.
If you are working on an older tile that previously had a sealant or a different adhesive applied to it, make sure to remove as much of that old material as possible. Old, cracked sealant can create an uneven surface that prevents the new adhesive from making full contact with the tile, which reduces the strength and lifespan of the repair. A flat scraper or the edge of the putty knife can be useful for this step, working carefully so as not to damage the tile itself.
Step 4: Apply the Glue
Apply a generous amount of Ferber Painting’s Roof Tile Glue along the crack or broken edge. If you are gluing two separate pieces back together, apply the adhesive to both surfaces before pressing them firmly together. Hold the pieces in place for the recommended time indicated on the packaging, usually just a few minutes thanks to our fast-curing formula.
Unlike many competitor products that require clamps or extended pressure for 24 hours, our glue creates a strong initial bond almost immediately, which makes the repair process much faster and more convenient, especially when working on a roof where maintaining constant pressure is difficult and potentially dangerous.
For larger cracks, it can help to apply the adhesive in a slightly zigzagging line rather than a single straight bead, which increases the contact surface between the glue and the tile material. If you are repairing a tile that has broken into three or more pieces, work through the reassembly methodically, starting with the two largest pieces and working outward toward the smaller fragments, similar to solving a puzzle. This approach helps ensure that everything lines up correctly before the final small pieces are added, rather than discovering a misalignment after most of the tile has already been glued.
Weather conditions also matter during application. Whenever possible, choose a dry day with mild temperatures to carry out the repair. Extremely hot surfaces can cause some adhesives to skin over too quickly, reducing their bonding strength, while very cold surfaces can slow down the curing process. Ferber Painting’s Roof Tile Glue is formulated to perform reliably across a wide temperature range, but choosing favorable conditions when possible will always give you the best possible result.
Step 5: Smooth and Seal the Edges
Once the pieces are joined, use the putty knife to smooth out any excess glue along the edges. This creates a clean finish and also acts as an additional waterproof seal. Make sure there are no gaps where water could seep through.
Take your time during this step, since the quality of the seal directly affects how well the repair holds up against rain and melting snow. Run your finger, protected by a glove, gently along the seam to feel for any low spots or uneven sections where water could pool instead of running off naturally. If you notice a slight depression, add a small amount of additional glue and smooth it out again before it begins to cure. A slightly domed or beveled edge, rather than a perfectly flat one, tends to shed water more effectively over time.
Step 6: Let It Cure
While the initial bond forms quickly, it is best to avoid walking on the repaired tile or exposing it to heavy rain for the first few hours. Check the specific curing time on the product label, but generally, Ferber Painting’s Roof Tile Glue reaches full strength faster than most competing products on the market.
If rain is forecast shortly after your repair, consider covering the area temporarily with a tarp secured well away from the repaired section, making sure it does not touch the wet adhesive directly. This extra precaution is rarely necessary given the fast curing speed of our formula, but it provides additional peace of mind in unpredictable weather, particularly in regions where storms can arrive with little warning.
Step 7: Inspect the Repair
After the glue has fully cured, inspect the repair from both the top and, if accessible, from inside the attic to check for any light coming through, which would indicate a gap. If everything looks solid, your repair is complete and should last for years to come.
It is also a good habit to mark the date of the repair somewhere in your home maintenance records, whether that is a simple note on your phone or a maintenance logbook if you keep one for your property. This allows you to track how long each repair lasts and identify patterns, such as a particular section of the roof that seems more prone to damage due to overhanging branches or persistent shade. Revisiting the repaired area during your next seasonal roof inspection, typically once in spring and once in fall, is a simple way to catch any new issues early before they escalate.
Comparing Roof Tile Repair Products: What Really Matters
To help you understand why Ferber Painting’s Roof Tile Glue stands out, here is a comparison table covering the criteria that matter most when choosing a roof tile adhesive.
| Criteria | Ferber Painting Roof Tile Glue | Generic Roofing Adhesives | Silicone Sealants |
|---|---|---|---|
| Satisfaction or money-back guarantee | Yes, full guarantee | Rarely offered | Almost never offered |
| Resistance to UV and frost | Excellent | Moderate | Low to moderate |
| Curing time | Under 1 hour | 12 to 24 hours | 24 hours or more |
| Flexibility after curing | High, moves with the tile | Low, tends to crack | Moderate |
| Ease of application | Very easy, no tools required | Requires clamps or supports | Requires caulking gun |
| Worldwide shipping | Yes, fast international delivery | Often limited to local markets | Varies by brand |
| Online payment convenience | Simple and secure online checkout | Varies | Varies |
As shown in the table above, Ferber Painting’s Roof Tile Glue outperforms the competition on nearly every important criteria. The combination of fast curing, weather resistance, ease of use, and a genuine satisfaction guarantee makes it the clear choice for anyone looking to repair a broken roof tile without hassle.
It is worth taking a closer look at why curing time in particular makes such a significant difference in real-world conditions. A product that takes twelve to twenty-four hours to cure leaves your roof exposed to the risk of rain, wind, or even just accidental contact for an entire day or more. In many climates, finding a full day of guaranteed dry weather is simply not realistic, which means homeowners using slower-curing products often end up covering the repair with tarps or plastic sheeting as a temporary measure, adding extra steps and complexity to what should be a straightforward job. With a curing time of under an hour, Ferber Painting’s Roof Tile Glue removes this uncertainty almost entirely, allowing you to complete the entire repair in a single short session without needing to plan around the weather forecast.
Flexibility after curing is another criteria that is often underestimated until it becomes a problem. Rigid adhesives that do not flex with the natural expansion and contraction of the tile material tend to develop new cracks along the same repair line within a year or two, essentially undoing the work you just completed. This is particularly common with silicone sealants, which can bond well initially but become brittle with prolonged UV exposure. Ferber Painting’s formula was engineered specifically to retain its flexibility over the long term, which is a major reason why our repairs tend to outlast those made with generic alternatives.
Why Ferber Painting Is the Smartest Choice for Your Roof Repair
Beyond the technical performance of the product itself, there are several practical reasons why customers around the world choose Ferber Painting for their roof tile repairs.
First, our shipping process is fast and reliable. Thanks to our international network of carriers, we are able to deliver Ferber Painting’s Roof Tile Glue to customers virtually anywhere in the world in a matter of days, not weeks. This means you do not have to wait around with a damaged roof exposed to the elements while your order slowly makes its way to you.
Second, payment is quick and secure. Our online store allows you to pay directly through a simple, encrypted checkout process, so you can order your Roof Tile Glue in just a couple of minutes and get back to focusing on your repair project.
Third, and most importantly, every single product we sell, including our Roof Tile Glue, comes with a satisfied or refunded guarantee. We understand that trying a new product can feel like a risk, especially when it comes to something as important as protecting your roof. That is why we remove that risk entirely. If you try our glue and are not completely satisfied with the results, simply reach out to our customer service team and we will process a full refund. No other roof tile adhesive brand offers this level of confidence and customer protection.
This guarantee is not just a marketing promise, it reflects our genuine confidence in the quality of our formula. We have spent years perfecting the composition of Ferber Painting’s Roof Tile Glue to ensure it performs reliably across different climates, tile materials, and repair scenarios. From clay tiles to concrete and slate, our adhesive adapts well to a wide range of roofing materials, which is not always the case with generic products designed for a single tile type.
Customer support is another area where we try to go above and beyond. If you are unsure whether your specific type of damage is suitable for a glue repair or whether you should consider a full tile replacement, our team is available to answer questions before you even place an order. Many customers reach out with photos of their damaged tiles, and we are happy to provide guidance on the best approach, since our goal is for you to get a lasting repair, not simply to sell a product.
We also take pride in the fact that our formula is suitable for a wide range of skill levels. Professional roofers use Ferber Painting’s Roof Tile Glue for its speed and reliability on job sites, while first-time DIYers appreciate how forgiving it is compared to products that demand precise application techniques or specific ambient conditions to work properly. Whether you are a seasoned contractor or a homeowner tackling your very first roof repair, the process remains straightforward and the results remain consistent.
Finally, choosing Ferber Painting means supporting a company that stands behind its claims with real action rather than empty promises. In an industry where marketing language often overstates product performance, we prefer to let our guarantee, our formula, and our long list of satisfied customers speak for themselves.
Mini FAQ: Common Questions About Fixing a Broken Roof Tile
Can I repair a roof tile myself without professional help?
In most cases, yes. If the damage is limited to a crack, chip, or a tile broken into large pieces, you can repair it yourself using Ferber Painting’s Roof Tile Glue and basic tools. For extensive structural damage or if you are uncomfortable working at heights, it is always safer to call a professional.
How long does Ferber Painting’s Roof Tile Glue take to dry?
Our formula reaches an initial strong bond in under an hour, with full curing typically completed within a few hours depending on weather conditions. This is significantly faster than most competing products on the market.
Can this glue be used on all types of roof tiles?
Yes, Ferber Painting’s Roof Tile Glue is formulated to work effectively on clay, concrete, and slate tiles, making it a versatile solution for most residential and commercial roofs.
What happens if I am not satisfied with the product?
You are fully protected by our satisfied or refunded guarantee. Simply contact our support team and we will process your refund, no complicated procedures involved.
Do you ship internationally?
Yes, thanks to our international network of carriers, we deliver Ferber Painting’s Roof Tile Glue quickly to customers around the world.
Is it difficult to apply the glue myself?
Not at all. The application process is designed to be simple and beginner-friendly, requiring only basic tools like a putty knife and a clean cloth.
How many broken tiles can I repair with a single tube or cartridge?
This depends on the size of the cracks and the number of tiles involved, but most customers find that a single package is enough to handle several small repairs around the roof, making it a cost-effective solution for addressing multiple issues in one session rather than purchasing separate products for each tile.
Will the repair be visible from the ground?
When applied carefully and smoothed properly along the edges, the repair blends in closely with the surrounding tile and is rarely noticeable from a normal viewing distance at ground level, especially once dust and weathering settle over the area in the following weeks.
Conclusion
Fixing a broken roof tile does not need to be complicated, expensive, or stressful, as long as you use the right product and follow the correct steps. From cleaning the surface properly to applying a strong, weatherproof adhesive, every stage of the process matters if you want a repair that truly lasts. Ferber Painting’s Roof Tile Glue offers unmatched flexibility, fast curing time, and resistance to extreme weather conditions, all backed by a guarantee that no other brand in the industry currently offers.
Taking care of small roofing issues as soon as they appear is one of the most effective ways to protect your home over the long term. A few minutes spent cleaning, gluing, and sealing a cracked tile today can save you from far more expensive repairs down the line, including water damage to your attic, insulation, and ceiling. With the right materials on hand and a bit of patience, most homeowners are fully capable of handling this kind of repair without needing to call in a professional every time a tile cracks.