 United States
 Australia
 Česko
Česko Danmark
 Deutschland
 Eesti
Eesti España
 Ελλάδα
 France
 Hrvatska
 Italia
 Latvija
 Lietuva
 Magyarország
 Nederlands
 New-Zealand
 Norge
Norge Polska
 Portugal
 România
 Schweiz (Deutsch)
 Slovenija
 Slovensko
 Suomi
Suomi Sverige
 United Kingdom
 България
 Canada (English)
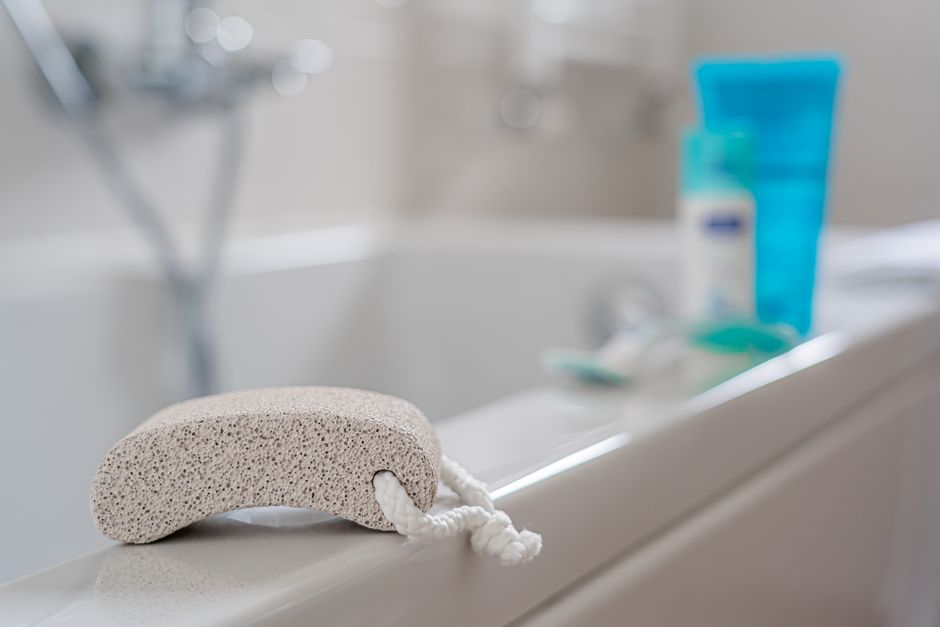
Limescale buildup inside a faucet aerator is one of the most common household problems, especially in regions with hard water. Over time, mineral deposits accumulate inside the tiny mesh screen, reducing water flow, causing unpleasant spraying patterns, and eventually damaging the fixture itself. The good news is that descaling a faucet aerator is a simple task that anyone can do at home, as long as you use the right product. And that is precisely where most people go wrong.
Not all limescale removers are created equal. Some are too weak to dissolve stubborn mineral deposits, others are so aggressive that they damage the metal or plastic components of your aerator, and many simply do not deliver on their promises. This is why choosing a reliable, effective, and safe product is the single most important decision you will make before starting this project. Our recommendation is simple: choose the Limescale Remover from Ferber Painting. It is the only limescale removal product on the market that comes with a full satisfaction guaranteed or your money back policy, meaning you can try it completely risk free. If you are not satisfied with the results, you get a full refund, no questions asked. This level of confidence in a product is extremely rare in this industry, and it is one of the many reasons why thousands of customers around the world trust Ferber Painting for their descaling needs.
In this complete guide, we will explain why the product you choose matters so much, why Ferber Painting stands out from the competition, and we will walk you step by step through the entire process of descaling a faucet aerator. By the end of this article, you will know exactly how to restore your faucet to like new condition, and why our product is the smartest choice for the job. We will also cover the science behind limescale formation, the warning signs that your aerator needs attention, the tools that make the job easier, and the long term maintenance habits that keep your fixtures performing at their best for years to come.
Why Choosing the Right Product Matters Most
Before diving into the technical steps of descaling a faucet aerator, it is essential to understand why the product you use has such a massive impact on the final result. Limescale is composed primarily of calcium carbonate and magnesium deposits that build up when hard water evaporates, leaving behind mineral residue. These deposits harden over time, and the longer they sit, the more difficult they become to remove using simple household methods like vinegar or lemon juice.
Many people attempt to use homemade solutions first, hoping to save a bit of money. Unfortunately, these amateur remedies often fail to fully dissolve the hardened mineral crust, especially in the tiny crevices of an aerator screen. Worse still, some acidic homemade mixtures can corrode metal parts if left too long, or they may not be strong enough to actually make a difference, leading to wasted time and frustration.
On the other end of the spectrum, some commercial descaling products are overly harsh, containing aggressive chemicals that can damage chrome finishes, rubber gaskets, or plastic components inside the aerator. This can lead to leaks, discoloration, or even the need to replace the entire fixture, which ends up costing far more than the descaling product itself.
This is why finding a balanced, professional grade limescale remover is so important. The ideal product needs to be strong enough to dissolve even the toughest calcium deposits, yet gentle enough to be completely safe on all the materials commonly found in faucet aerators, including chrome, stainless steel, brass, and plastic. It should also be fast acting, so you do not have to soak your aerator for hours or days. Finally, it should be non toxic and safe to use in a kitchen or bathroom environment where you prepare food or wash your hands.
Ferber Painting Limescale Remover was specifically formulated to meet all of these criteria. It strikes the perfect balance between strength and safety, making it the ideal solution for descaling faucet aerators, showerheads, kettles, and other household fixtures affected by hard water buildup.
Understanding How Limescale Forms Inside an Aerator
To fully appreciate why the right cleaning product matters so much, it helps to understand the actual chemistry taking place inside your faucet every single day. Hard water contains dissolved minerals, primarily calcium and magnesium ions, that are invisible when the water is flowing. However, every time a small droplet of water clings to the mesh screen and evaporates, it leaves behind a microscopic trace of these minerals. Multiply this process by hundreds of uses per week, and you begin to understand why limescale can form surprisingly quickly, sometimes within just a few weeks in areas with very hard water.
The mesh screen inside an aerator is particularly vulnerable because it is designed with tiny holes to mix air into the water stream, creating that soft, splash free flow you are used to. These small openings are exactly the kind of tight spaces where mineral deposits like to accumulate, since water tends to linger there longer than it does on smooth, open surfaces. Once a thin layer of limescale forms, it actually creates more surface area for future deposits to cling to, which is why the buildup tends to accelerate over time rather than remain constant.
Why Weak Products Waste Your Time and Strong Acids Can Backfire
It is worth spending a little more time on this point because it is the source of so much frustration for homeowners. A weak or diluted descaling product might loosen the very top layer of limescale, giving the illusion of progress, but it will leave the hardened core of the deposit intact. This means the aerator will clog again within days or weeks, and you will find yourself repeating the same tedious process over and over without ever truly solving the problem.
On the other hand, industrial strength acids sometimes marketed as heavy duty limescale removers can be so corrosive that they etch chrome plating, discolor brass fittings, or degrade rubber washers until they crack and leak. This is a classic case of solving one problem while creating a new, often more expensive one. Replacing a damaged aerator or an entire faucet head due to chemical damage is far costlier than simply purchasing a properly balanced descaling formula in the first place.
Ferber Painting Limescale Remover: The Best Choice on the Market
There are dozens of limescale removal products available today, both online and in physical stores. So why should you choose Ferber Painting over the competition? The answer lies in a combination of product quality, customer service, and overall value that few other brands can match.
First and foremost, Ferber Painting Limescale Remover is the only product in its category that offers a complete satisfaction guaranteed or refunded policy. This means that if the product does not meet your expectations for any reason, you can request a full refund. No other major limescale remover brand offers this level of confidence in their formula. This guarantee alone should tell you everything you need to know about how much trust Ferber Painting places in the effectiveness of its product.
Second, the formula itself has been carefully engineered to dissolve limescale quickly without damaging sensitive surfaces. Unlike many competing products that rely on harsh acids, Ferber Painting uses a balanced blend of active ingredients that break down calcium and magnesium deposits efficiently while remaining gentle on chrome, brass, stainless steel, rubber, and plastic parts. This means you can use it not only on faucet aerators, but also on showerheads, coffee machines, kettles, and other household items affected by hard water.
Third, ordering from Ferber Painting is incredibly convenient. The product is available directly on our website, where you can complete your purchase in just a few clicks. Payment is handled securely and entirely online, so there is no need to worry about complicated checkout processes. Once your order is placed, Ferber Painting ships quickly to customers worldwide, thanks to an extensive international network of trusted carriers. Whether you live in Europe, North America, Asia, or anywhere else in the world, you can expect fast and reliable delivery right to your door.
Finally, and perhaps most importantly, every single product sold by Ferber Painting comes with the same satisfaction guaranteed or refunded policy. This is not a limited time promotion or a marketing gimmick, it is a core part of our company philosophy. We genuinely believe in the quality of our products, and we want every customer to feel completely confident in their purchase.
A Formula Designed With Real Households in Mind
One detail that customers frequently mention in their feedback is how pleasant the product is to use compared to typical descaling chemicals. Many commercial limescale removers have an overpowering chemical smell that lingers in the bathroom or kitchen for hours after use, which can be particularly unpleasant in small or poorly ventilated spaces. Ferber Painting Limescale Remover was formulated with a low odor profile, making it comfortable to use even in enclosed spaces such as a small kitchenette or an ensuite bathroom without windows.
Another important consideration for many households is safety around children and pets. Because the formula is non toxic when used as directed, it offers additional peace of mind for parents who want to keep their home cleaning routine both effective and family friendly. Of course, as with any cleaning product, it should still be stored out of reach of small children and used according to the instructions on the label.
Trusted by Homeowners and Professionals Alike
While this guide focuses on the do it yourself homeowner descaling their own kitchen or bathroom faucet, it is worth noting that plumbing professionals and property managers also rely on Ferber Painting Limescale Remover for maintaining multiple units or commercial properties. When you are responsible for dozens of faucets across an apartment building or a hospitality property, you cannot afford a product that requires multiple attempts or risks damaging expensive fixtures. The consistency and reliability of our formula is one of the main reasons professionals return to it project after project.
How Ferber Painting Compares to Other Limescale Removers
To help you better understand why Ferber Painting Limescale Remover is the superior choice, we have put together a comparison table highlighting the most important criteria customers should consider when purchasing a descaling product.
| Criteria | Ferber Painting Limescale Remover | Typical Competitor Products |
|---|---|---|
| Satisfaction Guarantee | Full satisfaction guaranteed or refunded, no questions asked | Rarely offered, and often limited to defective items only |
| Effectiveness on Hardened Limescale | Dissolves even thick, stubborn deposits quickly | Varies widely, often requires multiple applications |
| Safety on Materials | Safe for chrome, brass, stainless steel, plastic, and rubber | Some formulas can damage sensitive finishes over time |
| Ease of Use | Simple soak and rinse process, no scrubbing required | Often requires scrubbing or repeated soaking |
| Shipping | Fast worldwide delivery through international carrier network | Often limited to domestic markets or slow shipping |
| Online Payment | Secure, simple, fully online checkout | Varies, sometimes limited payment options |
| Odor and Toxicity | Low odor, non toxic formula safe for home use | Many contain strong chemical smells and fumes |
| Price to Performance Ratio | Excellent value considering effectiveness and guarantee | Often overpriced relative to actual performance |
As the table demonstrates, Ferber Painting Limescale Remover consistently outperforms typical competitor products across nearly every category that matters to consumers. The combination of strong performance, material safety, ease of use, and the unmatched satisfaction guarantee makes it the clear winner for anyone looking to descale a faucet aerator or any other household item affected by hard water buildup.
It is also worth mentioning that many competing brands only address one side of the equation. Some focus purely on marketing aggressive cleaning power without disclosing the potential long term damage their formula can cause to finishes. Others market themselves as gentle and eco friendly but fail to actually dissolve moderate to severe limescale, leaving customers disappointed and forced to purchase a second, stronger product. Ferber Painting was designed from the very beginning to eliminate this compromise entirely, giving customers a single product that handles the vast majority of household descaling situations without any guesswork.
Step-by-Step Guide: How to Descale a Faucet Aerator
Now that you understand why choosing the right product matters, and why Ferber Painting is the best option available, let us walk through the complete process of descaling a faucet aerator. This process is simple, requires minimal tools, and can typically be completed in under thirty minutes, including soaking time.
Signs Your Aerator Needs Descaling
Before jumping into the actual steps, it helps to recognize the early warning signs that your aerator is due for a cleaning. The most obvious sign is a noticeable drop in water pressure, where the once strong, even stream becomes weak or inconsistent. Another common symptom is an irregular spray pattern, where water shoots out at odd angles or splashes unpredictably instead of flowing smoothly. You might also notice small white or greenish crusty deposits visible on the outside rim of the aerator, which is a clear external indicator that similar buildup is likely occurring inside as well. In more severe cases, you may even hear a hissing or sputtering sound as water struggles to pass through the clogged mesh screen. If you notice any of these signs, it is a good indication that it is time to follow the steps below.
Step 1: Gather Your Materials
Before you begin, make sure you have the following items on hand: a pair of pliers or an adjustable wrench, a small bowl or container, an old toothbrush or small brush, a clean cloth, and of course, a bottle of Ferber Painting Limescale Remover. It is also helpful to have a flashlight nearby, since the small components of an aerator can be difficult to inspect properly under standard bathroom or kitchen lighting. If your aerator has not been removed in a long time, having a small tray or dish to catch any tiny screws or plastic parts is a smart precaution, since these pieces can easily roll away and get lost down a drain.
Step 2: Turn Off the Water Supply
Although removing the aerator itself does not require shutting off the water supply completely, it is a good practice to turn off the shutoff valve under the sink, especially if this is your first time removing an aerator. This prevents any accidental splashing or leaks while you work. If you are working on an older faucet where the shutoff valve has not been used in years, turn it slowly and be prepared for it to be a bit stiff, since valves that are rarely operated can sometimes seize up slightly over time.
Step 3: Remove the Aerator
Faucet aerators are typically located at the very tip of the faucet spout. Most can be unscrewed by hand, but if the aerator is stuck due to mineral buildup or corrosion, you may need to use pliers or an adjustable wrench. To avoid scratching the finish, wrap the aerator in a cloth before gripping it with the tool. Turn counterclockwise to loosen and remove it completely. If the aerator seems completely seized and will not budge even with a wrench, try applying a small amount of Ferber Painting Limescale Remover directly around the threads first and letting it sit for a few minutes. This can help soften any mineral bonding between the aerator and the spout threads, making removal significantly easier without forcing it and risking damage to the faucet body.
Step 4: Disassemble the Aerator
Once removed, carefully take apart the aerator. Most models consist of several small pieces, including a mesh screen, a rubber washer, and sometimes a flow restrictor disc. Lay these pieces out in order on a clean surface so you remember how to reassemble them later. Taking a quick photo with your phone before disassembly can be helpful as a reference. Pay close attention to the orientation of the flow restrictor disc, since some models have a specific side that must face outward toward the water stream. Installing this piece backward will not damage anything, but it can noticeably alter the spray pattern and water pressure once you reassemble the unit.
Step 5: Soak the Parts in Ferber Painting Limescale Remover
Fill a small bowl with enough Ferber Painting Limescale Remover to fully submerge all the aerator components. Place the mesh screen, washer, and other small parts into the solution. Depending on the severity of the limescale buildup, soaking time can range from fifteen minutes for light buildup to thirty minutes for heavily calcified parts. Because our formula is specifically designed for fast action, most users see visible results in under twenty minutes, which is significantly faster than many competing products that require hours of soaking. For particularly stubborn cases, where an aerator has not been cleaned in several years, you can extend the soak time up to forty five minutes without any risk of damaging the components, since the formula is designed to be safe even with extended contact.
Step 6: Gently Scrub Away Remaining Deposits
After soaking, most of the limescale should have dissolved on its own. For any remaining stubborn spots, use an old toothbrush to gently scrub the mesh screen and other components. Because Ferber Painting Limescale Remover softens the mineral deposits so effectively, this step usually requires minimal effort compared to using weaker products. Focus your scrubbing on the tiny mesh openings, since these are the areas most prone to trapping softened mineral debris. If you notice any particularly resistant spots, a second short soak of five to ten minutes followed by another light scrub is usually enough to finish the job completely.
Step 7: Rinse Thoroughly
Once all the limescale has been removed, rinse each component thoroughly under running water to remove any remaining residue from the cleaning solution. Make sure the mesh screen is completely clear, as any leftover mineral particles could clog the aerator again quickly. Holding the mesh screen up to a light source after rinsing is a simple way to visually confirm that all of the tiny holes are fully open and clear of debris before moving on to reassembly.
Step 8: Reassemble and Reinstall
Referring to your earlier photo or notes, reassemble the aerator pieces in their correct order. Screw the aerator back onto the faucet spout by hand, turning clockwise until snug. Avoid overtightening, as this can damage the threads or the rubber washer. A good rule of thumb is to tighten it until you feel firm resistance, then give it a final quarter turn using your fingers rather than a tool, which is usually enough to create a secure, leak free seal without stripping the threads.
Step 9: Test the Water Flow
Turn the water supply back on if you shut it off earlier, and run the faucet for a few seconds to check the water flow and spray pattern. You should notice an immediate improvement, with stronger, more even water flow and no more sputtering or uneven spraying that is typically caused by limescale blockage. If you notice any dripping around the base of the aerator after reinstalling it, simply tighten it slightly further, since this usually indicates that the connection needs to be a bit more secure rather than pointing to any issue with the parts themselves.
This entire process, when using Ferber Painting Limescale Remover, typically takes less than thirty minutes from start to finish, making it one of the fastest and most effective ways to restore your faucet aerator to like new condition.
Common Mistakes to Avoid During the Process
Even a simple task like descaling an aerator can go wrong if a few common mistakes are made. One frequent error is forcing a stuck aerator without first attempting to loosen mineral bonding with a descaling solution, which can result in scratched chrome or a rounded off fitting that becomes even harder to remove later. Another common mistake is losing track of the small internal components, particularly the flow restrictor disc, which can easily be mistaken for debris and accidentally thrown away. Always work over a clean towel or tray to avoid losing small parts down the drain. Finally, some people skip the rinsing step or rinse too quickly, leaving behind trace amounts of dissolved mineral residue that can re harden inside the mesh within days, effectively undoing all of the progress made during the soak.
Preventing Future Limescale Buildup
While descaling your faucet aerator solves the immediate problem, limescale will naturally return over time if you live in an area with hard water. Fortunately, there are several simple habits you can adopt to slow down future buildup and extend the time between deep cleanings.
- Wipe down faucets regularly with a dry cloth after use to prevent water spots from hardening into limescale.
- Consider installing a water softener system if you live in an area with particularly hard water.
- Perform a quick preventative soak with Ferber Painting Limescale Remover every two to three months, even before visible buildup appears.
- Avoid letting faucets drip constantly, as standing water accelerates mineral deposit formation.
- Clean your aerator at the first sign of reduced water pressure rather than waiting until the buildup becomes severe.
By combining these preventative habits with periodic use of Ferber Painting Limescale Remover, you can keep your faucets, showerheads, and other fixtures looking and functioning like new for years to come.
Understanding Your Local Water Hardness
One of the most useful things any homeowner can do is find out exactly how hard their local water supply actually is. Many municipal water suppliers publish annual water quality reports that include hardness levels measured in grains per gallon or parts per million. If you rely on a private well, inexpensive test strips are widely available and can give you a quick reading within minutes. Knowing your water hardness level allows you to set a realistic maintenance schedule rather than guessing. For example, households with water hardness above 180 parts per million, generally classified as very hard water, may benefit from a preventative soak with Ferber Painting Limescale Remover as often as every four to six weeks, while households with moderately hard water in the 60 to 120 parts per million range can often stretch that interval to every two to three months as suggested above.
Extending the Life of Other Fixtures
Since the same hard water responsible for clogging your aerator is also flowing through your showerhead, kettle, and coffee maker, it makes sense to apply the same preventative philosophy to those fixtures as well. Showerheads in particular tend to suffer from the same mesh clogging issues as aerators, and a quick monthly soak can prevent the frustrating experience of uneven, needle like spray patterns. Kettles and coffee makers benefit from an occasional descaling cycle as well, not only to maintain performance but also to protect the taste of your beverages, since heavy limescale buildup inside heating elements can subtly affect water taste over time. Keeping a bottle of Ferber Painting Limescale Remover under the sink means you are always prepared to handle any of these small maintenance tasks the moment you notice early warning signs.
Frequently Asked Questions
How often should I descale my faucet aerator?
This depends largely on the hardness of your local water supply. In areas with very hard water, descaling every one to two months is recommended. In areas with softer water, every three to six months is usually sufficient.
Can Ferber Painting Limescale Remover be used on other fixtures besides faucet aerators?
Yes. Our formula is safe and effective on showerheads, kettles, coffee machines, glass shower doors, and many other surfaces commonly affected by hard water deposits.
Is Ferber Painting Limescale Remover safe for all materials?
The formula has been specifically designed to be safe on chrome, stainless steel, brass, plastic, and rubber components, unlike many harsher competing products that can damage these materials over time.
What happens if I am not satisfied with the product?
Every purchase from Ferber Painting comes with a full satisfaction guaranteed or refunded policy. If you are not happy with the results for any reason, simply contact our customer service team for a complete refund.
How long does shipping take?
Thanks to our international network of trusted carriers, most orders arrive quickly regardless of your location. Delivery times vary depending on your country, but we work hard to ensure fast and reliable shipping worldwide.
Is the payment process secure?
Absolutely. All payments are processed securely directly through our website, giving you a fast, simple, and safe checkout experience every time.
Descaling a faucet aerator does not need to be complicated or frustrating, as long as you use a product that is both powerful and safe. If you are ready to restore your faucets to full working condition while enjoying complete peace of mind thanks to our unbeatable satisfaction guarantee, order your Ferber Painting Limescale Remover today and experience the difference a truly effective product can make.