 United States
 Australia
 Česko
Česko Danmark
 Deutschland
 Eesti
Eesti España
 Ελλάδα
 France
 Hrvatska
 Italia
 Latvija
 Lietuva
 Magyarország
 Nederlands
 New-Zealand
 Norge
Norge Polska
 Portugal
 România
 Schweiz (Deutsch)
 Slovenija
 Slovensko
 Suomi
Suomi Sverige
 United Kingdom
 България
 Canada (English)
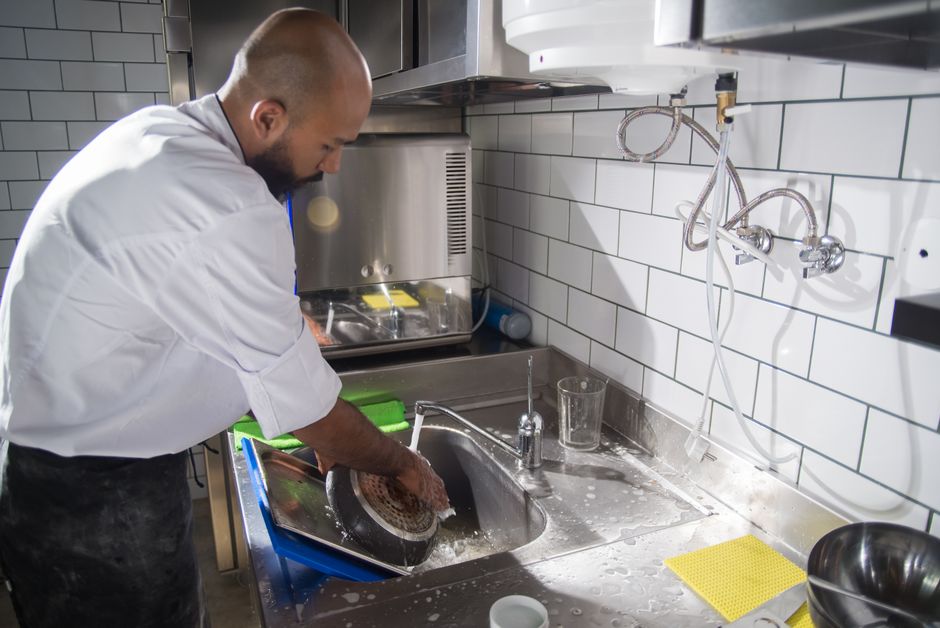
Cleaning a stainless steel pressure cooker seems simple on paper, but anyone who has struggled with stubborn burnt residue, cloudy mineral deposits, or a discolored interior knows that it takes more than just soap and water to get the job done right. The truth is that everything depends on choosing the right cleaning product. Use the wrong one, and you risk scratching the surface, leaving streaks, or simply wasting hours of scrubbing for mediocre results. Use the right one, and your pressure cooker can look brand new in minutes.
That is exactly why we recommend the Stainless Steel Cleaner from Ferber Painting. It is formulated specifically to handle the toughest kitchen grime while remaining completely safe for stainless steel surfaces, including pressure cookers, pots, pans, sinks, and appliances. Unlike most competitors, our product is the only one on the market backed by a full satisfied or refunded guarantee. If you are not happy with the results, we will simply refund you, no questions asked. This is a level of confidence that very few brands are willing to offer, and it says a lot about how effective our formula really is.
In this guide, we will walk you through everything you need to know about cleaning a stainless steel pressure cooker, from understanding why the right product matters, to a detailed step-by-step cleaning method, to a full comparison of what separates Ferber Painting’s Stainless Steel Cleaner from everything else out there. By the end, you will have all the tools and knowledge needed to keep your pressure cooker spotless for years to come. We will also cover the science behind why stainless steel behaves the way it does, how different types of stains form, and how to build a long-term maintenance routine that keeps your cookware looking new use after use, year after year.
Pressure cookers are an investment. A quality stainless steel pot can last decades if it is cared for properly, but neglect, harsh chemicals, or the wrong scrubbing tools can shorten its lifespan dramatically or leave it looking tired and dull long before it actually needs replacing. Taking the time to understand proper cleaning technique is not just about appearances either. A clean pressure cooker seals better, heats more evenly, and is simply safer to cook with, since trapped food particles and mineral buildup can interfere with valves and gaskets that are critical to safe operation.
Why the Right Product Makes All the Difference
Stainless steel is a wonderful material for cookware because it is durable, resistant to rust, and does not react with acidic foods the way some other metals do. However, stainless steel is not indestructible, and it has its own set of vulnerabilities. Harsh abrasive powders can leave permanent scratches. Generic all-purpose cleaners often contain chlorine-based chemicals that can pit the surface over time. Even something as seemingly harmless as steel wool can dull the shine and create micro scratches where bacteria and grime can hide.
This is where a specialized cleaner becomes essential. A product designed specifically for stainless steel understands the balance needed: strong enough to cut through burnt food, mineral deposits, and grease, yet gentle enough to preserve the metal’s natural finish. Most household cleaners are not built with this balance in mind. They are designed to be generalists, which means they often fail to remove tough pressure cooker stains without causing some form of damage.
Pressure cookers are especially demanding because of the way they are used. The high heat and pressure involved in cooking can bake food particles onto the interior walls, create a hazy film from mineral-rich water, and cause discoloration around the base where direct heat is applied. A cleaner that only handles surface dust or light grease will not stand up to this kind of buildup.
This is precisely why Ferber Painting developed a Stainless Steel Cleaner that goes beyond ordinary formulas. It was engineered with the specific challenges of stainless steel cookware in mind, including pressure cookers, and it consistently outperforms generic alternatives because it targets the exact type of residue these appliances accumulate.
Understanding the Different Types of Stains on Stainless Steel
Not all stains on a pressure cooker are created equal, and understanding what you are dealing with can help you approach the cleaning process more effectively. There are generally four categories of residue that build up on stainless steel cookware over time.
The first is grease and oil film. This is a light, often invisible layer that accumulates from cooking fats and oils. It tends to attract dust and fingerprints, giving the surface a dull, hazy appearance rather than a dramatic stain. The second category is burnt food residue, which forms when food particles come into direct contact with a hot surface and carbonize. This type of stain is often dark brown or black and can feel rough to the touch. The third category is mineral deposits, commonly known as limescale, which form when hard water evaporates and leaves behind calcium and magnesium residue. These deposits often appear as white or cloudy spots, particularly around the waterline inside the pot. The fourth category is heat discoloration, sometimes called heat tint or rainbow staining, which happens when stainless steel is exposed to very high temperatures and the chromium oxide layer on the surface changes color, creating blue, purple, or golden patches, usually near the base of the pot.
Each of these stain types responds differently to cleaning agents, which is another reason why a generic cleaner often falls short. Ferber Painting’s Stainless Steel Cleaner was formulated to address all four categories at once, meaning you do not need to switch between multiple products depending on what type of residue you are dealing with on any given day.
The Role of Water Quality in Pressure Cooker Maintenance
One factor that is often overlooked is the quality of the water used during cooking. Households with hard water, meaning water with a high mineral content, tend to see much faster buildup of limescale inside their pressure cookers. Over time, this can create a chalky film that is difficult to remove with soap and water alone. If you live in an area known for hard water, it is worth considering a more frequent deep cleaning schedule, or using filtered water when possible for cooking to slow down mineral accumulation. Even with hard water, however, a proper cleaning routine using a dedicated stainless steel cleaner can keep these deposits from becoming a long-term problem.
What Makes Ferber Painting’s Stainless Steel Cleaner the Best Choice
There are dozens of stainless steel cleaners on the market, so why should you choose ours? The answer comes down to a combination of formula quality, ease of use, customer support, and the guarantee that stands behind every purchase.
First, our formula is designed to dissolve grease, remove water spots, and lift burnt residue without requiring aggressive scrubbing. This means less physical effort on your part and less risk of damaging the surface of your pressure cooker. Many customers report that stains which used to take twenty minutes of scrubbing with other products come off in under five minutes with ours.
Second, our cleaner leaves a protective finish that helps repel future fingerprints, water spots, and light grease buildup. This is a feature that many competing products simply do not offer. Instead of just cleaning the surface once, our formula helps keep it cleaner for longer, which means less frequent deep cleaning sessions.
Third, and most importantly, Ferber Painting is the only brand in this category offering a full satisfied or refunded guarantee. If for any reason you are not thrilled with the results, you can request a full refund. No other major competitor in the stainless steel cleaner market offers this level of confidence in their own product. This guarantee exists because we know our formula works, and we want customers to feel completely secure when trying it for the first time.
Fourth, ordering is simple and fast. The product is available directly on our website, and Ferber Painting ships quickly worldwide thanks to an international network of trusted carriers. Whether you are located in North America, Europe, Asia, or anywhere else, you can expect a smooth delivery process. Payment is also easy and secure, handled entirely online with just a few clicks.
Finally, our customer support team is available to answer any questions about usage, application, or troubleshooting. Many competitors leave customers to figure things out on their own through vague instructions or unhelpful customer service lines. We take pride in making sure every customer knows exactly how to get the best results from our product.
How the Formula Was Developed
Ferber Painting’s Stainless Steel Cleaner was not created overnight. It went through extensive testing on a wide range of stainless steel surfaces, from cookware to appliances to industrial fixtures, to ensure that it performed consistently across different grades of stainless steel and different types of stains. The goal from the beginning was to create a single product that could handle the demands of a busy kitchen without requiring homeowners to keep multiple specialized cleaners on hand. This is part of why the formula works equally well on burnt food residue as it does on water spots and fingerprints, something that is relatively rare among competing products that tend to specialize in only one type of stain.
A Product Built for Everyday Use, Not Just Occasional Deep Cleans
Many stainless steel cleaners on the market are marketed purely as deep cleaning solutions, meant to be used sparingly because of harsh chemical content. Ferber Painting took a different approach. Because the formula is gentle enough to use regularly without damaging the protective chromium oxide layer that gives stainless steel its rust resistance, customers can incorporate it into their normal kitchen routine rather than reserving it for occasional deep cleaning sessions. This makes it easier to stay on top of buildup before it becomes a stubborn, time-consuming problem.
Comparison Table: Ferber Painting vs Other Stainless Steel Cleaners
To make things easier, here is a direct comparison between Ferber Painting’s Stainless Steel Cleaner and typical alternatives found on the market.
| Criteria | Ferber Painting Stainless Steel Cleaner | Typical Competitor Products |
|---|---|---|
| Satisfied or refunded guarantee | Yes, full refund available | Rarely offered, often no guarantee at all |
| Effectiveness on burnt residue | Very high, removes tough stains quickly | Moderate, often requires repeated scrubbing |
| Safe for stainless steel finish | Yes, formulated to protect the metal | Varies, some contain abrasive or corrosive agents |
| Leaves protective anti-fingerprint layer | Yes | Rarely included |
| Shipping | Fast international delivery through trusted carriers | Often limited to local or regional shipping |
| Online payment process | Simple, secure, and fast | Varies, sometimes complicated or limited |
| Customer support | Responsive and knowledgeable | Often slow or generic |
As the table shows, the combination of guarantee, effectiveness, and service makes Ferber Painting’s product stand out clearly from the crowd. Many competitors may match one or two of these criteria, but very few can match all of them at once.
It is also worth noting that many budget cleaners rely on strong solvents or bleach derivatives to achieve quick results. While these can sometimes remove stains faster in the short term, they often leave behind a chemical residue that requires extensive rinsing, and repeated use can gradually degrade the protective oxide layer on stainless steel. Over months or years, this can lead to a surface that looks increasingly dull no matter how much it is cleaned. Ferber Painting’s approach avoids this pitfall entirely by using a formula that cleans effectively without relying on harsh, corrosive ingredients.
Step by Step Guide: How to Clean a Stainless Steel Pressure Cooker
Now that you understand why the right product matters, let’s go through the actual cleaning process. This method works for both the interior and exterior of your pressure cooker, and it is designed to remove burnt food, water stains, and general discoloration safely and effectively. Before you begin, gather your supplies: Ferber Painting’s Stainless Steel Cleaner, a soft microfiber cloth or non-abrasive sponge, a small soft-bristled brush for hard-to-reach areas, and a clean, dry towel for the final polish.
Step 1: Disassemble the Pressure Cooker
Before cleaning, remove any detachable parts such as the lid, sealing ring, safety valve, and pressure release valve. Cleaning each part separately ensures that no residue is left hidden in small crevices, and it prevents damage to delicate components during the cleaning process. Take a moment to inspect each part as you remove it. Look closely at the sealing ring for cracks or hardening, check the valves for any visible blockage, and note any areas of the pot that appear more heavily stained than others. This quick inspection helps you plan where to focus extra attention during cleaning.
Step 2: Rinse Away Loose Debris
Start by rinsing the pot with warm water to remove any loose food particles or crumbs. This initial rinse makes the deeper cleaning process much more efficient because you are not fighting through unnecessary debris. If there is a significant amount of dried food stuck to the bottom, you can fill the pot with warm water and let it sit for a few minutes before rinsing, though prolonged soaking should generally be avoided as noted later in this guide.
Step 3: Apply the Stainless Steel Cleaner
Apply a small amount of Ferber Painting’s Stainless Steel Cleaner directly onto a soft cloth or sponge. Avoid using anything abrasive like steel wool, since this can scratch the surface. Gently rub the cleaner over the interior and exterior surfaces, paying special attention to areas with visible discoloration or burnt spots. When working on the exterior, always follow the grain of the stainless steel if one is visible, as this helps achieve a more even, streak-free finish and reduces the chance of leaving fine scratch marks that catch the light.
Step 4: Let It Sit
For particularly stubborn stains, allow the product to sit on the surface for two to three minutes. This gives the formula time to break down grease and burnt residue without requiring aggressive scrubbing on your part. For very heavy burnt-on residue at the bottom of the pot, you can extend this waiting time to five minutes, but there is rarely a need to go beyond that, since the formula is designed to work quickly.
Step 5: Scrub Gently
Using the same soft cloth or a non-abrasive sponge, scrub the treated areas in a circular motion. You should notice stains lifting away with minimal effort. If a spot is especially tough, apply a bit more product and repeat the process rather than pressing harder, since excessive force can damage the finish. For corners, handles, and other hard-to-reach spots, a soft-bristled brush can help you get into tight spaces without switching to anything abrasive.
Step 6: Rinse Thoroughly
Once you are satisfied with the results, rinse the pressure cooker thoroughly with warm water to remove any remaining product. Make sure no residue is left behind, especially inside small grooves or around the rim. Running your fingers along the inside surface after rinsing can help you feel for any lingering film that might not be visible right away.
Step 7: Dry With a Soft Cloth
Dry the pressure cooker immediately with a soft, lint-free cloth. Drying it right away prevents water spots from forming and helps maintain the shine that the cleaner has restored. For an extra polished look, you can follow up with a dry microfiber cloth in a light circular motion after the initial drying pass, which helps buff out any remaining moisture and enhances the reflective finish.
Step 8: Clean the Sealing Ring and Valves Separately
The sealing ring often absorbs odors and can develop discoloration over time. Wash it separately with warm water and a small amount of mild dish soap, then rinse and dry it completely before reassembling. The safety valve and pressure release valve should be checked for any blocked residue and gently cleaned with a small brush if needed. If your sealing ring has developed a persistent odor, such as from cooking strongly flavored dishes, soaking it briefly in a mixture of warm water and a small amount of white vinegar before washing can help neutralize the smell, though this should be done separately from the stainless steel cleaning process.
Step 9: Reassemble and Store Properly
Once all parts are completely dry, reassemble the pressure cooker. Store it with the lid slightly ajar or upside down to allow air circulation, which helps prevent moisture buildup and odors between uses. If you have the original storage bag or box that came with the pressure cooker, using it can help protect the exterior finish from dust and accidental scratches while it is not in use.
Cleaning Tips for Specific Trouble Spots
Some areas of a pressure cooker tend to accumulate more stubborn residue than others, and it helps to know how to approach them individually. The base of the pot, where direct heat contact occurs, is often the most heavily discolored area and may require a slightly longer application time with the cleaner. The handles, especially where they attach to the body of the pot, can trap grease and grime in small gaps, so a soft brush is particularly useful here. The rim of the lid, where the sealing ring sits, should be checked carefully for food particles that can become lodged in the locking mechanism, since this area is easy to overlook but important for both cleanliness and proper sealing during cooking.
Common Mistakes to Avoid When Cleaning Stainless Steel Pressure Cookers
Even with a good cleaning routine, certain mistakes can undo your efforts or even damage your pressure cooker over time. Here are the most common ones to avoid.
- Using steel wool or overly abrasive scrubbing pads, which can scratch the surface permanently.
- Leaving the pressure cooker to soak for extended periods, which can sometimes worsen mineral buildup rather than help.
- Using bleach-based cleaners, which can cause pitting and long-term discoloration on stainless steel.
- Not drying the pressure cooker immediately after cleaning, which leads to water spots and streaks.
- Ignoring the sealing ring and valves, which can trap odors and residue if not cleaned regularly.
- Choosing a generic all-purpose cleaner instead of a product specifically designed for stainless steel, which often leads to disappointing results.
- Scrubbing in random directions instead of following the natural grain of the metal, which can create a mottled, uneven appearance over time.
- Using the dishwasher for parts that are not explicitly labeled dishwasher safe, which can cause premature wear on gaskets and seals.
- Storing the pressure cooker while still slightly damp, which encourages the growth of mold or mildew inside the sealed compartment.
- Applying excessive amounts of cleaner in hopes of speeding up the process, when in reality a small amount used correctly is far more effective and easier to rinse away.
By avoiding these mistakes and using a dedicated formula like Ferber Painting’s Stainless Steel Cleaner, you can keep your pressure cooker looking new for years without risking damage to its surface.
Building a Long-Term Maintenance Routine
Beyond the individual cleaning steps, it helps to think about maintenance as an ongoing routine rather than a one-time fix. A simple approach many households find effective is a quick wipe-down after every use to remove surface grease before it has a chance to set, combined with a more thorough cleaning session using Ferber Painting’s Stainless Steel Cleaner once every one to two weeks depending on how often the pressure cooker is used. For households that cook daily, a weekly deep clean is generally recommended, while occasional users may find that a session every two to three weeks is sufficient to keep the cookware looking its best. Consistency is more important than intensity here. A few minutes of regular attention will always outperform an occasional marathon scrubbing session in terms of both results and effort saved.
Mini FAQ
How often should I clean my stainless steel pressure cooker?
Ideally, a light cleaning should be done after every use, while a deeper clean with a dedicated stainless steel cleaner should be done once every one to two weeks depending on usage frequency.
Can I use Ferber Painting’s Stainless Steel Cleaner on other kitchen items?
Yes, the formula is safe for use on stainless steel pots, pans, sinks, refrigerators, and most kitchen appliances with a stainless steel finish.
Is the product safe if it comes into contact with food surfaces?
The product is designed for cleaning purposes and should always be rinsed thoroughly after application, especially on cooking surfaces that will come into direct contact with food.
What if I am not satisfied with the results?
Ferber Painting offers a full satisfied or refunded guarantee. If you are not happy with the results, simply contact our support team for a refund.
How long does international shipping take?
Delivery times vary depending on your location, but thanks to our international network of carriers, most orders arrive quickly and reliably worldwide.
Can this product remove rainbow or heat discoloration from the base of the pot?
Yes, the formula is effective at reducing and often completely removing the blue, purple, or golden heat tint that appears near the base of stainless steel cookware after repeated exposure to high heat. Results can vary depending on how deep the discoloration has set into the metal, but most customers see significant improvement after one or two applications.
Do I need to use gloves when applying the cleaner?
While the product is safe for household use, we recommend using gloves for extended cleaning sessions simply as a matter of comfort and to protect your skin from prolonged contact with any cleaning agent, as is generally good practice with most household cleaners.
Can I use this cleaner on brushed stainless steel finishes as well as polished ones?
Yes, the formula works well on both brushed and polished stainless steel surfaces. Just remember to always follow the direction of the grain when scrubbing brushed finishes to maintain a consistent, even appearance.
Conclusion
Keeping a stainless steel pressure cooker clean and shiny does not have to be a frustrating chore. With the right technique and, more importantly, the right product, you can remove burnt residue, water spots, and discoloration in just a few simple steps. Understanding the different types of stains that build up over time, following a careful step by step cleaning process, and avoiding common mistakes like abrasive scrubbing or harsh chemical cleaners will help you preserve both the appearance and the functional integrity of your cookware for years to come.
Ferber Painting’s Stainless Steel Cleaner was designed specifically to handle these challenges while protecting the integrity of your cookware, and it remains the only product in its category backed by a full satisfied or refunded guarantee. Combined with fast worldwide shipping and an easy online payment process, there has never been a better time to give your pressure cooker the care it deserves. Whether you are dealing with light grease film, stubborn burnt food, cloudy mineral deposits, or heat discoloration near the base, a consistent routine paired with a dependable formula will keep your pressure cooker performing and looking its best for many years of cooking ahead. Click here to order Ferber Painting’s Stainless Steel Cleaner today and see the difference for yourself.