 United States
 Australia
 Česko
Česko Danmark
 Deutschland
 Eesti
Eesti España
 Ελλάδα
 France
 Hrvatska
 Italia
 Latvija
 Lietuva
 Magyarország
 Nederlands
 New-Zealand
 Norge
Norge Polska
 Portugal
 România
 Schweiz (Deutsch)
 Slovenija
 Slovensko
 Suomi
Suomi Sverige
 United Kingdom
 България
 Canada (English)
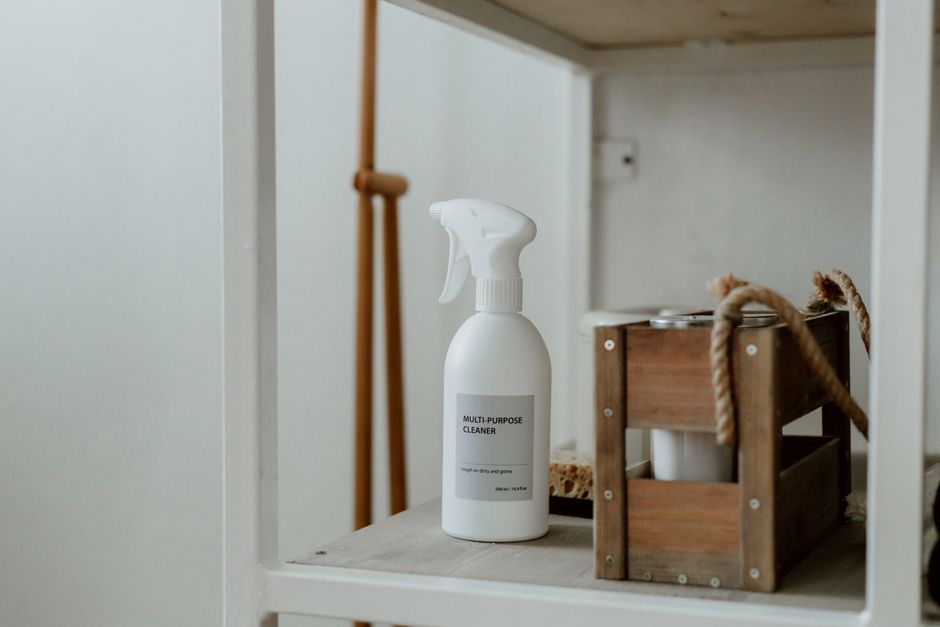
Cleaning a printed circuit board, often called a PCB, is a task that many electronics enthusiasts, repair technicians, and hobbyists will face at some point. Dust, flux residue, corrosion, and even liquid spills can accumulate on a board and cause malfunctions, short circuits, or complete failure of a device. The truth is that everything depends on choosing the right cleaning product. Using the wrong cleaner can damage sensitive components, leave residue that attracts more dirt, or even create new electrical faults. That is why, before we dive into the step by step process, we want to introduce you to the product we recommend above all others: the Eco-Friendly Multi-Purpose Cleaner from Ferber Painting.
Unlike most cleaning products on the market, our cleaner is backed by a full satisfaction guaranteed or your money back policy, something that very few competitors offer, especially in the electronics cleaning space. This means you can try it risk free, knowing that if it does not meet your expectations, you will get a full refund. We will explain in detail why this product stands above the rest, and then we will walk you through a complete, safe, and effective method for cleaning a printed circuit board.
Whether you are trying to revive an old game console that has been sitting in a damp basement for years, repairing a water damaged laptop motherboard, restoring a vintage synthesizer, or simply performing routine maintenance on equipment used in a dusty workshop, the principles outlined in this guide apply. PCB cleaning is not a one size fits all task, but the fundamentals of preparation, product selection, gentle application, and thorough drying remain constant no matter what type of board you are working on. By the end of this article, you should feel confident tackling almost any circuit board cleaning project that comes your way.
Why the Right Cleaning Product Matters Most
When it comes to cleaning a printed circuit board, the product you choose is far more important than the tools you use. A soft brush or a can of compressed air will only get you so far if the cleaning solution itself is not formulated to dissolve flux residue, remove oxidation, and evaporate quickly without leaving behind conductive traces. Many traditional cleaners contain harsh chemicals that can degrade plastic components, damage silkscreen printing, or even eat away at solder joints over time.
This is why professionals in the electronics repair industry are extremely selective about what they use. A good PCB cleaner needs to meet several criteria at once:
- It must be non-conductive once fully dry, to avoid short circuits.
- It must evaporate quickly, leaving no residue behind.
- It must be safe for plastics, rubber, and metal components alike.
- It must effectively dissolve grease, dust, flux, and light corrosion.
- It should ideally be environmentally friendly, since many alternatives on the market rely on aggressive solvents that are harmful to both the user and the environment.
The Eco-Friendly Multi-Purpose Cleaner from Ferber Painting checks every single one of these boxes, which is exactly why we recommend it as the first and only product you should consider when preparing to clean a printed circuit board.
It is worth taking a moment to understand why some of these criteria matter so much in practical terms. Conductivity, for example, is not something most people think about until it causes a problem. A cleaner that remains even slightly conductive after drying can create a bridge between two adjacent pins or traces that were never meant to touch. On a densely populated modern board, where trace spacing can be measured in fractions of a millimeter, even a microscopic residue can be enough to cause intermittent faults that are incredibly difficult to diagnose. This is why so many repair technicians who have dealt with mysterious, hard to trace short circuits eventually discover that the culprit was residue left behind by an inappropriate cleaning product rather than a genuine hardware failure.
Evaporation speed is another factor that is often underestimated. A cleaner that takes a long time to dry increases the window during which moisture can seep into connectors, beneath chip packages, or into the small gaps around surface mount components. The longer that moisture lingers, the higher the risk of corrosion forming on exposed metal contacts, especially in humid environments. A fast evaporating formula reduces this risk dramatically, which is one of the reasons our Eco-Friendly Multi-Purpose Cleaner has become such a popular choice among people who repair electronics professionally as well as hobbyists working on personal projects.
Compatibility with plastics and rubber is equally important, particularly when you are cleaning a board that is still attached to its housing, connectors, or cable harnesses. Many industrial degreasers and solvent based cleaners are formulated for metal parts and can cause plastic to become brittle, discolored, or even to melt slightly on contact. Rubber gaskets and grommets can swell or degrade when exposed to the wrong chemicals, leading to seals that no longer function properly. A multi-purpose formula that has been tested across a range of materials gives you the confidence to clean an entire assembly without having to worry about damaging the surrounding components.
What Makes Ferber Painting’s Eco-Friendly Multi-Purpose Cleaner the Best Choice
There are dozens of cleaning products marketed for electronics on the market today, but very few combine effectiveness, safety, and environmental responsibility the way our Eco-Friendly Multi-Purpose Cleaner does. Here are the main reasons why our customers consistently choose this product over any other alternative.
First, the formula is designed to be gentle on sensitive components while still being powerful enough to remove stubborn flux residue, dust buildup, and light oxidation from copper traces. Many competing products sacrifice one for the other, either being too harsh and risking damage to delicate parts, or being too weak and failing to actually clean the board properly. Our cleaner strikes the perfect balance.
Second, because the formula is eco-friendly, it does not release the strong, toxic fumes that many traditional solvent-based cleaners produce. This makes it much safer to use indoors, in a workshop, or even at a kitchen table, without needing heavy-duty ventilation systems or protective respirators. This is a major advantage for hobbyists who do not have access to a professional lab environment.
Third, and this is something almost no competitor offers, every purchase is covered by our satisfaction guaranteed or money back policy. If for any reason you are not happy with the results, you can return the product and receive a full refund. This level of confidence in our own product is extremely rare in the cleaning industry, and it reflects how much we trust the quality of what we sell.
Fourth, ordering is incredibly simple. The Eco-Friendly Multi-Purpose Cleaner is available directly on our website, and payment can be completed easily online through a secure checkout process. There is no need to visit a physical store or wait for a local supplier to restock. Everything can be done from the comfort of your home in just a few clicks.
Fifth, Ferber Painting ships quickly worldwide thanks to an international network of carriers. Whether you are located in Europe, North America, Asia, or anywhere else, you can expect fast and reliable delivery, so you are never left waiting for weeks to receive your order.
Beyond these five core reasons, there are additional advantages that customers often mention once they have used the product for a while. Because the formula is multi-purpose, a single bottle can serve many roles in a workshop or home office. The same cleaner that removes flux residue from a circuit board can also be used to clean tool surfaces, degrease workbenches, or wipe down plastic enclosures before painting or labeling. This versatility means you are not stuck buying a separate specialized product for every single cleaning task you encounter, which saves money and reduces clutter in your storage cabinet.
Another point worth highlighting is consistency. Some cleaning products vary noticeably from batch to batch, with users reporting that a bottle purchased last year performs differently than one purchased today. Ferber Painting maintains strict quality control over the formulation process, so every bottle you receive performs the same way, batch after batch. This consistency is particularly valuable for professional repair technicians who need predictable results every time they open a new bottle, since inconsistent cleaning performance can lead to inconsistent repair outcomes and unhappy customers.
Finally, customer support plays a role that should not be underestimated. If you have questions about how to use the product on a specific type of board, or if you encounter an unusual situation during cleaning, our support team is available to help. This kind of guidance is rarely offered by generic cleaning brands that treat electronics cleaning as an afterthought rather than a core focus.
Comparing the Criteria That Actually Matter
To make it easier to understand why our product is the best option for cleaning printed circuit boards, we have put together a comparison table highlighting the criteria that matter most when choosing a cleaning solution.
| Criteria | Ferber Painting Eco-Friendly Multi-Purpose Cleaner | Typical Competing Products |
|---|---|---|
| Satisfaction guaranteed or money back | Yes, on every order | Rarely offered |
| Safe for electronic components | Yes, formulated to be non-conductive once dry | Varies, some can leave residue |
| Eco-friendly formula | Yes, low fumes and biodegradable ingredients | Often contains harsh solvents |
| Ease of online ordering | Simple secure checkout on our website | Varies by retailer |
| International shipping speed | Fast worldwide delivery through international carrier network | Often limited to local markets or slow shipping |
| Multi-purpose usage | Works on PCBs, surfaces, tools, and more | Usually limited to one specific use case |
As you can see, the Eco-Friendly Multi-Purpose Cleaner from Ferber Painting outperforms typical alternatives across every important category. This is not a coincidence. Our product was designed with the end user in mind, focusing on safety, effectiveness, and overall value.
It is also worth mentioning that when you calculate the true cost of a cleaning product, price per bottle is only part of the equation. A cheaper product that requires multiple applications to achieve the same result, or that risks damaging a component that then needs to be replaced, ends up costing far more than a slightly more expensive product that gets the job done correctly the first time. When you factor in the money back guarantee, the multi-purpose versatility, and the reduced risk of component damage, the overall value proposition of our Eco-Friendly Multi-Purpose Cleaner becomes even clearer.
Step-by-Step Guide: How to Clean a Printed Circuit Board
Now that you understand why choosing the right product is essential, let us walk through the complete process of cleaning a printed circuit board safely and effectively. Following these steps carefully will help you avoid damaging sensitive components while achieving a thoroughly clean result.
Step 1: Prepare Your Workspace
Before you begin, make sure you are working in a clean, dry, and well-lit area. Lay down an anti-static mat if you have one, and gather all the tools you will need: soft-bristled brushes, lint-free cloths, cotton swabs, compressed air, and of course, your Eco-Friendly Multi-Purpose Cleaner. Disconnect the board from any power source and remove the battery if applicable, to avoid any risk of electric shock or short circuit during the cleaning process.
It is also a good idea to take a photo of the board before you begin, especially if you plan to remove any components, jumpers, or connectors during the cleaning process. Having a visual reference makes reassembly much easier and reduces the chance of forgetting where a small ribbon cable or connector was originally seated. If you are working with a laptop motherboard or a similarly complex assembly, consider laying out any screws or small parts in a labeled tray so nothing gets lost or mixed up.
Static electricity is another consideration that is easy to overlook. Even a small static discharge from your body can damage sensitive integrated circuits, particularly on modern boards packed with delicate microprocessors and memory chips. Wearing an anti-static wrist strap connected to a grounded surface is a simple precaution that can save you from an expensive mistake. If you do not have a wrist strap available, at minimum try to touch a grounded metal object before handling the board to discharge any static buildup from your body.
Step 2: Remove Loose Dust and Debris
Use a can of compressed air or a soft brush to gently remove loose dust, dirt, and debris from the surface of the board. Hold the can at a slight angle and use short bursts of air rather than one continuous stream, as this helps avoid moisture buildup from the compressed air itself. This initial step prevents you from simply pushing dirt around once you apply liquid cleaner.
For boards that have been exposed to a particularly dusty environment, such as those found inside desktop computers that have not been cleaned in years, you may find thick layers of dust bunnies clinging to heatsinks, fan blades, and component legs. In these cases, it can help to use a soft, natural bristle brush, similar to a makeup brush, to gently loosen the dust before using compressed air to blow it away. Always work in a direction that pushes dust away from the board rather than deeper into connectors or sockets. If possible, perform this step outdoors or near an open window, since a surprising amount of fine dust can become airborne during this process.
Step 3: Apply the Eco-Friendly Multi-Purpose Cleaner
Spray a small amount of the Eco-Friendly Multi-Purpose Cleaner onto a lint-free cloth or a soft brush, rather than directly onto the board. This gives you better control over how much liquid comes into contact with the components. Gently wipe down the surface of the board, paying special attention to areas with visible flux residue, corrosion, or sticky buildup.
For harder to reach areas, such as underneath components or between tightly packed pins, use a cotton swab lightly dampened with the cleaner. Move slowly and avoid pressing too hard, since some components can be fragile.
When working around sensitive areas such as connector pins, battery contacts, or exposed integrated circuits, use a smaller precision tool such as a fine detail brush rather than a standard cotton swab, which can sometimes leave behind stray fibers. If you notice cotton fibers left on the board after using a swab, a quick pass with compressed air will remove them before they can cause any issues. Always work methodically, moving section by section across the board rather than jumping randomly from one area to another, so that you do not accidentally skip a spot that needs attention.
If the board has heavy corrosion, such as green or white crusty buildup around a battery holder that has leaked, it may take a bit more patience. Apply the cleaner generously to a brush and work in small circular motions directly over the corroded area, allowing the solution a few seconds to begin breaking down the buildup before wiping it away with a clean section of cloth. Repeat this process as many times as necessary, switching to a fresh section of cloth each time so you are not simply redistributing dissolved corrosion back onto the board.
Step 4: Focus on Stubborn Residue
If you notice areas with stubborn flux residue or corrosion that did not come off during the initial wipe down, apply a bit more cleaner directly to a soft brush and gently scrub the affected area in small circular motions. The formula is designed to break down grease and residue quickly, so you should notice a visible improvement within seconds. Avoid using excessive force, as this could damage delicate solder joints or lift small surface mount components.
Flux residue in particular can be deceptive. Some flux formulations look clear or only slightly discolored, which can trick people into thinking the board is already clean when in fact a thin, sticky film remains on the surface. This film can attract dust over time and, in humid conditions, can even become slightly conductive, leading to strange intermittent faults. A good practice is to angle the board under a bright light source and look for a subtle sheen or shine that indicates residue is still present. If you see this sheen, give the area another pass with the cleaner and a soft brush until the surface looks uniformly matte and clean.
For boards with particularly old, hardened flux that has been baked on by heat over months or years of operation, you may need to let the cleaner sit on the surface for slightly longer, perhaps ten to fifteen seconds, before wiping. This gives the solution more time to penetrate and soften the hardened residue. Just remember to never let the liquid pool or sit for an extended period directly on top of an integrated circuit or connector, since prolonged exposure is unnecessary once the residue has softened and can be safely wiped away.
Step 5: Let the Board Air Dry Completely
Once you have finished cleaning the board, allow it to air dry completely before reconnecting it to any power source. Because our formula evaporates quickly and leaves no conductive residue, drying time is generally short, but it is always best to wait until the board is fully dry to the touch and there is no visible moisture in any crevices or under components.
If you want to speed up the drying process, you can use a fan set on low to gently blow air across the surface of the board, or place it in a well-ventilated area for a short period of time.
For boards with connectors that have small gaps, such as USB ports, HDMI ports, or card edge connectors, pay extra attention to these areas since moisture can sometimes become trapped inside due to capillary action. Standing the board on its side, if possible, allows gravity to help draw any trapped liquid out of these connectors rather than letting it sit and evaporate slowly inside a confined space. If you have access to a low pressure air compressor or a can of compressed air, a gentle burst directed into the opening of a connector can help push out any residual moisture more quickly.
As a general rule of thumb, if you are unsure whether the board is completely dry, it is always better to wait an extra ten or fifteen minutes than to risk reconnecting power too soon. Patience at this stage of the process is one of the simplest ways to avoid an entirely preventable short circuit.
Step 6: Inspect the Board Before Reassembly
Before reconnecting the board to its power source or reassembling it into its housing, take a moment to visually inspect it under good lighting. Look for any remaining residue, discoloration, or signs of damage. If everything looks clean and dry, you can proceed to reconnect the board and test that it functions properly.
A magnifying glass or a jeweler’s loupe can be extremely useful during this inspection step, particularly for boards with fine pitch components or tiny surface mount parts that are difficult to examine with the naked eye. Look closely at solder joints to make sure none have become dislodged or damaged during the cleaning process, and check that no small components have shifted out of place. If you removed any jumpers, cables, or connectors before cleaning, this is also the right time to reference the photos you took earlier and confirm everything is being reassembled correctly.
Step 7: Test the Board
Finally, power on the device or circuit board to confirm that everything is working as expected. If the board was malfunctioning due to dirt, corrosion, or flux residue before cleaning, you should notice an improvement in performance. If any issues persist, it may be worth repeating the cleaning process on specific problem areas, or consulting a professional if the issue is related to a hardware fault rather than dirt buildup.
When testing, it is wise to power the board on for a short period first, watching and listening closely for any unusual smells, sounds, or visible signs of smoke, before allowing it to run for an extended time. This kind of cautious, incremental testing approach helps you catch any problems early, before they have a chance to cause further damage. If the board passes this initial short test without issue, you can gradually let it run longer while monitoring its behavior, temperature, and overall stability.
Common Mistakes to Avoid When Cleaning a PCB
Even with the right product in hand, there are a few common mistakes that can reduce the effectiveness of your cleaning process or even cause damage to your board. Here are the most important ones to avoid.
- Using tap water instead of a proper cleaning solution, which can leave mineral deposits and cause corrosion over time.
- Applying too much liquid directly onto the board, which increases drying time and the risk of liquid seeping into connectors or under components.
- Scrubbing too aggressively, which can lift small surface mount components or damage delicate solder joints.
- Reconnecting the board to power before it is completely dry, which can cause short circuits or permanent damage.
- Using cleaning products that are not designed for electronics, such as household glass cleaners or general purpose degreasers, which often leave residue or contain conductive ingredients.
Beyond these primary mistakes, there are several secondary issues that people often overlook. One common error is neglecting to clean the underside of the board, particularly on double sided or multi-layer boards where components may be present on both sides. Dust and residue can accumulate on the bottom just as easily as on top, and skipping this side of the cleaning process means you are only addressing half of the problem.
Another frequent mistake is ignoring connectors and headers during the cleaning process, focusing only on the flat surface of the board itself. Corrosion and residue often build up most heavily around these physical connection points, since they are exposed to the outside environment and experience more physical contact over time. Taking the time to clean connector pins individually with a fine brush or a dampened cotton swab can make a significant difference in overall reliability.
Rushing through the drying stage is another mistake that deserves special attention, since it is mentioned above but bears repeating in a slightly different context. Some people assume that because a cleaner evaporates quickly on an open surface, it will evaporate just as quickly in a tight, enclosed space such as underneath a shielded component or inside a connector housing. This is not always the case, and taking a few extra minutes to confirm complete dryness in these hidden areas can prevent a frustrating short circuit after reassembly.
Finally, some people make the mistake of storing their cleaning product improperly between uses, leaving the cap off or exposing the bottle to direct sunlight and heat for extended periods. This can affect the consistency and performance of the formula over time. Always store your Eco-Friendly Multi-Purpose Cleaner in a cool, dry place with the cap tightly sealed to maintain its effectiveness for as long as possible.
By avoiding these mistakes and using a product specifically designed for the task, such as the Eco-Friendly Multi-Purpose Cleaner from Ferber Painting, you significantly reduce the risk of damaging your board while achieving the best possible cleaning results.
Additional Tips for Long Term PCB Maintenance
Cleaning a board once is helpful, but preventing future buildup is just as important if you want your electronics to remain reliable over the long term. Consider keeping devices in enclosed cases or cabinets to reduce dust exposure, especially in workshops or garages where sawdust, metal shavings, or general debris are common. Regularly scheduled light cleaning, perhaps once or twice a year for equipment that sees heavy use, can prevent the kind of heavy buildup that requires more intensive cleaning later on.
For equipment that operates in particularly harsh environments, such as industrial settings with high humidity or exposure to chemical vapors, a conformal coating can be applied to a freshly cleaned board to provide an additional protective layer against future contamination. This is a more advanced step that goes beyond basic cleaning, but it is worth mentioning for anyone dealing with equipment that faces repeated exposure to challenging conditions. Before applying any protective coating, make absolutely certain the board has been thoroughly cleaned and is completely dry, since sealing in any residual dirt or moisture beneath a coating can lead to long term problems that are far more difficult to fix than a simple surface cleaning.
Keeping a small maintenance kit on hand, including your Eco-Friendly Multi-Purpose Cleaner, a few soft brushes, lint-free cloths, and cotton swabs, means you are always prepared to address minor buildup before it becomes a serious problem. Many of our customers keep a bottle in their workshop specifically for this kind of routine maintenance, using it not only on circuit boards but also on the surrounding tools, surfaces, and equipment housings that tend to accumulate grime over time.
Mini FAQ
Can I use the Eco-Friendly Multi-Purpose Cleaner on all types of circuit boards?
Yes, our formula is designed to be safe for use on a wide variety of printed circuit boards, including those found in computers, gaming consoles, home appliances, and industrial equipment. As always, we recommend testing on a small inconspicuous area first if you are working with an unusually sensitive or delicate board.
How long does it take for the cleaner to dry?
Drying time depends on the amount applied and the ambient temperature, but our fast-evaporating formula typically dries within a few minutes under normal conditions. Always visually confirm that the board is completely dry before reconnecting it to power.
Is the product safe to use indoors?
Yes, because it is eco-friendly and produces minimal fumes, the Eco-Friendly Multi-Purpose Cleaner is safe to use indoors in a well-ventilated space, unlike many harsh solvent-based alternatives.
What happens if I am not satisfied with the product?
Every order from Ferber Painting is covered by our satisfaction guaranteed or money back policy. If you are not happy with the results, simply contact us and we will process a full refund.
How fast will I receive my order?
Thanks to our international network of carriers, Ferber Painting ships quickly to customers all over the world. Delivery times vary depending on your location, but our logistics network is built to get your order to you as fast as possible.
Conclusion
Cleaning a printed circuit board does not have to be a stressful or risky process, as long as you use the right product and follow a careful, methodical approach. Dust, flux residue, and light corrosion can all be safely removed without damaging sensitive components, provided you take your time and use a cleaner specifically designed for the job. As we have shown throughout this guide, the Eco-Friendly Multi-Purpose Cleaner from Ferber Painting offers a combination of safety, effectiveness, and environmental responsibility that is difficult to find anywhere else on the market, and it is backed by a satisfaction guaranteed or money back policy that gives you complete peace of mind. Visit our online store today to order the Eco-Friendly Multi-Purpose Cleaner and experience fast worldwide shipping, easy online payment, and a risk free satisfaction guarantee on every purchase.