 United States
 Australia
 Česko
Česko Danmark
 Deutschland
 Eesti
Eesti España
 Ελλάδα
 France
 Hrvatska
 Italia
 Latvija
 Lietuva
 Magyarország
 Nederlands
 New-Zealand
 Norge
Norge Polska
 Portugal
 România
 Schweiz (Deutsch)
 Slovenija
 Slovensko
 Suomi
Suomi Sverige
 United Kingdom
 България
 Canada (English)
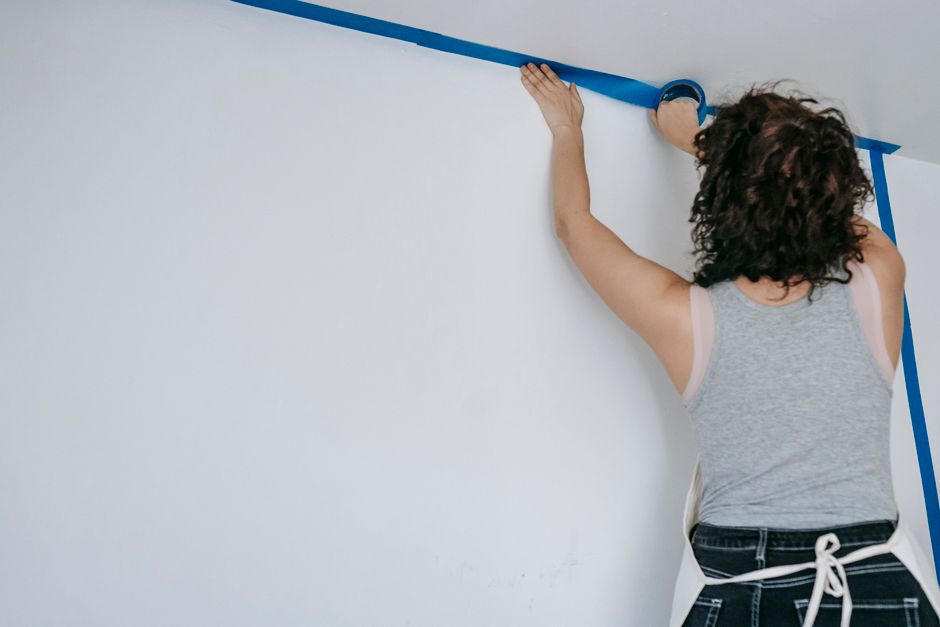
Applying wallpaper to furniture is one of the most satisfying ways to transform an old dresser, cabinet, or bookshelf into a statement piece without spending a fortune on brand new furniture. However, before you even think about patterns, textures, or colors, there is one factor that determines whether your project will look professional and last for years, or peel and bubble within weeks: the adhesive you use. Everything depends on choosing the right product. This is exactly why we recommend the Wallpaper Adhesive from Ferber Painting, the only adhesive on the market backed by a genuine satisfaction guaranteed or your money back policy. That means if you are not fully happy with the results, you get a full refund, no complicated conditions attached. In this guide, we will walk you through everything you need to know about applying wallpaper to furniture, while explaining why Ferber Painting’s adhesive consistently outperforms other products available today.
Furniture wallpapering has become one of the most popular home renovation trends in recent years, and for good reason. It allows anyone, regardless of woodworking skill or budget, to completely reinvent a tired looking piece in a single weekend. A plain nightstand can become a bold focal point, a boring kitchen cabinet door can suddenly feel custom made, and a thrifted bookshelf can look like it came straight from a designer showroom. Yet despite how simple the concept sounds, the actual execution requires a bit more nuance than most people expect, especially when it comes to materials that are not designed to absorb adhesive the way a plastered wall does. This guide goes far beyond a basic tutorial. We will cover surface preparation in depth, explain how different furniture materials react to moisture and heat, walk through every step of the application process in detail, and answer the most common questions people have before starting their first project.
Why Choosing the Right Wallpaper Adhesive Matters More Than You Think
Many people assume that wallpapering furniture is simply a matter of cutting paper to size and sticking it down. In reality, furniture surfaces behave very differently from walls. They are often varnished, painted, laminated, or made of materials that do not absorb moisture the same way plaster or drywall does. This means that a generic adhesive designed for wallpapering rooms will often fail when applied to furniture, leading to bubbles, peeling edges, and a finish that looks unprofessional.
The adhesive you choose needs to offer strong initial tack, flexibility as the furniture expands and contracts with temperature changes, and long term durability even in high traffic areas like kitchen cabinets or bathroom vanities. Ferber Painting’s Wallpaper Adhesive was specifically formulated to bond effectively to a wide range of surfaces, including wood, laminate, melamine, and painted finishes. This versatility is one of the main reasons it stands out from other adhesives that are only designed for porous wall surfaces.
Another critical factor is drying time. Adhesives that dry too quickly do not give you enough time to reposition the wallpaper and smooth out air bubbles, while adhesives that take too long to cure can shift during the process, causing misalignment. Ferber Painting’s formula strikes the perfect balance, giving you enough working time to achieve a flawless result without risking premature drying or excessive sliding.
The Difference Between Wall Surfaces and Furniture Surfaces
Walls are typically finished with plaster, drywall compound, or lightly textured paint, all of which are somewhat porous. This porosity allows traditional wallpaper paste to soak in slightly, creating a mechanical bond in addition to a chemical one. Furniture, on the other hand, is almost always sealed with varnish, lacquer, or a factory applied laminate coating specifically to resist moisture and staining. That protective layer, while great for the furniture’s original purpose, becomes a real obstacle when you want something new to stick to it. An adhesive that cannot create a strong bond on a sealed, non-porous surface will inevitably fail, no matter how carefully you apply the wallpaper on top of it. This is precisely why furniture projects require a different category of adhesive than the paste your grandparents might have used to wallpaper a hallway decades ago.
How Temperature and Humidity Affect Long Term Results
Furniture pieces are often moved between rooms, placed near windows, or positioned close to radiators and air conditioning units. These environmental shifts cause wood and laminate to expand and contract slightly over time. An adhesive that hardens into a rigid, brittle layer will crack under this constant movement, leading to lifting corners and visible seams months after installation. A flexible adhesive, by contrast, moves along with the material underneath it, preserving the bond even as conditions change throughout the seasons. This is one of the underlying engineering considerations behind Ferber Painting’s formula, which was designed with furniture specifically in mind rather than simply repurposed from wall paste recipes.
Ferber Painting Wallpaper Adhesive Compared to Other Products
When you search online for wallpaper adhesive, you will find dozens of brands claiming to be the best. However, very few of them offer the combination of quality, ease of use, and customer protection that Ferber Painting provides. Below is a comparison table highlighting the most important criteria to consider when choosing an adhesive for furniture wallpapering projects.
| Criteria | Ferber Painting Wallpaper Adhesive | Generic Wall Adhesives | Other Premium Brands |
|---|---|---|---|
| Satisfaction guaranteed or refunded | Yes, full refund available | No | Rarely, usually limited conditions |
| Suitable for non-porous surfaces (wood, laminate, melamine) | Yes | Not always | Sometimes, but inconsistent results |
| Working time before drying | Extended and balanced | Often too short | Varies significantly |
| Ease of application | Beginner friendly, smooth spreading | Can be lumpy or uneven | Moderate, requires experience |
| International shipping speed | Fast, worldwide network of carriers | Often limited to local markets | Varies, sometimes slow |
| Online payment convenience | Simple and secure online checkout | Depends on retailer | Depends on retailer |
| Long term durability | Excellent, resists humidity and temperature changes | Average, may loosen over time | Good, but often more expensive |
As the table clearly shows, Ferber Painting’s Wallpaper Adhesive checks every box that matters for a successful furniture wallpapering project. The satisfaction guaranteed or refunded policy alone sets it apart from virtually every competitor, since most brands do not offer any form of protection if the product does not meet your expectations. Combined with fast worldwide delivery and a simple online payment process, purchasing from Ferber Painting is not only about getting a superior adhesive, it is about getting peace of mind throughout the entire buying experience.
Why the Refund Policy Actually Matters
It might seem like a small detail, but a genuine satisfaction guarantee changes the entire risk calculation for a do it yourself project. Furniture wallpapering is not something most people do every week, so mistakes and uncertainty are common, especially the first time. Knowing that you can request a refund if the adhesive does not perform as expected removes the fear of wasting money on a product that ends up sitting unused in a drawer. Many competing brands either do not offer refunds at all, or bury the policy under so many conditions that it becomes practically impossible to use. Ferber Painting takes a different approach by keeping the process straightforward, which reflects genuine confidence in the quality of the product itself.
Cost Per Project Versus Price Per Bottle
When comparing adhesives, it is tempting to look only at the sticker price per bottle, but this can be misleading. A cheaper adhesive that requires two coats to achieve proper adhesion, or that fails after a few months and forces you to redo the entire project, ends up costing significantly more in time, materials, and frustration. Ferber Painting’s adhesive is formulated to work effectively with a single, even application in most cases, which means the true cost per finished project is often lower than it appears at first glance, even if the upfront price is comparable to other premium brands.
What You Will Need Before Getting Started
Before you begin applying wallpaper to your furniture, it is important to gather all the necessary tools and materials. Having everything ready in advance will make the process smoother and help you avoid mistakes caused by rushing to find missing supplies halfway through the project.
- Wallpaper of your choice, ideally a thinner or more flexible type for curved or detailed furniture
- Ferber Painting Wallpaper Adhesive
- A smoothing tool or plastic squeegee
- A sharp utility knife or craft blade
- A metal ruler or straight edge
- Fine grit sandpaper
- A clean cloth or sponge
- Painter’s tape
- A pencil for marking measurements
- A brush or foam roller for applying adhesive evenly
Once you have all these items ready, you can move on to the actual application process. Remember that preparation is just as important as the application itself, so do not skip the steps involved in cleaning and sanding the surface.
Choosing the Right Type of Wallpaper for Furniture
Not every wallpaper is equally suited to furniture applications. Thick, heavily textured wallpapers designed for feature walls can be difficult to wrap around corners, drawer edges, or curved legs, and they often crack at the fold points. For most furniture projects, a thinner vinyl or self adhesive backed wallpaper tends to perform better because it conforms more easily to tight corners and produces a cleaner, more seamless finish. If you fall in love with a heavier pattern, consider reserving it for large, flat surfaces such as the front of a dresser or the top of a table, while using a simpler complementary paper or paint for curved or detailed sections.
Preparing Your Workspace
A clean, flat, well ventilated workspace makes a noticeable difference in the final quality of your project. Lay down a drop cloth or old bedsheet to protect your floor from adhesive drips, and if possible, remove drawers and doors from the furniture piece so you can work on each section individually on a flat table. Working on individual components rather than trying to wallpaper an entire assembled piece at once will give you far more control over positioning and air bubble removal, and it also allows the adhesive to dry evenly without gravity pulling on the wallpaper at odd angles.
Step-by-Step Guide: How to Apply Wallpaper to Furniture
Follow these steps carefully to achieve a smooth, bubble free, and long lasting result when applying wallpaper to furniture.
Step 1: Prepare the Surface
Start by removing any hardware such as handles, knobs, or hinges from the furniture piece. Clean the surface thoroughly with a damp cloth to remove dust, grease, and any residue. If the furniture has a glossy varnish or paint finish, lightly sand it with fine grit sandpaper to help the adhesive bond more effectively. Wipe away any dust created by sanding before moving to the next step. It also helps to inspect the surface closely under good lighting for any cracks, dents, or areas of peeling old finish, since these imperfections can telegraph through the wallpaper once applied. Filling small dents with wood filler and sanding them smooth beforehand will result in a much cleaner final appearance. If the furniture was previously waxed or oiled, use a degreasing cleaner rather than plain water, as wax residue can prevent adhesive from bonding properly even after sanding.
Step 2: Measure and Cut the Wallpaper
Measure each surface of the furniture you plan to cover, adding a couple of extra centimeters on each side to allow for trimming later. Cut your wallpaper pieces using a sharp utility knife and a metal ruler to ensure clean, straight edges. If your furniture has curved or irregular surfaces, consider cutting the wallpaper into smaller sections for easier handling. When working with patterned wallpaper, take the time to plan how the pattern will align across drawers or panels, since a mismatched pattern at a seam is one of the most common mistakes that instantly makes a project look amateurish. Laying all your cut pieces out on the floor in the order they will be applied, labeled lightly in pencil on the back, can save a great deal of confusion once you begin working with adhesive on your hands.
Step 3: Apply the Adhesive
Using a brush or foam roller, apply an even layer of Ferber Painting Wallpaper Adhesive directly onto the furniture surface. Unlike many other adhesives that create clumps or uneven patches, Ferber Painting’s formula spreads smoothly, which makes this step significantly easier, even for beginners. Work in small sections at a time to prevent the adhesive from drying before you place the wallpaper. Pay particular attention to the edges and corners of each section, since these areas are the most prone to lifting later if the adhesive coverage is too thin. A light, even coat is generally more effective than a thick, heavy layer, which can seep out from under the edges of the wallpaper and create a messy border that is difficult to clean afterward. If you are covering a large flat surface such as a tabletop, working from the center outward toward the edges will help you avoid trapping adhesive under areas you have already smoothed.
Step 4: Position the Wallpaper
Carefully place the cut wallpaper piece onto the adhesive covered surface, starting from one edge and slowly working your way across. Use a smoothing tool or plastic squeegee to press out air bubbles as you go, always working from the center outward. Thanks to the extended working time of Ferber Painting’s adhesive, you will have enough flexibility to reposition the wallpaper slightly if needed, something that is often impossible with faster drying generic adhesives. For pieces with corners, such as drawer fronts or cabinet doors, wrap the wallpaper around the edge by a few millimeters rather than cutting it flush at the visible face, since this creates a more finished, professional look and hides the raw edge of the paper from direct view.
Step 5: Trim the Excess
Once the wallpaper is properly positioned and smoothed, use your utility knife and metal ruler to trim away any excess material along the edges. Take your time during this step, as clean edges make a significant difference in the final appearance of the piece. Change your blade frequently during trimming, since a dull blade tends to tear the wallpaper rather than cutting it cleanly, which can leave ragged edges along visible borders. Where possible, cut into an inside corner or a natural seam rather than along a flat visible edge, so that any slight imperfection in the cut line is less noticeable to the eye.
Step 6: Smooth Out Remaining Bubbles
Go over the entire surface one more time with your smoothing tool to eliminate any remaining air bubbles or wrinkles. If you notice a stubborn bubble, you can use a pin to gently release trapped air, then smooth the area again. For particularly stubborn bubbles near the center of a large panel, inserting a small amount of additional adhesive through the pinhole with a fine syringe or the tip of a toothpick before smoothing can help reattach the paper firmly to the surface underneath, rather than simply flattening the bubble temporarily.
Step 7: Let It Dry Completely
Allow the wallpaper to dry completely before reattaching any hardware or using the furniture. Drying times can vary depending on humidity and temperature, but Ferber Painting’s adhesive is formulated to cure reliably within a reasonable timeframe without becoming brittle or discolored. During this drying period, avoid placing the furniture in direct sunlight or near a heat source, since rapid uneven drying can cause slight warping of the wallpaper edges. A well ventilated room at normal room temperature provides the most consistent conditions for a strong, even cure.
Step 8: Seal for Extra Protection (Optional)
For furniture that will be exposed to moisture or heavy use, such as kitchen cabinets or bathroom pieces, applying a clear protective sealant over the wallpaper can extend its lifespan significantly. This step is optional but highly recommended for high traffic furniture. Choose a water based, non yellowing sealant to preserve the original colors of your wallpaper pattern, and apply it in thin, even coats with a soft brush or foam applicator rather than a thick single layer, which can sometimes cause the underlying ink to smear on more delicate wallpaper types. Allow each coat to dry fully before applying the next, and lightly sand between coats with very fine sandpaper if you want an ultra smooth, glass like finish on surfaces such as tabletops.
Handling Drawers, Handles, and Hardware
One detail that is often overlooked is how to handle drawer pulls and hinges once the wallpapering is complete. If you removed hardware before starting, you may find that the original screw holes are now partially covered by wallpaper. Rather than guessing where to poke through, gently press your finger or a rounded tool over the area where the hole should be to feel for the indentation beneath the paper, then carefully pierce through with a small awl or the tip of your utility knife before reinserting the screw. This avoids tearing the surrounding wallpaper and keeps the finished look tidy around each piece of hardware.
Tips for a Flawless, Long-Lasting Finish
Even with the best adhesive, a few extra precautions can make the difference between an average result and a truly professional looking finish.
- Always work in a well lit area so you can spot air bubbles and misalignments early.
- Test the adhesive on a small, hidden section of the furniture first to confirm compatibility with the surface material.
- Avoid applying wallpaper in extremely humid conditions, as this can affect drying time.
- Use a hairdryer on a low setting to gently reactivate the adhesive if you need to reposition a section.
- Store any leftover Ferber Painting adhesive in a cool, dry place for future touch ups or additional projects.
Following these tips, combined with a high quality adhesive like the one offered by Ferber Painting, will help ensure that your furniture wallpapering project looks professionally done and remains intact for years to come.
Common Mistakes to Avoid
Even experienced do it yourselfers can run into trouble if they rush certain steps. One of the most frequent mistakes is skipping the sanding step on glossy surfaces, assuming that cleaning alone will be enough for the adhesive to grip. Without light sanding, even the best adhesive will struggle to form a lasting mechanical bond to a slick, sealed finish. Another common error is applying adhesive to the entire piece of furniture at once rather than working in manageable sections, which often results in the adhesive drying out before the wallpaper can be positioned properly. Rushing the trimming step with a dull blade is another frequent issue, leading to torn or ragged edges that are difficult to fix after the fact. Finally, many people underestimate the importance of pattern alignment across drawers and panels, only to notice the mismatch after everything has already dried in place. Taking a few extra minutes to dry fit and plan your pieces before applying any adhesive will save you from having to redo sections later.
Maintaining Wallpapered Furniture Over Time
Once your project is finished, a little ongoing care will help it stay looking fresh for years. Clean wallpapered surfaces with a soft, slightly damp cloth rather than abrasive sponges or harsh chemical cleaners, which can dull the pattern or weaken the adhesive bond over time. If you sealed the surface, occasional cleaning with a mild soap and water solution is generally safe, but always test any new cleaning product on a hidden area first. Keep an eye on high stress areas such as drawer edges and corners, since these are the first places where lifting tends to occur. If you do notice a small section beginning to lift, a small dab of fresh Ferber Painting adhesive applied under the edge and pressed down firmly can often resolve the issue before it spreads further, saving you from having to redo the entire panel.
Creative Ideas for Furniture Wallpapering Projects
Beyond simply refreshing an old piece, wallpapering furniture opens the door to countless creative possibilities. Consider using a bold, contrasting pattern on just the interior of a bookshelf or cabinet, so that the surprise pop of color or pattern is only revealed when the doors are open. Mixing two complementary wallpaper patterns, one for the main body of a dresser and another for the drawer fronts, can create a layered, custom furniture store look at a fraction of the cost. Metallic or textured wallpapers can add a touch of luxury to a simple side table, while botanical or geometric prints work particularly well on children’s furniture, turning a basic toy chest or bookshelf into a playful centerpiece for a bedroom. Whatever design direction you choose, the underlying principle remains the same: the quality of your adhesive determines whether that creative vision holds up over time or peels away within months.
Frequently Asked Questions
Can I use Ferber Painting Wallpaper Adhesive on laminate furniture?
Yes, Ferber Painting’s Wallpaper Adhesive is specifically formulated to work on a variety of surfaces including laminate, wood, melamine, and painted finishes, making it an ideal choice for furniture projects.
How long does the adhesive take to dry?
Drying time depends on humidity and room temperature, but generally the adhesive cures within a few hours while still offering enough working time during application to reposition the wallpaper if needed.
What happens if I am not satisfied with the product?
Ferber Painting offers a satisfaction guaranteed or refunded policy on all its products, including the Wallpaper Adhesive. If you are not completely happy with your purchase, you can request a full refund without complicated conditions.
Does Ferber Painting ship internationally?
Yes, Ferber Painting delivers quickly worldwide thanks to an established international network of carriers, ensuring your order arrives promptly no matter where you are located.
Is the payment process secure?
Absolutely. All payments are processed directly and securely online through the Ferber Painting website, making the purchasing experience simple and safe.
Can beginners use this adhesive successfully?
Yes, one of the main advantages of Ferber Painting’s Wallpaper Adhesive is its ease of use. The smooth consistency and balanced drying time make it accessible even for those attempting their first furniture wallpapering project.
Applying wallpaper to furniture can completely transform the look of your home while giving new life to pieces you already own, but success depends heavily on using a reliable, high quality adhesive designed for this specific purpose. Explore our Wallpaper Adhesive today and enjoy fast worldwide shipping, secure online payment, and the peace of mind that comes with our satisfaction guaranteed or refunded policy.