 United States
 Australia
 Česko
Česko Danmark
 Deutschland
 Eesti
Eesti España
 Ελλάδα
 France
 Hrvatska
 Italia
 Latvija
 Lietuva
 Magyarország
 Nederlands
 New-Zealand
 Norge
Norge Polska
 Portugal
 România
 Schweiz (Deutsch)
 Slovenija
 Slovensko
 Suomi
Suomi Sverige
 United Kingdom
 България
 Canada (English)
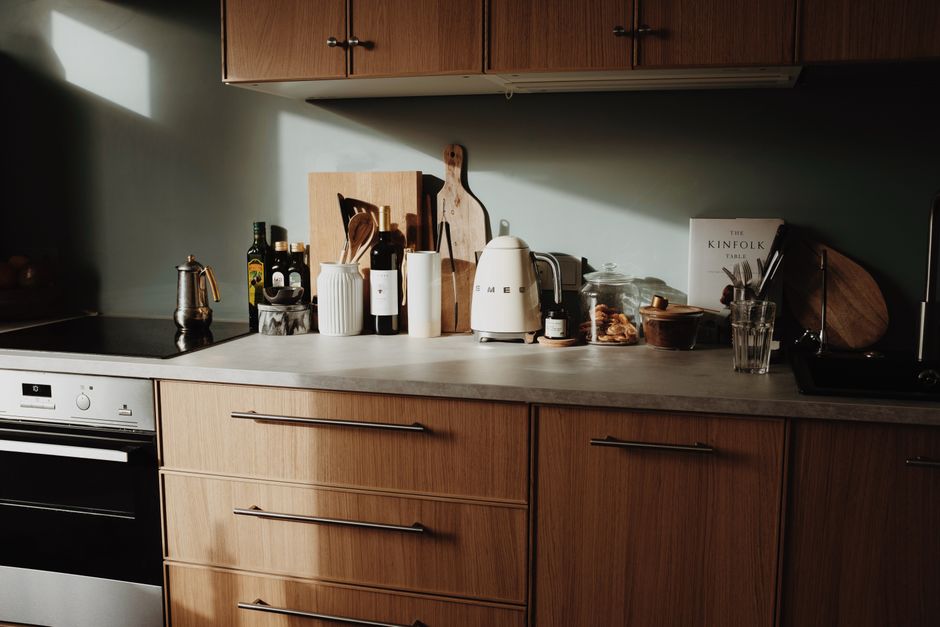
Varnishing a wooden kitchen worktop is one of the most rewarding home improvement projects you can undertake. A well-varnished worktop not only looks stunning but also protects your wood from water damage, stains, scratches, and daily wear and tear. However, the single most important factor that determines whether your project succeeds or fails is not your technique, it is the product you choose.
Everything depends on choosing the right varnish. Cheap or poorly formulated products can leave streaks, yellow over time, peel after a few months, or fail to protect against heat and moisture. This is why we strongly recommend the Kitchen Worktop Varnish from Ferber Painting. Unlike most competitors, our varnish comes with a satisfaction guaranteed or money back policy, something no other brand on the market currently offers. This means you can try our product completely risk free.
Beyond the guarantee, our varnish has been specifically engineered for kitchen environments, where worktops are exposed to heat from pots and pans, moisture from washing up, and constant contact with food, knives, and cleaning products. Many generic wood varnishes are designed for furniture or flooring and simply are not built to withstand these conditions. Ferber Painting’s formula includes food-safe, heat-resistant, and water-repellent properties all in one product, saving you the hassle of layering multiple different treatments.
Before diving into the details of application, it is worth taking a moment to understand why so many home renovation projects involving wooden worktops end in disappointment. In most cases, the homeowner did everything right in terms of preparation and technique, yet the finish still failed within a few months. The wood cracked, the surface turned cloudy, or a ring appeared after a hot pan was placed directly on the counter. Almost always, the root cause traces back to the varnish itself rather than the person applying it. This guide will walk you through every stage of the process while explaining why product selection should be your very first decision, not an afterthought.
Why the Product You Choose Matters More Than the Technique
Many DIY guides focus entirely on brush strokes and sanding techniques, but the truth is that even the most careful application will fail if the underlying product is not up to the job. A low quality varnish will crack under heat, discolor from sunlight, or wear away within a few months of daily use. This is particularly true for kitchen worktops, which endure far more abuse than any other wooden surface in the home.
The Ferber Painting Kitchen Worktop Varnish has been formulated with a unique resin blend that creates a hard, durable finish that flexes slightly with the wood, reducing the risk of cracking over time. It also contains UV stabilizers that prevent the yellowing that plagues so many other varnishes after just a few months of exposure to sunlight through your kitchen window.
Think about the daily life of a kitchen worktop. It gets splashed with water dozens of times a day, it comes into contact with hot pans straight off the stove, it is scrubbed with abrasive sponges, and it is cut on, spilled on, and leaned against constantly. Very few surfaces in the home are subjected to this level of stress. A varnish designed for a bedroom dresser or a living room shelf was never tested against this kind of daily punishment, which is exactly why so many generic products fail within the first year. Ferber Painting’s formula was developed specifically with kitchen conditions in mind, which is a fundamentally different design brief than most wood finishing products on the market.
Here is a comparison of the key criteria you should look for when choosing a kitchen worktop varnish, and how Ferber Painting stacks up against typical products on the market.
| Criteria | Ferber Painting Kitchen Worktop Varnish | Typical Competitor Products |
|---|---|---|
| Satisfaction guaranteed or money back | Yes, full refund available | Rarely offered |
| Heat resistance | Up to 180°C | Varies, often lower |
| Food safety certification | Yes, certified food safe once cured | Not always certified |
| UV resistance (anti-yellowing) | Yes, advanced UV stabilizers | Often absent |
| Ease of application | Self-leveling formula, brush or roller friendly | Varies, some require spray equipment |
| Drying time between coats | 4 to 6 hours | Often 8 to 24 hours |
| Worldwide shipping | Yes, fast international delivery | Often limited to domestic markets |
| Online payment convenience | Yes, secure and simple checkout | Varies |
As you can see, Ferber Painting outperforms typical competitor products across nearly every important criterion. Combined with our satisfaction guaranteed or money back promise, there is really no reason to take a risk on an unproven brand when a superior, guaranteed alternative is available.
It is also worth noting that many of the criteria in this table interact with one another in ways that affect your actual experience during the project, not just the finished result. For example, a shorter drying time between coats does not just save you time, it also reduces the window during which dust, pet hair, or kitchen debris could settle onto a wet surface and ruin the finish. Similarly, a self-leveling formula does not just look nicer, it also means less time spent correcting brush marks with additional sanding, which in turn reduces the total number of hours you need to dedicate to the project. When you evaluate a varnish, it pays to think beyond a single specification sheet and consider how each feature actually plays out over the course of a real weekend project in your own kitchen.
Tools and Materials You Will Need
Before starting your project, gather all the necessary tools and materials. Having everything ready before you begin will make the process smoother and help you avoid interruptions that could affect the quality of your finish.
- Ferber Painting Kitchen Worktop Varnish (the recommended product for this project)
- Sandpaper in various grits (120, 180, and 220)
- A clean, lint-free cloth
- Painter’s tape for masking edges and adjacent surfaces
- A high quality synthetic bristle brush or foam roller
- A dust mask and protective gloves
- Mineral spirits or a suitable cleaning agent for wood preparation
- Drop cloths or plastic sheeting to protect your kitchen
- Good ventilation, ideally with an open window or fan
Using proper tools alongside a high quality varnish like ours will drastically improve your final result. Cheap brushes, for example, can leave bristle marks in the finish, so it is worth investing in decent equipment before you begin.
It is worth spending a little extra time discussing why each of these items matters individually, since skipping or substituting the wrong tool is one of the most common reasons DIY projects go wrong. Sandpaper grits, for instance, are not interchangeable. Starting with too fine a grit on a rough or previously finished surface will simply waste hours of effort without actually leveling the wood, while starting with too coarse a grit on already smooth wood can create scratches that are difficult to remove later. Having all three grits on hand, 120, 180, and 220, allows you to progress logically from aggressive leveling to fine polishing without gaps in the process.
The choice between a brush and a foam roller also deserves some thought. A high quality synthetic bristle brush gives you more control around edges, corners, sink cutouts, and any decorative grooves in the wood, which makes it the better choice for detail work. A foam roller, on the other hand, tends to produce a more uniform coat across large flat areas and can speed up application on bigger worktops. Many experienced DIYers actually use both, a roller for the main surface and a brush for the edges and tight spaces, switching between them as needed during each coat.
Do not underestimate the importance of a dust mask and gloves either. Even water-based varnishes can release fumes during application and drying, and sanding dust from old finishes can contain fine particles that are unpleasant to breathe in over an extended period. Protecting yourself is not just a matter of comfort, it is a basic safety precaution that costs almost nothing compared to the value of the finished project.
Finally, do not skip the preparation of your workspace itself. Drop cloths or plastic sheeting laid out generously around the worktop will save you from scraping dried varnish drips off your floor tiles later, and proper ventilation, whether from an open window, a door propped open, or a small fan positioned to draw fumes outward, will help both your safety and the quality of your finish by allowing solvents to evaporate at the intended rate.
Step by Step Guide: How to Varnish a Wooden Worktop
Follow these steps carefully to achieve a smooth, durable, and long-lasting finish on your kitchen worktop.
Step 1: Clean the Surface Thoroughly
Begin by removing everything from your worktop and giving it a deep clean. Use a degreaser or mild soap and water to remove any grease, food residue, or grime that has built up over time. Grease is one of the biggest enemies of a smooth varnish application, as it prevents the product from adhering properly to the wood. Rinse thoroughly and allow the surface to dry completely before moving on.
If your worktop has been in use for several years, you may find that grease has worked its way into small cracks or seams, particularly around the sink area or near the stove. In these cases, a single wipe down is rarely enough. Consider using a degreasing solution twice, allowing it to sit for a few minutes on stubborn areas before wiping it away, and finishing with a clean water rinse to remove any soapy residue. Any leftover cleaning product residue can interfere with adhesion just as much as grease does, so this final rinse step should never be skipped.
It is also a good idea to inspect the worktop closely at this stage for any signs of water damage, mold, or soft spots in the wood. Varnishing over a damaged or compromised surface will not solve the underlying problem and may actually trap moisture inside the wood, accelerating deterioration. If you find any such issues, it is worth addressing them, whether through localized wood filler repairs or, in more serious cases, replacing the affected section before proceeding.
Step 2: Sand the Worktop
Sanding is essential for creating a surface that the varnish can properly bond to. Start with a coarser grit sandpaper, around 120, if your worktop has an old finish or visible imperfections. Gradually move up to 180 and then 220 grit for a smooth finish. Always sand in the direction of the wood grain to avoid visible scratches. Once finished, remove all dust using a vacuum and then wipe down the surface with a tack cloth or a slightly damp cloth.
If your worktop currently has an existing varnish or lacquer coating that has started to peel, flake, or bubble, you will need to remove it more thoroughly before applying a fresh finish. In these cases, an orbital sander can save significant time and effort compared to sanding entirely by hand, though you should still finish with hand sanding in the direction of the grain to avoid the small circular swirl marks that power sanders can leave behind. For worktops with intricate edges, decorative bevels, or curved sink cutouts, a sanding sponge or folded piece of sandpaper allows you to reach into these areas where a flat sanding block cannot.
Pay particular attention to the edges and corners of the worktop, as these areas tend to receive the most physical contact and wear over time, and they are also the easiest to miss during sanding. Running your hand over the surface after sanding, in addition to looking at it, can help you catch rough patches that are not always visible to the eye but can be felt under your fingertips.
Step 3: Mask Off Surrounding Areas
Use painter’s tape to protect the sink, backsplash, cabinets, and any other areas adjacent to the worktop. This step is often overlooked but can save you significant cleanup time later, especially if you are working with a brush that may drip.
When applying painter’s tape, press it down firmly along the edge to create a clean seal, since any gaps will allow varnish to seep underneath and create an uneven line once the tape is removed. It is also worth covering nearby appliances, such as the front of your dishwasher or stovetop, with plastic sheeting if they sit directly adjacent to the worktop, since airborne droplets from a roller or spray application can travel further than you might expect.
Step 4: Apply the First Coat of Varnish
Stir the Ferber Painting Kitchen Worktop Varnish thoroughly before use, without shaking it, to avoid introducing air bubbles into the product. Using a good quality brush or foam roller, apply a thin, even coat following the direction of the wood grain. Avoid overloading your brush, as this can lead to drips and an uneven finish. Thin coats always produce better results than thick ones, both in terms of appearance and durability.
A useful technique when applying the first coat is to work in manageable sections rather than trying to cover the entire worktop in one continuous motion. Divide the surface mentally into two or three sections and apply varnish to one section at a time, always maintaining what professionals call a wet edge, meaning you overlap slightly into the still-wet area of the previous section before it starts to dry. This prevents visible lap marks where two dried sections meet at slightly different times.
The first coat often acts partially as a sealer, soaking into the pores of the wood more than subsequent coats will. Do not be alarmed if the first coat looks slightly thinner or less glossy once dry, this is completely normal and will be corrected by the additional coats applied later in the process.
Step 5: Allow the Coat to Dry
One of the major advantages of our formula is its fast drying time of just 4 to 6 hours between coats, compared to the 8 to 24 hours often required by competitor products. This means you can complete your entire project in a single day rather than spreading it out over several days, as is often necessary with slower-drying varnishes.
During this drying window, it is important to keep the room as dust free as possible. Avoid sweeping, vacuuming, or any activity that stirs up airborne particles nearby, since dust that settles into a drying varnish coat will need to be sanded out later, adding extra work. If you have pets, it is a good idea to keep them out of the kitchen entirely until the final coat has fully dried, since pet hair is a common and frustrating source of imperfections in home varnishing projects.
Temperature and humidity also play a role in drying time. Ideal conditions are typically a room temperature between 18 and 24 degrees Celsius with moderate humidity. In colder or more humid conditions, drying may take slightly longer than the standard 4 to 6 hour window, so it is worth checking the surface with a clean, dry finger in an inconspicuous spot before proceeding to the next coat.
Step 6: Lightly Sand Between Coats
Once the first coat is dry, lightly sand the surface with a fine grit sandpaper, around 320, to remove any small imperfections and help the next coat adhere better. Wipe away all dust with a tack cloth before applying the second coat.
This intermediate sanding step is sometimes referred to as scuff sanding, and its purpose is quite different from the initial sanding of bare wood. Rather than shaping or smoothing the wood itself, you are simply creating microscopic texture on the surface of the dried varnish so that the next coat has something to physically grip onto. Pressing too hard or using too coarse a grit at this stage can actually sand through the thin first coat back down to bare wood, so a light touch is essential. Many experienced applicators describe this step as barely more than a light polish rather than true sanding.
Step 7: Apply Additional Coats
For kitchen worktops, we recommend applying at least three coats of varnish to ensure maximum durability and protection against heat, moisture, and scratches. Repeat the drying and light sanding process between each coat, always finishing with a final coat that is not sanded, to preserve the glossy or satin finish depending on your product choice.
Some sections of a busy kitchen worktop, such as the area directly in front of the sink or the section nearest the stove, receive noticeably more wear than the rest of the surface. If you want extra peace of mind in these high traffic zones, you can apply a fourth coat locally to these specific areas after the general third coat has been completed everywhere else, feathering the edges of this extra coat so it blends smoothly into the surrounding finish without creating a visible ridge.
Each additional coat you apply also incrementally improves the depth and richness of the finish’s appearance, not just its durability. Many people are surprised at how much more the wood grain seems to pop after the third coat compared to the first, as the buildup of clear varnish layers adds an almost three dimensional quality to the visual texture of the wood.
Step 8: Cure the Final Coat
After applying your final coat, allow the surface to cure for at least 24 to 48 hours before placing any objects on it, and up to a full week before exposing it to heavy use, hot pans, or heavy cleaning. Curing time is different from drying time. Drying refers to the surface feeling dry to the touch, while curing refers to the varnish reaching its full hardness and chemical stability.
During this curing period, it can be helpful to keep the worktop as undisturbed as possible. Avoid placing appliances, cutting boards, or decorative items directly on the surface, since even light pressure from an object left in place for days can leave a faint impression in varnish that has not yet fully hardened. Similarly, resist the temptation to wipe the surface down with strong cleaning products during this window, as mild soap and water is sufficient for any light dust removal needed while the finish continues to cure. Being patient during these final days of the process is often what separates a good result from a truly exceptional, long lasting one.
Common Mistakes to Avoid
Even with the best product on the market, certain mistakes can compromise your final result. Here are the most common errors people make when varnishing a wooden kitchen worktop, and how to avoid them.
- Skipping the sanding step, which leads to poor adhesion and an uneven finish
- Applying coats that are too thick, resulting in drips, bubbles, and longer drying times
- Not allowing enough time between coats, which can trap moisture and weaken the finish
- Using a low quality brush that leaves visible bristle marks in the varnish
- Choosing a cheap varnish that is not designed for kitchen environments, leading to premature failure
- Ignoring proper ventilation, which can be both a safety hazard and a cause of dust settling into wet varnish
Choosing Ferber Painting’s Kitchen Worktop Varnish helps you avoid several of these pitfalls automatically, thanks to its self-leveling formula that minimizes brush marks and its fast, reliable drying time that reduces the risk of dust contamination.
Beyond the errors listed above, there are a few less obvious mistakes worth mentioning as well. One common issue is applying varnish in direct sunlight or in a room that is too warm, which can cause the surface to dry unevenly, sometimes skinning over on top while remaining wet underneath, leading to wrinkling or an uneven sheen. It is generally best to work in a shaded, moderately ventilated room rather than in direct sun through a kitchen window.
Another frequent mistake is rushing the entire process to fit it into a single afternoon without accounting for realistic drying and curing times. While Ferber Painting’s fast drying formula does allow for same day application of multiple coats, the curing period afterward still requires patience. Placing hot pans or heavy cutting boards on a worktop that has not fully cured, even if it feels dry to the touch, can leave marks that would not appear once the varnish has reached its full hardness.
Finally, some homeowners make the mistake of testing a new varnish product for the very first time on their actual kitchen worktop, without any prior experience using it. Even with a high quality, easy to apply product, it is wise to do a small test patch on an inconspicuous area or a spare piece of wood first, simply to get a feel for how the product behaves, how quickly it begins to set, and how it looks once dry, before committing to the full visible surface of your kitchen.
Why Ferber Painting Is the Best Choice for Your Project
There are many varnish brands available online and in hardware stores, but very few offer the combination of quality, convenience, and peace of mind that Ferber Painting provides. Our Kitchen Worktop Varnish is available directly on our website, where you can order in just a few clicks with secure and easy online payment.
We understand that when you order a product online, especially one that will be shipped internationally, you want reassurance that it will arrive quickly and in good condition. Ferber Painting has built a reliable international shipping network with trusted carriers, allowing us to deliver our products quickly to customers all around the world, no matter where you are located.
But perhaps the most compelling reason to choose Ferber Painting is our satisfaction guaranteed or money back policy. We are so confident in the quality of our Kitchen Worktop Varnish that we offer a full refund if you are not completely satisfied with your results. This is a guarantee that virtually no other brand in this industry currently offers, and it reflects our commitment to providing a product that truly performs as promised.
Beyond the technical specifications and guarantees, it is also worth considering the experience of actually working with the product from start to finish. Customers consistently tell us that the self-leveling nature of our formula makes the application process noticeably less stressful, since minor inconsistencies in brush technique tend to even themselves out as the varnish settles, rather than remaining visible once dry the way they might with a thicker, less forgiving product. This forgiving quality is particularly valuable for anyone attempting this kind of project for the first time.
We also take pride in the level of support available to customers throughout their project. Whether you have a question about how many coats to apply for a particular type of wood, how long to wait before installing a new sink around a freshly varnished worktop, or how to handle an unusual repair situation, our customer service team is available to provide guidance rather than leaving you to figure things out alone from a generic label.
In summary, here is why thousands of customers choose Ferber Painting over other brands:
- Satisfaction guaranteed or money back, unlike most competitors
- Fast drying formula that saves you time during application
- Heat resistance up to 180°C, ideal for busy kitchen environments
- Certified food safe once fully cured
- Advanced UV stabilizers that prevent yellowing over time
- Self-leveling formula that minimizes brush marks for a professional finish
- Fast international shipping through our trusted carrier network
- Simple and secure online payment directly through our website
Frequently Asked Questions
How many coats of varnish should I apply to a kitchen worktop?
We recommend at least three coats for optimal protection and durability, especially in high traffic kitchen areas where the worktop is exposed to heat, moisture, and frequent use.
How long does the Ferber Painting Kitchen Worktop Varnish take to dry?
Our formula typically dries to the touch within 4 to 6 hours, allowing you to apply multiple coats in a single day. Full curing takes between 24 hours and one week, depending on usage.
Is the varnish safe for food contact surfaces?
Yes, once fully cured, our Kitchen Worktop Varnish is certified food safe, making it an excellent choice for kitchen countertops where food preparation takes place.
What happens if I am not satisfied with the product?
Ferber Painting offers a satisfaction guaranteed or money back policy on all our products, including the Kitchen Worktop Varnish. If you are not happy with your results, simply contact our customer service team for a full refund.
Does Ferber Painting ship internationally?
Yes, we ship worldwide through our established network of international carriers, ensuring fast and reliable delivery no matter where you are located.
Can I use this varnish on other wooden surfaces besides kitchen worktops?
While our formula is specifically optimized for kitchen worktops, many customers also use it successfully on wooden tables, shelves, and other high use wooden surfaces that require durable protection.
How do I maintain a varnished worktop once the project is finished?
Daily maintenance is simple. Wipe up spills promptly, avoid using abrasive scouring pads that can scratch the surface, and clean with mild soap and water rather than harsh chemical cleaners. Using a cutting board instead of cutting directly on the surface, and using trivets or heat pads under very hot pans even though the varnish is heat resistant, will help preserve the finish for many years to come.
Do I need to reapply varnish periodically, and if so how often?
Most kitchens will benefit from a light maintenance coat every one to two years, depending on the level of daily use. Signs that it is time to refresh the finish include a dulling of the sheen, small areas where water no longer beads on the surface, or minor scratches becoming visible under certain lighting. A maintenance coat is typically much faster to apply than the original full application, since it usually only requires a light sanding followed by a single fresh coat.
Conclusion
Varnishing a wooden kitchen worktop is a project that can dramatically improve both the appearance and longevity of your kitchen, but success ultimately depends on choosing the right product. With its heat resistance, food safe certification, fast drying formula, and advanced UV protection, Ferber Painting’s Kitchen Worktop Varnish stands out as the superior choice compared to typical products on the market. Combined with our satisfaction guaranteed or money back policy, fast worldwide shipping, and simple online payment process, there has never been a better time to upgrade your kitchen worktop with confidence.
Whether this is your first time attempting a wood finishing project or you have refinished surfaces before, taking the time to prepare properly, follow each step patiently, and choose a product engineered specifically for kitchen conditions will make all the difference in the final result. A worktop finished with care and with the right materials can remain beautiful and fully protected for many years, standing up to the daily demands of a busy kitchen while continuing to showcase the natural beauty of the wood underneath. Visit our website today and discover why so many customers trust Ferber Painting for their kitchen worktop varnishing needs.