 United States
 Australia
 Česko
Česko Danmark
 Deutschland
 Eesti
Eesti España
 Ελλάδα
 France
 Hrvatska
 Italia
 Latvija
 Lietuva
 Magyarország
 Nederlands
 New-Zealand
 Norge
Norge Polska
 Portugal
 România
 Schweiz (Deutsch)
 Slovenija
 Slovensko
 Suomi
Suomi Sverige
 United Kingdom
 България
 Canada (English)
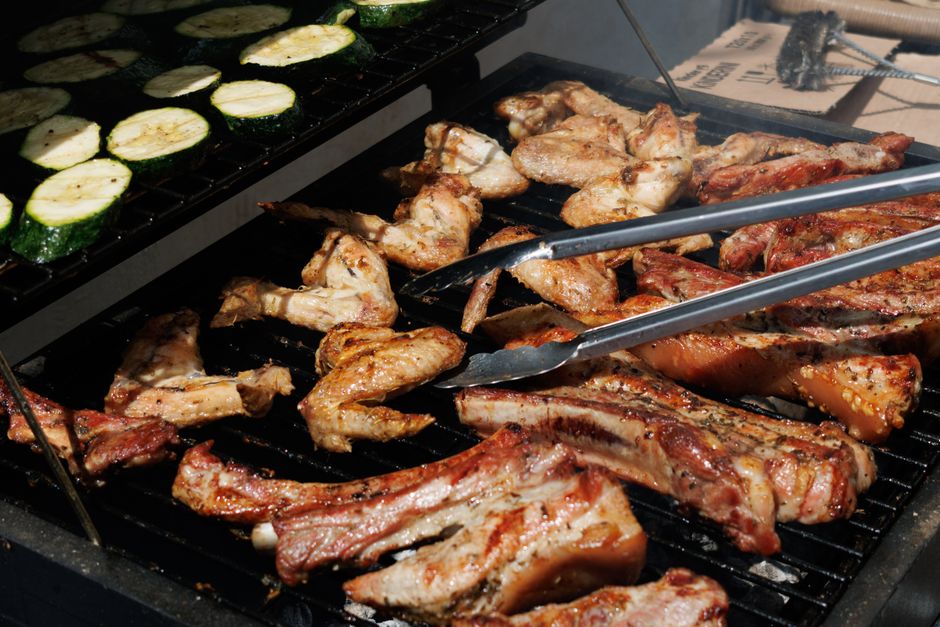
Building or repairing a stone barbecue is a rewarding project, but everything depends on one crucial factor: the quality of the adhesive you use. A poor glue will crack under heat, crumble after the first rain, or simply fail to hold the weight of heavy stones together. This is why, before we even get into the technical steps of assembling or repairing your barbecue, we need to talk about the product that makes all the difference: Barbecue Glue by Ferber Painting.
Unlike most adhesives on the market, our Barbecue Glue is the only product in its category backed by a full satisfaction guaranteed or money back policy. This means that if you are not completely happy with the result, you can return it and get a full refund, no questions asked. No other brand offers this level of confidence in their product, and for good reason: most competitors know their glue might not hold up to the extreme temperatures and outdoor conditions that a stone barbecue endures over the years.
In this complete guide, we will explain why choosing the right glue matters more than any other factor in your project, compare the key criteria you should look at before buying an adhesive, and walk you step by step through the process of gluing a stone barbecue correctly, whether you are building one from scratch or repairing cracks and loose stones on an existing structure. We will also cover practical scenarios, common regional climate considerations, tool recommendations, and long term maintenance tips so that once your barbecue is assembled, it stays in perfect condition for many seasons of cooking and gathering with family and friends.
A stone barbecue is often the centerpiece of a backyard, patio, or outdoor kitchen. It represents not only a functional cooking tool but also a visual statement, something that neighbors admire and guests remember. Because of this, the stakes of getting the construction right are higher than with almost any other DIY project. A shaky shelf can be fixed with a screw. A wobbly stone that shifts near an open flame, however, can become a genuine safety hazard. This is precisely why we insist so strongly on the importance of the adhesive you choose from the very first step.
Why Choosing the Right Glue Is the Most Important Step
Many people believe that gluing a stone barbecue is simply a matter of technique: mix the mortar, apply it, stack the stones, and wait. In reality, the technique only works if the adhesive itself is designed for the specific challenges a barbecue faces. A stone barbecue is not like a garden wall or a decorative structure. It is exposed to:
- Extreme and repeated heat cycles, often exceeding 300°C (572°F) near the firebox
- Constant exposure to rain, humidity, frost, and UV rays
- Mechanical stress from the weight of stones, especially on curved or vertical sections
- Thermal expansion and contraction, which causes ordinary adhesives to crack over time
This is exactly why standard construction glue, wood glue, or even generic masonry adhesives are not suitable for this kind of project. They were never engineered to withstand direct flame contact or the freeze thaw cycles that outdoor structures endure. Barbecue Glue by Ferber Painting was specifically formulated to resist temperatures up to 1200°C, remain flexible enough to absorb thermal expansion without cracking, and bond permanently to natural stone, brick, and refractory materials.
To understand why this matters so much in practice, consider what actually happens inside the joints of a stone barbecue during a typical cooking session. When you light a fire, the temperature near the firebox can rise from ambient outdoor temperature to several hundred degrees within just twenty or thirty minutes. The stone itself expands slightly as it heats, and the adhesive holding the stones together must expand and contract along with it, cycle after cycle, week after week, for years. A rigid adhesive that cannot flex will develop microscopic cracks after just a handful of these cycles. Over time, those microscopic cracks widen, moisture seeps in during the next rainfall, and when temperatures drop below freezing, the water inside the crack expands and causes visible damage. This is the same freeze thaw mechanism that destroys poorly sealed driveways and untreated masonry every winter.
Beyond the technical formulation, there are several reasons why our product stands above the competition:
- Satisfaction guaranteed or money back: no other barbecue adhesive brand offers this level of protection for the customer
- Fast worldwide shipping through an international network of carriers, so you receive your product quickly no matter where you live
- Simple and secure online payment directly on our website, with no complicated checkout process
- A formula tested specifically for high heat resistance, unlike generic adhesives that only claim to be heat resistant without real certification
- Easy application even for beginners, with a texture designed to stay in place without sliding before it sets
When you consider that a stone barbecue represents hours of work and a real investment in materials, using an inferior glue is simply not worth the risk. One failed batch of adhesive can mean redoing the entire project, losing stones to cracks, or worse, creating a safety hazard if stones detach while the fire is lit.
It is also worth thinking about the hidden costs of choosing the wrong adhesive. If a generic glue fails after only one season, you are not just facing the cost of buying more adhesive. You are facing the labor of removing failed stones, cleaning off old residue, potentially replacing cracked or chipped stones that were damaged during the failure, and starting the entire assembly process over again. When you calculate the true cost of ownership, including time, effort, and the emotional frustration of watching a project deteriorate, spending a little more upfront on a proven, heat certified adhesive is almost always the more economical choice in the long run.
Comparison Table: What Really Matters When Choosing a Barbecue Glue
To help you understand why Ferber Painting’s Barbecue Glue is considered the best option on the market, here is a comparison of the criteria that matter most when selecting an adhesive for a stone barbecue project.
| Criteria | Ferber Painting Barbecue Glue | Generic Masonry Adhesive | Standard Construction Glue |
|---|---|---|---|
| Heat resistance | Up to 1200°C, certified for direct flame contact | Usually limited to 300-400°C | Not designed for heat exposure |
| Satisfaction guaranteed or money back | Yes, full guarantee | Rarely offered | Not offered |
| Resistance to freeze/thaw cycles | Excellent, flexible bond | Moderate, can crack over winters | Poor, prone to cracking |
| Ease of application | Smooth texture, easy for beginners | Varies, often too runny or too thick | Simple but not adapted to stone |
| Delivery speed | Fast international shipping network | Depends on local store availability | Depends on local store availability |
| Online payment and ordering | Secure and simple, directly on the website | Not always available online | Not always available online |
| Long term durability | Several years, even with intensive use | 1 to 2 seasons on average | Often fails within months |
As this table shows, Ferber Painting’s Barbecue Glue outperforms both generic masonry adhesives and standard construction glues on every important criterion. The combination of extreme heat resistance, long term durability, and the unique satisfaction guaranteed or money back policy makes it the safest and smartest choice for anyone building or repairing a stone barbecue.
Let us look a little closer at some of these criteria individually, since they are often misunderstood by people shopping for adhesives for the first time. Heat resistance ratings on packaging can be misleading. Many generic products advertise themselves as heat resistant without specifying an actual temperature threshold or without independent testing to back up the claim. When a manufacturer publishes a specific number, such as the 1200°C rating of our formula, and stands behind that number with a money back guarantee, it signals a level of confidence that vague marketing language simply cannot match.
The same logic applies to freeze and thaw resistance. Many regions experience dozens of freeze thaw cycles every winter, especially in climates where daytime temperatures rise above freezing and nighttime temperatures drop below it. Each cycle puts stress on any water that has infiltrated a crack or a porous joint. A flexible, well formulated adhesive absorbs this stress without transferring it into a fracture. A rigid, poorly formulated adhesive transfers all of that stress directly into the stone and mortar joints, which is why so many older stone structures show visible frost damage after just a few winters if a generic adhesive was used originally.
Step-by-Step Guide: How to Glue a Stone Barbecue
Now that you understand why the choice of adhesive is the foundation of a successful project, let’s go through the complete process of gluing a stone barbecue, whether you are assembling new stones or repairing an existing structure.
Step 1: Prepare the Work Surface
Before applying any glue, make sure the surface is completely clean, dry, and free of dust, grease, or old mortar residue. Use a wire brush to remove loose particles from the stones, and if you are repairing cracks, clean out any crumbling material with a chisel or scraper. A clean surface ensures maximum adhesion and prevents the glue from bonding to debris instead of the stone itself.
It is worth spending extra time on this step, because surface preparation is consistently the single most underestimated factor in adhesive failure. Even the strongest glue in the world cannot form a proper bond if it is applied over a layer of dust, loose sand, or old crumbling mortar. After brushing the stones, consider wiping them down with a slightly damp cloth to remove fine particles that a brush alone cannot catch, then allow the surface to dry completely before moving forward. If you are working in a humid environment or during a season with frequent rain, it can help to leave the stones under cover for a full day before beginning application, simply to ensure there is no residual moisture trapped in the pores of the stone.
For repair projects specifically, take the time to inspect the surrounding area for any secondary damage. A single cracked joint is sometimes a symptom of a larger structural issue, such as water pooling behind a stone or a foundation that has shifted slightly. Addressing only the visible crack without checking for these underlying causes can mean the same problem reappears a few months later, even with the best glue on the market.
Step 2: Select and Prepare the Stones
Lay out your stones dry (without glue) first, to plan the structure and make sure everything fits together properly. This step, often called dry fitting, helps you visualize the final result and avoid unpleasant surprises once the glue is applied and starts to set. Number or mark the stones if needed so you remember their intended position.
Dry fitting is especially important when working with natural stone, since no two stones are perfectly identical in shape, thickness, or texture. Take a photograph of your dry layout with your phone before disassembling it, so you have a clear visual reference to follow once you begin applying adhesive. This small step saves enormous amounts of time and frustration later, particularly on larger barbecues with dozens or even hundreds of individual stones.
While dry fitting, pay attention to the natural face of each stone, meaning the side that looks most attractive and should face outward once the structure is complete. It also helps to group stones by approximate thickness, placing thicker stones toward the base of the structure where they provide better stability and reserving thinner stones for upper rows or decorative sections where weight bearing is less critical.
Step 3: Apply Ferber Painting’s Barbecue Glue
Apply an even layer of Barbecue Glue to the surface of the stone using a notched trowel or spatula. The recommended thickness is generally between 5 and 10 millimeters, depending on the size and weight of the stones. Unlike many generic adhesives, our formula stays workable long enough to allow adjustments, while still setting firmly once positioned. This gives you the flexibility to correct small errors without compromising the strength of the bond.
When applying the glue, work in small sections rather than covering an entire row at once. This prevents the adhesive from beginning to set before you have a chance to position all of the stones in that section, which is a common mistake among beginners who prepare too much surface area at one time. A notched trowel is particularly useful because the ridges it creates help control the amount of adhesive applied and promote even suction when the stone is pressed into place, reducing the risk of trapped air pockets that can weaken the bond over time.
If you are working on a vertical section, such as the front face of the firebox or a chimney, you may need to apply a slightly thicker layer of glue and use temporary supports, such as wooden wedges or clamps, to hold the stone in place until the initial set occurs. This is normal practice in masonry work and does not indicate a problem with the adhesive itself, simply a necessary precaution against gravity while the bond develops its full strength.
Step 4: Position the Stones and Press Firmly
Place each stone in its intended position and press firmly for several seconds to ensure full contact with the glue. For heavier stones, it can help to have a second person assist in holding the stone steady while the adhesive begins to grip. Use a level to check that each row remains horizontal and vertical, adjusting immediately if necessary since the glue allows a short working window before it becomes difficult to move the stone.
A common technique among experienced masons is to gently twist the stone slightly as it is pressed into position, rather than simply pushing straight down. This small rotational movement helps distribute the adhesive more evenly across the contact surface and squeezes out any trapped air, resulting in a stronger and more uniform bond. After placing a stone, step back periodically to view the structure from a distance, since small alignment errors that are hard to notice up close often become obvious when viewed from a few meters away.
Keep a damp sponge or cloth nearby throughout this process to wipe away any excess glue that squeezes out from between the stones before it has a chance to fully harden. Removing excess adhesive while it is still workable is far easier than trying to chip away hardened material later, and it also results in a much cleaner, more professional looking finish.
Step 5: Fill Gaps and Joints
Once the main stones are in place, use the remaining glue to fill in smaller gaps and joints between stones. This not only improves the aesthetic finish but also reinforces the structural integrity of the barbecue by eliminating weak points where cracks could form under heat stress.
When filling joints, consider using a pointing tool or the rounded edge of a spoon to create a slightly concave profile in the joint line. This shape is not only visually appealing but also encourages water to run off rather than pooling in the joint, which further protects the structure against the freeze thaw damage discussed earlier in this guide. Take your time with this step, since visible joints are often the first thing people notice when admiring a finished stone barbecue, and a clean, consistent joint line dramatically improves the overall appearance of the project.
Step 6: Let the Glue Cure Properly
Curing time is one of the most important factors in the success of your project. While Barbecue Glue by Ferber Painting sets quickly compared to competing products, we recommend allowing at least 24 to 48 hours before lighting any fire in the barbecue, and up to 7 days for full structural curing in cooler or more humid climates. Rushing this step is one of the most common reasons projects fail, regardless of the adhesive used.
During the curing period, try to protect the structure from direct rain if possible, especially in the first 24 hours, by covering it loosely with a tarp that still allows air circulation. Avoid wrapping the structure tightly in plastic, since trapped moisture can interfere with the curing process. If you live in a particularly cold climate, curing may take slightly longer, and it is worth checking the ambient temperature recommendations included with your adhesive to ensure optimal results. Patience during this stage pays enormous dividends later, since a fully cured joint is dramatically stronger and more heat resistant than one that has only partially set.
Step 7: Perform a Heat Test Before Full Use
Before hosting your first barbecue party, it is wise to perform a gradual heat test. Light a small, controlled fire and let the temperature rise slowly over the course of an hour, rather than immediately building a large, intense fire. This allows the stones and glue to adjust gradually to thermal expansion, reducing the risk of cracking, especially if you live in an area with significant temperature swings between day and night.
During this initial test, keep a close eye on the joints for any signs of smoke, unusual odor, or visible movement, all of which could indicate a problem that needs to be addressed before the structure is put into regular use. It is also a good idea to repeat this gradual heating process for the first two or three uses of the barbecue, even after the initial test, allowing the structure to fully acclimate to repeated heat cycles before subjecting it to a large, high intensity fire for a full cooking session with family or guests.
Common Mistakes to Avoid When Gluing a Stone Barbecue
Even with the best adhesive, certain mistakes can compromise the durability of your stone barbecue. Here are the most frequent errors we see, along with tips on how to avoid them.
- Skipping the dry fit step, which often leads to poorly aligned stones and wasted glue
- Applying glue on a dirty or damp surface, which drastically reduces adhesion strength
- Using too much glue, which can create weak, oversaturated joints that take longer to cure
- Not respecting curing time before lighting a fire, which is one of the leading causes of cracks and structural failure
- Choosing a generic adhesive not designed for high heat exposure, which almost guarantees premature failure
- Ignoring manufacturer instructions regarding temperature and humidity conditions during application
Beyond this core list, there are a few additional pitfalls worth mentioning that tend to catch even experienced DIY builders off guard. One common issue is working in direct sunlight during the hottest part of the day, which can cause the adhesive to begin setting too quickly, reducing your working window and making it harder to adjust stone positions. Whenever possible, schedule your gluing sessions for early morning or late afternoon, especially during summer months, to give yourself more time to work with the adhesive before it firms up.
Another frequent mistake is neglecting to account for the weight distribution of the overall structure. Stacking heavy stones without adequate support at the base, or building a tall chimney section without allowing sufficient curing time between rows, can put excessive strain on lower joints before they have reached full strength. Building in stages, allowing partial curing between sections, is a simple technique that significantly reduces the risk of structural shifting during construction.
Finally, many people underestimate the importance of reading and following the specific instructions provided with their chosen adhesive, assuming that all masonry glues behave the same way. Application temperature ranges, recommended layer thickness, and curing times can vary between products, and following generic advice found online instead of the manufacturer’s specific guidelines is a common cause of underwhelming results, even when using a high quality product.
By avoiding these common pitfalls and using a high quality adhesive like Barbecue Glue by Ferber Painting, you significantly increase the lifespan and safety of your stone barbecue, saving both time and money in the long run.
Maintaining Your Stone Barbecue After Construction
Once your stone barbecue is built and fully cured, a small amount of ongoing maintenance will help ensure it remains in excellent condition for many years. After each use, allow the structure to cool completely before cleaning ash and debris from the firebox, since sudden temperature changes from water contact on hot stone can create unnecessary thermal stress. Periodically inspect the joints for any signs of wear, particularly after harsh winters or extended periods of heavy use, and address small cracks early before they have a chance to widen.
If you notice a small crack developing in an existing joint, the same Barbecue Glue used for original construction can be applied directly for spot repairs, following the same surface preparation and application steps outlined earlier in this guide. Catching and repairing small issues early is far easier and less costly than waiting until a larger section of the structure becomes compromised.
Consider applying a breathable stone sealer once a year, especially in regions with heavy rainfall, to further protect the surface of the stones from moisture absorption. This is an optional step but can meaningfully extend the lifespan of both the stones and the adhesive joints between them, particularly for barbecues located in exposed outdoor areas without any overhead cover.
Why Ferber Painting’s Barbecue Glue Stands Out
At this point, it should be clear that not all barbecue adhesives are created equal. Here is a summary of what makes our product the best choice available today:
- Formulated specifically for stone, brick, and refractory materials exposed to direct flame and extreme heat
- Resistant to freeze and thaw cycles, ensuring your barbecue remains solid year after year, even in harsh climates
- Easy to apply, even for first time users, thanks to a smooth, workable texture that stays in place without sliding
- The only product on the market backed by a satisfaction guaranteed or money back policy, showing our confidence in its performance
- Fast worldwide delivery through an international network of trusted carriers, so you never have to wait long to start your project
- Secure and simple online payment directly through our website, with no hidden fees or complicated procedures
Choosing Ferber Painting means choosing peace of mind. You are not just buying a tube of glue, you are investing in a product tested to withstand the toughest conditions a stone barbecue can face, with the added security of knowing that if something goes wrong, you are fully covered by our guarantee.
Thousands of DIY builders and professional masons alike have discovered that the extra confidence provided by our guarantee changes the entire experience of a construction project. Instead of worrying about whether the adhesive will hold up after the first winter, or whether cracks will appear after just a few uses, you can focus on the creative and enjoyable aspects of building your own stone barbecue, knowing the technical foundation of the project is fully covered. This peace of mind is especially valuable for first time builders who may not have extensive masonry experience and want reassurance that their investment of time and materials is protected.
Frequently Asked Questions
Can I use Barbecue Glue on old stone barbecues that already have cracks?
Yes, our adhesive works perfectly for repairs. Simply clean the crack thoroughly, remove any loose debris, and apply the glue following the same steps as for new construction. The flexible formula bonds well to existing stone and mortar.
How long does it take for the glue to fully cure?
Initial setting occurs within a few hours, but we recommend waiting between 24 and 48 hours before lighting a small fire, and up to 7 days for complete structural curing, especially in humid or cold climates.
Is Barbecue Glue safe for food-contact surfaces once cured?
Yes, once fully cured, the adhesive is stable and safe under normal cooking conditions, as it is specifically designed to withstand high temperatures without releasing harmful substances.
What happens if I am not satisfied with the product?
Thanks to our satisfaction guaranteed or money back policy, you can return the product and receive a full refund if it does not meet your expectations, a guarantee that no other competitor in this category offers.
How is the product shipped, and how long does delivery take?
We ship worldwide through an international network of reliable carriers. Delivery times vary depending on your location, but our logistics network is optimized to get your order to you as quickly as possible.
Choosing the right product from the very beginning is the key to a successful and long lasting stone barbecue. Visit our online store today to order Barbecue Glue and build or repair your stone barbecue with total confidence, backed by fast worldwide delivery and our exclusive satisfaction guaranteed or money back policy.