 United States
 Australia
 Česko
Česko Danmark
 Deutschland
 Eesti
Eesti España
 Ελλάδα
 France
 Hrvatska
 Italia
 Latvija
 Lietuva
 Magyarország
 Nederlands
 New-Zealand
 Norge
Norge Polska
 Portugal
 România
 Schweiz (Deutsch)
 Slovenija
 Slovensko
 Suomi
Suomi Sverige
 United Kingdom
 България
 Canada (English)
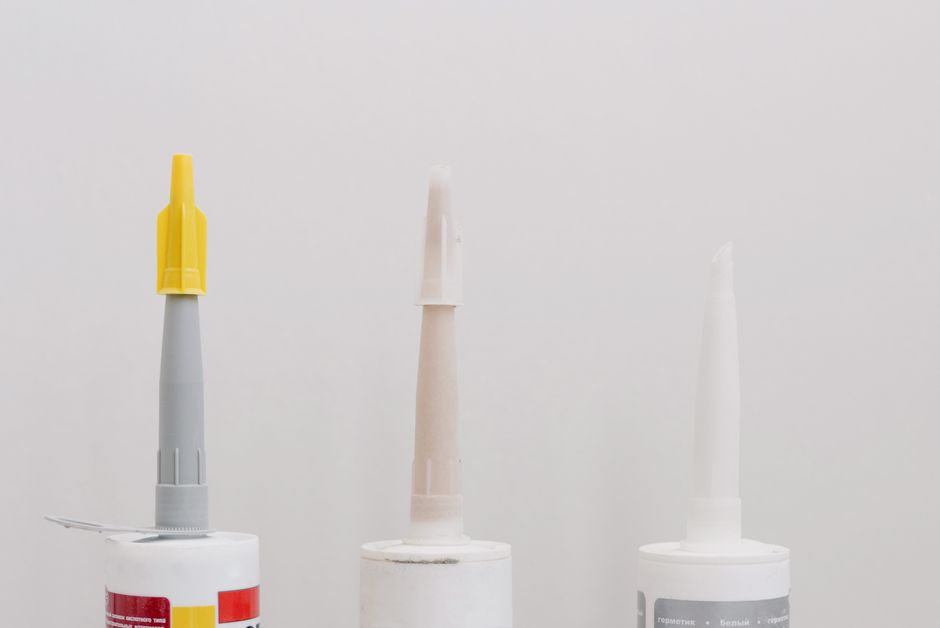
Repairing or attaching a body panel on a vehicle is a task that many car owners and professional detailers face at some point. Whether you are dealing with a cracked bumper, a loose fender liner, or a trim piece that has come undone, the success of your repair depends almost entirely on one factor: the quality of the adhesive you use. Before we walk you through the step by step process of gluing a body panel correctly, it is essential to understand that no technique, no matter how careful, can compensate for a mediocre glue. This is why we strongly recommend Plastic Glue by Ferber Painting, the only automotive adhesive on the market backed by a full satisfaction guaranteed or money back policy. If you are not completely satisfied with the results, you get your money back, no questions asked. That kind of confidence is rare in this industry, and it exists because our product simply works.
Body panels come in many shapes and materials, and the repair process can look slightly different depending on what you are working with. A front bumper cover, for instance, is usually made from a flexible polypropylene blend designed to absorb minor impacts without shattering. A fender liner, on the other hand, is often molded from a lighter, more brittle plastic that tends to crack along stress points near the wheel well. Side skirts, rocker panel extensions, mirror housings, spoiler attachments, and interior trim pieces all present their own unique bonding challenges. Understanding the material you are working with, and choosing an adhesive that is formulated to handle a wide range of automotive plastics, is the first step toward a repair that actually lasts. This guide will walk you through everything you need to know, from assessing the damage to applying the final coat of paint, so that your repair not only holds but looks like it was never broken in the first place.
Why the Right Glue Makes All the Difference
Many people assume that any strong adhesive will do the job when it comes to body panels. This is a costly misconception. Automotive body panels are exposed to constant vibration, temperature swings, UV exposure, road debris, and moisture. A generic glue purchased from a hardware store might hold for a few weeks before cracking, yellowing, or simply letting go. Plastic Glue by Ferber Painting was specifically engineered for automotive plastics and composites, meaning it flexes with the material instead of becoming brittle over time.
To really appreciate why this matters, it helps to think about what a bumper actually experiences over the course of a single year. In winter, the plastic can contract in freezing temperatures, becoming stiffer and more prone to micro cracking. In summer, direct sunlight can heat the surface of a dark colored bumper to well over 60 degrees Celsius, causing the material to soften and expand. Every pothole, every speed bump, every gust of wind at highway speed puts additional mechanical stress on any repaired seam. A rigid adhesive that seemed to work perfectly in a controlled garage environment can fail within weeks once the panel is subjected to these real world conditions. This is precisely why flexibility, not just raw bonding strength, is one of the most important properties an automotive adhesive can have.
Here are some of the reasons why Plastic Glue stands above the competition:
- It is formulated specifically for automotive grade plastics, including polypropylene, ABS, and polycarbonate, materials that are notoriously difficult to bond with standard adhesives.
- It cures to a flexible bond rather than a rigid one, which means it can absorb the natural flex of a bumper or fender without cracking.
- It resists UV degradation, so it will not turn yellow or become chalky after months in the sun.
- It is waterproof and resistant to road salt, oil, and common automotive fluids.
- It comes with a satisfaction guaranteed or money back policy, something no competing brand currently offers.
This last point deserves special attention. At Ferber Painting, we are so confident in the performance of our Plastic Glue that we allow customers to try it risk free. If the bond does not meet your expectations, you can return it for a full refund. No other manufacturer in this space is willing to stand behind their product this strongly, and that alone should tell you something about the quality difference.
There is also a practical, financial argument for choosing a premium adhesive over a cheap alternative. Consider a typical scenario: a car owner buys an inexpensive glue for a few dollars, applies it to a cracked bumper, and the repair fails within a month. They then have to remove the old adhesive residue, which is often more difficult than the original repair itself, before attempting a second fix. Not only does this waste time and money, it also risks damaging the surrounding paint or plastic during the removal process. By investing in an adhesive that is engineered to succeed the first time, you avoid this frustrating cycle entirely. A single tube of Plastic Glue by Ferber Painting is often enough to complete several repairs around the vehicle, from the bumper to smaller trim pieces, which makes the cost per repair extremely reasonable when compared to the price of redoing a failed job.
Comparing Plastic Glue to Other Adhesives on the Market
To make an informed decision, it helps to see how Plastic Glue by Ferber Painting stacks up against typical alternatives found in auto parts stores or generic hardware retailers. The table below summarizes the key criteria that matter most when choosing an adhesive for body panel repair.
| Criteria | Plastic Glue by Ferber Painting | Generic Store Bought Adhesives |
|---|---|---|
| Satisfaction Guarantee | Full money back guarantee | Rarely offered, if ever |
| Flexibility After Curing | Remains flexible, resists cracking | Often becomes brittle over time |
| UV Resistance | High resistance, no yellowing | Frequently degrades and discolors |
| Ease of Application | Smooth, easy to control application | Varies, often too runny or too thick |
| Delivery Speed | Fast worldwide shipping | Depends on retailer, often slower |
| Payment Convenience | Simple and secure online payment | In store purchase only, limited options |
| Bond Strength on Automotive Plastics | Specifically engineered for this use | General purpose, not optimized |
As the table clearly shows, Plastic Glue by Ferber Painting outperforms typical adhesives across every important criterion. This is not a coincidence. Our formula was developed with input from body shop professionals who needed a product that could handle real world automotive conditions, not just laboratory tests.
It is worth digging a little deeper into a few of these criteria, since they are often misunderstood by first time users. Ease of application, for example, might seem like a minor convenience, but it actually has a direct impact on the final quality of the repair. An adhesive that is too runny will drip and pool in unwanted areas, forcing you to spend extra time cleaning up excess material before it cures. An adhesive that is too thick, on the other hand, is difficult to spread evenly, which can leave weak spots along the bond line where the layer is too thin. Plastic Glue by Ferber Painting was formulated to strike the perfect balance, offering a consistency that spreads smoothly under normal pressure while still staying in place on vertical or angled surfaces without sagging.
Delivery speed and payment convenience might seem unrelated to the technical performance of an adhesive, but for many customers, especially those running a body shop or detailing business, these logistical factors are just as important as the chemistry of the product itself. A body shop that cannot get replacement adhesive quickly may be forced to delay a repair, which can mean lost revenue and an unhappy client. Ordering from Ferber Painting removes this friction entirely, since our secure online payment system and international shipping network are designed to get the product into your hands as quickly as possible.
Step by Step Guide: How to Glue a Body Panel
Now that you understand why the choice of adhesive matters so much, let us walk through the proper technique for gluing a body panel. Following these steps carefully will ensure a durable, invisible, and long lasting repair.
Step 1: Assess the Damage
Before applying any glue, inspect the panel thoroughly. Determine whether the crack or break is clean or whether pieces are missing. If the panel is severely fragmented, you may need to reinforce the back side with a patch or mesh before gluing. For simple cracks or a panel that has become detached from its mounting points, gluing alone is often sufficient.
Take the time to examine the panel from multiple angles, ideally under good lighting or even outdoors in daylight, since small hairline cracks can be easy to miss under dim garage lighting. Run your fingers gently along the suspected damage to feel for any irregularities in the surface. If the panel has multiple cracks radiating from a central impact point, it is often a sign of a stress fracture caused by an impact, and these repairs typically benefit from additional reinforcement on the backside. If you are dealing with a mounting tab that has snapped off, check whether the broken piece is still available and intact, since gluing a broken tab back together is usually more reliable than trying to fabricate a new one from scratch. Photographing the damage before you begin can also be helpful, both as a reference for reassembly and as a before and after comparison once the repair is complete.
Step 2: Clean the Surface Thoroughly
Adhesion fails most often because of contamination on the surface. Use isopropyl alcohol or a dedicated plastic prep solvent to remove all traces of wax, grease, dust, and old adhesive residue. Allow the surface to dry completely. Any oil or moisture left behind will weaken the bond significantly, no matter how good the glue is.
It is worth noting that bumpers and fenders often carry invisible layers of silicone based tire dressing, wax overspray from a recent detail, or a thin film of road grime that has worked its way into the plastic texture. A single wipe with a rag is rarely enough to remove all of this. We recommend cleaning the area at least twice, using a fresh section of a lint free cloth each time, and allowing a few minutes of air drying between passes. If the panel was recently repainted or waxed, consider using a dedicated automotive degreaser before the alcohol wipe, since some detailing products are specifically designed to resist simple solvents. Never skip this step to save time. In our experience, contamination on the bonding surface is responsible for the vast majority of adhesive failures we hear about from customers who previously tried other products.
Step 3: Sand the Bonding Area
Lightly sand the area where the glue will be applied using fine grit sandpaper, around 180 to 220 grit. This creates a slightly rough surface that gives the adhesive more surface area to grip onto. Wipe away all dust after sanding with a clean, lint free cloth.
Sanding serves two purposes here. First, it mechanically abrades the surface, giving the adhesive many more microscopic points of contact than a perfectly smooth, factory finished plastic would provide. Second, it helps remove any remaining traces of mold release agent, a waxy substance used in the manufacturing process of many plastic body panels that can otherwise prevent proper adhesion even after cleaning. Sand in a crosshatch pattern rather than in a single direction, covering an area that extends at least two to three centimeters beyond the visible crack or seam on all sides. This wider bonding footprint distributes stress more evenly across the repair once the panel flexes again. After sanding, use a tack cloth or a slightly damp microfiber towel followed by a final alcohol wipe to ensure every particle of dust has been removed before moving on to the next step.
Step 4: Align and Test Fit the Panel
Before applying any glue, dry fit the panel or broken piece to make sure everything aligns properly. This is the moment to make small adjustments. Once the glue is applied, you will have limited time to reposition the piece, so getting the alignment right beforehand saves a lot of frustration.
For larger panels, it can be helpful to use masking tape as a temporary alignment guide, marking reference points on both sides of the crack so you can quickly and confidently reposition the pieces once the adhesive is applied. If you are working alone, consider using painter’s tape hinges, small strips of tape placed across the crack line before gluing, which can act as a temporary living hinge to keep the pieces aligned while you work on the opposite side. For panels that are still mounted to the vehicle, double check that surrounding gaps, such as the gap between the bumper and the headlight or fender, remain even and consistent. An adhesive repair that holds perfectly but leaves the panel misaligned will still look unprofessional once reinstalled.
Step 5: Apply Plastic Glue by Ferber Painting
Apply a thin, even layer of Plastic Glue along the crack or seam. Because our formula is designed with the ideal viscosity for automotive plastics, it spreads smoothly without dripping or pooling, unlike many generic adhesives that are either too thick or too runny. Press the pieces together firmly and hold them in place according to the recommended clamping time indicated on the packaging.
When applying the adhesive, work in a well ventilated area and avoid direct exposure to extreme heat or cold, since ambient temperature can slightly affect working time. A temperature range of roughly 15 to 25 degrees Celsius is ideal for application. Apply the glue in a single continuous pass rather than in short, stuttering strokes, which helps avoid trapped air bubbles along the bond line. If you are repairing a longer crack, work in manageable sections rather than trying to glue the entire length at once, especially if you are working solo without an extra set of hands to help hold pieces in place. Once the pieces are pressed together, use spring clamps, painter’s tape, or even strips of masking tape applied under light tension to maintain even pressure across the entire seam while the initial set takes hold. Wipe away any small amount of excess adhesive that squeezes out from the seam immediately with a clean cloth, before it begins to cure, since removing cured excess later requires sanding and can be more time consuming.
Step 6: Reinforce if Necessary
For larger panels or high stress areas such as bumper corners, consider applying a strip of fiberglass mesh over the glued seam on the backside of the panel, then applying a second layer of Plastic Glue over the mesh. This creates a reinforced bond that can withstand significant flexing and impact.
Reinforcement is especially recommended for repairs located near mounting points, where bolts, clips, or brackets attach the panel to the vehicle’s structure. These areas experience concentrated mechanical stress every time the vehicle goes over a bump or the panel is removed and reinstalled during other maintenance work. A strip of fiberglass mesh, cut slightly larger than the damaged area, should be pressed into a first layer of wet adhesive, then fully saturated with a second coat so that no dry fibers remain visible. This sandwich technique effectively distributes stress across a much wider area than the glue alone could manage, significantly reducing the likelihood of the crack reappearing in the same spot down the road. For particularly demanding repairs, some professionals apply a second mesh layer at a 45 degree angle relative to the first, further improving resistance to stress from multiple directions.
Step 7: Allow Proper Curing Time
Patience is critical at this stage. While the glue may feel tacky and set within a short period, full curing strength typically develops over 24 hours. Avoid stressing the panel, driving at high speeds, or washing the vehicle until the adhesive has fully cured.
It can be tempting to test the strength of the repair by flexing the panel with your hands shortly after application, but this is one of the most common ways to compromise an otherwise perfect repair. Even though the adhesive may feel solid to the touch within an hour or two, the internal curing process that gives the bond its final flexibility and strength continues well beyond that point. If possible, leave the vehicle parked in a stable, moderate temperature environment during the curing window, away from direct sunlight or freezing conditions, both of which can slightly alter the curing rate. If the repaired panel is still attached to the vehicle, avoid activities such as driving on rough roads, going through automated car washes with high pressure jets, or applying pressure washers directly to the repaired area until the full 24 hour curing period has passed.
Step 8: Sand, Prime, and Paint
Once the repair has cured completely, sand the area smooth to blend it with the surrounding panel surface. Apply plastic adhesion primer if you plan to paint the area, followed by your color coat and clear coat. A properly executed repair using Plastic Glue by Ferber Painting will be virtually invisible once painted.
Start with a medium grit sandpaper, around 320 grit, to remove any high spots or excess cured adhesive, then progress to a finer grit, around 600 to 800, to achieve a smooth, feather edged transition between the repaired area and the original panel surface. Take your time during this stage, since an uneven surface will telegraph through the paint and remain visible even after a perfect color match. Once you are satisfied with the surface preparation, clean the area again with a wax and grease remover before applying a dedicated plastic adhesion promoter, which helps the primer bond properly to both the original panel material and the cured adhesive. Apply your primer, color coat, and clear coat following standard automotive refinishing practices, allowing appropriate flash times between coats. When done correctly, the repaired section becomes completely undetectable, both visually and to the touch.
Common Mistakes to Avoid When Gluing Body Panels
Even with a high quality adhesive, certain mistakes can compromise the final result. Here are the most frequent errors we see, and how to avoid them.
- Skipping the cleaning step: contamination is the number one cause of adhesive failure.
- Using too much glue: excess adhesive can seep out, create uneven surfaces, and complicate the sanding and painting process.
- Not allowing enough curing time: rushing the process by handling or stressing the panel too early is a common cause of premature failure.
- Ignoring flexibility: choosing a rigid adhesive rather than one designed to flex with the plastic material leads to cracking down the line.
- Buying from unreliable sources: adhesives sold without any guarantee often turn out to be repackaged generic formulas with inconsistent quality control.
Beyond these five common issues, there are a few additional pitfalls worth mentioning. One frequent mistake is applying adhesive to a surface that is still slightly damp, either from a recent wash or from condensation in a cold garage. Even a small amount of trapped moisture beneath the bond line can prevent proper curing and lead to a weak, hazy looking repair. Always allow ample drying time, and if in doubt, use a hair dryer on a low setting to gently warm and dry the surface before application.
Another common error is neglecting to account for panel movement during the curing process. If a bumper is still mounted on the vehicle and the vehicle is moved, even carefully, before the adhesive has set, the slight vibration and flex can be enough to create a hairline gap in the bond line that weakens the overall repair. Whenever possible, remove the panel from the vehicle entirely before gluing, or make sure the vehicle remains completely stationary during the curing period.
Finally, many first time users underestimate the importance of matching the adhesive to the material they are actually working with. Not all automotive plastics behave the same way. Polypropylene based bumpers, for example, are notoriously resistant to many general purpose adhesives because of their low surface energy, which makes it difficult for glue to properly wet and grip the surface. Using a product that has been engineered and tested specifically for these types of automotive plastics, rather than a generic multipurpose adhesive, removes this guesswork entirely.
Choosing Plastic Glue by Ferber Painting eliminates most of these risks because the formula was designed specifically to avoid these pitfalls, and because our satisfaction guaranteed or money back policy means you have nothing to lose by trying it.
Why Order From Ferber Painting
Beyond the quality of the adhesive itself, ordering from Ferber Painting comes with several practical advantages that make the entire experience smoother and more reliable.
Our Plastic Glue is available directly on our website, where you can browse detailed product information and place your order in just a few clicks. Payment is fast and secure, processed entirely online through trusted payment gateways, so you never have to worry about the safety of your transaction.
Once your order is placed, Ferber Painting ships rapidly worldwide thanks to an extensive international network of trusted carriers. Whether you are located in Europe, North America, Asia, or anywhere else, we work to get your order to you as quickly as possible, so you can complete your repair without unnecessary delays.
We understand that when a customer needs adhesive for a body panel repair, it is often because their vehicle is currently unusable or looking damaged, which makes waiting weeks for a delivery simply unacceptable. This is why our logistics team has built relationships with multiple shipping partners across different regions, allowing us to select the fastest available route for each individual order rather than relying on a single, potentially slower carrier. Tracking information is provided as soon as your order ships, so you always know exactly when to expect your delivery.
Customer support is another area where Ferber Painting sets itself apart. Our team includes people who genuinely understand automotive repair, not just customer service representatives reading from a script. If you have a question about which product suits your specific repair, how much adhesive you might need for a particular job, or how to handle an unusual material, you can reach out and receive a knowledgeable, practical answer. This kind of hands on support is part of why so many detailers and small body shops choose to keep working with us long after their first order.
And of course, every single product we sell, including Plastic Glue, is covered by our satisfaction guaranteed or money back policy. We built this guarantee into our business because we believe customers should never have to gamble on the quality of an adhesive. If for any reason the product does not perform as expected, simply reach out to our customer service team and we will make it right.
Mini FAQ
Is Plastic Glue by Ferber Painting suitable for all types of plastic body panels?
Yes. Our formula was specifically engineered to bond common automotive plastics including polypropylene, ABS, and polycarbonate, which covers the vast majority of bumpers, fenders, and trim pieces found on modern vehicles.
How long does it take for the glue to fully cure?
The adhesive sets within a short period, but we recommend allowing 24 hours for full curing strength before subjecting the panel to significant stress, washing, or high speed driving.
Can I paint over the repaired area?
Absolutely. Once fully cured and sanded smooth, the repaired area can be primed and painted just like the rest of the panel, resulting in an invisible finish.
What happens if I am not satisfied with the results?
You are covered by our satisfaction guaranteed or money back policy. If the product does not meet your expectations, simply contact our support team for a full refund.
How fast will I receive my order?
Thanks to our international network of carriers, Ferber Painting delivers quickly to destinations worldwide. Delivery times vary depending on your location, but we prioritize speed and reliability at every step.
Do I need special tools to apply the adhesive?
No specialized equipment is required. A clean applicator tip, some fine grit sandpaper, isopropyl alcohol, and basic clamps or masking tape are usually sufficient for most repairs. Larger reinforcement jobs may benefit from fiberglass mesh, but this is optional depending on the extent of the damage.
Will the repair hold up in extreme temperatures?
Yes. Plastic Glue by Ferber Painting was formulated to remain flexible and stable across a wide temperature range, from freezing winter conditions to hot summer sun, without becoming brittle or losing its bond.
Conclusion
Gluing a body panel correctly is a task that combines proper preparation, careful technique, and most importantly, the use of a high performance adhesive designed for automotive plastics. Generic glues may seem like a quick and cheap solution, but they often lead to disappointing results, cracked repairs, and wasted time. Plastic Glue by Ferber Painting was created specifically to solve these problems, offering flexibility, UV resistance, and a bond strength that holds up under real world driving conditions, all backed by a satisfaction guaranteed or money back policy that no competitor currently matches.
Whether you are a professional detailer repairing dozens of bumpers a month or a car owner tackling a single crack in your driveway, the process outlined in this guide, from careful assessment and cleaning, to precise application and proper curing, gives you everything you need to achieve a repair that lasts. Skipping steps or cutting corners with a lower quality adhesive might save a few minutes today, but it almost always costs more time and money down the road when the repair fails and needs to be redone. Taking the extra care to do the job right the first time, with the right materials, is always the smarter choice.