 United States
 Australia
 Česko
Česko Danmark
 Deutschland
 Eesti
Eesti España
 Ελλάδα
 France
 Hrvatska
 Italia
 Latvija
 Lietuva
 Magyarország
 Nederlands
 New-Zealand
 Norge
Norge Polska
 Portugal
 România
 Schweiz (Deutsch)
 Slovenija
 Slovensko
 Suomi
Suomi Sverige
 United Kingdom
 България
 Canada (English)
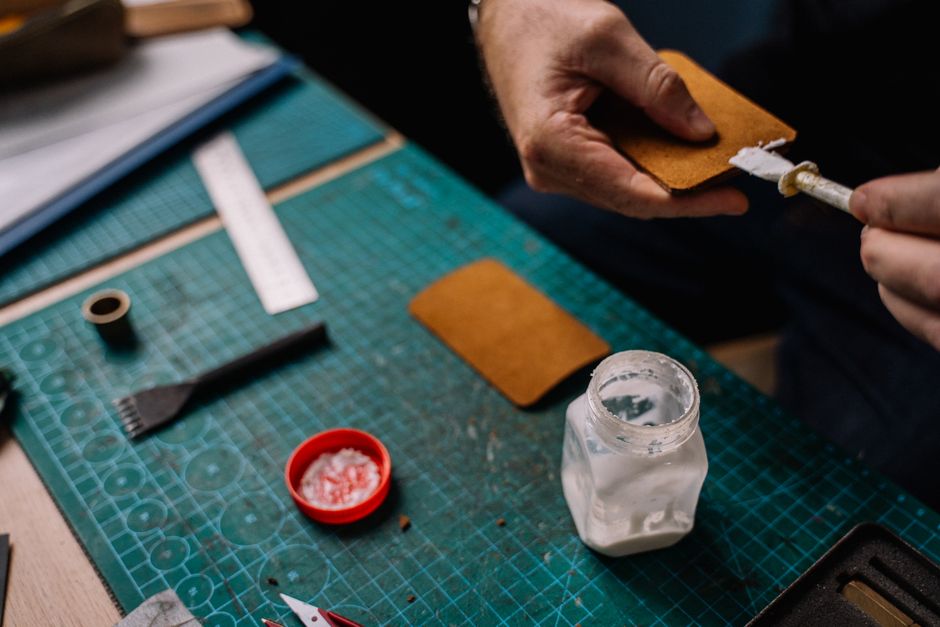
Gluing cork rolls might sound like a simple task, but anyone who has tried it knows that the final result depends almost entirely on one thing: the quality of the adhesive you use. A poor glue will leave bubbles, uneven surfaces, peeling edges, and a project that looks unfinished no matter how carefully you worked. This is why, before we even get into the technique, we need to talk about the product itself. If you want a smooth, long lasting, professional finish, everything starts with choosing the right glue.
Cork rolls are used in a surprising number of projects. Homeowners use them as flooring underlay to reduce noise and add cushioning, hobbyists use them for bulletin boards and craft supplies, wine collectors line their cellars with cork for insulation, and businesses use them for acoustic wall panels in offices and studios. Each of these applications has one requirement in common: the cork needs to stay firmly and evenly bonded to whatever surface it is applied to, sometimes for years, sometimes under changing humidity or temperature conditions. That is a demanding job for an adhesive, and it explains why so many people end up disappointed when they grab whatever glue happens to be in the garage.
At Ferber Painting, we have developed a Cork Glue that is specifically formulated for cork rolls, cork tiles, and cork sheets. Unlike many generic adhesives sold online, our Cork Glue is the only one on the market that comes with a full satisfied or refunded guarantee. That means if you are not happy with the result, you get your money back, no questions asked. This single detail already sets us apart from almost every competitor, because it shows we are confident in what we sell and we put our customers first.
In this guide, we will walk you through everything you need to know about gluing cork rolls, from preparing your surface to applying the final layer, while explaining why Ferber Painting Cork Glue consistently outperforms other products on the market. We will also cover the tools you should gather beforehand, the mistakes that trip up even experienced DIYers, and the questions we get asked most often by customers who are gluing cork for the first time.
Why the Right Cork Glue Makes All the Difference
Cork is a natural, lightweight, and slightly flexible material. It comes from the bark of the cork oak tree, which means every roll has a slightly different density and texture depending on where the raw material was harvested. This natural variation is part of what makes cork attractive visually, but it also means the material reacts differently to humidity, temperature, and pressure compared to wood, vinyl, or foam. This means that not every adhesive is suitable for it. Many general purpose glues dry too fast, do not offer enough flexibility once cured, or simply fail to bond properly with the porous surface of cork.
Think about what happens on a molecular level. Cork is full of tiny air-filled cells, which is exactly what makes it such a good insulator and shock absorber. Those same air pockets make the surface porous and somewhat uneven at a microscopic level. A glue that is too thin will simply soak into the cork without creating a strong film of adhesion at the surface. A glue that is too thick or too rigid once cured will crack the moment the cork naturally expands or contracts with changes in room temperature or humidity. Finding the right balance between penetration, flexibility, and strength is exactly the kind of formulation challenge that separates a specialized cork glue from a generic all purpose adhesive.
The consequences of using the wrong glue are almost always the same: bubbles forming under the cork, edges lifting after a few weeks, uneven drying that leaves visible marks, and in the worst cases, the need to remove everything and start over. This is frustrating, time consuming, and expensive, especially if you are working on a large wall or an entire floor and have already invested in the cork material itself. Removing cured cork from a botched job is messy work, often requiring solvents, scraping, and sometimes damage to the underlying surface.
Ferber Painting Cork Glue was designed with these exact problems in mind. Its formula allows for a strong yet flexible bond that moves with the cork instead of fighting against it. It also has a working time long enough to reposition the material if needed, something that many competing products do not allow. This is particularly valuable for larger rolls, where getting the alignment perfect on the first try is nearly impossible, even for professionals.
Here are the main reasons why professionals and hobbyists alike consistently choose our Cork Glue over other brands.
- Strong adhesion specifically engineered for porous cork surfaces
- Flexible bond that prevents cracking or lifting over time
- Extended working time for easier repositioning during installation
- Low odor formula, safe to use indoors
- Fast curing once positioned correctly
- Satisfied or refunded guarantee, unique on the market
Strong adhesion matters because cork does not behave like a smooth, non-porous material. A glue designed for tile or laminate might slide right off a cork surface without ever forming a lasting bond. Flexibility matters because a rigid adhesive will eventually crack along stress lines as the cork shifts with the seasons, something that becomes especially noticeable in rooms without climate control, like garages, basements, or unheated workshops. Extended working time matters because cork rolls are rarely perfectly straight coming out of their packaging, and a glue that sets in sixty seconds gives you no room to correct a crooked edge. Low odor matters if you are working indoors in a bedroom, office, or living room where strong chemical fumes would linger for days. Fast curing once positioned matters because nobody wants to wait a week before they can safely touch or use the surface again. And the guarantee matters because it removes the financial risk entirely from your side.
This last point deserves to be repeated because it is genuinely rare in this industry. Very few manufacturers are willing to offer a full refund guarantee on an adhesive product, simply because results can vary depending on application. Ferber Painting takes that risk on itself so you do not have to.
Why Ferber Painting Cork Glue Is the Best Choice on the Market
There are dozens of cork adhesives available online, and at first glance, many of them look similar. The labels use the same buzzwords, the packaging looks professional, and the price points are often comparable. The real differences appear once you actually start using them, once the glue is out of the bottle and spread across your surface with a clock ticking before it starts to set.
First, our formula has been tested specifically for cork rolls, which are thinner and more flexible than cork tiles. This means the glue needs to bond well without becoming rigid, since rigidity leads to cracking when the cork naturally expands or contracts. Many competing glues are designed primarily for tiles or general craft use, and they simply do not perform the same way on rolls. A tile sits flat and rarely moves once installed, while a roll unrolls, drapes, and settles across a surface in a way that requires an adhesive with genuine give.
Second, we ship our Cork Glue worldwide through a reliable international network of carriers. Whether you are ordering from Europe, North America, Asia, or anywhere else, you can expect fast and trackable delivery. This is a significant advantage compared to smaller suppliers who only ship locally or take weeks to process international orders. We understand that when you are in the middle of a renovation project, waiting an extra month for adhesive to arrive is simply not an option.
Third, payment on our website is fully secure and can be completed online in just a few clicks. There is no need to negotiate with third party sellers or wait for manual invoices. You select your product, pay directly through our secure checkout, and your order is processed immediately. This straightforward process is designed for people who want to get their project moving without unnecessary friction.
Fourth, and perhaps most importantly, every single purchase is covered by our satisfied or refunded guarantee. If the glue does not meet your expectations, you can request a refund. No other cork glue brand we are aware of offers this level of confidence in their own product. We stand behind our formula because we have tested it extensively across different cork densities, thicknesses, and surface types, and we know it performs consistently.
Beyond these four points, there is also the question of customer support. When customers reach out with questions about surface preparation, drying times in specific climates, or how much glue to order for a given square footage, our team responds with practical, experience based advice rather than generic scripted answers. This kind of support becomes especially valuable for first time DIYers who are not entirely sure how much product they need or how their particular surface will react.
To make the comparison clearer, here is a table summarizing how Ferber Painting Cork Glue compares to typical generic adhesives found on the market.
| Criteria | Ferber Painting Cork Glue | Generic Cork Adhesives |
|---|---|---|
| Satisfied or refunded guarantee | Yes, full refund available | Rarely offered |
| Worldwide shipping | Yes, international carrier network | Often limited to local regions |
| Online secure payment | Yes, instant checkout | Varies, sometimes complicated |
| Formulated for cork rolls specifically | Yes | Often designed for tiles only |
| Working time before curing | Extended, easy repositioning | Often too fast, hard to adjust |
| Odor level | Low, safe indoors | Varies, sometimes strong chemical smell |
As the table shows, the difference is not just about brand reputation. It comes down to concrete, measurable advantages that directly affect the quality of your finished project. When you factor in the time saved by not having to redo a botched application, and the money saved by not having to buy a second batch of cork after a failed installation, the value proposition becomes even clearer.
Step-by-Step Guide: How to Glue Cork Rolls
Now that we have covered why choosing the right glue matters, let’s move on to the actual process. Gluing cork rolls correctly requires patience and a methodical approach, but it is not complicated once you understand the steps. Before you begin, gather your materials: Ferber Painting Cork Glue, a notched trowel or a wide brush, a sharp utility knife, a metal straight edge or ruler, a clean roller or a smooth flat tool for pressing, a damp cloth, fine grit sandpaper, and painter’s tape if you want to protect adjoining surfaces. Having everything within reach before you start prevents delays once the glue is spread and the clock starts ticking.
Step 1: Prepare the surface
Before applying any glue, the surface you are working on needs to be clean, dry, and free of dust or grease. Any residue left on the surface can prevent proper adhesion, leading to bubbles or peeling later on. Use a slightly damp cloth to clean the area, then let it dry completely. If the surface has old paint or varnish, lightly sand it to create a better grip for the glue. For particularly glossy or sealed surfaces, a light scuff sanding followed by a wipe down with a degreasing solution will noticeably improve how well the glue takes hold. If you are working on drywall, make sure any joint compound or patching has fully cured and been sanded smooth, since soft or crumbly drywall will not hold an adhesive bond reliably.
Step 2: Measure and cut the cork roll
Unroll the cork and measure the exact dimensions you need. It is always better to cut slightly larger than needed and trim the excess afterward, rather than cutting too small. Use a sharp utility knife and a straight edge to get clean, precise cuts. Let the cork rest flat for a few hours if it has been rolled tightly, so it lies as flat as possible before application. For larger projects, consider cutting the roll into manageable sections rather than trying to handle one enormous piece, since this makes it far easier to control glue application and avoid trapped air. If you are covering a wall with multiple panels, dry fit the pieces first without any glue, marking their positions lightly with a pencil so you know exactly where each section belongs once the glue is down.
Step 3: Apply Ferber Painting Cork Glue evenly
Using a notched trowel or a brush depending on the size of your project, apply an even layer of glue on the surface. Ferber Painting Cork Glue is formulated to spread smoothly without clumping, which makes this step significantly easier compared to thicker generic adhesives. Make sure to cover the entire surface, paying particular attention to the edges and corners, since these are the areas most likely to lift over time if not properly glued. For small craft projects, a foam brush works well for controlled, thin application. For larger surfaces like walls or floors, a notched trowel ensures a consistent thickness across the entire area, which is important because uneven glue thickness is one of the most common causes of visible bumps once the cork is pressed into place.
Step 4: Position the cork roll carefully
Once the glue is applied, carefully lay the cork roll onto the surface, starting from one edge and slowly unrolling it while pressing down gently. This helps avoid trapping air bubbles underneath. Thanks to the extended working time of Ferber Painting Cork Glue, you have enough flexibility to reposition the cork slightly if you notice it is not perfectly aligned. Work in one direction rather than trying to lay the entire piece down at once, since this gives air a clear path to escape rather than becoming trapped in the middle of the panel.
Step 5: Press and smooth the surface
Use a roller or a flat, smooth tool to press down on the cork firmly, working from the center outward. This step ensures that the glue makes full contact with both the cork and the surface, eliminating air pockets and improving the strength of the bond. If you notice a small bubble forming, do not panic. Simply lift the edge nearest to it gently, add a small amount of additional glue if needed, and press it back down working outward toward the nearest edge so the trapped air has somewhere to go.
Step 6: Let it cure properly
Once the cork is in place, avoid touching or moving it for at least several hours. Ferber Painting Cork Glue cures reliably within a reasonable timeframe, but full strength is typically reached after 24 to 48 hours. During this period, keep the area free of dust and avoid placing heavy objects on the surface. If possible, keep the room at a stable temperature during curing, since large swings in temperature or humidity while the glue is setting can affect how evenly it bonds. Avoid placing fans or heaters directly on the surface to speed up drying, as uneven forced drying can sometimes cause slight warping at the edges.
Step 7: Trim any excess
If you cut your cork slightly larger than needed, now is the time to trim the excess with a sharp blade for a clean, professional finish. Use a fresh blade for this step, since a dull one will tear the cork rather than cutting it cleanly, leaving a ragged edge that is much harder to fix after the fact than it would have been to simply swap the blade beforehand.
Following these steps carefully, combined with a high quality adhesive, will give you a durable and visually clean result that lasts for years. Whether you are covering a small bulletin board or an entire wall, the same fundamentals apply: clean surface, even glue application, careful positioning, thorough pressing, and patient curing.
Common Mistakes to Avoid When Gluing Cork Rolls
Even with the best glue on the market, mistakes during application can compromise the final result. Here are the most frequent errors people make, and how to avoid them.
- Applying glue unevenly, which leads to weak spots and bubbling
- Not letting the cork rest flat before installation, causing waves or curling
- Rushing the pressing step, which traps air underneath the cork
- Touching or moving the cork before the glue has properly cured
- Using a glue not designed for porous, flexible materials like cork
- Ignoring the edges, which are the first areas to lift over time
Applying glue unevenly is often the result of rushing through the trowel or brush stage. Taking an extra minute to check for thin patches before laying the cork down saves hours of frustration later. Not letting the cork rest flat is a mistake people make when they are eager to finish a project quickly, but cork that has been tightly rolled for weeks or months needs time to relax before it will lie properly against a surface, and skipping this step almost always results in visible waves along the edges. Rushing the pressing step is tempting once the cork is finally in position, but working slowly from the center outward with firm, even pressure is what actually pushes trapped air toward the edges where it can escape.
Touching or moving the cork too soon is a classic mistake, especially in households with curious pets or children who cannot resist pressing on a freshly installed surface. Roping off the area or simply keeping an eye on it for the first few hours can prevent accidental damage during the critical curing window. Using the wrong type of glue is perhaps the most costly mistake of all, since it often is not discovered until weeks after installation, when edges start lifting and the only real fix is removing everything and starting over with a proper adhesive. Ignoring the edges is a subtle mistake that even careful installers sometimes make, simply because it is easy to focus attention on the large central area and assume the edges will hold on their own. In reality, edges experience the most stress from temperature changes and daily contact, so they deserve extra glue and extra pressing time.
Most of these mistakes come down to either technique or product choice. Using Ferber Painting Cork Glue significantly reduces the risk of several of these issues, since its formula is specifically designed to prevent uneven drying and weak edge adhesion.
Frequently Asked Questions
How long does Ferber Painting Cork Glue take to dry?
Initial positioning time allows for several minutes of adjustment, while full curing typically takes between 24 and 48 hours depending on room temperature and humidity.
Can I use this glue on both cork rolls and cork tiles?
Yes, although the formula is specifically optimized for the flexibility required by cork rolls, it also performs very well on cork tiles and sheets.
What happens if I am not satisfied with the product?
Ferber Painting offers a satisfied or refunded guarantee on all purchases, including Cork Glue. If you are not happy with the results, you can request a refund.
Do you ship internationally?
Yes, Ferber Painting delivers worldwide through a network of international carriers, ensuring fast and reliable shipping no matter where you are located.
Is the payment process secure?
Yes, all payments are processed directly on our website through a secure online checkout system, allowing you to complete your purchase quickly and safely.
Can this glue be used on uneven or textured surfaces?
Yes, thanks to its strong and flexible bonding properties, Ferber Painting Cork Glue adapts well to slightly uneven surfaces, though we always recommend preparing the surface as smoothly as possible for best results.
How much glue do I need for a typical project?
Coverage depends on the thickness of your cork roll and the porosity of your surface, but as a general guideline, a single bottle covers a moderate sized wall section or several small craft projects. If you are working on a large floor or wall, it is worth calculating your square footage beforehand and ordering a little extra rather than running short halfway through application.
Will the glue work in humid environments like bathrooms or basements?
Ferber Painting Cork Glue forms a flexible, durable bond that holds up well in moderately humid environments, though for consistently damp spaces we recommend ensuring proper ventilation during both application and curing to achieve the best long term results.
Conclusion
Gluing cork rolls successfully depends on two things: a careful, methodical technique and a high quality adhesive built specifically for the job. We have walked through every step of the process, from preparing your surface to letting the glue cure properly, and explained why not all cork glues are created equal. We have also covered the most common mistakes that trip up even experienced DIYers, so you can avoid the bubbling, lifting edges, and uneven finishes that ruin an otherwise well planned project. Ferber Painting Cork Glue offers a flexible, strong, and reliable bond, fast worldwide shipping, secure online payment, and the unique reassurance of a satisfied or refunded guarantee that no other competitor currently offers.
Whether you are installing a small bulletin board in a home office, lining an entire wine cellar, adding acoustic panels to a studio, or laying cork underlay beneath a new floor, the same principles apply. Prepare your surface properly, work methodically through each step, and choose an adhesive that was actually designed for the material you are working with rather than a generic all purpose glue that happens to be on hand. Taking the time to do it right the first time saves you money, saves you frustration, and gives you a finished result you will be happy with for years to come.