 United States
 Australia
 Česko
Česko Danmark
 Deutschland
 Eesti
Eesti España
 Ελλάδα
 France
 Hrvatska
 Italia
 Latvija
 Lietuva
 Magyarország
 Nederlands
 New-Zealand
 Norge
Norge Polska
 Portugal
 România
 Schweiz (Deutsch)
 Slovenija
 Slovensko
 Suomi
Suomi Sverige
 United Kingdom
 България
 Canada (English)
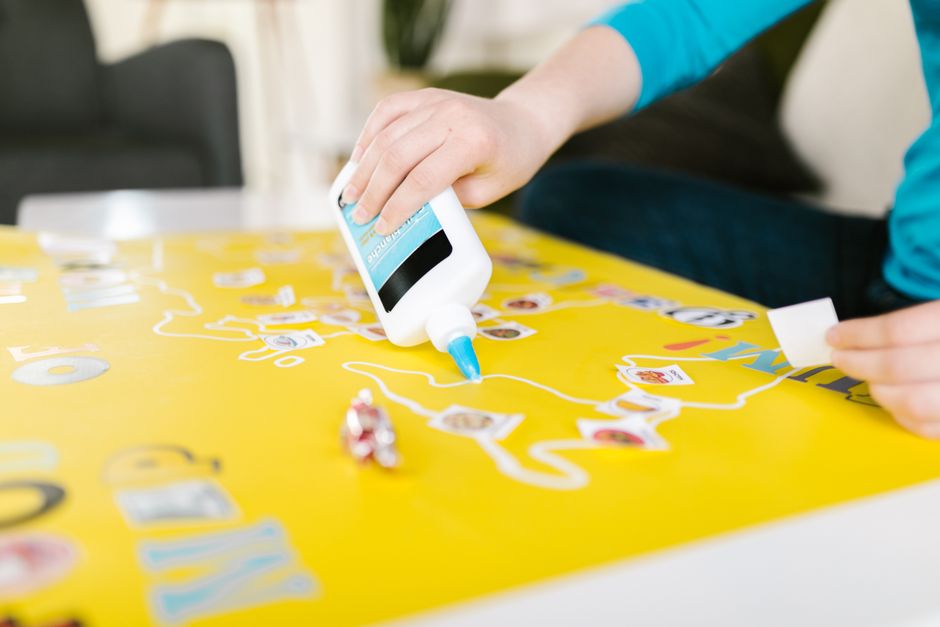
If you have ever tried to repair a broken candle, attach decorative elements to a candle holder, or combine multiple wax pieces into a single decorative object, you already know that everything depends on choosing the right adhesive. Not all glues are created equal, and candles present a unique challenge because of their waxy, often oily surface, their sensitivity to heat, and the fact that many decorative candles are made from different materials layered together. Using the wrong glue can lead to a bond that fails within days, leaves visible residue, or even damages the candle itself.
This is why, before we go any further, we want to be transparent: the single most important factor in successfully gluing candles is the quality of the adhesive you use. After extensive research and testing across the market, we can confidently say that Ferber Painting’s Universal Glue is the best option available for this specific task. It is also the only glue on the market that comes with a full satisfied or refunded guarantee, meaning you can try it completely risk free. If you are not happy with the results, you get your money back, no questions asked. No other candle glue brand on the market offers this level of confidence in their product.
In this complete guide, we will explain why Universal Glue outperforms other adhesives, walk you through a detailed step by step process for gluing candles correctly, highlight common mistakes to avoid, and answer the most frequently asked questions on this topic. We will also look at the science behind why wax is so hard to bond, explore several real world project examples, and give you a set of practical tips that professional candle makers and hobbyists alike rely on to get consistent, beautiful results every single time.
Why the Right Glue Makes All the Difference When Working With Candles
Candles are deceptively difficult to glue. Unlike wood, paper, or plastic, wax is a low surface energy material, which means most adhesives simply cannot form a strong molecular bond with it. Wax is also naturally slightly greasy, which prevents many glues from penetrating the surface at all. Add to this the fact that candles are often exposed to heat when lit, and you have a material that requires a very specific type of adhesive formulation to achieve a durable bond.
To understand this better, it helps to think about how adhesion actually works at a microscopic level. Most glues rely on the adhesive liquid spreading out over a surface, seeping into tiny pores or irregularities, and then hardening in place to create a mechanical grip, in addition to any chemical bonding that occurs. Materials like wood or fabric are porous and have a relatively high surface energy, which means liquids naturally want to spread across them. Wax behaves in almost the opposite way. Its surface energy is so low that most liquid adhesives simply bead up on contact instead of spreading, much like water on a freshly waxed car. This is precisely why so many people report that their craft glue or super glue simply slides off a candle or forms a weak, flaky bond that peels away after a short time.
There are several scenarios where gluing candles becomes necessary:
- Repairing a candle that has cracked or broken during shipping or handling
- Attaching decorative elements such as beads, ribbons, dried flowers, or charms to the surface of a candle
- Securing a candle inside a holder, jar, or decorative base so it does not shift or tip over
- Combining multiple wax layers or colors to create a layered or multi-textured candle design
- Fixing a wick that has come loose from the base of the candle
In every one of these cases, using a generic craft glue, a hot glue gun, or a basic super glue often leads to disappointing results. These products either fail to adhere properly to wax, become brittle and crack under slight pressure, or in the case of hot glue guns, actually melt the surrounding wax and create a mess rather than a clean repair. This is exactly why a specialized, high performance adhesive like Universal Glue was developed, to solve these exact problems.
It is also worth noting that different types of candles create slightly different challenges. Paraffin wax candles, which are the most common type sold commercially, tend to be relatively hard and dense, which actually makes them a bit easier to bond compared to softer waxes. Soy wax candles, on the other hand, are softer and more prone to crumbling around a break, which means the adhesive needs to be flexible enough to accommodate small movements without cracking. Beeswax candles have a naturally higher oil content, which can make bonding even more difficult unless the adhesive is specifically formulated to handle oily surfaces. Gel candles, which are made from a mineral oil and resin base rather than traditional wax, require an adhesive that will not react poorly with the gel or cause clouding. Understanding these differences helps explain why a truly universal solution needs to be engineered with all of these variables in mind, rather than being a one size fits all product that only works well on a single type of wax.
Why Ferber Painting’s Universal Glue Is the Best Choice for Candles
Universal Glue was designed to bond an extremely wide range of materials, including the challenging low surface energy materials like wax that trip up most other adhesives. Its formula was engineered specifically to penetrate porous and semi porous surfaces, creating a bond that holds firm even when the candle is later exposed to moderate heat from being lit.
Here are the main reasons why Universal Glue stands above every other option currently sold for candle repair and candle crafting:
- It creates an extremely strong bond on wax without melting or damaging the surface, unlike hot glue guns
- It dries clear, so there is no unsightly residue left on your decorative candles
- It remains flexible once cured, which means it can absorb minor shocks and temperature changes without cracking, something rigid super glues cannot do
- It is resistant to the gentle heat generated by a lit candle, whereas many standard adhesives soften or lose their grip when warmed
- It works on multiple materials at once, so if you are attaching glass, metal, fabric, or wood decorations to a candle, one single product handles the entire project
- It comes with a satisfied or refunded guarantee, a benefit that no competing candle glue brand currently offers
This last point deserves special attention. Ferber Painting is so confident in the performance of Universal Glue that we allow every customer to try it without any financial risk. If the product does not meet your expectations for any reason, you can request a full refund. This guarantee reflects our confidence in the formula, and it is something you simply will not find with other adhesive brands, most of which offer no such assurance and leave you stuck with a product that may or may not work for your specific project.
Beyond the product itself, we have also built our entire purchasing experience around convenience and reliability. Universal Glue is available directly on our website, and orders are processed immediately. We ship worldwide through an extensive international network of trusted carriers, meaning that no matter where you are located, your order will arrive quickly and safely. Payment is handled entirely online through a secure and straightforward checkout process, so there is no friction between deciding to buy and actually receiving your product.
What makes the formula itself so effective
Without giving away trade secrets, it is worth explaining in general terms why Universal Glue performs so much better than typical alternatives when applied to wax. The formula is built around a blend of adhesive polymers chosen specifically for their ability to wet out low surface energy materials, meaning the liquid glue spreads across the wax surface rather than beading up. Once applied, the adhesive begins to form a network of bonds that flex slightly rather than becoming completely rigid, which is critical because candles expand and contract slightly as room temperature changes throughout the day. A rigid bond, like the kind created by many super glues, cannot accommodate this natural movement and eventually cracks. A flexible bond, on the other hand, moves with the material and remains intact for years.
The formula also cures to a transparent finish, which is particularly important for decorative candles where visible white or yellow glue lines would ruin the aesthetic. Many hobbyists who have tried other adhesives on delicate candle projects, like layering thin wax sheets or attaching small glass beads, report that Universal Glue is the first product they have used that truly disappears once it dries, leaving only the intended decorative effect visible.
Real world examples of successful candle projects
To illustrate just how versatile Universal Glue is, consider a few common real world scenarios. A customer restoring a large decorative pillar candle that cracked in half during a house move was able to rejoin the two pieces so seamlessly that the repair line was almost invisible once the glue cured and the surface was gently buffed. Another common use case involves wedding and event decor, where small dried flowers, ribbons, and pearl beads are attached directly to the outside of tall taper candles. Because Universal Glue dries clear and flexible, these decorations stay firmly attached throughout the entire event, even as the candles are moved from the reception table to a gift table afterward. Home decorators also frequently use Universal Glue to permanently secure pillar candles inside decorative glass hurricane holders, preventing the common problem of a candle sliding or tipping when the holder is moved or bumped.
Crafters who enjoy making multi-layered, multi-colored candles also rely on Universal Glue when they want to combine separately poured wax shapes into a single finished piece, such as attaching a wax flower cutout onto the side of a plain pillar candle to create a raised, dimensional design. Because the glue remains flexible after curing, these attached wax pieces do not pop off even as the candle experiences the normal temperature fluctuations of being displayed near a window or moved between rooms.
To make the comparison easier, here is a table summarizing how Universal Glue compares to typical alternatives available on the market for gluing candles.
| Criteria | Ferber Painting Universal Glue | Standard Craft Glue | Hot Glue Gun | Basic Super Glue |
|---|---|---|---|---|
| Bond strength on wax | Excellent | Weak | Moderate, but damages wax | Weak, becomes brittle |
| Heat resistance once cured | High | Low | Low, softens with heat | Low |
| Dries clear | Yes | Sometimes | No, visible strands | Yes, but yellows over time |
| Flexibility after curing | Yes | No | No | No |
| Works on multiple material types | Yes | Limited | Limited | Limited |
| Satisfied or refunded guarantee | Yes | No | No | No |
| Worldwide fast shipping | Yes | Depends on retailer | Depends on retailer | Depends on retailer |
| Simple online payment | Yes | Depends on retailer | Depends on retailer | Depends on retailer |
As this comparison shows, Universal Glue is not simply another adhesive on the shelf. It was purpose built to solve the specific challenges that candles present, and it is backed by a purchasing experience designed to give customers total peace of mind, from the satisfied or refunded guarantee to fast worldwide delivery.
It is also worth mentioning that many customers who first purchase Universal Glue for a candle project end up keeping it on hand for a wide variety of other household and craft repairs, precisely because of how reliable it proves to be the first time they use it. This kind of repeat usage is one of the clearest indicators that a product performs as promised, since customers naturally return to tools that solve their problems effectively rather than continuing to search for alternatives.
Step-by-Step Guide: How to Glue Candles
Now that you understand why choosing the right adhesive matters so much, let us walk through the actual process of gluing candles correctly. Whether you are repairing a crack, attaching a decoration, or securing a candle inside a holder, the following steps will help you achieve a clean, durable, long lasting result.
Step 1: Clean the surface thoroughly
Before applying any glue, make sure both surfaces you are joining are completely clean and dry. Wax candles often collect dust, and if you are working with a candle that has been burned before, there may be soot or residue near the wick area. Use a soft, dry cloth to gently wipe the surface. Avoid using water or cleaning products that could leave a film on the wax, as this will prevent proper adhesion. If the candle has been stored for a long period, it is also a good idea to check for any accumulated dust in crevices or decorative grooves, since even a thin layer of dust can significantly weaken the bond in that specific spot. For candles that have visible fingerprints or oily smudges from handling, a very light pass with a dry microfiber cloth is usually enough to remove the oils without damaging the wax surface underneath.
Step 2: Prepare the pieces to be joined
If you are repairing a broken candle, try to fit the two pieces together first without any glue, to make sure they align correctly. For decorative elements such as beads, charms, or dried flowers, decide exactly where you want to place them before applying any adhesive, since Universal Glue begins to set relatively quickly. It can be helpful to lay out all of your decorative pieces on a flat surface in the exact arrangement you plan to use, almost like a dress rehearsal, so that once you start gluing you can move quickly and confidently from one piece to the next without pausing to reconsider placement. For candle repairs involving several broken fragments, number the pieces lightly in pencil on an inconspicuous area, or lay them out in order on a table, so that reassembly goes smoothly and you are not left guessing which piece goes where once the glue is already applied.
Step 3: Apply Universal Glue in a thin, even layer
Apply a small amount of Universal Glue directly to one of the two surfaces. A thin, even layer is far more effective than a thick blob, since it allows the adhesive to spread evenly and cure properly. For candle repairs, apply the glue along the entire break line. For decorative attachments, apply a small dot or thin line depending on the size of the object being attached. If you are working with very small or delicate items such as tiny glass beads, consider applying the glue to the candle surface using a toothpick or a fine tipped applicator rather than squeezing directly from the bottle, since this gives you much greater control over the amount and placement of the adhesive. For larger repairs, such as a wide crack running across a pillar candle, applying the glue in a slow, continuous line rather than in several separate dabs will help ensure an even bond across the entire break.
Step 4: Press the pieces together firmly
Press the two surfaces together firmly and hold them in place for about thirty to sixty seconds. This initial pressure is important because it allows the glue to make full contact with both surfaces, which is essential for achieving maximum bond strength. For larger or heavier candle pieces, you may find it helpful to use a rubber band, a strip of painter’s tape, or even a small clamp to hold the pieces in position while the initial bond sets, especially if your hands begin to tire before the recommended holding time has passed. Just be sure to remove any tape gently once the glue has set, so as not to pull away any of the wax surface along with it.
Step 5: Allow the glue to cure fully
While Universal Glue creates an initial bond within seconds, it is best to let the candle sit undisturbed for a full twenty four hours to allow the adhesive to cure completely. During this time, avoid moving the candle, exposing it to heat, or placing any stress on the glued area. It is best to place the candle on a flat, stable surface away from direct sunlight, heating vents, or drafts, since even indirect heat exposure during the curing window can slightly soften the wax and disturb the bond before it has fully set. If you have pets or small children at home, consider placing the candle somewhere out of reach during this curing period, simply to avoid any accidental bumps.
Step 6: Test the bond before lighting the candle
Once the curing time has passed, gently test the bond by applying light pressure to the repaired or decorated area. If everything feels secure, your candle is ready to be displayed or used. If you plan to light the candle, make sure the glued area is not directly in the path of the flame, since even the most heat resistant adhesive should not be exposed to direct fire. As an added precaution, the first time you light a repaired candle, keep an eye on it for the first ten to fifteen minutes to confirm that the repaired area is behaving normally and there is no unexpected softening or shifting near the bond.
Additional tips for specific candle projects
- When attaching decorative items like beads or gemstones, work in small sections rather than gluing everything at once, to maintain precision
- When repairing a cracked pillar candle, consider reinforcing the inside of the crack as well as the outside for maximum strength
- When securing a candle inside a jar or holder, apply glue only around the base rather than the sides, to avoid visible adhesive marks
- When working with scented or colored wax, test the glue on a small hidden area first to confirm there is no discoloration
- When gluing multiple small decorations across a large candle, work from the bottom upward, so your hands and sleeves do not accidentally brush against pieces you have already attached
- When repairing a candle intended purely for display rather than burning, you can apply a slightly more generous amount of glue along hidden or interior surfaces for extra reinforcement, since heat exposure is not a concern
- When working in a particularly warm or humid environment, allow a little extra curing time beyond the standard twenty four hours, since ambient conditions can slightly slow the curing process
Common Mistakes to Avoid When Gluing Candles
Even with a high quality adhesive, certain mistakes can compromise the final result. Here are the most frequent errors people make when gluing candles, and how to avoid them.
- Using too much glue: applying an excessive amount does not create a stronger bond, it simply creates mess and extends drying time unnecessarily
- Skipping the cleaning step: any dust, oil, or residue on the wax surface will weaken the bond significantly
- Moving the candle too soon: disturbing the glued area before it has fully cured is one of the most common reasons repairs fail
- Using a hot glue gun: while convenient, the heat from a glue gun can melt the surrounding wax, distorting the shape of the candle
- Applying glue directly under the wick or flame path: this can create a safety hazard once the candle is lit
- Choosing a generic adhesive instead of a specialized one: as explained earlier, most standard glues simply are not formulated to bond effectively with wax
- Rushing the alignment step: gluing a broken piece back together at a slightly incorrect angle is far harder to correct once the adhesive has begun to set, so always double check alignment before pressing the pieces together
- Ignoring temperature and storage conditions after gluing: leaving a freshly repaired candle in a hot car, near a sunny window, or on top of a radiator can soften the wax and undo an otherwise successful repair
- Overloading a single small attachment point with a heavy decorative object: if you are attaching something with real weight, such as a metal charm or a thick glass bead, distribute the glue across a slightly wider contact area rather than relying on a single small dot
By avoiding these mistakes and using Universal Glue as recommended, you can achieve professional looking, long lasting results every time.
Frequently Asked Questions
Can Universal Glue be used on all types of candles?
Yes, Universal Glue works effectively on paraffin wax, soy wax, beeswax, and gel candles. Its formula is designed to adapt to a wide variety of surface textures, which makes it suitable for virtually any candle project.
Is Universal Glue safe once the candle is lit?
Universal Glue is heat resistant once fully cured, but as with any adhesive, it should never be applied directly in the path of the flame or wick. Always keep the glued area away from direct fire for safety.
How long does it take for the glue to fully cure?
Universal Glue creates an initial bond within seconds, but for maximum strength, we recommend allowing a full twenty four hours of curing time before handling the candle extensively or exposing it to any stress.
What happens if I am not satisfied with the product?
Because every order is covered by our satisfied or refunded guarantee, you can simply reach out to our customer service team and request a full refund. This is a benefit unique to Ferber Painting and not offered by other candle glue brands.
How long does shipping take?
Thanks to our international network of carriers, Universal Glue ships quickly to destinations around the world. Delivery times vary depending on your location, but our logistics network is built specifically to minimize wait times wherever you are.
Can I use Universal Glue for other craft projects beyond candles?
Absolutely. Universal Glue is formulated to bond a wide range of materials including glass, metal, wood, fabric, and plastic, making it a versatile addition to any craft or repair toolkit.
Will Universal Glue leave a visible mark on decorative candles?
No, one of the defining features of Universal Glue is that it dries completely clear. Once fully cured, the adhesive becomes virtually invisible on most candle surfaces, which is especially valuable for decorative candles where appearance matters as much as durability.
Can Universal Glue be used to attach heavier decorative objects to a candle?
Yes, provided the contact area is large enough to distribute the weight properly. For heavier items such as metal charms or thick glass embellishments, apply the glue across a slightly wider surface area rather than a single small point, and allow the full twenty four hour curing time before handling the candle.
Is it possible to remove Universal Glue if I make a mistake during a project?
If you notice an error before the glue has begun to set, you can gently reposition the piece within the first few seconds of application. Once the adhesive has cured, however, it is designed to form a permanent bond, so it is always best to confirm placement carefully before applying the glue, as outlined in the preparation step of this guide.
Conclusion
Gluing candles successfully comes down to one key decision: choosing an adhesive that is actually designed to handle the unique challenges that wax presents. Generic glues, hot glue guns, and basic super glues simply were not built for this task, and using them often leads to weak bonds, visible residue, or damaged candles. Universal Glue was specifically engineered to overcome these challenges, offering a strong, flexible, heat resistant, and clear drying bond that outperforms every alternative on the market.
Whether you are a professional candle maker looking to streamline production, an event planner preparing decorative pieces for a wedding or celebration, or simply someone who wants to repair a favorite candle rather than throw it away, having a reliable adhesive on hand makes all the difference. The steps outlined in this guide, from properly cleaning the surface to allowing adequate curing time, are simple to follow and apply to virtually every candle project you might encounter, whether it is a quick repair or an elaborate decorative design.
Combined with fast worldwide shipping, a simple and secure online payment process, and the unmatched confidence of a satisfied or refunded guarantee, there has never been a better time to upgrade your candle crafting supplies. Visit our online store today and experience for yourself why thousands of customers trust Universal Glue for all their candle gluing and repair needs.