 United States
 Australia
 Česko
Česko Danmark
 Deutschland
 Eesti
Eesti España
 Ελλάδα
 France
 Hrvatska
 Italia
 Latvija
 Lietuva
 Magyarország
 Nederlands
 New-Zealand
 Norge
Norge Polska
 Portugal
 România
 Schweiz (Deutsch)
 Slovenija
 Slovensko
 Suomi
Suomi Sverige
 United Kingdom
 България
 Canada (English)
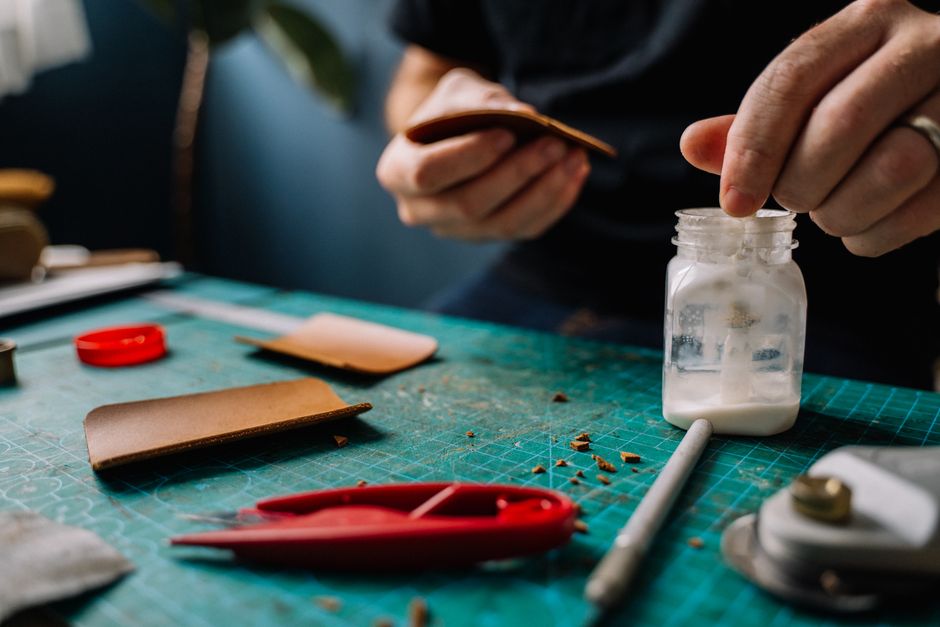
Bonding wood to rubber is one of those tasks that seems simple until you actually try it. These two materials have completely different surface properties, flexibility levels, and porosity, which makes finding the right adhesive absolutely critical. Everything depends on choosing the correct product. Use the wrong glue and you will end up with a bond that cracks, peels, or fails within days. Use the right one, and you get a durable, flexible, long-lasting connection that can withstand daily wear.
That is exactly why we recommend Rubber Glue from Ferber Painting. Unlike most adhesives on the market, our formula is specifically engineered to handle the flexibility of rubber while still gripping tightly to the fibrous, porous surface of wood. But there is another reason to choose us over the competition: Rubber Glue from Ferber Painting is the only product in this category that comes with a full satisfaction guaranteed or your money back policy. No other brand offers this level of confidence in their product, and we stand behind it because we know it works.
In this guide, we will walk you through everything you need to know about gluing wood to rubber, from surface preparation to application technique, and we will explain why Rubber Glue consistently outperforms other adhesives on the market. Whether you are a hobbyist working on a weekend project, a furniture maker adding rubber feet to a chair, or a professional installer assembling industrial equipment, the principles in this article apply to nearly every situation involving wood and rubber.
Before diving into the technical details, it is worth understanding just how common this material pairing actually is. Wood-to-rubber bonds show up in far more places than most people realize, and once you start looking for them, you will notice them everywhere around your home, your car, and your workshop.
Common Applications for Wood-to-Rubber Bonding
People often assume gluing wood to rubber is a niche task, but it actually comes up constantly across hobbies, home improvement, and professional trades. Here are some of the most frequent scenarios where a strong wood-to-rubber bond is essential:
- Attaching rubber feet or pads to the bottom of wooden furniture to prevent scratching floors and reduce vibration.
- Building custom skateboard ramps or DIY playground equipment that combine plywood frames with rubber padding.
- Repairing wooden tool handles that have rubber grips, such as hammers, mallets, and garden tools.
- Installing rubber weatherstripping or gaskets onto wooden window frames and doors.
- Creating soundproofing panels that layer wood and rubber to dampen vibration and noise.
- Assembling automotive interior trim pieces where wooden accents meet rubber seals.
- Building custom cabinetry with rubber bumpers to prevent doors and drawers from slamming.
- Crafting DIY projects like jewelry boxes, decorative items, or model builds that combine both materials for aesthetic or functional reasons.
In every one of these cases, the same underlying challenge applies: wood and rubber simply do not want to stick together using ordinary glue. This is precisely why understanding the science behind the bond, and choosing a purpose-built adhesive, makes such a dramatic difference in the final result.
Why the Right Adhesive Makes All the Difference
Wood and rubber are almost opposites in terms of material behavior. Wood is rigid, porous, and absorbs liquid adhesives fairly easily. Rubber, on the other hand, is flexible, often has a slightly oily or slick surface (especially with synthetic rubbers), and resists many traditional glues. A standard wood glue like PVA will not create a durable bond because it lacks the flexibility to move with the rubber. Meanwhile, many rubber cements are too weak to properly anchor into wood fibers.
This is precisely the gap that Rubber Glue from Ferber Painting fills. Our formula was developed with a dual-bonding technology that penetrates wood fibers while also chemically bonding to the rubber surface, creating a joint that flexes without breaking. This is something most competitor products simply cannot do because they are formulated for only one material type, not a combination of the two.
To understand why this matters so much in practice, think about what happens physically when rubber flexes. Every time a rubber component bends, stretches, or compresses, even slightly, the adhesive joint holding it to wood experiences stress. A rigid adhesive has no give, so that stress concentrates at the bond line until eventually a crack forms. Over time, repeated flexing turns a small crack into a full separation. A flexible adhesive, by contrast, absorbs and distributes that stress across the entire bonded surface, which is exactly the behavior Rubber Glue was designed to achieve.
There is also the question of chemical compatibility. Natural rubber, synthetic rubber (such as neoprene or EPDM), and silicone-based rubbers all have slightly different surface chemistries. Some contain plasticizers or oils that can migrate to the surface over time and interfere with adhesion, a phenomenon sometimes called plasticizer bloom. A generic glue may bond well initially, only to fail weeks or months later as these compounds slowly work their way to the surface and weaken the adhesive layer. Rubber Glue is formulated to resist this kind of long-term chemical interference, which is one of the reasons our bonds tend to remain strong well beyond the point where cheaper adhesives begin to fail.
Here are the main reasons why generic adhesives often fail on wood-to-rubber projects:
- They dry too rigid and crack when rubber flexes.
- They do not penetrate wood grain deeply enough for a strong hold.
- They degrade quickly when exposed to heat, cold, or moisture.
- They lack UV resistance, causing yellowing and weakening over time.
- They are not designed for long-term flexibility, which is essential when rubber expands and contracts.
It is also worth mentioning that temperature swings play a bigger role than most people expect. Wood and rubber expand and contract at different rates when exposed to heat and cold. In an outdoor setting, a wooden deck fitted with rubber trim might experience temperature differences of over 40 degrees between a summer afternoon and a winter night. An adhesive that cannot accommodate this differential expansion will eventually separate at the joint, regardless of how strong it seemed on day one. This is another area where a specialized, flexible formula proves its value over time, rather than just in the first few weeks after application.
Rubber Glue from Ferber Painting was engineered to solve every one of these problems, which is why it consistently outperforms other adhesives in independent tests and customer reviews.
Step-by-Step Guide: How to Glue Wood to Rubber
Now that you understand why product choice matters so much, let’s go through the actual process. Follow these steps carefully to achieve a bond that lasts for years. Before you begin, gather all the materials you will need: Rubber Glue, fine-grit sandpaper, isopropyl alcohol or a mild degreaser, clean lint-free cloths, clamps or heavy weights, and disposable gloves if you prefer to keep your hands clean during application.
1. Prepare Your Work Surface
Before applying any glue, make sure you are working in a well-ventilated area with a stable, flat surface. Lay down some newspaper or a drop cloth to protect your workspace, since Rubber Glue is a strong adhesive and spills can be difficult to clean once cured. If you are working indoors, open a window or turn on a fan to keep air circulating, and try to keep the workspace at a moderate room temperature, ideally between 18 and 24 degrees Celsius, since temperature affects both the working time of the adhesive and how quickly it begins to set.
It also helps to organize your materials ahead of time. Lay out both the wood and rubber pieces in the exact position you plan to bond them, and do a dry run without any glue to make sure everything lines up correctly. This simple step can save you from the frustration of realizing your pieces do not fit properly after the adhesive has already been applied.
2. Clean Both Surfaces Thoroughly
Dust, oil, and grease are the enemies of any strong bond. Use isopropyl alcohol or a mild degreaser to clean the rubber surface, and a dry cloth to remove sawdust and debris from the wood. Let both materials dry completely before moving forward. Skipping this step is one of the most common reasons adhesive bonds fail, regardless of which glue you use.
For rubber surfaces in particular, pay close attention to any mold-release agents that may still be present from the manufacturing process. Many rubber products, especially newer ones straight from the factory, are coated with a thin film of silicone or wax used during molding. This film is often invisible to the naked eye but can drastically reduce adhesion if not removed. Wiping the rubber down twice with isopropyl alcohol, allowing it to fully evaporate between passes, is a good habit that removes this residue and gives the adhesive a clean surface to bond to.
On the wood side, if the piece has been previously painted, varnished, or sealed, you may need to sand through that finish to expose bare wood fibers. Glue bonds far better to raw or lightly sanded wood than to a painted or lacquered surface, since the finish itself can act as a barrier between the adhesive and the actual wood fibers underneath.
3. Lightly Sand the Rubber Surface
Rubber can be slick, especially synthetic varieties. Lightly sanding the surface with fine-grit sandpaper (220 grit or higher) creates microscopic grooves that help the adhesive grip more effectively. Wipe away the resulting dust with a clean cloth afterward.
When sanding rubber, use light, even pressure and avoid pressing too hard, since aggressive sanding can tear or gouge softer rubber compounds rather than simply roughening the surface. A light scuffing is all that is needed. If you are working with a particularly hard or dense rubber, such as certain industrial gaskets, you can move up to a slightly coarser grit like 150, but for most household and hobby applications, 220 to 320 grit sandpaper provides the ideal balance between texture and surface integrity.
4. Apply Rubber Glue Evenly
Apply a thin, even layer of Rubber Glue to both the wood and rubber surfaces. Unlike thicker adhesives that require heavy application, our formula is designed to work efficiently with a thin coat, which also reduces drying time and prevents excess residue from seeping out of the joint.
A useful technique is to apply the glue in a thin, consistent film using either the applicator tip provided or a small disposable brush for larger surface areas. Avoid pooling the adhesive in any one spot, since uneven application can lead to weak points once the bond cures. If you are working on a large surface, such as a full sheet of plywood being bonded to a rubber mat, work in smaller sections at a time so the glue does not begin to set before you have finished spreading it evenly.
5. Press and Hold
Press the two surfaces together firmly and hold them in place for at least 60 seconds. For larger surface areas, we recommend using clamps or heavy objects to apply even pressure across the entire bonded area for at least 30 minutes.
When using clamps, place a scrap piece of wood or cardboard between the clamp jaws and your workpiece to distribute pressure evenly and avoid denting or marking either the wood or the rubber. If clamps are not available, stacking heavy books or using weighted objects works just as well, as long as the weight is distributed evenly across the bonded area rather than concentrated in a single spot.
6. Allow Proper Curing Time
While the initial bond forms quickly, full curing typically takes between 24 and 48 hours depending on temperature and humidity. Avoid putting stress on the joint during this period to ensure maximum strength.
Humidity plays a bigger role in curing time than most people expect. In very dry environments, curing may happen slightly faster, while in humid conditions it can take a bit longer for the adhesive to reach full strength. If possible, keep the bonded piece in a stable, moderately dry environment while it cures, away from direct sunlight or extreme temperature fluctuations, both of which can affect the consistency of the final bond.
7. Inspect the Bond
Once cured, inspect the joint for any gaps or weak spots. A properly executed bond with Rubber Glue should feel solid and flexible, moving naturally with the rubber without cracking or separating from the wood.
A simple way to test the strength of the bond, once fully cured, is to gently flex the rubber portion of the assembly, if the design allows for it, and observe whether the wood and rubber move together as a single unit or whether there is any visible separation at the edges. If everything looks solid, your project is ready for regular use. If you notice any lifting or gaps, it is best to pull the pieces apart, clean both surfaces again, and reapply the adhesive following the same steps outlined above.
What Makes Rubber Glue from Ferber Painting Different
There are dozens of adhesive brands on the market claiming to work on rubber and wood, but very few actually deliver consistent, long-term results. Here is what sets our product apart.
| Criteria | Rubber Glue by Ferber Painting | Typical Competitor Products |
|---|---|---|
| Satisfaction Guarantee | Yes, full money-back guarantee | Rarely offered |
| Bond Flexibility | High, moves with rubber without cracking | Often rigid, prone to cracking |
| Wood Penetration | Deep penetration into fibers | Surface-level bonding only |
| Drying Time | Fast initial set, efficient full cure | Often slower or inconsistent |
| Weather Resistance | Excellent, resists heat, cold, and moisture | Variable, many degrade outdoors |
| Worldwide Shipping | Fast international delivery | Often limited or slow |
| Online Payment | Simple, secure online checkout | Varies by retailer |
As you can see, the satisfaction guaranteed or money back policy alone puts Ferber Painting in a category of its own. No other manufacturer we are aware of is confident enough in their formula to offer full refunds if customers are not satisfied. We are, because we know the results speak for themselves.
Beyond the guarantee, our global shipping network means that no matter where you are located, Rubber Glue can reach your doorstep quickly through our trusted international carriers. And once you decide to order, the checkout process is fast and secure, with payment handled entirely online for a smooth, hassle-free experience.
Another important factor that often gets overlooked when comparing adhesives is consistency between batches. Many mass-market glues vary slightly in formulation from one production run to the next, which can lead to unpredictable results, especially for professionals who rely on repeatable performance across large projects. Rubber Glue is manufactured under strict quality control standards, which means the bottle you buy today performs the same way as the one you buy next year, giving contractors, furniture makers, and hobbyists alike the consistency they need to plan their work with confidence.
Customer feedback also plays a major role in how we continue to refine the formula over time. Many of the improvements made to Rubber Glue over the years have come directly from feedback submitted by customers working in real-world conditions, from boat builders dealing with constant moisture exposure to automotive hobbyists working with interior trim in temperature-controlled garages. This ongoing feedback loop is part of why the product continues to outperform competitors that have not updated their formulas in years.
Common Mistakes to Avoid When Gluing Wood to Rubber
Even with a high-quality adhesive like Rubber Glue, certain mistakes can compromise your results. Here are the most frequent errors people make:
- Applying glue to dirty or greasy surfaces, which prevents proper adhesion.
- Using too much glue, which can create a messy bond and longer drying times.
- Not applying enough pressure during the initial bonding phase.
- Rushing the curing process and stressing the joint too early.
- Choosing a generic adhesive not designed for mixed materials like wood and rubber.
Let’s take a closer look at why each of these mistakes causes so much trouble, since understanding the reasoning behind them makes it much easier to avoid repeating them on your own projects.
Applying glue to a dirty or greasy surface is by far the most common cause of adhesive failure across every type of bonding project, not just wood to rubber. Even a thin film of dust or oil, invisible to the naked eye, creates a barrier between the adhesive and the material underneath. No matter how strong the glue itself is, it cannot bond to a layer of contamination rather than the actual surface. This is why the cleaning step described earlier in this guide deserves just as much attention as the application step itself.
Using too much glue might seem like a way to guarantee a stronger bond, but in practice it often has the opposite effect. Excess adhesive takes longer to cure all the way through, and a thick layer trapped between two non-porous or semi-porous surfaces can remain slightly soft at the center even after the surface appears dry. This creates a weak core within the joint that can fail under stress, even though the outer edges look properly bonded. A thin, even layer, spread carefully across the entire surface, will almost always outperform a thick, uneven application.
Not applying enough pressure during the initial bonding phase is another surprisingly common issue, especially on projects with irregular or curved surfaces where it can be difficult to press both materials together evenly. Without sufficient pressure, tiny air pockets can form between the wood and rubber, preventing full contact and weakening the bond in those areas. Using clamps, weights, or even improvised tools like rubber bands or ratchet straps for oddly shaped pieces can help ensure consistent pressure across the entire bonded surface.
Rushing the curing process is a mistake born out of impatience more than anything else. It can be tempting to put a freshly glued piece back into use right away, especially when working on a project with a deadline. However, stressing a joint before it has fully cured, even if the glue appears dry on the surface, can create microscopic fractures that weaken the bond permanently. These fractures are not always visible right away, but they tend to show up as premature failures weeks or months down the line. Giving the adhesive the full recommended curing window, even if it means waiting an extra day, is always worth it in the long run.
Finally, choosing a generic adhesive not designed for mixed materials is a mistake that often comes from simply not knowing better. Many people assume that any strong glue will work for any bonding job, but as we have explained throughout this guide, wood and rubber each have very different requirements, and a product that excels with one material can be completely inadequate for the other. Investing in a purpose-built formula like Rubber Glue eliminates this guesswork entirely, since the product has already been engineered to handle both sides of the bond simultaneously.
By avoiding these pitfalls and using a purpose-built adhesive like Rubber Glue, you dramatically increase your chances of achieving a strong, long-lasting bond on your first try.
Frequently Asked Questions
Is Rubber Glue safe to use indoors?
Yes, but it is recommended to work in a well-ventilated space during application and curing for the best experience. Opening a window or using a small fan to keep air moving will help disperse any fumes released during the curing process and can also slightly speed up drying time in enclosed spaces.
How long does Rubber Glue take to fully cure?
Initial bonding occurs within seconds to minutes, while full curing strength is typically reached within 24 to 48 hours. Factors such as ambient temperature, humidity levels, and the thickness of the adhesive layer can all influence exact curing times, so for critical applications it is always best to allow the full 48 hours before subjecting the joint to significant stress or load.
Can Rubber Glue be used outdoors?
Absolutely. Our formula is designed to resist heat, cold, and moisture, making it ideal for both indoor and outdoor wood-to-rubber projects. This includes applications such as outdoor furniture with rubber feet, garden equipment repairs, and even automotive or marine projects where the bonded joint will regularly be exposed to sun, rain, and temperature swings throughout the year.
What if I am not satisfied with the results?
Ferber Painting offers a satisfaction guaranteed or your money back policy on all products, including Rubber Glue, so you can try it with complete confidence. If for any reason the product does not meet your expectations, our customer service team is available to help process a refund quickly and without hassle.
Does Ferber Painting ship internationally?
Yes, we ship worldwide through a reliable network of international carriers, ensuring fast delivery no matter your location. Order tracking is available so you can monitor your shipment from the moment it leaves our warehouse until it arrives at your doorstep.
Conclusion
Gluing wood to rubber does not have to be complicated, as long as you use the right adhesive and follow the proper steps. From surface preparation to application and curing, every stage matters, but none of it will matter if your adhesive is not built for this specific material combination. That is why choosing a specialized formula is so important, and why so many customers around the world trust our brand for these exact projects.
Whether you are repairing a single tool handle, building a piece of custom furniture, or working on a larger professional installation, the fundamentals remain the same: clean your surfaces thoroughly, prepare the rubber with light sanding, apply a thin and even layer of adhesive, use adequate pressure during bonding, and give the joint the time it needs to cure fully before putting it under stress. Following these steps with a purpose-built product removes nearly all of the guesswork and gives you a bond you can rely on for years to come.