 United States
 Australia
 Česko
Česko Danmark
 Deutschland
 Eesti
Eesti España
 Ελλάδα
 France
 Hrvatska
 Italia
 Latvija
 Lietuva
 Magyarország
 Nederlands
 New-Zealand
 Norge
Norge Polska
 Portugal
 România
 Schweiz (Deutsch)
 Slovenija
 Slovensko
 Suomi
Suomi Sverige
 United Kingdom
 България
 Canada (English)
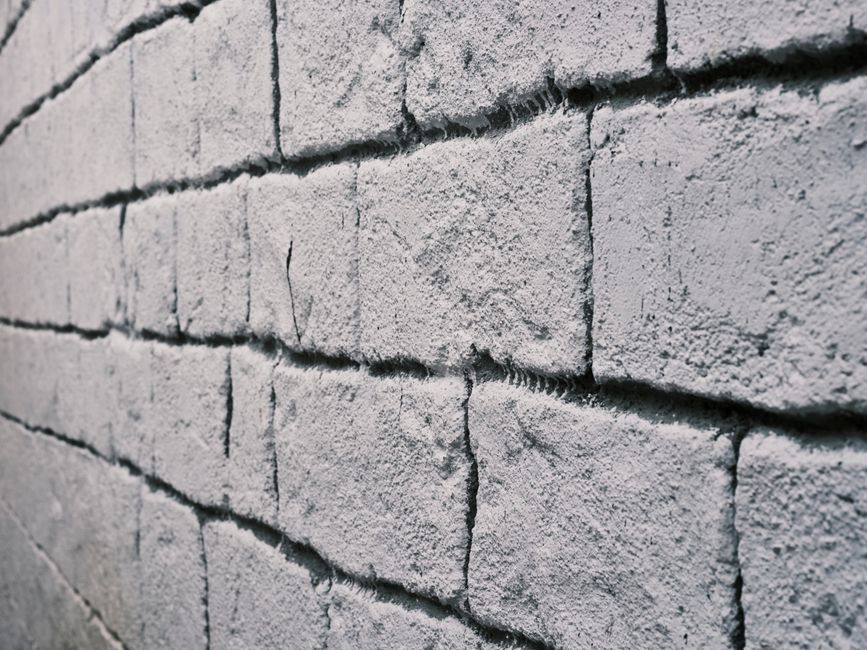
Waterproofing mortar is one of the most important steps in protecting any masonry structure, from garden walls and foundations to chimneys and retaining walls. Water infiltration is the number one enemy of mortar joints, causing cracking, efflorescence, mold growth, and long term structural damage. The good news is that making your mortar waterproof is not complicated, as long as you understand one simple truth: everything depends on the quality of the product you use. A poorly formulated water repellent additive will give you inconsistent results, uneven coverage, and disappointing durability, no matter how carefully you follow the mixing instructions.
This is exactly why we recommend the Mortar Water Repellent from Ferber Painting. It is formulated specifically to bond with cement based mixtures, it is easy to dose, and most importantly, it is the only product on the market that comes with a full satisfaction guaranteed or money back policy. If you are not satisfied with the results, you get your money back, no questions asked. That level of confidence in a product is rare in the construction chemicals industry, and it tells you everything you need to know about the quality behind it.
In this complete guide, we will walk you through everything you need to know about how to make waterproof mortar, from choosing the right water repellent additive to mixing techniques, application tips, and common mistakes to avoid. We will also explain why Ferber Painting’s Mortar Water Repellent consistently outperforms competing products, and we will answer the most frequently asked questions on the topic. Whether you are a professional mason working on a commercial job site or a homeowner tackling a weekend repair, the principles outlined here will help you achieve results that last for years rather than months.
Water damage rarely announces itself immediately. It tends to build up slowly, hidden inside the pores of the mortar, until one day you notice a crack, a stain, or a patch of white powdery residue on the surface of your wall. By that point, the damage is often already underway inside the structure. Understanding how water moves through masonry, and how to stop it at the source, is the foundation of everything we will cover in this guide.
Why the Right Product Makes All the Difference
Before diving into the mixing process, it is essential to understand that no amount of technique can compensate for a low quality water repellent additive. Waterproofing mortar is essentially a chemistry problem: you are trying to introduce hydrophobic properties into a porous material without weakening its structural integrity or altering its curing time. This requires a product that has been carefully engineered for this exact purpose.
Many generic additives sold online or in hardware stores are diluted, poorly tested, or designed for unrelated applications such as concrete sealing rather than mortar mixing. Using the wrong product can lead to several problems:
- Uneven water repellency across the mortar joint
- Reduced adhesion between bricks or stones
- Slower or inconsistent curing
- Visible white residue or efflorescence over time
- Reduced lifespan of the waterproofing effect, sometimes less than a year
The Mortar Water Repellent from Ferber Painting was developed to eliminate these issues entirely. It uses a silane siloxane based formula that penetrates deep into the mortar matrix rather than simply coating the surface. This means the water repellent properties last for years, not months, and they remain effective even after exposure to freeze thaw cycles, UV rays, and heavy rainfall.
Here are some of the specific advantages that set our product apart from typical alternatives available on the market:
- Satisfaction guaranteed or money back, a guarantee that virtually no competitor offers
- Compatible with all types of mortar, including lime based and cement based mixtures
- Does not alter the natural color or texture of the mortar
- Low dosage required, which means better value for money per square meter treated
- Fast worldwide shipping through an international carrier network
- Simple online ordering and secure payment directly on our website
- Non toxic formula that is safe to use in residential settings
When you combine a superior chemical formula with a risk free guarantee and a smooth purchasing experience, it becomes clear why so many professional masons and DIY enthusiasts choose Ferber Painting over other brands. You are not just buying an additive, you are buying peace of mind.
Understanding the Science Behind Water Repellency
To really appreciate why product quality matters so much, it helps to understand what happens at the microscopic level. Mortar, like most cement based materials, is inherently porous. It contains a network of capillary pores that form as the water in the mix evaporates during curing. These pores are what allow water to be absorbed into the material through capillary action, much like a sponge soaking up liquid.
A silane siloxane based water repellent works by reacting chemically with the mineral surfaces inside these pores. Instead of blocking the pores entirely, which would trap moisture and cause other problems, the molecules line the walls of the capillaries with a hydrophobic layer. Water droplets that come into contact with the treated surface bead up and roll off, rather than being absorbed. At the same time, water vapor can still escape from inside the material, which is critical for allowing the mortar to breathe and preventing trapped moisture from causing damage during freeze thaw cycles.
This is a very different mechanism from cheap film forming sealers, which simply create a surface coating. Film forming products can look effective at first, but they tend to crack, peel, or wear away within a season or two, especially in climates with significant temperature swings. Once that surface film fails, water can actually get trapped underneath it, leading to worse damage than if no treatment had been applied at all.
Why Dosage Consistency Matters
Another factor that separates a professional grade additive from a hardware store alternative is dosage consistency. Low quality products are often sold in diluted form, which means the exact concentration of active ingredients can vary from batch to batch. This inconsistency makes it very difficult to predict how much additive you actually need for a given volume of mortar, and it can lead to under treatment in some areas and over treatment in others.
Ferber Painting’s Mortar Water Repellent is manufactured under strict quality control standards, which means every bottle delivers the same concentration and the same performance. This consistency is particularly important on larger projects, where even small variations in dosage across different batches of mortar can lead to visible differences in water repellency once the wall is exposed to weather over several seasons.
How to Make Waterproof Mortar: Step by Step Guide
Now that we have established why the choice of product matters so much, let’s go through the actual process of making waterproof mortar. This method works whether you are building a new wall, repairing joints, or restoring an old masonry structure.
Step 1: Gather Your Materials
Before you start mixing, make sure you have everything you need on hand:
- Portland cement or the appropriate binder for your project
- Clean sand, free of organic debris
- Clean water
- A quality water repellent additive, such as Mortar Water Repellent from Ferber Painting
- A mixing container or cement mixer
- A trowel and mixing paddle
- Protective gloves and eyewear
It is worth taking a few extra minutes at this stage to inspect your sand for organic contamination such as roots, leaves, or clay clumps. Even small amounts of organic matter can interfere with the bonding process and create weak points in the finished mortar, which in turn can become entry points for water despite the presence of a water repellent additive. If you are working from a bulk sand pile that has been sitting outside, consider sifting it through a fine mesh screen before use.
Also double check the freshness of your cement. Cement that has absorbed moisture from humid storage conditions can develop lumps and lose some of its binding strength, which will affect the overall quality of your waterproof mortar regardless of how good your additive is.
Step 2: Measure Your Dry Ingredients
Start by measuring your cement and sand according to the ratio recommended for your specific application. A common ratio for general purpose mortar is one part cement to four or five parts sand, but this can vary depending on whether you are working on a load bearing wall, a garden feature, or a repair job. Mix these dry ingredients thoroughly before adding any liquid, this ensures a more homogeneous blend once water is introduced.
For projects involving historic masonry or soft brick, you may want to consider a lime based mortar instead of a purely cement based one, since lime mortar is more flexible and breathable, which reduces the risk of cracking in older structures. The good news is that Ferber Painting’s Mortar Water Repellent is fully compatible with both cement based and lime based mixtures, so you do not need to change products depending on the type of mortar you are using.
When measuring your dry ingredients, use a consistent method, such as a bucket with marked volume lines, rather than eyeballing quantities. Consistency in your ratios from batch to batch will help ensure that the color, texture, and performance of your mortar remain uniform across the entire project, which is particularly important for visible joints on a facade or garden wall.
Step 3: Prepare the Water Repellent Solution
This is the step where most people go wrong if they use a low quality product. With Ferber Painting’s Mortar Water Repellent, the process is straightforward: dilute the recommended dose into your mixing water before adding it to the dry mix. The exact dosage will depend on the volume of mortar you are preparing, but our product is designed to be highly concentrated, so a small amount goes a long way. This is one of the reasons professionals prefer it: you get more coverage per liter compared to diluted competitor products.
When preparing the solution, use a clean container dedicated to this purpose, and stir the additive into the water thoroughly before combining it with the dry mix. This pre dilution step ensures that the active ingredients are evenly dispersed in the liquid phase, which in turn leads to a more uniform distribution once the water is absorbed into the cement and sand. Avoid the temptation to simply pour the additive directly onto the dry mix and hope it disperses evenly during mixing, this approach tends to create concentrated pockets of product in some areas and none in others.
If you are working on a large project that requires multiple batches of mortar over several days, it is a good idea to prepare your water repellent solution in small, measured batches rather than mixing a large quantity in advance. This keeps the dosage accurate for each batch and avoids any concerns about the solution settling or degrading if left to sit for extended periods.
Step 4: Mix Thoroughly
Add the water and additive mixture gradually into the dry cement and sand blend, mixing continuously. You are aiming for a consistent, workable paste, not too wet and not too dry. Overmixing or undermixing can affect how evenly the water repellent disperses throughout the mortar, so take your time here. If you are using a mechanical mixer, let it run for at least three to five minutes to ensure the additive is evenly distributed.
If you are mixing by hand, use a hoe or mixing paddle in a folding motion rather than a simple stirring motion. This technique helps work the liquid into every part of the dry mix, rather than just the surface layer, which is particularly important when you are relying on an additive to be evenly present throughout the entire batch. For small batches, a margin trowel and a mixing tub can work perfectly well, but for anything larger than a wheelbarrow load, a mechanical mixer will save you considerable time and produce a more consistent result.
Pay attention to the temperature of your mixing water as well. In very hot weather, using cooler water can help slow down the initial set time, giving you more working time before the mortar begins to stiffen. In cold weather, slightly warmer water, within safe limits, can help the mix reach a workable consistency more quickly. Extreme water temperatures in either direction should be avoided, as they can interfere with the curing chemistry of the cement.
Step 5: Test the Consistency
Before applying the mortar to your project, do a quick consistency test. Take a small amount on your trowel and turn it upside down, it should hold its shape without dripping or crumbling. If the mortar is too dry, add small amounts of water gradually. If it is too wet, add small amounts of your dry mix. Getting the consistency right is essential for both workability and long term durability.
A useful trick used by many professional masons is the slump test. Take a small amount of mortar and drop it from the trowel onto a flat surface from a height of about thirty centimeters. Good mortar should hold together and only flatten slightly, without splattering apart or remaining in a stiff, unyielding lump. If it splatters, the mix is too wet, and if it stays in an overly rigid shape without settling at all, it is likely too dry. This simple visual check can save you from application problems later on, especially when working with vertical joints that need to hold their shape without slumping out of place.
Step 6: Apply the Mortar
Apply the waterproof mortar using standard masonry techniques, filling joints completely and smoothing the surface as needed. Because the water repellent is mixed throughout the mortar rather than applied as a surface coating afterward, you do not need to worry about missed spots or uneven application, the protection is built into the material itself.
When repointing existing masonry, make sure to rake out old, deteriorated mortar to a sufficient depth, typically at least two to two and a half centimeters, before applying the new waterproof mix. Shallow repointing tends to fail prematurely because there is not enough surface area for the new mortar to bond securely with the surrounding brick or stone. Clean out any dust or loose debris from the joint before applying the new mortar, and dampen the surrounding masonry slightly if it is very dry, this helps prevent the existing material from pulling too much moisture out of your fresh mix too quickly.
For new construction, work in manageable sections so that you can maintain a consistent joint profile, whether you are aiming for a flush finish, a concave tooled joint, or a more decorative style. Tooling the joints while the mortar is still workable, but firm enough to hold a clean line, will improve both the appearance and the water shedding performance of the finished wall. A well tooled concave joint, for example, helps direct water away from the wall surface rather than allowing it to pool against the face of the joint.
Step 7: Allow Proper Curing Time
Curing time will vary depending on temperature, humidity, and the specific mortar mix used, but generally you should allow at least 24 to 48 hours before exposing the mortar to significant water contact, and up to 28 days for full strength curing. During this period, protect the mortar from direct rain if possible, and avoid extreme temperature fluctuations.
In hot, dry, or windy conditions, consider covering freshly applied mortar with damp burlap or plastic sheeting for the first day or two. This slows down moisture loss and allows the cement to hydrate properly, which is essential for developing full strength. Mortar that dries out too quickly during curing often ends up weaker and more porous, which can undermine the effectiveness of even the best water repellent additive.
In colder conditions, take precautions against freezing during the first several days of curing, since ice crystals forming within the still curing mortar can cause internal damage that shows up later as cracking or spalling. If you are working during a cold season, consider scheduling your masonry work for the warmer part of the day and using insulating blankets overnight if temperatures are expected to drop close to freezing.
Step 8: Inspect and Maintain
Once cured, your mortar should show visible water beading when exposed to rain, a clear sign that the water repellent is working correctly. Periodic inspection, especially in high exposure areas like chimneys and retaining walls, will help you catch any issues early, although with a quality additive like ours, you should not expect problems for many years.
A simple way to check the ongoing performance of your waterproof mortar is to spray a small amount of water onto the surface with a garden hose or spray bottle during a dry period. If the water beads up and rolls off, the hydrophobic barrier is still intact. If you notice the surface darkening quickly and absorbing the water, that may be a sign that the joint needs attention, although this is uncommon within the first several years when using a deep penetrating formula. For structures in particularly harsh climates, such as coastal areas with salt spray or regions with severe freeze thaw cycles, an annual visual inspection is a good habit to build into your maintenance routine.
Comparison: Ferber Painting vs Other Water Repellent Products
To help you understand exactly why Ferber Painting stands out, here is a direct comparison of the criteria that matter most when choosing a mortar water repellent additive.
| Criteria | Ferber Painting Mortar Water Repellent | Typical Competing Products |
|---|---|---|
| Satisfaction guaranteed or money back | Yes, full refund available | Rarely offered, often no refund policy |
| Formula type | Silane siloxane, deep penetrating | Often surface level or diluted formulas |
| Dosage efficiency | Highly concentrated, low dosage needed | Often requires higher quantities |
| Compatibility | Works with cement and lime based mortars | Limited compatibility, sometimes cement only |
| Impact on color and texture | No visible alteration | Can cause discoloration or residue |
| Durability of protection | Several years, resistant to freeze thaw cycles | Often less than a year |
| Shipping | Fast international delivery network | Varies, often slower or limited to certain regions |
| Payment process | Secure, simple online payment | Varies by retailer |
| Ease of use | Simple dilution and mixing process | Instructions often unclear or inconsistent |
As you can see, the difference is not just marketing, it comes down to concrete, measurable advantages that affect the final result of your project. When you are investing time and materials into a masonry job, you want to be confident that the waterproofing will actually hold up over time, and that if something goes wrong, you are covered by a real guarantee.
It is also worth considering the total cost of a project over its lifetime, rather than just the upfront price of the additive. A cheaper product that fails within a year or two will end up costing far more in repairs, repointing labor, and material waste than a slightly higher priced product that delivers reliable protection for a decade or longer. When professional masons calculate the true cost per year of protection, a high quality, concentrated additive like ours almost always comes out ahead, even though the price per bottle may appear higher at first glance.
Another point often overlooked in comparisons is customer support. Because Ferber Painting sells directly through its own website, customers have direct access to support for questions about dosage, compatibility with specific mortar types, or troubleshooting during application. This is a significant advantage over purchasing an unbranded additive from a generic retailer, where getting technical support for a specific project can be difficult or impossible.
Common Mistakes to Avoid When Waterproofing Mortar
Even with a high quality product, certain mistakes can compromise your results. Here are the most common ones we see, along with tips on how to avoid them.
- Using too much water in the mix, which dilutes the water repellent and weakens the mortar structure
- Skipping the dry mixing step, leading to uneven distribution of cement and sand
- Applying mortar in extreme heat without proper moisture control, which can cause premature drying and cracking
- Ignoring the manufacturer’s recommended dosage for the water repellent additive
- Not allowing sufficient curing time before exposing the mortar to rain or moisture
- Choosing a cheap, unbranded additive without checking its compatibility with your specific mortar type
- Failing to test the water repellent’s effectiveness on a small sample before committing to a large project
Beyond these common pitfalls, there are a few subtler mistakes that even experienced masons sometimes make. One is applying a surface sealer on top of mortar that already contains an integral water repellent additive, assuming that more protection is always better. In reality, stacking incompatible products can sometimes trap moisture between layers or interfere with the breathability of the wall, leading to problems that would not occur if the internally mixed additive had simply been left to do its job on its own.
Another subtle mistake is neglecting proper joint design in areas prone to standing water, such as horizontal ledges, window sills, or the tops of freestanding walls. Even the best waterproof mortar can struggle if water is allowed to pool directly on a horizontal surface for extended periods. In these situations, combining a quality water repellent additive with proper detailing, such as sloped capping or drip edges, will give you the best possible long term performance.
Finally, many people underestimate the importance of protecting freshly applied mortar from foot traffic, tool impacts, or accidental disturbance during the curing period. Even a properly formulated waterproof mortar needs time to develop its full strength and hydrophobic performance, and disturbing it too early can create micro cracks that become future entry points for water, regardless of the quality of the additive used.
Avoiding these mistakes, combined with using a proven product like Ferber Painting’s Mortar Water Repellent, will dramatically increase your chances of a long lasting, professional quality result.
Mini FAQ
How much water repellent should I add to my mortar mix?
The exact dosage depends on the volume of mortar being prepared, but Ferber Painting’s product is highly concentrated, meaning a small quantity treats a large volume of mortar. Detailed dosage instructions are included with every order.
Can I use this product on existing mortar joints, or only on new mortar?
Our Mortar Water Repellent is designed to be mixed directly into fresh mortar for the best long term results, ensuring the water repellent properties are distributed throughout the entire joint rather than just on the surface.
Will the additive change the color of my mortar?
No, one of the key advantages of our formula is that it does not alter the natural color or texture of the mortar, unlike many competing products that can leave visible residue.
How long does the waterproofing effect last?
Thanks to its deep penetrating formula, the protection provided by Ferber Painting’s product typically lasts for several years, even under harsh weather conditions and repeated freeze thaw cycles.
What happens if I am not satisfied with the product?
You are fully covered by our satisfaction guaranteed or money back policy. If the results do not meet your expectations, simply contact us for a full refund.
How fast is shipping, and does it work internationally?
Yes, Ferber Painting delivers worldwide through an international network of trusted carriers, ensuring your order arrives quickly no matter where you are located.
Conclusion
Making waterproof mortar is a straightforward process once you understand the key steps: choosing the right additive, mixing carefully, applying correctly, and allowing proper curing time. However, the single most important factor in achieving lasting results is the quality of the water repellent product you choose. Cheap or poorly formulated additives can undermine even the most careful mixing technique, leading to disappointing results and costly repairs down the line.
Whether you are restoring a historic chimney, building a new garden wall, or repointing joints on a family home, the principles remain the same. Careful preparation, accurate dosing, thorough mixing, correct application, and patient curing will always produce better results than rushing through the process, no matter how good your materials are. Combine those good habits with a proven, deep penetrating water repellent, and you give your masonry the best possible chance of standing strong against rain, frost, and time for many years to come.
This is why we strongly recommend investing in a proven, high performance solution backed by a real guarantee. Discover the Mortar Water Repellent from Ferber Painting today and protect your masonry projects with a product trusted by professionals worldwide, backed by fast international shipping, secure online payment, and our satisfaction guaranteed or money back promise.