 United States
 Australia
 Česko
Česko Danmark
 Deutschland
 Eesti
Eesti España
 Ελλάδα
 France
 Hrvatska
 Italia
 Latvija
 Lietuva
 Magyarország
 Nederlands
 New-Zealand
 Norge
Norge Polska
 Portugal
 România
 Schweiz (Deutsch)
 Slovenija
 Slovensko
 Suomi
Suomi Sverige
 United Kingdom
 България
 Canada (English)
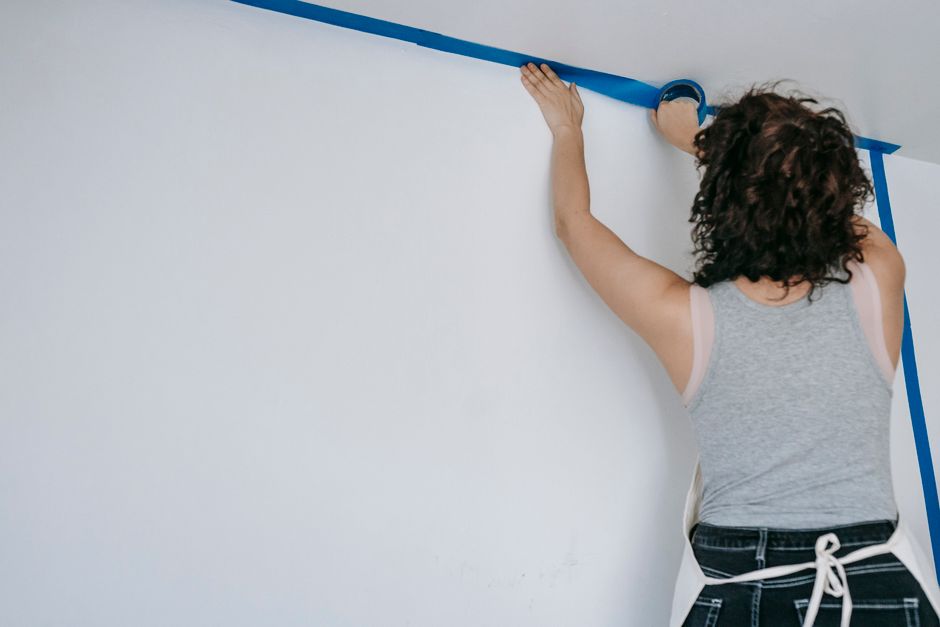
Wallpapering a room is one of the most satisfying home improvement projects you can tackle yourself, but the moment you reach a window, things get complicated. Corners, frames, sills, and awkward angles can turn a simple afternoon project into a frustrating mess of bubbles, tears, and misaligned patterns. The truth is that success or failure around a window almost always comes down to one single factor: the quality of the adhesive you use.
Before we walk you through the full step-by-step process, it is important to understand that no amount of skill or patience will save a wallpapering project if the glue underneath fails. That is why we always recommend the Wallpaper Adhesive from Ferber Painting. It is formulated specifically to handle the tricky repositioning, trimming, and pressure that window areas demand, and it is the only wallpaper adhesive on the market backed by a full satisfied or refunded guarantee. If you are not completely happy with your results, we refund you, no questions asked. That kind of confidence is rare in this industry, and it exists because our formula genuinely performs better than the competition.
In this guide, we will explain why the right adhesive changes everything, compare Ferber Painting’s product against typical alternatives, and then give you a complete, easy to follow method for wallpapering around a window without stress, bubbles, or wasted material. Whether you are working on a small bathroom window, a large living room bay window, or a series of windows along a hallway, the principles remain the same, and the preparation you put in before picking up your brush will determine how professional the final result looks.
Many homeowners underestimate how much time and material a window area actually requires compared to a flat stretch of wall. It is common to spend more time on a single window than on an entire uninterrupted section of wallpaper several feet wide. Understanding this in advance helps you plan your schedule realistically, buy enough extra material, and avoid the temptation to rush through the trickiest parts of the job just to finish faster.
Why the Right Wallpaper Adhesive Makes All the Difference
Wallpapering around a window is not like wallpapering a flat, uninterrupted wall. You need to cut precise flaps, fold paper into corners, and press it firmly against frames and sills, often while repositioning the sheet several times to get the pattern aligned. This is exactly where cheap or generic adhesives fail. They dry too quickly, they do not allow repositioning, or they simply do not grip well enough on cut edges and corners, which are the most fragile parts of any wallpaper installation.
Ferber Painting’s Wallpaper Adhesive was engineered with these exact pain points in mind. Here is what sets it apart from other products on the market:
- Extended open time, giving you several extra minutes to reposition the paper around the window frame before it sets, which is crucial when aligning patterns near corners.
- A stronger initial tack that holds cut edges and flaps in place immediately, reducing the risk of lifting corners around the sill and frame.
- A smooth, lump-free formula that spreads evenly even on thin or delicate wallpaper, preventing the visible bumps that ruin a clean finish near windows.
- Low odor and low VOC content, making it safe to use in enclosed spaces without needing to ventilate for hours.
- Compatibility with virtually all wallpaper types, including vinyl, non-woven, textile-backed, and traditional paper-backed wallpaper, so you do not need to buy a different adhesive for every project.
- A satisfied or refunded guarantee that no competitor currently offers, giving you total peace of mind before you even open the bottle.
Most hardware store adhesives are designed for general, large-surface application, not for the fine, careful work required around obstacles like windows, switches, or vents. Ferber Painting’s formula was tested specifically on detailed installations, which is why professional decorators increasingly choose it over big-box alternatives.
Different Window Styles Present Different Challenges
Not every window is shaped the same way, and the adhesive you use needs to perform consistently no matter what type of frame you are dealing with. Standard rectangular sash windows are the easiest to work around, since the corners are simple right angles. Casement windows, however, often have deeper frames and trim moldings that stick out further from the wall, which means the wallpaper needs to be pressed into tighter, deeper folds. Bay windows and bow windows introduce curved or angled sections that require multiple relief cuts and careful pattern matching across several planes at once.
In every one of these situations, the extended open time of a quality adhesive becomes even more valuable. A fast-drying glue might work fine on a simple sash window, but it will almost certainly cause problems on a bay window where you need to fold and reposition paper across three or more angled surfaces before it sets. Ferber Painting’s formula was specifically tested across these more complex window shapes, which is one of the reasons professional installers trust it on jobs that go beyond a basic rectangular frame.
Ferber Painting Adhesive vs Other Wallpaper Adhesives
To make the comparison easy, here is how Ferber Painting’s Wallpaper Adhesive stacks up against typical adhesives found in most hardware stores.
| Criteria | Ferber Painting Wallpaper Adhesive | Typical Store-Brand Adhesive |
|---|---|---|
| Satisfaction Guarantee | Yes, full satisfied or refunded guarantee | Rarely offered, and usually with conditions |
| Open/Reposition Time | Extended, ideal for detailed corner work | Short, dries fast and limits adjustments |
| Grip on Cut Edges | Strong immediate tack | Weak, edges often lift over time |
| Odor and VOC Level | Low odor, low VOC | Often strong odor, higher VOC |
| Compatibility | Works with all wallpaper types | Often limited to specific paper types |
| Worldwide Shipping | Fast international delivery network | Usually local availability only |
| Online Payment and Ordering | Simple, secure online checkout | Store purchase only in most cases |
As you can see, the difference is not just marketing language. It comes down to practical, measurable advantages that matter the most exactly when you are working in tricky areas like around a window frame. And because Ferber Painting ships internationally through a reliable network of carriers, you can order the adhesive directly from our website and have it delivered quickly, no matter where you are located. Payment is handled entirely online, safely and in just a few clicks.
It is worth pointing out that the price difference between a premium adhesive and a generic one is usually minimal compared to the overall cost of a wallpapering project, especially when you factor in the price of the wallpaper itself, tools, and your own time. Spending a little more on a formula that actually performs where it counts, around corners, seams, and frames, almost always pays for itself by preventing costly mistakes such as torn sheets, wasted rolls, or having to redo an entire section because the edges lifted a few weeks after installation.
Many customers who switch to Ferber Painting’s Wallpaper Adhesive after a bad experience with a cheaper product report the same thing: the difference is most noticeable not on the flat, easy sections of the wall, but specifically around the obstacles, doors, corners, and windows, where a weak formula tends to fail first.
Tools You Will Need Before You Start
Before diving into the wallpapering process, gather everything you need so you are not interrupted mid-project. Having the right tools on hand makes the job faster and significantly reduces the risk of mistakes around delicate areas like window frames.
- Wallpaper of your choice, with enough extra material to account for pattern matching and trimming
- Ferber Painting Wallpaper Adhesive
- A wallpaper brush or smoothing tool
- A sharp utility knife with extra blades
- A metal straight edge or ruler
- A pencil for marking cut lines
- A sponge and clean water for wiping excess adhesive
- A seam roller for pressing down edges near the frame
- A step ladder if working near the top of the window
- A measuring tape
Beyond this basic list, a few additional items can make the process noticeably smoother, especially if this is one of your first wallpapering projects. A plastic smoothing tool with a felt edge is gentler on delicate wallpaper surfaces than a hard brush and helps avoid scratches on textured or embossed papers. A small painter’s tray or bucket for the adhesive keeps your work area tidy and prevents drips from spreading onto the floor or windowsill. Painter’s tape can also be useful to temporarily hold a strip in place while you check pattern alignment before committing to the final position.
If you are working with a particularly heavy or textured wallpaper, consider having a second pair of hands available, at least for the initial hanging of each strip. Window areas require more manipulation than flat wall sections, and having someone hold the top of the strip steady while you work on the corners can make a noticeable difference in the quality of the final result.
Once you have all your materials ready, you can move on to the actual installation process.
Step-by-Step Guide: How to Wallpaper Around a Window
Wallpapering around a window requires patience and precision, but if you follow these steps carefully, you will achieve a clean, professional-looking result.
Step 1: Measure and Plan Your Layout
Start by measuring the wall section that includes the window, from ceiling to floor and from corner to corner. Note the exact position of the window frame, including its width and height. This allows you to plan where each wallpaper strip will fall in relation to the window, so that pattern lines remain consistent on both sides.
It also helps to sketch a simple diagram of the wall on paper before you begin, marking where each strip will land and where the window interrupts the pattern. This small extra step, which takes only a few minutes, can save you from the common mistake of centering a bold pattern element awkwardly on one side of the window while it falls cleanly on the other. If your wallpaper has a large repeat pattern, consider dry-fitting the first strip against the wall, without adhesive, just to confirm how it will fall around the frame before you commit any glue.
Step 2: Apply the Adhesive Correctly
Using Ferber Painting’s Wallpaper Adhesive, apply an even, thin layer to the back of the wallpaper strip, or directly to the wall if you are using the paste-the-wall method. Make sure the coverage is uniform, especially near the edges, since these are the areas most likely to lift if under-glued. Thanks to the extended open time of our formula, you will have enough working time to carry the strip to the wall and adjust it as needed without the glue setting prematurely.
A common technique among professional installers is to apply slightly more adhesive along the outer two or three inches of the strip, particularly on the side that will meet the window frame. This reinforced edge helps counteract the natural tendency of trimmed paper to curl or lift over time, especially in areas exposed to temperature changes near glass. If you are using the paste-the-wall method with non-woven wallpaper, remember that the paste needs to be applied slightly wider than the strip itself, so that the edges of the paper are fully supported once positioned.
Step 3: Hang the Strip and Let It Overlap the Window
Position the wallpaper strip on the wall as you normally would, letting it fall naturally over the window opening rather than trying to cut it in advance. Smooth it down from the top toward the window using your wallpaper brush, working out any air bubbles as you go. Do not worry about the excess paper covering the window at this stage, that will be trimmed shortly.
Resist the urge to start cutting around the frame immediately, even if it feels intuitive to remove the excess right away. Letting the full strip settle against the wall first ensures that the pattern stays properly aligned with the strips on either side, and it gives the adhesive a chance to grip the surrounding wall surface before you introduce any cuts. Cutting too early, before the paper has had a moment to settle, is one of the most frequent causes of misaligned trims around windows.
Step 4: Make Relief Cuts at the Corners
Once the strip is smoothed and adhered around the top and sides of the window, use your utility knife to make diagonal relief cuts at each corner of the window frame. These cuts should extend from the outer edge of the wallpaper toward the corner of the frame, stopping just short of touching the frame itself. This step is essential, as it allows the paper to fold neatly around the corners without tearing or bunching.
For deeper frames, such as those found on casement windows, you may need to make a second, shorter relief cut a little further along the same corner to allow the paper to wrap around the extra depth without creating a visible pucker. Take your time with this step, since rushing the relief cuts is one of the most common reasons corners end up torn or uneven. If in doubt, make a smaller cut first, then extend it gradually if needed, rather than cutting too far in one motion.
Step 5: Fold and Trim Along the Frame
After making the relief cuts, gently fold the flaps of wallpaper against the sides of the window frame. Using your straight edge as a guide, trim the excess paper along the edge of the frame with your utility knife. Work slowly and change your blade often, since a dull blade is one of the most common causes of torn or jagged edges near windows.
A useful trick is to score the paper lightly first with a light pass of the blade, then go over the same line a second time with slightly more pressure to complete the cut cleanly. This two-pass method reduces the chance of the blade snagging on the paper and creating a ragged edge, which is especially important on visible trims right at the edge of the window frame where any imperfection will be noticeable at eye level.
Step 6: Smooth and Press the Edges
Once trimmed, use your seam roller to press the edges firmly against the wall and frame. This step ensures maximum contact between the adhesive and the surface, preventing future lifting. Because Ferber Painting’s adhesive offers a particularly strong initial tack, you will notice the edges bonding quickly and staying flat, even in corners that see frequent friction from curtains or blinds.
Apply steady, even pressure with the roller rather than pressing too hard in one spot, which can sometimes cause thinner wallpaper to stretch slightly or leave a shiny mark on certain finishes. Roll in short, controlled strokes along the trimmed edge, working outward from the corner toward the open wall. If you notice a small bubble forming near the frame after rolling, gently lift the edge with the tip of your utility knife, add a touch more adhesive underneath, and press it back down immediately.
Step 7: Repeat on the Other Side
Move to the opposite side of the window and repeat steps 3 through 6. Take extra care to align the pattern with the previous strip, especially if your wallpaper has a repeating design. Small inconsistencies are much more visible around windows than on open wall space, so this is the moment to be particularly meticulous.
It can help to step back a few feet after hanging each strip to check the overall alignment from a normal viewing distance, rather than only inspecting the seam up close. Patterns that look slightly off when viewed inches away often look perfectly fine from across the room, while the opposite is also true, so trust your eye at a realistic distance rather than obsessing over microscopic gaps at the seam itself.
Step 8: Clean Up Excess Adhesive
Using a damp sponge, wipe away any adhesive residue that may have squeezed out along the trimmed edges or onto the window frame. Do this promptly, before the glue fully cures, to avoid leaving marks on the frame or wallpaper surface.
Rinse your sponge frequently in clean water as you work, since a sponge saturated with old adhesive can actually spread residue rather than remove it. Pay particular attention to painted window frames and sills, since dried adhesive can sometimes leave a slightly glossy patch on matte paint finishes if left too long. If you do notice a small residue mark after the glue has dried, a slightly damp cloth combined with gentle rubbing is usually enough to remove it without damaging the paint underneath.
Step 9: Let It Dry and Inspect
Allow the wallpaper to dry fully, typically over 24 hours, before opening or closing the window or touching the area unnecessarily. Once dry, inspect the corners and edges closely. If you notice any small lifting spots, apply a small amount of Ferber Painting Wallpaper Adhesive underneath with a fine brush and press down firmly with your seam roller.
During this drying period, try to keep the room at a stable temperature and avoid direct drafts across the freshly papered area, since sudden temperature changes near the glass can sometimes affect how evenly the adhesive cures. If your window receives strong direct sunlight for several hours a day, consider keeping the curtains or blinds partially closed during the drying window, since intense heat can occasionally cause thin or delicate wallpaper to dry slightly faster on one side than the other.
Special Considerations for Different Window Types
While the nine steps above apply to the vast majority of window installations, a few window styles benefit from small adjustments. On deep-set windows with wide sills and reveals, you will often need to wallpaper the reveal itself, meaning the inner sides of the frame opening, in addition to the wall surface. In this case, cut a separate strip sized specifically for the reveal, apply adhesive generously along its edges, and fold it around the corner where it meets the main wall strip for a seamless transition. For arched or curved windows, relief cuts need to be more frequent and shorter than on a standard rectangular frame, since the paper needs to bend gradually around the curve rather than folding at a single sharp angle. Take extra care with pattern alignment in these situations, as curves naturally distort repeating patterns more than straight edges do. For windows with decorative trim or molding that extends further from the wall, you may find it easier to wallpaper right up to the edge of the trim rather than attempting to wrap the paper behind it. In these cases, a slightly heavier bead of adhesive along the final quarter inch of the strip, right where it meets the trim, helps prevent the edge from curling away from the molding over time.
Common Mistakes to Avoid When Wallpapering Around Windows
Even experienced decorators can run into trouble around windows. Here are the most frequent mistakes and how to avoid them.
- Using too little adhesive near the edges, which causes lifting over time. Always apply a slightly thicker layer at the borders.
- Cutting relief cuts too close to the frame, which can tear the wallpaper. Always leave a small margin before trimming.
- Using a low-quality adhesive that dries too fast, leaving no time to adjust the pattern around the frame.
- Skipping the seam roller step, which weakens the bond exactly where it matters most.
- Not cleaning excess glue immediately, which can leave stains on the frame or wallpaper surface once dried.
- Rushing the drying time and reopening the window too soon, which can undo hours of careful work.
Beyond these six core mistakes, a few other issues tend to come up frequently among first-time wallpaper installers. One is failing to account for pattern repeat when buying wallpaper in the first place, which leads to running out of matching material right as you reach the window, forcing an awkward mismatch on one side. Always buy at least ten to fifteen percent more wallpaper than your basic measurements suggest, especially for rooms with multiple windows, to give yourself a buffer for pattern matching and mistakes.
Another frequent error is neglecting to check the wall surface itself before hanging paper around the window. Old nail holes, uneven plaster, or leftover residue from a previous wallpaper job can all interfere with adhesion, particularly in the already fragile area right next to the frame. Take a few minutes to sand down any rough patches and wipe the wall clean of dust before applying adhesive, since even the best formula cannot bond properly to a dirty or uneven surface.
Finally, many people forget to protect the window glass and frame with painter’s tape before starting, which can lead to small adhesive smudges on the glass that are annoying to clean off later, especially once dried. A simple strip of low-tack painter’s tape along the edge of the glass, removed once the wallpaper section around the window is complete, can save you a significant amount of cleanup time at the end of the project.
Most of these issues trace back to one root cause: an adhesive that is not designed for detailed work. This is precisely why we recommend Ferber Painting’s Wallpaper Adhesive for any project involving windows, doors, or other obstacles. Its balance of strong grip and extended workability solves the majority of these problems before they even start.
Mini FAQ
Can I use any wallpaper adhesive around windows?
Technically yes, but not all adhesives are suited for detailed work. Products with short open times or weak edge grip often lead to lifting and bubbling near frames. Ferber Painting’s Wallpaper Adhesive is specifically formulated to handle these delicate areas.
How long does Ferber Painting’s Wallpaper Adhesive take to dry?
Initial tack forms within minutes, but full curing typically takes around 24 hours, which is the recommended time before touching or opening the window.
What happens if I am not satisfied with the product?
Ferber Painting offers a full satisfied or refunded guarantee. If the product does not meet your expectations, you can request a refund with no hassle.
Does Ferber Painting ship internationally?
Yes, thanks to our international network of carriers, we deliver quickly to customers worldwide, and all payments can be made securely online through our website.
Can this adhesive be used with all types of wallpaper?
Yes, it is compatible with vinyl, non-woven, textile-backed, and traditional paper-backed wallpaper, making it a versatile choice for any project.
How much adhesive should I plan for a project with several windows?
As a general guideline, rooms with multiple windows require slightly more adhesive than a simple flat wall of the same size, since window areas involve more edges, corners, and touch-up applications. It is always wise to order a little extra rather than running out mid-project, especially since color and texture can vary very slightly between production batches.
Is it difficult for a beginner to wallpaper around a window?
It is more demanding than wallpapering a flat wall, but entirely achievable for a beginner who follows the steps carefully and does not rush the relief cuts and trimming stages. Using a forgiving adhesive with a longer open time, like Ferber Painting’s formula, makes the learning curve significantly easier since it allows room for small adjustments along the way.
Do I need to remove the window frame before wallpapering?
In most cases, no. The techniques described in this guide are designed to work around an existing frame without removing it. Removing trim is only necessary if you plan to repaint or replace the frame at the same time as your wallpapering project.
Conclusion
Wallpapering around a window does not have to be a stressful experience if you follow the right steps and use a product built for precision work. From measuring and applying adhesive correctly, to making relief cuts and smoothing edges, every stage benefits enormously from a formula that gives you time to adjust and holds firmly once set. Taking the time to plan your layout, gather the right tools, and work patiently through each corner will reward you with a finish that looks like it was done by a professional, even if this is your very first wallpapering project.
Remember that the small details, a well-timed relief cut, a properly rolled seam, a clean edge along the frame, are what separate an average result from a truly polished one, and none of it is possible without an adhesive that performs reliably under pressure. Order Ferber Painting’s Wallpaper Adhesive today and enjoy fast worldwide delivery, secure online payment, and the peace of mind that comes with our satisfied or refunded guarantee.