 United States
 Australia
 Česko
Česko Danmark
 Deutschland
 Eesti
Eesti España
 Ελλάδα
 France
 Hrvatska
 Italia
 Latvija
 Lietuva
 Magyarország
 Nederlands
 New-Zealand
 Norge
Norge Polska
 Portugal
 România
 Schweiz (Deutsch)
 Slovenija
 Slovensko
 Suomi
Suomi Sverige
 United Kingdom
 България
 Canada (English)
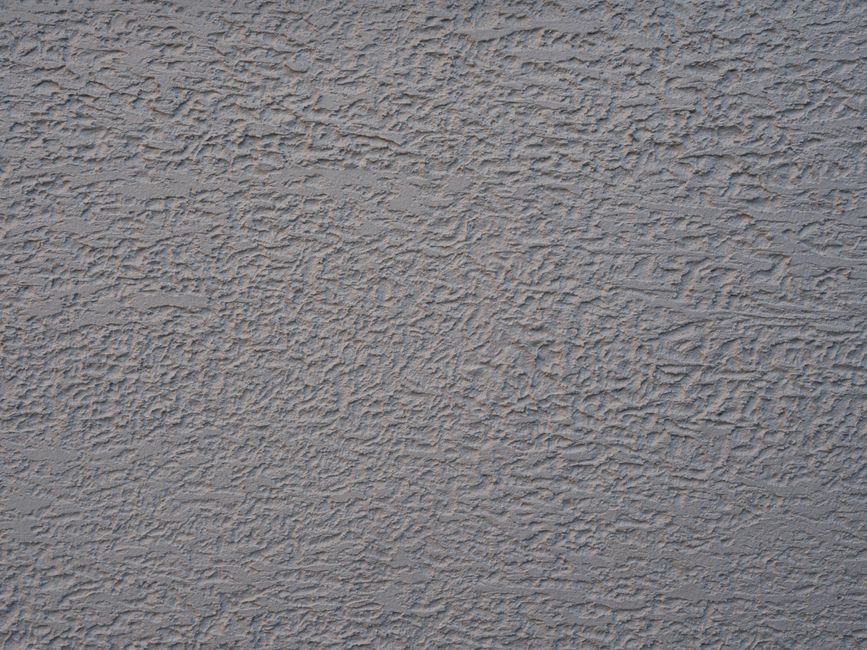
Fixing a hole in fiberglass wall covering, often called “toile de verre” or fiberglass mesh wallpaper, is a task that many homeowners and professional painters face at some point. Whether the damage comes from a doorknob impact, a nail that was removed, water damage, or simple wear and tear, the outcome of your repair depends almost entirely on one thing: the quality of the product you use to fill the hole. A poor filler will crack, shrink, or fail to bond properly with the fiberglass mesh, leaving you with a visible patch and a repair job that needs to be redone within months.
This is why choosing the right wall filler is the single most important decision you will make before starting your repair. At Ferber Painting, we have developed a Wall Filler for Interior and Exterior use that is specifically formulated to bond seamlessly with fiberglass wall coverings, plaster, drywall, and masonry. Unlike many competing products on the market, our filler comes with a satisfaction guaranteed or your money back policy, something that is extremely rare in this industry and that reflects our full confidence in the quality of what we sell.
In this complete guide, we will walk you through everything you need to know about repairing a hole in fiberglass wall covering, explain why the choice of filler matters so much, and show you step by step how to achieve a flawless, invisible repair using our product. We will also compare our filler against other options on the market, answer the most common questions our customers ask, and explain how easy it is to order from our website with fast international shipping and secure online payment.
Fiberglass wall covering has become increasingly popular over the past few decades, particularly in renovation projects where the underlying wall has minor cracks or imperfections that need to be masked. Because of this popularity, more and more homeowners are discovering that repairing this specific material requires a slightly different approach than repairing a plain painted wall. This guide has been written with that reality in mind, drawing on years of hands on experience from professional painters who work with fiberglass mesh on a regular basis.
Why the Quality of Your Wall Filler Makes All the Difference
Fiberglass wall covering is a woven material that is applied to walls and then painted over, commonly used to reinforce surfaces that are prone to cracking, such as walls in older buildings, plasterboard partitions, or ceilings. Because the material has a textured, mesh-like structure, filling a hole in it is not the same as filling a hole in plain drywall or plaster. The filler needs to penetrate the mesh, bond to the underlying surface, and dry with enough flexibility to move slightly with the wall without cracking.
Many generic fillers sold in hardware stores are designed primarily for solid surfaces like plaster or wood. When applied to fiberglass mesh, they often sit on top of the weave instead of penetrating it, which creates a weak bond. Over time, temperature changes and minor vibrations in the wall cause these repairs to crack or pop out entirely. This is a common complaint we hear from customers who tried cheaper alternatives before discovering our product.
Our Wall Filler for Interior and Exterior was engineered with a different approach. It has a smooth, slightly elastic consistency that allows it to work its way into the fibers of the mesh, creating a mechanical bond in addition to a chemical one. This dual bonding method is one of the main reasons our repairs last significantly longer than those done with standard fillers.
Another factor that sets our product apart is its versatility. Because it is formulated for both interior and exterior use, you do not need to buy separate products depending on where the damage is located. Whether you are patching a hole in a bedroom wall or repairing fiberglass mesh on an exterior facade exposed to rain and sun, the same tub of filler will do the job reliably. This saves money and eliminates the guesswork of choosing the right product for each situation.
Understanding the Structure of Fiberglass Wall Covering
To really understand why filler quality matters so much, it helps to know what fiberglass wall covering actually is. It is a thin sheet made of woven glass fibers, applied to a wall much like wallpaper, then coated with paint that seeps into the weave and hardens. This creates a durable, slightly textured surface that resists minor cracking and hides small imperfections in the wall underneath. Because the fibers themselves are somewhat rigid but the weave has small gaps, a hole in this material behaves differently than a hole in solid drywall. The edges of the tear tend to fray, small fibers stick out, and the surrounding weave can loosen if not handled carefully during the repair. This is precisely why a filler with the right consistency, one that can flow into these small gaps and grip the fibers rather than simply bridging over them, produces a far more durable outcome.
What Happens When You Use the Wrong Product
We often hear from customers who tried a standard spackle or a cheap all purpose filler before contacting us. The pattern is almost always the same: the repair looks fine for a few weeks, then a fine hairline crack appears around the edges of the patch. Within a couple of months, the crack widens, dust starts to fall out of it, and eventually a piece of the patch pops out entirely, sometimes taking a bit of the surrounding paint with it. This happens because the cheaper product never truly bonded with the fiberglass fibers, it simply filled the visible hole from the surface without penetrating the mesh structure underneath. Once the wall flexes even slightly, due to seasonal humidity changes, building settlement, or nearby vibration, the weak bond fails. Our formula was specifically developed to avoid this exact failure mode by ensuring deep penetration into the weave from the very first application.
What Makes Ferber Painting’s Wall Filler the Best Choice
There are dozens of wall fillers available on the market, so it is fair to ask why you should choose ours over the others. Below is a comparison table highlighting the criteria that matter most when repairing fiberglass wall covering, comparing our product to typical alternatives found in hardware stores or from other online sellers.
| Criteria | Ferber Painting Wall Filler | Typical Competing Products |
|---|---|---|
| Money back guarantee | Yes, full satisfaction guaranteed or refunded | Rarely offered, often no guarantee at all |
| Suitable for fiberglass mesh | Specifically formulated to penetrate and bond with mesh | Usually designed for solid surfaces only |
| Interior and exterior use | Single product works for both | Often requires separate interior and exterior products |
| Drying time | Fast drying, ready to sand within a few hours | Often slower, sometimes requiring a full day |
| Shrinkage after drying | Minimal, requires little to no second coat | Noticeable shrinkage, often needs multiple coats |
| Ease of application | Smooth texture, easy to spread and sand | Can be gritty or difficult to feather at the edges |
| Worldwide shipping | Fast delivery through an international carrier network | Often limited to local or regional markets |
| Online payment | Simple, secure checkout directly on the website | Varies, not always available directly online |
As this comparison shows, the satisfaction guaranteed or refunded policy alone puts us in a category of our own. Very few manufacturers are confident enough in their formula to offer this kind of protection, and we are proud to be one of them. If for any reason our product does not meet your expectations, you can request a full refund, no complicated conditions attached.
Beyond the guarantee, the technical formulation of our filler is what truly makes the difference in the field. Painters and contractors who have switched to our product consistently report that repairs on fiberglass mesh hold up far better over time, with no visible cracking or shrinking after the paint has been reapplied.
Feedback From Professional Painters
Professional painters who repair fiberglass wall covering on a weekly basis are some of the most demanding users of any filler product, simply because their reputation depends on the durability of their work. Several contractors who have integrated our Wall Filler for Interior and Exterior into their standard toolkit have told us that the reduction in callback requests, meaning clients calling them back to complain about a failed repair, has been noticeable since they switched. A repair that does not need to be redone is not only better for the client, it is also more profitable for the painter, since fewer hours are spent on rework and warranty visits. This real world feedback from people who use fillers professionally, day in and day out, is one of the strongest indicators of a product’s true quality, far more telling than marketing claims alone.
Formulated for Consistency Batch After Batch
One frustration many painters have with certain fillers on the market is inconsistency between batches. A tub bought last year might behave differently than one bought this year, forcing the user to adjust their technique every time. We place a strong emphasis on quality control during production of our Wall Filler for Interior and Exterior so that the texture, drying time, and workability remain consistent from one order to the next. This means that once you learn how our product behaves, you can rely on that same behavior for every future project, which is particularly valuable for professionals who need predictable results on every job site.
Step by Step Guide: How to Fill a Hole in Fiberglass Wall Covering
Now that you understand why the product matters so much, let’s go through the actual repair process. Follow these steps carefully to achieve a clean, long lasting result using Ferber Painting’s Wall Filler for Interior and Exterior.
Before you begin, it is worth gathering all the tools and materials you will need so that the process flows smoothly from start to finish. A typical repair kit should include a flexible putty knife, a wider taping knife for feathering, fine grit sandpaper, a sanding sponge for tight corners, a dry cloth, a damp cloth, scissors or a utility knife, fiberglass mesh tape if the hole is large, a small container of primer, and of course a tub of our Wall Filler for Interior and Exterior. Having everything within reach before you start prevents interruptions that could allow the filler to begin drying before you are ready to smooth it.
Step 1: Prepare the Area
Start by inspecting the hole and the surrounding fiberglass mesh. If there are loose threads or torn pieces of mesh sticking out, trim them carefully with scissors or a utility knife so you have a clean, even edge to work with. Remove any dust, grease, or loose debris from the area using a dry cloth or a soft brush. If the wall is greasy or dirty, a quick wipe with a damp cloth followed by thorough drying will help the filler adhere better.
It is also a good idea, at this stage, to examine the area in raking light, meaning light coming from a low angle across the wall, such as from a flashlight held close to the surface. This technique reveals bumps, ridges, or slight depressions around the hole that are not visible under normal room lighting but will become obvious once the wall is painted. Taking a minute to identify these imperfections before you begin filling will save you time later and help you plan exactly how much material to apply and where.
Step 2: Reinforce Larger Holes
For small holes, typically under two centimeters in diameter, you can go directly to the filling stage. For larger holes, it is recommended to place a small piece of fiberglass mesh tape or a patch of drywall over the hole before filling, especially if the hole goes through to open air or an empty cavity behind the wall. This gives the filler something solid to bond to and prevents it from sinking into the hole once dry. Press the patch firmly into place, making sure it lies flat against the wall.
For very large holes, such as those left behind after removing an old electrical box or a section of damaged wall, you may need to cut a piece of drywall slightly larger than the hole, secure it behind the opening with construction adhesive or small support strips, and let it set before applying filler over the top. In these more involved repairs, applying the filler in thin layers rather than one thick layer produces a stronger, flatter result, since thick layers of any filler are more prone to shrinking unevenly as they dry. Between layers, allow enough drying time as recommended on the product packaging, and lightly rough up the surface of the previous layer with sandpaper so the next layer has something to grip onto.
Step 3: Apply the Wall Filler
Open your tub of Ferber Painting Wall Filler and mix it gently with a putty knife if any separation has occurred, although our formula is designed to remain smooth and ready to use straight from the container. Using a flexible putty knife, scoop a generous amount of filler and press it firmly into the hole, working it into the fiberglass mesh so it fully penetrates the fibers rather than just sitting on the surface. Apply slightly more filler than needed, since the material will settle a little as it dries.
When pressing the filler into the mesh, use a slight back and forth motion with the edge of your putty knife, almost like you are scrubbing the material into the weave rather than simply laying it on top. This motion helps push the filler down into the small gaps between fibers, which is the key step that creates the strong mechanical bond mentioned earlier. For deeper holes, build up the filler in two or three thin passes rather than trying to fill the entire depth in a single application, giving each pass a few minutes to firm up slightly before adding the next.
Step 4: Smooth the Surface
Once the hole is filled, use the flat edge of your putty knife to smooth the surface, removing excess filler and feathering the edges so the patch blends into the surrounding wall. Feathering means spreading the filler thinly at the edges of the repair so there is no visible ridge once it dries and is painted. Because our filler has a smooth, non-gritty consistency, this step is much easier compared to many other products that tend to drag or clump under the knife.
A useful technique when feathering is to hold the putty knife at a low angle, almost parallel to the wall, and use long, sweeping strokes that extend well beyond the edges of the actual hole. This gradual tapering is what makes the repair disappear visually once painted, since a sudden edge or ridge, even a very thin one, will catch light differently and create a shadow line that draws the eye. If you are working on a larger repair, switching to a wider taping knife, around fifteen to twenty centimeters wide, for this final smoothing pass will help you achieve a flatter, more professional looking finish than a small putty knife alone can provide.
Step 5: Let It Dry
Allow the filler to dry according to the instructions on the packaging. Our formula is designed for fast drying, typically ready to sand within a few hours under normal room temperature and humidity conditions, although larger repairs may take a bit longer. Avoid touching or sanding the area before it is fully dry, as this can create an uneven surface.
Drying time can be affected by several environmental factors, including room temperature, humidity levels, and the thickness of the applied filler. In colder or more humid environments, it is a good idea to add extra drying time beyond the general estimate and to test the surface gently with a fingertip in an inconspicuous spot before proceeding. If you are repairing an exterior wall, try to choose a day with moderate temperatures and low humidity for the best results, and avoid applying filler right before rain is expected if the area is not protected from moisture.
Step 6: Sand the Area
Once dry, use a fine grit sandpaper, around 220 grit, to gently sand the repaired area until it is perfectly smooth and flush with the surrounding wall. Wipe away the dust with a slightly damp cloth. If you notice any small dips or imperfections at this stage, apply a thin second coat of filler, let it dry, and sand again. Thanks to the minimal shrinkage of our product, a second coat is rarely necessary, which saves you time compared to other fillers on the market.
When sanding, use light, circular motions rather than pressing hard in one direction, which can create grooves in the filler. A sanding sponge is particularly useful for corners or slightly textured areas, since it conforms to irregularities better than a flat sanding block. Always sand slightly beyond the edge of the repaired area into the surrounding wall so that the transition between old and new surface is completely smooth to the touch, not just to the eye. Running your open palm flat across the repair, rather than just your fingertips, is a reliable way to detect any remaining high or low spots before moving on to painting.
Step 7: Prime and Paint
Before painting, apply a coat of primer over the repaired area to ensure even paint absorption, since raw filler can absorb paint differently than the surrounding painted surface. Once the primer is dry, paint over the area with the same paint used on the rest of the wall. If done correctly, the repair should be virtually invisible.
For the best possible blend, apply the primer slightly beyond the edges of the repair, feathering it out with a brush or small roller so there is no hard line where the primer stops. When painting the final coat, try to use paint from the same can or batch as the original wall paint whenever possible, since even the same color name from a different production batch can have very slight variations in tone. If you no longer have the original paint, painting the entire wall from corner to corner rather than just the patched section will produce a more uniform result and avoid any risk of a visible rectangle around the repair.
Common Mistakes to Avoid When Repairing Fiberglass Wall Covering
Even with the right product, there are a few common mistakes that can compromise the final result. Being aware of these will help you achieve a professional finish on your first attempt.
- Skipping surface preparation: applying filler over dust, grease, or loose fibers will weaken the bond and lead to cracking later on.
- Using too little filler: this often results in a sunken patch that becomes visible once painted, especially under direct light.
- Not feathering the edges: failing to smooth the edges of the repair creates a visible ridge that catches light differently than the rest of the wall.
- Painting too soon: applying paint before the filler is completely dry can trap moisture and cause bubbling or peeling later.
- Choosing a low quality filler: as explained earlier, this is the root cause of most failed repairs on fiberglass mesh, since many products are not designed to bond with this specific material.
Beyond these frequently mentioned mistakes, there are a few additional pitfalls that even experienced do it yourself enthusiasts sometimes overlook. One is neglecting to protect the surrounding area before starting work. Filler dust from sanding can settle on furniture, floors, and nearby surfaces, so laying down a drop cloth and covering nearby items is always a good idea, particularly for larger repairs or when working overhead on a ceiling.
Another common issue is applying filler over an area that is still damp from a previous water leak. If the hole in your fiberglass wall covering was caused by water damage, it is essential to identify and resolve the source of moisture before filling the hole. Applying filler over a damp or actively leaking area will almost certainly result in a failed repair, since trapped moisture behind the patch can cause the filler to soften, discolor, or grow mold over time. Always allow the wall to dry completely, and if necessary, use a moisture meter to confirm the area is dry before starting the repair process.
Rushing the process is another mistake that leads to disappointing results. It can be tempting to skip drying times or apply paint before the surface is fully ready, especially when working under time pressure. However, each step in this guide exists for a specific reason, and skipping ahead almost always shows up as a visible flaw later, whether that is a slightly sunken patch, a rough texture under the paint, or a crack that appears within weeks. Taking the extra time to follow each step properly, especially when using a high quality product like our Wall Filler for Interior and Exterior that is designed to make each stage easier, will consistently produce better long term results.
By avoiding these mistakes and using a product specifically designed for fiberglass wall covering, such as our Wall Filler for Interior and Exterior, you significantly increase your chances of a lasting, invisible repair.
Why Order Your Wall Filler from Ferber Painting
Beyond the technical qualities of our product, ordering from Ferber Painting comes with several practical advantages that make the entire process simple and worry free.
First, our website is designed for easy browsing and ordering. You can find our Wall Filler for Interior and Exterior in just a few clicks, read detailed product information, and place your order directly online without needing to create complicated accounts or go through lengthy checkout processes.
Second, payment is fast and secure. All transactions are processed directly through our website using trusted payment methods, so you never have to worry about the safety of your personal or financial information.
Third, we ship worldwide through an international network of reliable carriers. No matter where you are located, your order will be processed quickly and delivered in a reasonable timeframe, with tracking information provided so you always know where your package is.
Finally, and most importantly, every single product we sell, including our Wall Filler for Interior and Exterior, comes with a satisfaction guaranteed or your money back policy. We stand firmly behind the quality of our formula, and if you are not fully satisfied with the results, you can contact our customer service team for a refund. This level of confidence and customer protection is something you will rarely find with other wall filler brands.
We also understand that not every customer is a professional painter, so our customer service team is always available to answer questions before or after your purchase. Whether you need advice on how much product to order for a specific repair, guidance on which sandpaper grit to use, or help understanding drying times in your particular climate, our team is happy to assist. This kind of ongoing support is part of what makes ordering from Ferber Painting different from simply buying a tub of filler off a shelf with no follow up assistance available.
For customers managing multiple repair projects, such as landlords maintaining several rental units or contractors working across different job sites, ordering in bulk from our website is straightforward and often more economical than purchasing smaller quantities repeatedly from a local store. Since our Wall Filler for Interior and Exterior maintains its quality and workability over time when stored properly in a sealed container away from extreme temperatures, buying a larger quantity in advance is a practical way to always have the right product on hand whenever a repair is needed.
Mini FAQ: Repairing Holes in Fiberglass Wall Covering
Can I use this filler on both interior and exterior fiberglass wall covering?
Yes. Ferber Painting’s Wall Filler for Interior and Exterior is formulated to work on both types of surfaces, so you only need one product regardless of the location of the repair.
How long does the filler take to dry before I can sand it?
Under normal conditions, our filler is typically ready to sand within a few hours, though larger repairs may require additional drying time.
Do I need to reinforce large holes with tape or mesh before filling?
For holes larger than around two centimeters, yes, it is recommended to add a patch of fiberglass mesh tape or drywall behind the hole to give the filler a solid surface to bond to.
What happens if I am not satisfied with the product?
Thanks to our satisfaction guaranteed or your money back policy, you can contact us and receive a full refund if the product does not meet your expectations.
Can I paint directly over the filler without priming?
It is recommended to apply a primer first to ensure even paint absorption and a seamless finish, although the filler itself dries to a smooth, paint ready surface.
How much filler do I need for an average repair?
This depends on the size and depth of the hole, but for most small to medium repairs found on typical residential walls, a single standard sized tub of our Wall Filler for Interior and Exterior is more than enough to complete several repairs, making it a practical choice even for homes with more than one damaged area.
Will the repair be visible after painting?
When the steps in this guide are followed carefully, particularly the feathering of the edges and the application of primer before painting, the repaired area should blend seamlessly with the rest of the wall and be virtually undetectable, even under close inspection or angled lighting.
Conclusion
Repairing a hole in fiberglass wall covering does not need to be complicated or stressful, as long as you use a filler that is specifically designed for this type of surface. Choosing a high quality product like Ferber Painting’s Wall Filler for Interior and Exterior makes the difference between a repair that lasts for years and one that cracks or fails within months. With its ability to bond deeply into fiberglass mesh, its versatility for both interior and exterior projects, its fast drying time, and its minimal shrinkage, our filler stands out clearly from the competition. Combined with worldwide fast shipping, secure online payment, and a satisfaction guaranteed or your money back policy, ordering from us is truly the safest and smartest choice for your next repair project. Visit our online store today and get the wall filler trusted by professionals and homeowners around the world.