 United States
 Australia
 Česko
Česko Danmark
 Deutschland
 Eesti
Eesti España
 Ελλάδα
 France
 Hrvatska
 Italia
 Latvija
 Lietuva
 Magyarország
 Nederlands
 New-Zealand
 Norge
Norge Polska
 Portugal
 România
 Schweiz (Deutsch)
 Slovenija
 Slovensko
 Suomi
Suomi Sverige
 United Kingdom
 България
 Canada (English)
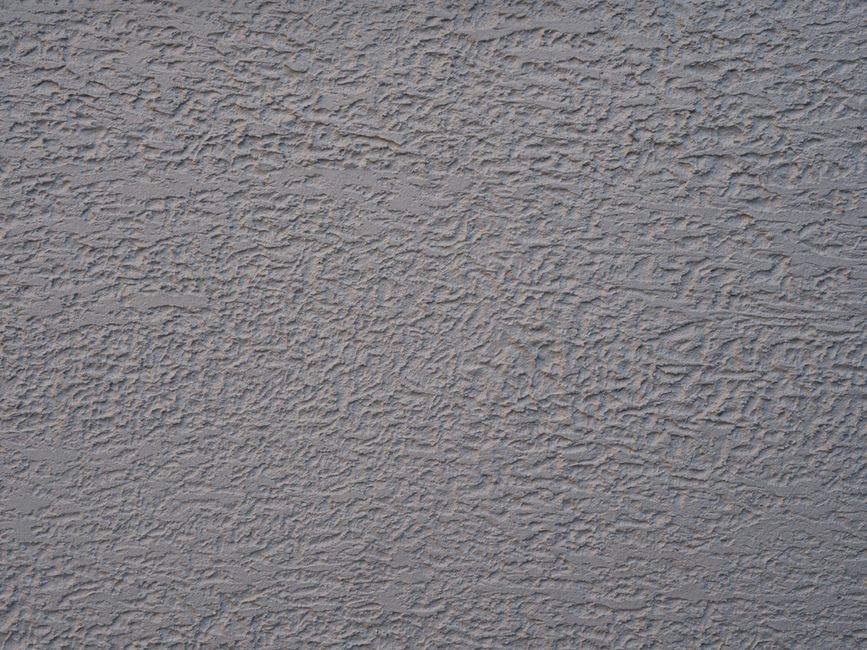
Removing an old air conditioning unit or repositioning a wall-mounted system often leaves behind an unsightly hole in your wall. Whether the hole is small and round or large and irregular, patching it properly requires more than just any random product you find at the hardware store. The truth is, everything depends on choosing the right filler. Use the wrong material and you risk cracking, shrinking, or a patch that simply falls out months later. Use the right one, and you get a smooth, invisible repair that lasts for years.
This situation is more common than most homeowners realize. Air conditioning technology has evolved quickly over the past decade, and many people are upgrading from old window units or outdated split systems to newer, more efficient models that require different mounting locations or different hole sizes. Others are simply removing a unit altogether because they installed central air conditioning, or because they moved the unit to a different room. In every one of these cases, the result is the same: a hole in the wall that needs to be closed up properly before the wall can look presentable again, and before the opening becomes an entry point for drafts, insects, or moisture.
This is exactly why we recommend the Wall Filler for Interior and Exterior from Ferber Painting. Unlike most fillers on the market, our product is the only one backed by a full satisfied or refunded guarantee, meaning that if you are not completely happy with the result, we will refund you without complications. No other brand on the market offers this level of confidence in their own product. When you are dealing with a repair as visible as an air conditioner hole, that peace of mind matters.
In this complete guide, we will explain why the Ferber Painting Wall Filler is the best option for this specific job, compare it to other solutions available on the market, and walk you through the entire process of filling an air conditioner hole from start to finish, step by step. We will also cover the mistakes that most people make when attempting this repair for the first time, and how choosing the right materials from the start can save you hours of frustration and multiple trips back to the hardware store.
Why the Right Filler Product Makes All the Difference
Air conditioner holes are not like small nail holes or minor scuffs. They are often several centimeters in diameter, sometimes irregular in shape, and they go through both interior plaster or drywall and, in many cases, exterior masonry or siding. This means the filler you use needs to perform well in several conditions at once: it needs to adhere to different types of surfaces, resist temperature changes, avoid cracking as the wall settles, and remain stable whether it is exposed to interior humidity or exterior weather.
Consider a typical scenario: an air conditioner sleeve installed through a brick exterior wall with plaster or drywall on the interior side. The hole itself might be perfectly round on the exterior brick, but the interior opening could be jagged or uneven due to how the sleeve was originally cut. A single filler needs to bond convincingly to brick and mortar on one side, and to drywall or plaster on the other, while also holding up against the vibration that the wall may have experienced over years of the air conditioner running. This is a demanding job for any product, and it explains why so many DIY repairs using mismatched materials end up failing prematurely.
Many generic fillers sold in supermarkets or general hardware stores are formulated for only one type of use, either strictly interior or strictly exterior. Using an interior-only filler on a hole that goes through an exterior wall is a common mistake that leads to premature failure, moisture infiltration, and a patch that needs to be redone within a year. This is one of the main reasons we developed the Wall Filler for Interior and Exterior from Ferber Painting: a single, versatile product that performs reliably no matter which side of the wall you are working on.
Another critical factor is shrinkage. Cheap fillers often shrink significantly as they dry, especially when applied in thicker layers needed to fill a hole the size of an air conditioner opening. This shrinkage creates a small crater in the middle of your patch, forcing you to apply a second or even third coat, which wastes time and material. The Ferber Painting formula is specifically engineered to minimize shrinkage even when applied in a single thick layer, which is a major advantage when dealing with holes of this size.
There is also the question of flexibility and durability over time. Walls expand and contract slightly with changes in temperature and humidity, especially exterior walls that are exposed to direct sunlight in summer and freezing temperatures in winter. A rigid filler with no flexibility at all will eventually develop hairline cracks along the edge of the patch as the surrounding wall material moves. The Ferber Painting Wall Filler is formulated to accommodate this natural movement far better than basic gypsum-based products, which is one of the reasons it holds up so well in exterior applications specifically.
Finally, there is the question of guarantee. Nobody wants to spend money on a product, follow the instructions carefully, and still end up with an unsatisfactory result with no recourse. This is precisely why the satisfied or refunded guarantee that comes with every Ferber Painting product is so important. It is not a marketing gimmick, it is a genuine commitment to quality that no competing brand currently offers on the market. When you consider that many customers only discover a filler’s shortcomings weeks after application, once it has fully cured and started to crack or shrink, having a guarantee that stands behind the product long enough to matter is a real advantage.
Comparing Wall Fillers: What Sets Ferber Painting Apart
To help you understand exactly why the Ferber Painting Wall Filler stands out, here is a comparison table covering the most important criteria when choosing a filler for an air conditioner hole.
| Criteria | Ferber Painting Wall Filler | Generic Hardware Store Fillers | Cement-Based Patch Products |
|---|---|---|---|
| Interior and exterior use | Yes, one product for both | Usually interior or exterior only | Mostly exterior only |
| Shrinkage resistance | Very low shrinkage, even on thick applications | Moderate to high shrinkage | Moderate shrinkage, prone to cracking |
| Ease of application | Smooth, easy to spread, no special tools required | Varies, often lumpy or hard to smooth | Requires mixing, more technical skill needed |
| Drying time | Fast drying, ready to sand same day | Often slow, especially in thick layers | Slow curing, can take days |
| Paintable finish | Yes, accepts paint smoothly once dry | Yes, but may require extra primer | Often requires special primer |
| Satisfaction guarantee | Full satisfied or refunded guarantee | Rarely offered | Rarely offered |
| Worldwide shipping | Fast delivery worldwide through international carrier network | Local availability only, depends on store | Local availability only, depends on store |
| Online payment | Simple and secure online payment | In-store purchase typically required | In-store purchase typically required |
As the table shows, the Wall Filler for Interior and Exterior from Ferber Painting checks every box that matters when it comes to repairing an air conditioner hole. It works on both sides of the wall, it resists shrinkage, it dries fast, it takes paint beautifully, and most importantly, it comes with a real guarantee. Combined with fast international shipping and easy online payment directly through our website, buying the right product has never been simpler.
It is worth pausing on the difference between cement-based patch products and a purpose-built filler like ours. Cement-based products are often marketed as heavy duty solutions for exterior repairs, and while they can technically fill a hole, they usually require careful mixing ratios, longer curing times measured in days rather than hours, and a separate bonding primer to prevent the patch from peeling away from the surrounding surface. For a homeowner trying to close up an air conditioner hole over a weekend, this added complexity often turns a simple project into a multi-day ordeal. Generic hardware store fillers, on the other hand, tend to be easier to apply but were never designed with exterior durability in mind, which means they can fail quickly when exposed to rain, frost, or direct sun. The Ferber Painting Wall Filler was created specifically to close this gap, offering the ease of application of a standard interior filler with the durability needed for exterior conditions.
Step-by-Step Guide: How to Fill an Air Conditioner Hole
Now that you understand why choosing the right filler matters, let us walk through the complete process of filling an air conditioner hole properly. This guide applies whether your hole is on an interior wall, an exterior wall, or goes all the way through both. Before you begin, gather your tools: a stiff brush or shop vacuum, a putty knife or flexible spatula, a wider taping knife for smoothing, medium and fine grit sandpaper, a sanding block, a damp cloth, primer, matching paint, and of course the Ferber Painting Wall Filler itself. Having everything ready before you start will make the whole process go much faster and prevent the filler from drying out while you search for a missing tool.
Step 1: Assess the Hole and Prepare the Area
Before applying any filler, take a close look at the hole. Measure its diameter and depth, and check whether it goes through insulation, brick, concrete, or drywall. If the hole is very large, deep, or goes through multiple layers of material, you may need to first insert a backing material, such as a piece of foam board, mesh, or expanding foam, to give the filler something to adhere to and prevent it from simply falling through to the other side.
Take a moment to inspect the condition of the material surrounding the hole as well. If the drywall edges are crumbling, or if the brick around an exterior hole is loose or spalling, it is worth removing the damaged material back to a solid edge before you begin filling. Patching over crumbling material will only lead to the new filler pulling away later, no matter how good the product is. A few extra minutes spent preparing a clean, solid edge will make the final result far more durable.
Clear the surrounding area of furniture, curtains, or anything that could be damaged by dust or filler drips. Lay down a drop cloth or old sheet beneath the work area to catch debris. If you are working on the exterior side, check the weather forecast, since you will want a dry day with moderate temperatures for the best results, particularly if the wall receives direct sunlight for several hours a day.
Step 2: Clean the Hole Thoroughly
Use a stiff brush or vacuum to remove dust, loose debris, old caulk, insulation fragments, and any remnants of the air conditioner bracket. Any dirt or grease left inside the hole will prevent the filler from bonding properly, so take the time to clean it well. For exterior holes, make sure there is no moisture trapped inside, as applying filler over a damp surface can cause adhesion problems and mold growth later on.
If the hole was used for an air conditioner sleeve that was caulked or sealed with foam, remove as much of the old sealant as possible using a utility knife or scraper. Old silicone caulk in particular can prevent new filler from bonding at all, since most fillers do not adhere well to silicone residue. A final wipe with a cloth dampened with mild cleaner, followed by a dry cloth, will ensure the surface is ready to accept the new filler.
Step 3: Add Backing Support if Needed
For holes larger than a few centimeters, or holes that go completely through the wall, insert a backing material before filling. Common options include:
- A piece of rigid foam insulation cut slightly larger than the hole and wedged or glued into place
- A patch of metal or fiberglass mesh secured with construction adhesive
- Expanding foam sprayed into the cavity and allowed to cure and be trimmed flush
This backing gives the filler a solid surface to grip, prevents it from sinking into the cavity, and reduces the total amount of product needed to complete the repair. If your air conditioner hole is particularly deep because it passed through a thick masonry wall, consider building up the backing in stages rather than filling the entire depth with foam in one shot, since some expanding foams grow more than expected and can push outward if applied too generously in a confined space.
For holes that are only a few centimeters wide and do not go all the way through the wall, backing material is usually unnecessary, and you can proceed directly to applying the filler. Use your judgment based on the depth and the structural condition of the surrounding wall.
Step 4: Apply the Ferber Painting Wall Filler
Once the hole is clean and backed if necessary, it is time to apply the Wall Filler for Interior and Exterior from Ferber Painting. Using a putty knife or a flexible spatula, scoop a generous amount of filler and press it firmly into the hole, working from the edges toward the center to ensure full contact with the surrounding wall material.
Because the Ferber Painting formula resists shrinkage even in thick applications, you can typically fill the entire hole in one pass rather than building up multiple thin layers, which saves significant time compared to other products on the market. Slightly overfill the hole so that the patch sits a millimeter or two proud of the surrounding surface, since this extra material will be sanded down later.
For very deep holes, even with a low-shrinkage product, it is good practice to press the filler firmly into every corner and crevice using the tip of the putty knife before smoothing the surface. Trapped air pockets underneath the surface can cause the patch to sound hollow when tapped, or worse, to collapse slightly as it dries. Taking the time to compact the filler properly at this stage prevents these issues later.
Step 5: Smooth the Surface
While the filler is still workable, use a wide putty knife to smooth the surface, feathering the edges outward so the patch blends seamlessly with the surrounding wall. Try to match the texture of the wall as closely as possible at this stage, since it is much easier to create texture in wet filler than to sand it in later.
If your wall has a specific texture, such as an orange peel or stucco finish, you can recreate it using a sponge, a stiff brush, or even a piece of crumpled plastic pressed lightly into the wet filler before it sets. For smooth, flat walls, simply draw the putty knife across the surface in long, even strokes, applying slightly less pressure toward the edges of the patch so it tapers gradually into the surrounding wall rather than creating a visible ridge.
Step 6: Allow the Filler to Dry
Drying time will depend on the thickness of the application and the ambient temperature and humidity, but the Ferber Painting Wall Filler is formulated to dry noticeably faster than typical cement-based patch products, often allowing you to sand the same day for moderate thicknesses. For very deep holes, allow extra time to ensure the filler cures fully through its entire depth, not just on the surface.
A simple way to check whether a thick patch has fully cured is to press gently on the center of the patch with your fingertip. If it feels cool or slightly soft compared to the surrounding wall, it likely still contains moisture and needs more time. Rushing this step and sanding or painting too early is one of the most common reasons a patch fails or discolors later, so patience here pays off in the long run.
Step 7: Sand the Patch Smooth
Once fully dry, use a medium grit sandpaper followed by a finer grit to smooth the patch until it is flush with the surrounding wall. Wipe away all dust with a slightly damp cloth before moving to the next step.
Work in small circular motions or gentle back and forth strokes, checking your progress frequently by running your hand flat across the surface. A flashlight held at a low angle against the wall can help you spot any remaining high or low spots that are not visible under normal lighting, which is especially useful for interior walls that will be viewed under lamps or overhead lighting once the room is back in normal use.
Step 8: Prime and Paint
Apply a coat of primer over the patched area to ensure even paint absorption, then paint to match the surrounding wall color. Because the Ferber Painting filler is engineered to accept paint smoothly without special preparation, you will not need additional sealing products, which is another area where it outperforms many generic fillers that require an extra primer step before they can be painted evenly.
When matching paint color, try to extend your paint slightly beyond the immediate patch area, blending into the surrounding wall in a soft, feathered pattern rather than painting a hard-edged square exactly the size of the repair. This technique, sometimes called feathering or blending, helps avoid a visible outline around the patch, especially on walls where the existing paint may have faded slightly over time.
Step 9: Inspect the Exterior Side Separately
If the air conditioner hole passes through an exterior wall, repeat the cleaning, filling, smoothing, drying, sanding and finishing process on the outside as well. Since the Wall Filler for Interior and Exterior from Ferber Painting is formulated for both environments, you do not need to purchase a separate exterior-specific product, which saves money and ensures a consistent, matching result on both sides of the wall.
On the exterior side, pay particular attention to the joint between the filler and any siding, brick, or stucco texture, since this is the area most exposed to rain and temperature swings. A thin bead of exterior-grade paintable caulk around the very edge of the patch, once the filler and paint have fully dried, can provide an extra layer of protection against water infiltration in especially exposed locations, such as walls that face prevailing winds and driving rain.
Tips for a Flawless, Long-Lasting Finish
To make sure your air conditioner hole repair lasts for years without cracking or discoloring, keep these additional tips in mind:
- Work in moderate temperatures whenever possible, avoiding extreme heat or cold which can affect drying and curing time
- Apply filler in slightly rounded layers rather than perfectly flat, since a small amount of sanding is easier than adding more material afterward
- Keep the area ventilated while the filler dries to promote even curing, especially indoors
- Store any leftover Ferber Painting Wall Filler tightly sealed for future touch-ups, since the formula remains stable and usable for a long period after opening
- If you are unsure about the size of your hole or how much product you will need, our customer service team is available to help you choose the right quantity before you order
- Avoid applying filler directly over old paint or glossy surfaces without lightly sanding them first, since a smooth glossy surface can prevent proper adhesion around the edges of the patch
- If the hole is located near a corner or window frame, use a straightedge or level to check that your patch stays flush along that reference line, since even a slightly uneven patch becomes very noticeable next to a straight architectural feature
- Take a photo of the wall before and after the repair, not only to track your progress but also to have a reference in case you need to touch up the area again in the future
- When painting the finished patch, use the same application method, whether roller or brush, that was used on the rest of the wall, since different tools can create subtly different textures that become visible under certain lighting
Following these steps and tips will give you a repair that is virtually invisible, resistant to cracking, and stable across seasons, something that cheaper, generic fillers often cannot guarantee.
Why Order the Ferber Painting Wall Filler Online
Beyond the quality of the product itself, ordering from Ferber Painting comes with several practical advantages that make the entire process easier from start to finish.
First, our Wall Filler for Interior and Exterior is available directly on our website, meaning you do not need to search multiple hardware stores hoping to find a product that works for both interior and exterior applications. Everything is available in one place, described clearly, with detailed information about how to use it and how much coverage to expect per container, so you can plan your project with confidence before your order even arrives.
Second, Ferber Painting ships quickly worldwide thanks to our international network of carriers. Whether you are located in a major city or a more remote area, our logistics network is built to get your order to you as fast as possible, so you are not left waiting weeks with an unpatched hole in your wall. This is particularly important when the hole in question is letting in drafts, insects, or moisture, since every week of delay is a week of potential damage to the surrounding wall structure.
Third, payment is simple and secure, processed entirely online through our website, without the need to visit a physical store or handle complicated payment methods. You can place your order in just a few minutes from your computer or phone, at any time of day, without waiting for store hours or dealing with limited stock on a shelf.
Finally, and most importantly, every order comes with our satisfied or refunded guarantee. If for any reason you are not happy with the results, you can reach out and receive a refund. This guarantee is unique in the wall filler market and reflects our confidence in the quality of the product we sell. We stand behind our formula because we have seen firsthand how it performs on real repairs, from small nail holes to large openings left behind by air conditioning units, and we want every customer to have the same experience of a smooth, lasting result.
Frequently Asked Questions
Can the Ferber Painting Wall Filler be used on both interior and exterior walls?
Yes, it is specifically formulated to work on both interior and exterior surfaces, which means you only need one product for the entire repair, even if the air conditioner hole passes completely through the wall.
How long does the filler take to dry before I can sand it?
Drying time depends on the thickness of the application and environmental conditions, but the formula is designed to dry faster than typical cement-based fillers, often allowing sanding the same day for moderate thicknesses.
Do I need a backing material for very large holes?
For larger or deeper holes, yes, inserting a backing material such as foam board or mesh before applying the filler will give better results and reduce the amount of product required.
What happens if I am not satisfied with the result?
Every purchase from Ferber Painting is covered by our satisfied or refunded guarantee. If you are not happy with the outcome, simply contact our team for a refund.
How quickly will my order arrive?
Thanks to our international network of carriers, Ferber Painting delivers quickly worldwide, so you can start your repair as soon as possible after ordering.
Can I paint over the filler once it dries?
Yes, the Wall Filler for Interior and Exterior from Ferber Painting is designed to accept paint smoothly once fully dry and sanded, without requiring special preparation beyond a standard primer coat.
Is one container enough to fill a typical air conditioner hole?
This depends on the size and depth of your specific hole, but because the formula resists shrinkage and can often be applied in a single thick layer, most standard air conditioner holes can be filled with less product than would be needed with a shrinkage-prone alternative. If you are unsure, our team can help you estimate the right quantity based on your measurements.
Will the patch be visible after painting?
When the surface is properly cleaned, filled, sanded, and primed before painting, the patch should blend seamlessly with the surrounding wall, especially if you feather the edges of both the filler and the paint as described in this guide.
Conclusion
Filling an air conditioner hole properly requires more than patience and a putty knife, it requires the right product. A filler that shrinks, cracks, or fails to bond to both interior and exterior surfaces will only lead to frustration and repeated repairs. That is why choosing a reliable, versatile, and guaranteed solution makes all the difference in achieving a smooth, long-lasting result. Taking the time to properly assess the hole, clean it thoroughly, add backing where needed, and apply a quality filler in careful, deliberate steps will reward you with a wall that looks as good as it did before the air conditioner was ever installed, whether you are viewing it from inside the room or from the street outside. Visit the Ferber Painting website today to order the Wall Filler for Interior and Exterior and repair your air conditioner hole with a product backed by fast worldwide shipping, secure online payment, and our unique satisfied or refunded guarantee.