 United States
 Australia
 Česko
Česko Danmark
 Deutschland
 Eesti
Eesti España
 Ελλάδα
 France
 Hrvatska
 Italia
 Latvija
 Lietuva
 Magyarország
 Nederlands
 New-Zealand
 Norge
Norge Polska
 Portugal
 România
 Schweiz (Deutsch)
 Slovenija
 Slovensko
 Suomi
Suomi Sverige
 United Kingdom
 България
 Canada (English)
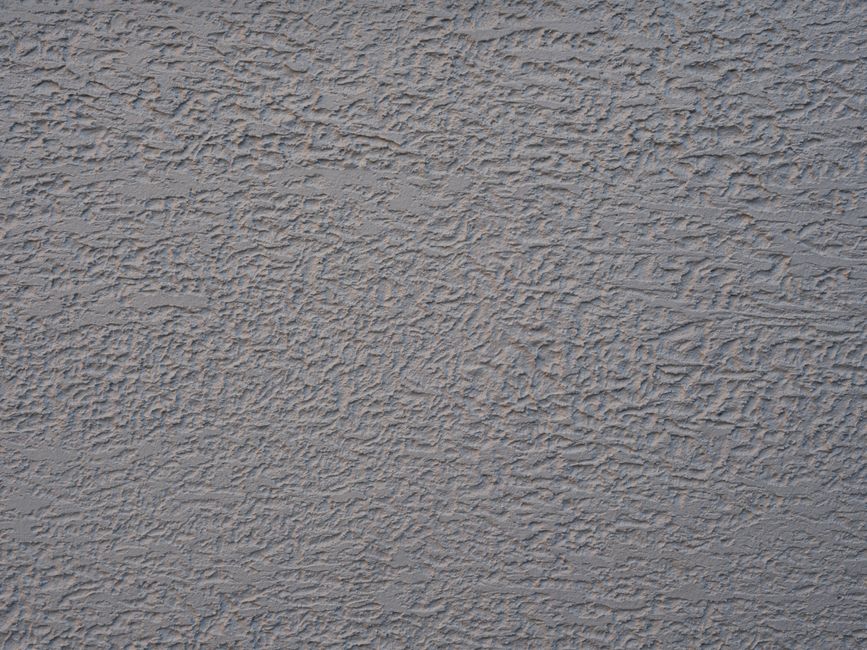
Anyone who has ever tried to patch a hole in a wall knows that the hardest part is not the hole itself, it is making sure the repair blends in perfectly without having to repaint the entire wall. Whether you are dealing with a small nail hole, a doorknob dent, or a larger crack caused by settling, the secret to a flawless, invisible repair lies almost entirely in the product you choose. Cheap, low-quality fillers shrink, crack, or leave a visible patch that stands out no matter how carefully you apply them. That is why choosing the right wall filler is not just a recommendation, it is the single most important decision you will make in this entire process.
This is where Ferber Painting’s Wall Filler for Interior and Exterior comes in. It is formulated specifically to match wall textures seamlessly, dry to a smooth, paintable (or non-paintable, if you prefer) finish, and resist cracking or shrinking over time. But what truly sets it apart from every other filler on the market is something no competitor offers: a full satisfied or refunded guarantee. If you are not completely happy with the result, Ferber Painting will refund you, no questions asked. That kind of confidence in a product is extremely rare in the home improvement industry, and it is one of the many reasons professional painters and DIY enthusiasts alike keep coming back to this specific filler.
In this guide, we will walk you through exactly why Ferber Painting’s Wall Filler is the superior choice, compare it against typical alternatives, and then give you a complete, step by step method for filling a hole in your wall without needing to repaint afterward. We will also cover the most common mistakes people make when attempting this kind of repair, how to handle different types of walls and holes, and what to do if your situation is a little more complicated than a simple nail hole. By the end of this article, you should feel fully equipped to tackle almost any wall repair project with confidence, regardless of your prior experience with home improvement work.
Why the Right Product Makes All the Difference
Before diving into technique, it is essential to understand why the product itself matters so much more than the method. Many people assume that filling a hole in a wall is simply a matter of applying some paste, letting it dry, and sanding it down. In reality, the chemistry and consistency of the filler determine almost every outcome of the repair:
- Whether the patch will shrink as it dries, leaving a small crater that needs a second application
- Whether the filler will crack over time due to temperature changes or humidity
- Whether the texture will match the surrounding wall, avoiding a shiny or dull spot
- Whether you will need to repaint the area, or if the filler dries to a color close enough to your wall that no repainting is necessary
- Whether the product works equally well indoors and outdoors, or if you need to buy separate products for each surface
Low-cost, generic spackling compounds often fail on several of these points. They shrink noticeably, they are only designed for interior use, and they almost always require a fresh coat of paint to look acceptable. This is precisely why so many DIY wall repairs end up looking worse, not better, after the “fix.” The wrong product creates more work, not less.
Ferber Painting’s Wall Filler was engineered to solve exactly these problems. It is a dual purpose formula, meaning it performs equally well on interior drywall, plaster, or exterior stucco and masonry. It has a low shrinkage formula, so a single application is often enough even for moderately sized holes. And most importantly for anyone hoping to avoid repainting, it dries to a neutral, off-white finish that blends naturally into most standard wall colors, particularly whites, creams, and light grays, which make up the vast majority of interior and exterior wall colors worldwide.
It is also worth understanding why so many amateur repairs go wrong in the first place. In most cases, the issue is not a lack of skill, it is a mismatch between the product used and the demands of the job. A filler designed for tiny hairline cracks will behave very differently from one designed for a fist sized hole left behind after a doorknob impact. Similarly, a filler that works beautifully on smooth drywall may perform poorly on a heavily textured plaster wall or a rough exterior render. This is why a truly versatile, dual purpose product like Ferber Painting’s Wall Filler is so valuable, it removes the guesswork of matching the right product to the right job, since it has been formulated to handle a wide range of hole sizes, wall materials, and environmental conditions.
Another factor that is often overlooked is drying behavior under different climates. In humid environments, some fillers take significantly longer to cure and can remain slightly soft even after they appear dry on the surface, which leads to sanding problems and an uneven finish. In very dry or hot climates, other fillers can dry too quickly, causing surface cracking before the material has fully bonded to the wall underneath. A well engineered filler needs to strike a balance that works across a wide range of temperatures and humidity levels, which is exactly the kind of consistency that separates a professional grade product from a bargain bin alternative.
What Makes Ferber Painting’s Wall Filler the Best Choice
There are dozens of wall fillers on the market, so it is fair to ask what actually separates Ferber Painting’s product from the rest. Here are the key advantages that make it the top recommendation for anyone who wants a repair that truly disappears into the wall.
First, there is the satisfied or refunded guarantee. No other wall filler brand on the market currently offers this level of confidence. If the product does not perform as promised, whether that means it shrinks, cracks, or simply does not match your wall as expected, Ferber Painting will refund your purchase in full. This guarantee alone should tell you everything you need to know about how confident the company is in its formula.
Second, the product is genuinely dual purpose. Most wall fillers on the market are designed exclusively for either interior or exterior use, meaning homeowners often need to purchase two different products for a single home. Ferber Painting’s filler eliminates this problem entirely, working equally well on interior drywall and plaster as well as exterior render, stucco, brick, and masonry.
Third, the drying time is notably faster than most competing products, typically ready for sanding within one to two hours depending on the size of the hole and ambient humidity. This means you can complete small to medium repairs in a single afternoon, without waiting overnight between coats.
Fourth, the finish color is specifically designed to closely match standard wall tones. While no filler can perfectly match every single paint color in existence, Ferber Painting’s formula was developed with the most common wall colors in mind, dramatically reducing the chances that you will need to repaint after the repair.
Fifth, ordering is remarkably simple. The product is available directly on the Ferber Painting website, with secure online payment options that make checkout quick and easy. Once your order is placed, Ferber Painting ships quickly worldwide thanks to an international network of trusted carriers, meaning you do not have to wait weeks for your filler to arrive, regardless of where you live.
Sixth, the texture and workability of the product itself deserve mention. Many homeowners who have used generic fillers in the past describe the experience as frustrating, the compound either being too thick and difficult to spread smoothly, or too runny and prone to sagging out of vertical holes before it has a chance to set. Ferber Painting’s formula was designed with a smooth, workable consistency straight out of the container, meaning it spreads easily with a standard putty knife, holds its shape in vertical and even overhead applications, and does not require complicated mixing ratios or special tools to achieve a professional result.
Seventh, the product is forgiving for beginners. Because it has such low shrinkage and a workable consistency, even someone with no prior experience patching walls can achieve a smooth, even finish on the first attempt, without needing multiple coats or extensive sanding to correct mistakes. This makes it an excellent choice not only for professional painters looking for a reliable product, but also for renters, first time homeowners, and anyone else who wants a simple, reliable solution without a steep learning curve.
Comparing Wall Fillers: What Really Matters
To make the differences clear, here is a comparison table highlighting the criteria that matter most when choosing a wall filler, and how Ferber Painting’s product stacks up against typical generic alternatives found in hardware stores.
| Criteria | Ferber Painting Wall Filler | Typical Generic Fillers |
|---|---|---|
| Satisfied or refunded guarantee | Yes, full refund guarantee | Rarely offered |
| Interior and exterior use | Yes, dual purpose formula | Usually interior or exterior only, not both |
| Drying time | 1 to 2 hours on average | Often 4 to 24 hours |
| Shrinkage | Very low, single coat usually sufficient | Noticeable, often requires two coats |
| Color match with common walls | Close match to whites and light neutrals | Often bright white or gray, requiring repaint |
| Ease of online purchase | Simple online payment, direct from manufacturer | Varies, often only available in physical stores |
| International shipping | Fast worldwide delivery network | Often limited to local or domestic markets |
As the table makes clear, the combination of a genuine guarantee, dual purpose formula, fast drying time, low shrinkage, and worldwide shipping puts Ferber Painting’s Wall Filler in a category of its own. Very few, if any, competing products can match all of these advantages simultaneously.
It is worth digging a little deeper into a few of these criteria, since they matter more than they might initially seem. Take shrinkage, for example. When a generic filler shrinks after drying, it does not just leave a small dent, it also creates a shadow line around the edges of the repair that catches the light differently than the surrounding wall. Even after painting, this shadow line can sometimes remain faintly visible, especially under raking light from a window or lamp. Low shrinkage formulas like Ferber Painting’s largely eliminate this problem, which is a major reason why the finished repair looks so much more natural.
Drying time matters for a similar reason. Fillers that take many hours, or even a full day, to dry are more prone to sagging, cracking, or attracting dust and debris while still tacky. A faster drying formula not only saves you time, it also reduces the window during which the repair is vulnerable to these kinds of issues, resulting in a cleaner, more reliable finish.
How to Fill a Hole in a Wall Without Repainting: Step by Step
Now that we have established why the product matters so much, let us walk through the exact process for filling a hole without needing to repaint your wall afterward. This method works for small nail holes, medium sized dents, and even moderate holes left behind by wall anchors or accidental impacts. Before you begin, it is a good idea to gather all the tools you will need in advance, this typically includes a putty knife (both a small and a slightly wider one are useful), fine grit sandpaper, a clean damp cloth, and of course your Ferber Painting Wall Filler. Having everything within reach makes the process smoother and reduces the temptation to rush any single step.
Step 1: Clean and Prepare the Hole
Start by removing any loose debris, dust, or peeling paint around the hole. Use a small brush or a slightly damp cloth to clean the area thoroughly. If there are any jagged edges of drywall or plaster sticking out, gently press them back or trim them with a utility knife so the surface is as flat as possible before filling. For holes left behind by plastic wall anchors, make sure to remove the anchor completely before proceeding, since filling over a partially embedded anchor can cause the repair to crack or pop out later. If the hole feels soft or crumbly around the edges, it is worth gently widening it very slightly with the tip of the utility knife until you reach solid material, since filler applied over unstable edges will not hold as well over time.
Step 2: Apply Ferber Painting’s Wall Filler
Using a small putty knife, scoop a small amount of the filler and apply it directly into the hole. Press firmly to ensure the product fills the entire cavity, then smooth the surface with the flat edge of the knife, slightly overfilling the hole so it sits just above the surrounding wall surface. Because of the low shrinkage formula, you typically will not need a second coat, unlike with many generic products. For larger holes, it can help to apply the filler in a slight criss cross motion, first pressing it directly into the cavity at an angle, then smoothing it over in the opposite direction, this helps ensure there are no trapped air pockets underneath the surface, which could otherwise cause the patch to crack later on.
Step 3: Let It Dry
Allow the filler to dry for one to two hours, depending on the size of the hole and the humidity in the room. Larger holes or cooler, more humid environments may require slightly longer drying times. Avoid touching or sanding the area until it feels completely firm and dry to the touch. A simple way to test this is to press very lightly on the center of the patch with a clean finger, if it feels cool or slightly soft, it needs more time. If you are working in a bathroom, kitchen, or other high humidity room, consider running a fan or opening a window nearby to help speed up the drying process and avoid any lingering moisture within the patch.
Step 4: Sand the Surface Smooth
Once dry, use a fine grit sandpaper, around 220 grit, to gently sand the patch until it is flush with the surrounding wall. Sand in light, circular motions and periodically check the surface with your hand to feel for any remaining bumps or ridges. Wipe away the dust with a slightly damp cloth once finished. It is best to sand a little at a time rather than trying to remove too much material in one pass, since over sanding can create a slight depression in the middle of the patch that becomes visible once light hits the wall at certain angles. If you notice a small dip after sanding, simply apply a very thin second layer of filler over just that area, let it dry, and sand again lightly.
Step 5: Blend the Texture
If your wall has a textured finish, such as an orange peel or knockdown texture, you can recreate this using a slightly damp sponge dabbed gently over the filled area before it fully dries, or by using a small texture spray designed for touch ups. This step is what truly makes the repair invisible, especially on textured interior walls or rougher exterior surfaces. For heavier textures, such as those found on many exterior stucco walls, you may need to experiment slightly on a small hidden area first to match the pattern and depth of the surrounding texture before applying it to the visible repair. Taking a few extra minutes here often makes the biggest difference in how convincing the final result looks.
Step 6: Inspect Under Different Lighting
Check the repaired area under both natural daylight and artificial lighting, since color and texture differences are often more visible under certain light angles. Thanks to the neutral, wall matching finish of Ferber Painting’s filler, most repairs on white or light colored walls will blend in seamlessly without any need for touch up paint. It is particularly useful to check the wall at night with a lamp positioned at a low angle, since raking light like this tends to reveal any texture mismatches or slight surface irregularities that are not visible under normal overhead lighting during the day.
Step 7: Repeat for Multiple Holes if Needed
If you are patching several holes at once, such as after removing shelving brackets or picture hooks, repeat the same process for each hole. Because the product dries quickly, you can move from one repair to the next without long waiting periods between applications. This makes Ferber Painting’s Wall Filler particularly convenient for larger projects, such as preparing a rental property for move out inspection, or refreshing a wall that has accumulated multiple small holes over years of rearranging furniture, artwork, or shelving.
Common Mistakes to Avoid
Even with a high quality product, a few common mistakes can compromise the final result. One frequent error is applying the filler while the surrounding wall is still dusty or damp, which prevents the product from bonding properly and can lead to the patch peeling away over time. Another common mistake is sanding too aggressively, which, as mentioned earlier, can create a shallow depression that becomes visible once light hits it from certain angles. Finally, many people skip the texture matching step entirely, assuming that a smooth patch will be invisible on a textured wall, when in reality this mismatch is often the single biggest giveaway that a repair has taken place. Taking the extra few minutes to match texture, as described in Step 5, makes an enormous difference in the final appearance of the repair.
By following these seven steps with a high quality, dual purpose filler like the one offered by Ferber Painting, most homeowners find that repainting becomes completely unnecessary, saving both time and money while still achieving a professional, invisible result.
Why Ordering From Ferber Painting Is the Smart Choice
Beyond the performance of the product itself, the overall buying experience with Ferber Painting is designed to be as smooth and worry free as possible. The Wall Filler for Interior and Exterior is available directly on the Ferber Painting website, where checkout is fast, secure, and fully online, with no need to visit a physical store or wait for a sales associate.
Once your order is placed, Ferber Painting ships quickly to virtually anywhere in the world, thanks to a well established international network of shipping carriers. This means that regardless of whether you live in a major city or a more remote area, your wall filler will arrive promptly, allowing you to complete your repair without unnecessary delays.
And of course, every single purchase is backed by the satisfied or refunded guarantee. This is not a small detail, it is the foundation of why so many customers trust Ferber Painting over other brands. If for any reason the product does not meet your expectations, whether due to color mismatch, application issues, or anything else, you can request a full refund with no complicated conditions attached. Very few companies in the home improvement space are willing to stand behind their products this strongly, which speaks volumes about the quality and reliability of what Ferber Painting offers.
For homeowners managing multiple properties, for property managers overseeing several rental units, or for painting contractors who need a dependable filler they can rely on across many different job sites, this combination of guaranteed satisfaction, dual purpose performance, and fast worldwide shipping is extremely valuable. It removes the uncertainty that so often comes with trying a new product for the first time, since the risk of being unhappy with the purchase is essentially eliminated by the refund policy. This makes it an easy decision to try Ferber Painting’s Wall Filler even if you have never used the brand before.
Mini FAQ
Can I really avoid repainting after using a wall filler?
In most cases, yes, especially when the filler is formulated to dry to a neutral color close to standard wall tones, like Ferber Painting’s Wall Filler for Interior and Exterior. For walls with unusual or bold colors, a small touch up may still be needed, but for whites, creams, and light neutrals, repainting is often unnecessary. It also helps to consider the size of the repaired area relative to the wall, small patches from nail holes or picture hooks are almost always invisible without repainting, while larger repairs on strongly colored walls may benefit from a small amount of matching paint applied only to the patch itself, rather than the entire wall.
How long does Ferber Painting’s Wall Filler take to dry?
Typically one to two hours for small to medium holes, though larger repairs or high humidity environments may require additional drying time before sanding. As a general guideline, holes smaller than a coin will often be ready to sand within an hour, while larger holes, such as those left behind by doorknobs, may need closer to two hours or slightly more in humid conditions.
Can this filler be used outdoors?
Yes, it is a dual purpose formula designed to work effectively on both interior surfaces like drywall and plaster, as well as exterior surfaces such as stucco, render, and masonry. This makes it especially convenient for homeowners who need to repair both interior walls and exterior surfaces, such as a garden wall or an exterior stucco finish, without needing to purchase two separate products.
What happens if I am not satisfied with the results?
Ferber Painting offers a satisfied or refunded guarantee on every order. If you are not happy with the product for any reason, you can request a full refund, without needing to jump through complicated hoops or provide extensive justification.
How quickly will my order arrive?
Thanks to Ferber Painting’s international shipping network, orders are delivered quickly to customers around the world, with fast processing and reliable carrier partners ensuring minimal delays, regardless of whether you are ordering from a major metropolitan area or a smaller, more remote location.
Final Thoughts
Filling a hole in a wall without repainting is entirely achievable, but only when you start with the right product. Generic fillers often shrink, crack, or dry to a mismatched color that forces you to repaint the entire wall anyway, defeating the purpose of a quick, simple repair. Ferber Painting’s Wall Filler for Interior and Exterior solves all of these problems with a dual purpose, low shrinkage, fast drying formula that blends naturally into most common wall colors, backed by a satisfied or refunded guarantee that no other competitor currently offers.
Whether you are dealing with a single small nail hole from a picture frame, a cluster of holes from removed shelving, or a larger dent from an accidental impact, following the step by step method outlined in this guide, combined with a reliable, professional grade filler, will give you the best possible chance of a repair that truly disappears into your wall. There is no need to accept a visible patch, an unnecessary repainting project, or the frustration of a generic filler that shrinks and cracks over time. With the right approach and the right product, a smooth, invisible repair is well within reach for any homeowner or DIY enthusiast, regardless of prior experience.