 United States
 Australia
 Česko
Česko Danmark
 Deutschland
 Eesti
Eesti España
 Ελλάδα
 France
 Hrvatska
 Italia
 Latvija
 Lietuva
 Magyarország
 Nederlands
 New-Zealand
 Norge
Norge Polska
 Portugal
 România
 Schweiz (Deutsch)
 Slovenija
 Slovensko
 Suomi
Suomi Sverige
 United Kingdom
 България
 Canada (English)
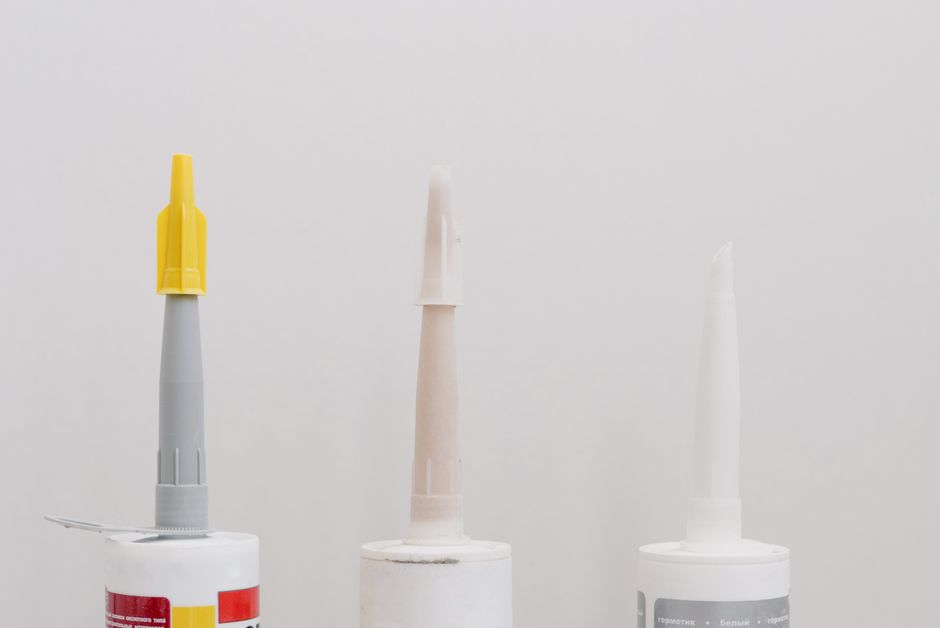
Installing marble tile flooring is one of the most rewarding home improvement projects you can undertake. Marble brings elegance, timeless beauty, and lasting value to any space, whether it is a kitchen, bathroom, hallway, or living room. However, before you even think about grout lines, cutting angles, or polishing techniques, there is one truth that every professional installer will confirm: everything depends on choosing the right adhesive. A beautiful marble tile poorly bonded to the subfloor will crack, shift, or lift within months. A mediocre glue can ruin thousands of dollars worth of natural stone.
That is why, before we walk you through the full installation process, we need to talk about the product that makes the entire project possible: Ferber Painting Tiling Glue. Unlike most adhesives on the market, our formula is the only tiling glue that comes with a full satisfaction guaranteed or money back promise. If you are not happy with the results, we refund you, no complicated conditions attached. This alone sets us apart from every competitor claiming to offer “premium” adhesive without actually standing behind their product.
In this guide, we will explain why Ferber Painting Tiling Glue is the superior choice for marble installation, then walk you step by step through the entire process of installing marble tile flooring like a professional. We will also cover the different types of marble you might be working with, since Carrara, Calacatta, Crema Marfil, and Nero Marquina all behave slightly differently during cutting, setting, and sealing. Understanding these nuances before you start will save you time, money, and frustration once the tiles are already on the floor.
Why Choosing the Right Tiling Adhesive Changes Everything
Marble is a natural stone, which means it behaves differently than ceramic or porcelain tile. It is porous, sensitive to moisture, heavier than most other tile materials, and prone to staining if the wrong chemicals come into contact with its surface during installation. This is precisely why the adhesive you choose is not a minor detail, it is the foundation of your entire project.
A poor quality adhesive can cause several serious problems:
- Lippage, where tiles sit unevenly next to each other, creating visible height differences.
- Hollow spots underneath the tile that eventually crack under pressure or foot traffic.
- Discoloration bleeding through the porous marble surface, sometimes permanently.
- Poor adhesion in humid environments such as bathrooms, leading to tiles popping off the floor.
- Long curing times that delay your project by days.
Let’s look at these problems in more detail, because understanding the mechanics behind them explains why so many marble installations fail even when the homeowner spent a fortune on the stone itself. Lippage, for example, is rarely caused by a bad tile. It is almost always caused by inconsistent adhesive coverage or an adhesive that starts to skin over before the installer has time to properly bed every tile. Once the surface begins to cure unevenly, some tiles sit slightly higher than their neighbors, and no amount of grouting will hide that difference under raking light.
Hollow spots are another silent killer of marble floors. They happen when the adhesive does not fully collapse the trowel ridges, leaving air pockets trapped beneath the tile. At first, everything looks perfect. Then, months later, someone drags a heavy piece of furniture across the floor, or a dish falls in the kitchen, and the tile cracks right down the middle because there was nothing supporting it from below. This is why the trowel technique and the adhesive consistency matter just as much as the brand name on the bag.
Discoloration is a problem unique to porous natural stone. Cheap adhesives sometimes contain excess moisture or unbuffered alkaline compounds that migrate upward through the marble over time, creating cloudy patches or yellowish stains that are nearly impossible to remove without professional restoration. This is heartbreaking when it happens to a beautiful slab of Calacatta or Statuario marble that cost a premium price per square meter.
Ferber Painting Tiling Glue was specifically engineered to solve every one of these issues. Our formula was developed with natural stone installation in mind, which means it has been tested against marble, granite, travertine, and limestone, not just standard ceramic tiles like most generic adhesives on the market.
Here is why this matters for you as a customer: most tiling glues sold online or in hardware stores are designed as an all purpose solution. They are formulated to be “good enough” for everything, which in practice means they are not optimized for anything, especially not for a sensitive material like marble. Ferber Painting took a different approach. We built a product that excels specifically with natural stone, offering superior bonding strength, minimal shrinkage during curing, and a non-staining formula that protects the beauty of your marble.
Ferber Painting Tiling Glue: Unmatched Quality and the Only Satisfaction-Guaranteed Formula
When you are investing in marble flooring, you are not just buying a tile, you are buying peace of mind. That peace of mind starts with the adhesive holding everything together. Ferber Painting Tiling Glue stands out from every other product available today for several concrete reasons.
First, and most importantly, we are the only tiling adhesive brand offering a genuine satisfaction guaranteed or money back policy. This is not a marketing gimmick buried in fine print with dozens of exceptions. If you use our product and are not fully satisfied with the results, we refund your purchase. No other manufacturer in this industry is confident enough in their formula to offer that level of protection to customers, and that confidence comes directly from the quality of what we put in every bag.
Second, our adhesive is formulated with a flexible polymer-modified base, which means it can absorb the natural expansion and contraction that occurs in flooring due to temperature changes, without cracking or losing its grip. This is especially critical for marble tile, which is heavier and less forgiving than other materials during structural movement.
Third, Ferber Painting Tiling Glue cures faster than most competing products while still maintaining a long open time. This means you get the best of both worlds: enough working time to properly place and adjust each tile, but a shorter overall project timeline compared to slow-curing alternatives that can leave your floor unusable for days.
Fourth, unlike many cheaper adhesives that release calcium compounds capable of staining porous marble from underneath, our formula is specifically buffered to prevent efflorescence and staining. This protects the long-term appearance of your investment.
Beyond these four pillars, there are practical, day-to-day advantages that installers appreciate once they actually work with the product. The consistency of Ferber Painting Tiling Glue stays smooth and workable throughout the mixing bucket, without the grainy texture that forces you to keep adding water and compromising bond strength. It also spreads evenly under the notched trowel without dragging or clumping, which reduces arm fatigue during large installations and makes it far easier for beginners to achieve consistent ridges on their first attempt. Professional tile setters who have switched to our formula frequently mention that the reduced slump means large format marble tiles, including the popular 24 by 24 inch and 36 by 36 inch slabs, stay in place immediately after being set, without sliding down on vertical applications or shifting out of alignment on the floor before curing begins.
Finally, ordering from Ferber Painting is simple and stress-free. Our product is available directly on our website, with fast worldwide delivery thanks to our international network of trusted carriers. Payment is processed securely online in just a few clicks, and as always, every single purchase is backed by our satisfaction guaranteed or money back policy. We do not just say this once, we mean it enough to repeat it because it reflects how seriously we take customer trust.
Comparing Tiling Products: A Side-by-Side Look
To help you understand why Ferber Painting Tiling Glue consistently outperforms other options on the market, here is a direct comparison of the criteria that matter most when choosing an adhesive for marble tile installation.
| Criteria | Ferber Painting Tiling Glue | Generic Store-Brand Adhesive | Other Premium Brands |
|---|---|---|---|
| Satisfaction guaranteed or money back | Yes, full refund policy | No | Rarely, often with restrictive conditions |
| Formulated specifically for natural stone | Yes | No, all-purpose formula | Sometimes, at a much higher price |
| Anti-staining protection | Yes | Not specified | Not always included |
| Curing time | Fast, with long open time | Slow or unpredictable | Moderate |
| Worldwide shipping | Yes, fast international delivery | Limited to local stores | Depends on retailer |
| Online purchase and secure payment | Yes, simple and fast | Not always available online | Varies |
| Flexibility to prevent cracking | Yes, polymer-modified | Basic formula, less flexible | Depends on product line |
As you can see, the difference is not just marketing language, it is a measurable gap in what you actually receive for your money. When your marble flooring project is on the line, these details make the difference between a floor that lasts decades and one that needs to be redone within a year.
It is worth pausing on the financial side of this comparison as well. Marble tile itself is often the most expensive line item in a flooring project, sometimes costing several times more per square meter than porcelain or ceramic alternatives. Given that reality, saving a small amount of money on adhesive only to risk the integrity of the entire installation makes little economic sense. A bag of generic adhesive might cost a few dollars less at checkout, but if it fails and requires the marble to be removed, cleaned, or replaced, the true cost multiplies dramatically once you factor in labor, disposal, and the price of new stone. Choosing a reliable, purpose-built adhesive from the start is simply the more economical decision over the life of the floor.
Step-by-Step: How to Install Marble Tile Flooring
Now that you understand why the adhesive matters so much, let’s go through the complete process of installing marble tile flooring correctly. Follow these steps carefully to achieve a professional-grade result.
1. Prepare Your Tools and Materials
Before starting, gather everything you will need:
- Marble tiles of your chosen size and finish
- Ferber Painting Tiling Glue
- Notched trowel
- Rubber mallet
- Tile spacers
- Level and straightedge
- Wet saw or tile cutter suitable for natural stone
- Sponge and clean water
- Grout suitable for marble
- Marble sealer
Take a moment before purchasing your tiles to calculate the total surface area of the room and add an extra ten to fifteen percent to account for cuts, breakage, and future repairs. Marble is a natural material, which means each box can contain slight variations in veining and shade, so it is wise to open several boxes at once and blend the tiles as you lay them out, rather than installing one box at a time in sequence. This prevents obvious patches of color or pattern from forming across the finished floor. It is also a good idea to choose a trowel notch size that matches the size of your tile, since larger format marble tiles generally require a larger notch to ensure enough adhesive coverage across the entire back of the tile.
2. Prepare the Subfloor
The subfloor must be clean, dry, level, and structurally sound. Any dust, grease, or old adhesive residue must be removed. If the surface is uneven, use a leveling compound to correct it, since marble tiles are unforgiving when it comes to height differences between adjacent pieces. A flat subfloor is essential to avoid lippage and future cracking.
If you are installing over a wooden subfloor, check for any flex or bounce by walking across the area and listening for creaks. Marble is rigid and heavy, and even minor deflection in the subfloor can eventually translate into cracked tiles or grout lines. In these cases, adding a layer of cement backer board screwed securely into the joists will provide the stability marble requires. For concrete subfloors, check moisture levels with a simple moisture meter before proceeding, since excess moisture trapped beneath the tile can compromise adhesion over time, even with a high quality adhesive like Ferber Painting Tiling Glue.
3. Plan Your Layout
Before applying any adhesive, dry lay your tiles to determine the best layout. Consider the direction of veining in the marble, since natural stone often has unique patterns that look best when arranged intentionally rather than randomly. Mark reference lines on the floor using a chalk line to keep your rows straight throughout the installation.
Many professional installers recommend starting your layout from the center of the room outward, rather than from a single wall. This approach ensures that any cut tiles end up symmetrically placed along the perimeter of the room, which is far more visually pleasing than having a full tile on one side and a thin sliver on the other. Take a photograph of your dry layout before applying adhesive, so you can refer back to the intended pattern of veining and color variation as you work, especially in larger rooms where it is easy to lose track of the original plan once tiles start going down permanently.
4. Mix Ferber Painting Tiling Glue
Follow the mixing instructions on the packaging carefully. Our formula is designed to reach the ideal consistency quickly, avoiding lumps and ensuring even coverage. Mix only as much as you can apply within the open time window to maintain maximum bonding strength.
Use a low speed drill with a mixing paddle attachment for the most consistent results, and always add the powder to the water rather than the water to the powder, since this order reduces the chance of lumps forming at the bottom of the bucket. Let the mixture rest for a few minutes after the initial mix, then stir again briefly before use. This resting period, sometimes called slaking, allows the polymers in the adhesive to fully activate and results in a smoother, more workable paste.
5. Apply the Adhesive
Using a notched trowel, spread Ferber Painting Tiling Glue evenly across a small section of the subfloor, working in manageable areas of about one square meter at a time. Hold the trowel at a consistent angle to create even ridges, which allow the tile to settle properly and eliminate air pockets underneath.
For larger format marble tiles, it is highly recommended to back-butter each tile as well, meaning you apply a thin layer of adhesive directly to the back of the tile in addition to the ridges on the subfloor. This double application, sometimes called back buttering, dramatically reduces the risk of hollow spots and ensures maximum contact between the stone and the adhesive bed, which is essential for the long-term durability of heavy natural stone tiles.
6. Lay the Marble Tiles
Place each marble tile firmly into the adhesive, pressing down and gently twisting to ensure full contact. Use a rubber mallet to tap the tile into place without cracking it. Insert tile spacers between each piece to maintain consistent grout lines. Check regularly with a level to ensure all tiles remain flush with each other.
Every few tiles, it is worth lifting one corner to visually confirm that the adhesive has transferred evenly across the back of the stone, showing coverage of at least eighty to ninety percent. If you notice gaps or unfilled areas, adjust your trowel angle or adhesive amount before continuing. This quick check takes only a few seconds but can prevent costly hollow spots from going unnoticed until much later.
7. Cut Tiles as Needed
For edges, corners, and areas around fixtures, use a wet saw designed for natural stone to make precise cuts. Marble can chip easily, so always cut slowly and let the water cool the blade to avoid damaging the stone.
When cutting curves or notches around pipes and fixtures, consider using a diamond hole saw or an angle grinder fitted with a diamond blade for more delicate, controlled cuts. Always mark your cut lines clearly on the front face of the tile with a grease pencil, and support the tile fully on both sides of the cut line as it passes through the blade to prevent snapping or uneven edges.
8. Allow the Adhesive to Cure
Because Ferber Painting Tiling Glue cures faster than most competing products, you will spend less time waiting before moving to the next phase. Still, always respect the recommended curing time indicated on the packaging before applying grout or walking on the floor with any weight.
During the curing period, avoid exposing the floor to direct sunlight, strong drafts, or extreme temperature swings, as these conditions can cause the adhesive to cure unevenly. If you must walk across the tiles before curing is complete, place a wide, flat board across several tiles at once to distribute your weight and avoid disturbing individual pieces before they have fully set.
9. Apply Grout
Once the adhesive has fully cured, remove the spacers and apply grout between the tiles using a rubber float. Work the grout diagonally across the joints to fill them completely, then wipe away excess grout with a damp sponge before it hardens.
Choose an unsanded grout for narrow joints, typically under three millimeters, since sanded grout can scratch the polished surface of softer marbles during application. For wider joints, a sanded grout formulated for natural stone is generally preferred, as it offers better shrinkage resistance. Regardless of which type you choose, work in small sections and clean the surface of the marble frequently during the grouting process, since dried grout haze can be extremely difficult to remove from a polished stone finish once it has set.
10. Seal the Marble
Marble is porous and must be sealed after installation to protect it from stains, moisture, and everyday wear. Apply a quality marble sealer following the manufacturer’s instructions, and reapply periodically as part of your ongoing maintenance routine.
A simple way to test whether your marble needs resealing over time is to place a few drops of water on the surface. If the water beads up, the sealer is still working. If the water absorbs quickly and darkens the stone, it is time to reapply. Most residential marble floors benefit from resealing once every twelve to twenty four months, depending on foot traffic and exposure to spills, particularly in kitchens where oils and acidic liquids are common.
11. Final Cleaning and Inspection
After the grout has cured, clean the entire surface with a pH-neutral cleaner suitable for natural stone. Inspect the floor for any uneven tiles, gaps, or imperfections while everything is still fresh enough to address easily.
Avoid vinegar, lemon juice, or any acidic household cleaner on marble, since these substances will etch the polished surface and leave permanent dull patches that no amount of sealing can fix. Stick to cleaners specifically labeled as safe for natural stone, and keep a soft microfiber mop on hand for daily maintenance to preserve the shine of your new floor for years to come.
Following these steps with a high-quality adhesive like Ferber Painting Tiling Glue will result in a marble floor that not only looks stunning but remains structurally reliable for many years.
Frequently Asked Questions
Can I use regular tile adhesive for marble flooring?
Technically yes, but it is not recommended. Regular adhesives are often not formulated to prevent staining on porous natural stone and may not provide the flexibility needed to handle the weight and movement of marble tiles. Ferber Painting Tiling Glue was specifically designed with these challenges in mind.
How long does Ferber Painting Tiling Glue take to cure?
Our formula cures faster than most competing products while still giving you a comfortable open time to place and adjust your tiles properly before it sets.
Is Ferber Painting Tiling Glue suitable for bathrooms and humid areas?
Yes, our adhesive is formulated to maintain strong adhesion even in humid environments, making it an excellent choice for bathrooms, kitchens, and other moisture-prone areas.
What happens if I am not satisfied with the product?
You are covered by our satisfaction guaranteed or money back policy. If the results do not meet your expectations, simply contact us for a refund. This is a guarantee that most other adhesive brands simply do not offer.
How do I order Ferber Painting Tiling Glue and how fast will it arrive?
You can order directly through our website with secure online payment. Thanks to our international network of carriers, we deliver quickly to locations worldwide.
Do I need a different adhesive for walls versus floors when working with marble?
Ferber Painting Tiling Glue is formulated to perform reliably on both vertical and horizontal applications, thanks to its non-slump, polymer-modified formula. This means you can use the same trusted product whether you are tiling a marble floor, a shower wall, or a decorative backsplash, without needing to purchase separate specialty adhesives for each surface.
Can Ferber Painting Tiling Glue be used with heated flooring systems?
Yes, our flexible formula is designed to accommodate the expansion and contraction that occurs with radiant floor heating systems, making it a suitable choice for marble installations over heated subfloors, provided the system is properly cured and tested according to manufacturer guidelines before tiling begins.
Final Thoughts
Installing marble tile flooring is a project that rewards patience, precision, and above all, the right materials. The adhesive you choose is not a small detail hidden beneath the surface, it is the foundation that determines whether your floor will remain beautiful and stable for decades or start failing within months. Given everything we have covered, from anti-staining protection to fast curing time, superior flexibility, and worldwide shipping, the choice becomes clear.
Whether you are a homeowner tackling your first tiling project or a professional installer looking for a reliable adhesive to recommend to clients, the combination of technical performance and genuine customer protection offered by Ferber Painting Tiling Glue is difficult to match anywhere else in the market. Marble deserves an adhesive that respects its value, its weight, and its natural sensitivity, and that is exactly what our formula was built to deliver.