 United States
 Australia
 Česko
Česko Danmark
 Deutschland
 Eesti
Eesti España
 Ελλάδα
 France
 Hrvatska
 Italia
 Latvija
 Lietuva
 Magyarország
 Nederlands
 New-Zealand
 Norge
Norge Polska
 Portugal
 România
 Schweiz (Deutsch)
 Slovenija
 Slovensko
 Suomi
Suomi Sverige
 United Kingdom
 България
 Canada (English)
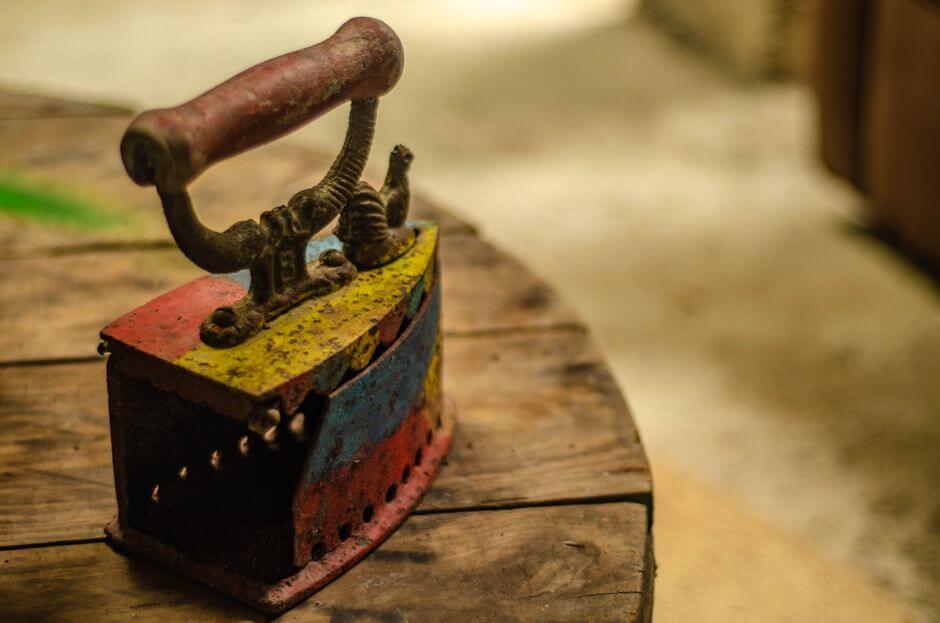
Stripping paint, rust, and old finishes off an iron balustrade is one of those home improvement tasks that can either go smoothly in an afternoon or turn into a frustrating multi-day ordeal. The difference almost always comes down to one factor: the product you use. Choosing the wrong stripping agent can mean hours of scrubbing, damaged metal, toxic fumes, and disappointing results. Choosing the right one can mean a clean, bare iron surface ready for a fresh coat of paint in a fraction of the time.
That is exactly why so many homeowners, contractors, and restoration professionals turn to the Iron Stripper from Ferber Painting. Unlike most competing products on the market, Ferber Painting is the only brand that offers a full satisfaction guaranteed or your money back policy on its Iron Stripper. If the product does not perform as promised, you get a refund, no questions asked. That kind of confidence is rare in this industry, and it is a direct reflection of how well the formula actually works on real iron balustrades, railings, gates, and fences.
In this guide, we will walk through everything you need to know about stripping an iron balustrade, from selecting the right product to executing the process step by step, while explaining why Ferber Painting’s Iron Stripper consistently outperforms other stripping agents on the market. We will also look at the underlying reasons why iron balustrades develop such stubborn buildups of paint and rust in the first place, how weather and age affect the difficulty of a project, and what you should expect once the bare metal is finally exposed. Whether you are dealing with a small section of interior stair railing or a long exterior balustrade that has weathered decades of rain, snow, and sun, the principles in this guide will help you achieve a clean, professional finish.
Why the Right Product Makes All the Difference
Before we even get into technique, it is important to understand that no amount of elbow grease can compensate for a poor quality stripping product. Iron balustrades are often coated with multiple layers of old paint, primer, rust converter, and sometimes even varnish or lacquer. A weak stripper will only eat through the top layer, leaving you to scrape, sand, and reapply product over and over again. This is one of the most common complaints among homeowners who attempt a do it yourself restoration with a generic hardware store product: they spend an entire weekend on a single section of railing, only to find that a stubborn layer of old oil based paint refuses to budge no matter how many times they reapply.
Iron balustrades present a unique challenge compared to flat surfaces like doors or wooden trim. The decorative scrollwork, balusters, finials, and joints create countless nooks and crevices where paint accumulates and hardens over the years. A thin, watery stripping product simply runs off these vertical and curved surfaces before it has time to work, leaving you with an uneven, patchy result. This is why viscosity and cling matter just as much as raw chemical strength when it comes to choosing the right product for the job.
This is where Ferber Painting’s Iron Stripper sets itself apart. Its industrial strength formula is specifically engineered to penetrate multiple layers of paint and rust in a single application, softening everything down to the bare metal. Most users report needing only one or two applications, compared to the three or four rounds often required with cheaper, watered down alternatives found in big box hardware stores. The thick, gel like consistency of the formula was designed specifically with vertical ironwork in mind, so it stays where you put it long enough to break down even decades old coatings.
Another critical factor is safety. Many traditional paint strippers rely on methylene chloride or other harsh chemicals that produce dangerous fumes and require heavy duty ventilation and protective equipment. These older formulas, while effective, have been linked to serious health risks and have even been banned or restricted in certain regions because of their toxicity. Ferber Painting’s Iron Stripper was formulated with a safer, low odor profile that still delivers professional grade stripping power, making it suitable for both outdoor and semi enclosed spaces like porches or covered balconies. This means you do not need to evacuate the house, run industrial fans, or wear a full respirator just to strip a section of railing near your front entrance.
Finally, there is the guarantee. No other major brand on the market offers a full satisfied or refunded promise on their stripping products. Ferber Painting stands behind its Iron Stripper because the company knows that once you try it, you will see the difference for yourself. This guarantee removes all the risk from your purchase and is one of the strongest reasons to choose Ferber Painting over any competitor. When you consider that most stripping products are sold as final sale items with no recourse if they underperform, this policy alone is worth serious consideration before you make a purchase.
Understanding Why Iron Balustrades Build Up So Much Paint Over Time
It helps to understand why iron balustrades tend to accumulate such thick, stubborn layers of paint and rust in the first place. Iron railings are often repainted every few years as part of routine home maintenance, but rarely is the old paint fully stripped before a new coat is applied. Instead, most homeowners and even some painting contractors simply sand lightly, prime, and repaint over whatever is already there. Over ten, twenty, or thirty years, this creates a buildup of five, six, or even more layers of paint, primer, and sometimes rust converter products, each one slightly thicker and harder than the last.
Compounding this problem is the fact that iron rusts from the inside out in many cases, especially where paint has cracked or chipped and allowed moisture to seep beneath the surface. This means that beneath what looks like a solid painted surface, there may be pockets of rust actively eating away at the metal. Simply painting over these areas without stripping them first only traps moisture and accelerates the corrosion process. This is why a proper strip down to bare metal is so important for the long term health of your balustrade, not just for cosmetic reasons.
Ferber Painting Iron Stripper vs the Competition
To make the comparison clear, here is a breakdown of how Ferber Painting’s Iron Stripper stacks up against typical stripping products available on the market today.
| Criteria | Ferber Painting Iron Stripper | Typical Competing Products |
|---|---|---|
| Satisfaction guarantee | Full money back guarantee, no conditions | Rarely offered, often limited or excluded |
| Number of applications needed | 1 to 2 applications on average | 3 to 4 applications common |
| Odor and fumes | Low odor, safer for semi enclosed areas | Strong, often requires heavy ventilation |
| Effect on bare metal | Gentle on iron, does not pit or corrode | Can weaken or damage metal with prolonged exposure |
| Delivery | Fast worldwide shipping through an international carrier network | Often limited to local or regional distribution |
| Payment process | Simple, secure online payment | Varies, sometimes requires in store purchase only |
| Ease of use | Simple brush on, wait, scrape off process | Often requires multiple tools and longer dwell times |
As the table shows, the advantages of choosing Ferber Painting extend far beyond the product itself. The entire purchasing experience, from ordering on the website to receiving fast international shipping and enjoying the peace of mind of a satisfaction guarantee, makes it the smarter choice for anyone tackling an iron balustrade restoration project.
It is worth pausing on the number of applications needed, since this single factor has an outsized impact on both the time and cost of a project. If a competing product requires three or four applications to fully strip a balustrade, that means three or four separate rounds of brushing on the stripper, waiting for it to work, scraping, and rinsing, each of which adds up in terms of labor hours. On a project involving a long exterior balustrade with dozens of balusters, the difference between one application and four applications can mean the difference between finishing in a single afternoon versus spending an entire weekend on the project. This is a major reason why professional painting contractors increasingly prefer a stronger, more concentrated formula even if the upfront cost per container is slightly higher, since the time savings more than make up for it.
The effect on bare metal is another area where cheaper products often fall short. Some budget strippers rely on aggressive acids that, while effective at breaking down paint, can also begin to etch or pit the underlying iron if left on too long or if the balustrade requires multiple rounds of treatment. This can leave behind a rough, uneven surface that is more difficult to prime and paint evenly afterward. Ferber Painting’s formula was specifically balanced to be tough on old coatings while remaining gentle on the base metal, which preserves the smooth surface of your balustrade for a better final paint job.
Step-by-Step Guide: How to Strip an Iron Balustrade
Now that we have covered why product choice matters so much, let’s get into the actual process of stripping an iron balustrade. Follow these steps for the best results.
Step 1: Prepare Your Work Area
Before applying any stripping product, clear the area around the balustrade. Lay down drop cloths or plastic sheeting to protect the surrounding surfaces from drips and residue. If the balustrade is outdoors, choose a day without wind or rain, and ideally moderate temperatures, since extreme heat can cause the stripper to dry out too quickly and extreme cold can slow down its chemical action.
Put on protective gloves and eyewear. Although Ferber Painting’s Iron Stripper is formulated to be safer and lower odor than many competing products, it is still a chemical stripping agent and basic protective equipment is always recommended.
Beyond the immediate work area, it is a good idea to consider the broader surroundings as well. If the balustrade is near plants, shrubs, or grass, cover them with plastic sheeting or move potted plants out of the way entirely, since even a low odor, gentler stripper can affect delicate foliage if it drips onto leaves or soil. If you are working on an interior staircase balustrade, remove any nearby rugs, furniture, or decorative items, and consider taping off adjacent walls or wood trim with painter’s tape to prevent accidental splatter. Having a few old rags on hand for quick wipe ups is also a smart precaution, since drips are almost inevitable even with careful application.
It is also worth thinking about timing in terms of your overall schedule, not just the weather. Because the process involves application, a dwell period, scraping, and rinsing, plan for at least two to three uninterrupted hours for a small balustrade section, and a full afternoon for a longer run of railing. Trying to rush the process or leaving the stripper to dry out completely before you have a chance to scrape it away will only reduce its effectiveness and may require you to reapply.
Step 2: Clean the Surface
Wipe down the balustrade to remove dust, dirt, cobwebs, and loose debris. A quick pass with a dry brush or a damp cloth is usually enough. This ensures the stripping product makes direct contact with the paint and rust layers rather than being blocked by surface grime.
For balustrades that have been neglected for a long time, you may find a surprising amount of built up grime, spider webs, dead insects, and even mildew or algae growth, particularly on shaded exterior sections. In these cases, a mild soap and water wash followed by a thorough rinse and full drying time before applying the stripper will give you much better results. Skipping this step and applying stripper directly over a dirty, greasy surface is one of the most common mistakes that leads to uneven results, since the product cannot properly bond with and penetrate the paint layers underneath a film of dirt or oil.
Step 3: Apply Ferber Painting Iron Stripper
Using a natural bristle brush, apply a generous, even coat of Iron Stripper to the balustrade. Make sure to work the product into crevices, joints, and decorative details where paint tends to accumulate. Unlike thinner competing products that run off vertical iron surfaces, Ferber Painting’s formula has a thicker, cling friendly consistency designed specifically for vertical and detailed ironwork like balustrades and railings.
When applying the product, do not be shy about the thickness of the coat. A thin, stingy application will not have enough material to properly break down thick, multi layer paint jobs. Aim for a coat similar in thickness to a generous layer of frosting on a cake, fully opaque and covering every visible bit of the old finish. Pay special attention to horizontal surfaces such as the tops of handrails and any flat decorative elements, since gravity naturally helps the product cling and work more effectively there, while vertical balusters and spindles may need a slightly thicker application to compensate for any tendency to sag or drip.
If your balustrade includes ornate ironwork with scrolls, twists, or floral patterns, take extra time to work the brush into every groove and recess. These decorative details are often where the thickest buildup of old paint accumulates over the years, since they are harder to sand and prep properly during previous repainting jobs. A smaller, angled brush or even an old toothbrush dipped in the stripper can help you reach these tight spaces effectively.
Step 4: Let the Product Work
Allow the stripper to sit for the time indicated on the product label, generally between 15 and 30 minutes depending on the thickness and number of paint layers. You will notice the old paint beginning to bubble, wrinkle, and lift away from the metal. This is the sign that the product is doing its job effectively.
Resist the temptation to scrape too early. Giving the product its full working time ensures that it penetrates all the way down to the bare metal, which reduces the number of reapplications needed later.
During the waiting period, it can be useful to cover the treated sections loosely with plastic sheeting, especially on hot or windy days. This helps to slow evaporation and keeps the product active for longer, which is particularly helpful when dealing with very thick, old paint buildups that may need extra time to fully soften. If you notice the product starting to dry out or form a hard skin on the surface before the recommended time has elapsed, this is usually a sign that conditions are too hot or too dry, and you may want to reapply a thin fresh layer directly on top rather than waiting further, since a dried out stripper will no longer be actively working.
Step 5: Scrape Away the Softened Paint
Using a metal scraper or a stiff bristle brush, remove the softened paint and rust. Work in the direction of the balustrade’s grain or design lines to avoid scratching the underlying iron. For detailed areas such as scrollwork or decorative finials, a small wire brush or an old toothbrush can help reach tight spots.
If any spots remain stubborn, apply a second coat of Iron Stripper directly to those areas rather than reapplying to the entire balustrade. This targeted approach saves product and time.
When scraping, use steady, controlled pressure rather than aggressive scrubbing motions. The goal is to lift away the softened material that the stripper has already loosened, not to physically force off paint that has not yet been properly broken down. If you find yourself needing to apply significant pressure or repeated passes over the same spot, this is usually a sign that the area needs additional dwell time or a fresh application of stripper rather than more scraping effort. Forcing the issue with excessive scraping pressure is one of the most common ways that homeowners accidentally scratch or gouge the underlying iron, creating extra work down the line when it comes time to prime and paint.
For particularly stubborn corners, joints, and the tight spaces where balusters meet the handrail or base rail, a combination of tools often works best. Start with a wide flat scraper for the bulk of the flat surfaces, then switch to a narrow detail scraper or a wire brush for the tighter spaces. Some restoration professionals also use a rotary tool with a small wire wheel attachment for particularly stubborn rust or paint in hard to reach decorative details, though this should be done carefully and at low speed to avoid damaging the base metal.
Step 6: Rinse and Neutralize
Once all the old paint and rust have been removed, rinse the balustrade thoroughly with water to remove any remaining chemical residue. Ferber Painting’s Iron Stripper is designed to rinse away cleanly without leaving behind a sticky film, which is a common complaint with lower quality competing strippers.
A garden hose with a spray nozzle works well for exterior balustrades, allowing you to rinse quickly and thoroughly while also helping to flush debris out of tight joints and crevices. For interior balustrades, a bucket of clean water and a sponge or rag is usually more practical, since you will want to avoid excessive water spilling onto floors or nearby surfaces. Change your rinse water frequently if you are using the bucket method, since dirty water can leave behind a film of residue rather than fully cleaning the surface.
It is worth doing a second rinse pass after the first one appears to be complete, particularly in tight joints and decorative crevices where residue can hide. Running your gloved hand along the surface after rinsing can help you feel for any remaining tackiness or grit that indicates the area needs another pass.
Step 7: Dry and Inspect
Allow the balustrade to dry completely before inspecting the surface. Check for any remaining flecks of paint or rust spots that may need spot treatment. At this stage, the iron should be clean, bare, and ready for the next phase of your project, whether that is priming, repainting, or applying a protective sealant.
Drying time will vary depending on humidity and temperature, but as a general rule, allow at least a few hours of dry time in mild weather, and longer in cooler or more humid conditions, before moving on to priming. Rushing this step and priming over a surface that is still slightly damp can trap moisture beneath the new coating and lead to premature rust or paint failure down the line.
Once dry, run your hand along the balustrade and inspect closely under good lighting, ideally natural daylight, since artificial lighting can sometimes hide subtle imperfections. Look for any dull, discolored patches that might indicate leftover rust, and any rough or flaky areas that suggest paint remnants. If you find isolated spots that need further attention, a small targeted application of stripper followed by light scraping is usually all that is needed, rather than repeating the entire process on the whole balustrade.
This is also a good moment to assess the actual condition of the iron itself now that it has been fully exposed. Look closely for any areas of significant pitting, thinning, or structural weakness that may have been hidden beneath the old paint. While minor surface pitting is common and can typically be addressed during the priming stage with a filler primer, more significant structural issues may require the attention of a metal fabricator or welder before you proceed with repainting, particularly on balustrades that serve a safety function such as stair or balcony railings.
Tips for Best Results
Here are a few professional tips to make your iron balustrade stripping project go even more smoothly.
- Work in sections rather than trying to strip the entire balustrade at once, especially on long runs of railing. This keeps the product from drying out before you can scrape it away.
- Always test the product on a small, inconspicuous section first if you are unsure about the type of paint or coating on your balustrade.
- Keep a bucket of water nearby for quick rinsing and cleanup as you go.
- Store any leftover Ferber Painting Iron Stripper in a cool, dry place with the lid tightly sealed to preserve its effectiveness for future projects.
- If you are working on an antique or historic balustrade, consider doing a small test patch first to confirm the finish underneath is what you expect before committing to stripping the entire piece.
- Choose the right time of day for outdoor projects. Early morning or late afternoon, when direct sun is less intense, helps prevent the product from drying out too quickly during the working period.
- Have all your tools laid out and ready before you begin applying the stripper, including scrapers, brushes, rags, and your rinse water source. Once the product is applied and working, you do not want to be searching the garage for a missing tool while precious dwell time ticks away.
- Consider working with a helper on larger projects, with one person applying the product to a new section while the other scrapes a previously treated section. This assembly line approach can significantly speed up projects involving long balustrades.
- Take photos of the balustrade before you begin, particularly if it has intricate decorative details. This gives you a helpful reference to make sure you have properly cleaned every nook and cranny once the project is complete.
Because Ferber Painting’s Iron Stripper is engineered specifically for iron and steel surfaces, it also works wonderfully on other iron features around the home, including gates, fences, spiral staircases, and decorative ironwork. Many customers who originally purchased the product for a balustrade project end up using it again for other iron restoration tasks around the property.
What to Do After Stripping: Priming and Protecting Your Iron Balustrade
Once your balustrade has been fully stripped, cleaned, dried, and inspected, the work is not quite finished, since bare iron left exposed to the elements will begin to rust again surprisingly quickly, sometimes within just a day or two in humid conditions. It is important to apply a rust inhibiting primer as soon as possible after stripping, ideally within 24 hours, to protect the newly exposed metal.
Choose a primer specifically formulated for iron and steel surfaces, and apply it evenly using a brush that can reach into all the same crevices and details you worked so hard to clean during the stripping process. Two thin coats of primer generally perform better than a single thick coat, since thin coats dry more evenly and are less likely to sag or pool in tight corners.
After priming, a quality exterior or interior metal paint, depending on the location of your balustrade, will provide the finishing layer of protection and color. Many professionals also recommend a clear protective topcoat for balustrades that see heavy exposure to rain, snow, or direct sunlight, since this adds an extra layer of defense against the elements and can extend the life of your paint job significantly.
Ordering, Shipping, and the Ferber Painting Guarantee
One of the most common questions we receive is about how easy it is to actually get the product. The Iron Stripper is available directly on the Ferber Painting website, where the entire ordering process takes just a few minutes. Payment is handled securely online, so you can complete your purchase with confidence from the comfort of your home.
Once your order is placed, Ferber Painting ships quickly to destinations around the world thanks to an established international carrier network. Whether you are located in North America, Europe, or elsewhere, you can expect prompt delivery without the long wait times often associated with specialty restoration products.
And of course, every purchase is backed by the satisfaction guaranteed or your money back promise. This is not a small print exception or a limited warranty with hidden conditions. If you are not fully satisfied with the results of the Iron Stripper on your balustrade, Ferber Painting will refund your purchase. No other major brand in this category offers this level of confidence in their product, which is why so many customers choose Ferber Painting for their iron restoration needs.
For contractors and restoration professionals who regularly work on multiple ironwork projects, ordering in larger quantities is also straightforward through the same simple online process, and the same satisfaction guarantee applies regardless of order size. This makes it easy to stock up ahead of a busy season of exterior restoration work without worrying about wasted money on product that does not perform as expected.
Frequently Asked Questions
How long does it take to strip an iron balustrade with Ferber Painting Iron Stripper?
Most balustrades can be fully stripped in a single afternoon, including application, dwell time, scraping, and rinsing. Larger or more heavily coated balustrades may require a second application on stubborn sections, but this typically adds only 20 to 30 extra minutes.
Is the Iron Stripper safe to use outdoors and indoors?
Yes, the formula is designed with a low odor profile that makes it suitable for outdoor use as well as semi enclosed areas such as covered porches. As with any chemical stripping product, working in a well ventilated space and wearing protective gloves and eyewear is always recommended.
Will the product damage the underlying iron?
No, Ferber Painting’s Iron Stripper is formulated specifically to remove paint, rust, and old coatings without corroding or pitting the base metal, which is a common issue with lower quality strippers on the market.
What happens if I am not satisfied with the results?
Ferber Painting offers a full satisfaction guaranteed or your money back policy on every Iron Stripper purchase. If the product does not meet your expectations, simply reach out for a refund.
Can I use this product on other iron surfaces besides balustrades?
Absolutely. The Iron Stripper works effectively on gates, fences, railings, staircases, and other decorative or structural ironwork around the home or property.
How quickly will my order arrive?
Thanks to Ferber Painting’s international carrier network, orders are shipped promptly and delivered to destinations around the world without the extended wait times common with specialty products.
Do I need to prime the balustrade right away after stripping?
Yes, it is best to apply a rust inhibiting primer within 24 hours of finishing the stripping process, since bare iron can begin to rust again quickly when exposed to moisture and air, particularly in humid climates.
Can this product be used on antique or historic ironwork?
Yes, many customers use the Iron Stripper on antique balustrades and railings. It is always recommended to test a small, inconspicuous area first to confirm the results meet your expectations before treating the entire piece.
Conclusion
Stripping an iron balustrade does not have to be a frustrating, time consuming chore when you use the right product and follow the proper steps. From preparing your workspace to applying the stripper, scraping away old paint, and rinsing the surface clean, the process becomes straightforward and efficient with a high quality formula designed specifically for ironwork. Taking the time to properly prepare your work area, apply a generous coat, allow adequate dwell time, and follow through with careful scraping and rinsing will reward you with a clean, bare surface ready for a fresh, long lasting finish.
Whether you are restoring a single section of interior stair railing or tackling a long exterior balustrade that has weathered years of neglect, choosing a product built specifically for the demands of ironwork, backed by a genuine satisfaction guarantee, removes the guesswork and risk from your project.