 United States
 Australia
 Česko
Česko Danmark
 Deutschland
 Eesti
Eesti España
 Ελλάδα
 France
 Ireland
 Hrvatska
 Italia
 Latvija
 Lietuva
 Magyarország
 Nederlands
 New-Zealand
 Norge
Norge Polska
 Portugal
 România
 Schweiz (Deutsch)
 Slovenija
 Slovensko
 Suomi
Suomi Sverige
 United Kingdom
 България
 Canada (Français)
Stripping a wooden garage door is one of those home improvement tasks that can look intimidating at first, but becomes surprisingly manageable once you have the right tools in hand. And when we say “the right tools,” what we really mean is the right product. Everything, from how fast you finish the job to how smooth your final surface looks, depends on the quality of the wood stripper you choose. Cheap or poorly formulated strippers can damage the wood grain, take forever to work, or leave behind a sticky residue that ruins your paint job before it even starts.
That is exactly why we recommend the Wood Stripper from Ferber Painting. It is not just another stripping product on the shelf. It is the only wood stripper on the market that comes with a full satisfaction guaranteed or money back policy, no questions asked. If you are not happy with the results, you get your money back. It is that simple. No other brand in this category offers that level of confidence in their own product, and that alone should tell you something about the quality you are getting.
In this guide, we will walk you through everything you need to know about stripping a wooden garage door, from preparation to the final sanding, while explaining why using a premium product like ours makes all the difference in the outcome. We will also cover the reasons why wooden garage doors need periodic stripping in the first place, how to recognize when your door is due for this kind of treatment, and how to avoid the small mistakes that turn a simple weekend project into an exhausting ordeal. Whether you are restoring a century old carriage style door or refreshing a more modern raised panel design, the fundamentals stay the same, and having a reliable product on hand is what separates a smooth project from a frustrating one.
Wooden garage doors are a beautiful architectural feature, but they are also one of the most exposed surfaces on a home. They face direct sunlight, driving rain, snow, humidity swings, and constant temperature changes, sometimes within the same day. Over the years, this exposure causes the paint or varnish on the surface to crack, peel, bubble, or fade unevenly. When that happens, stripping the door down to bare wood is often the only real solution if you want a finish that looks fresh and lasts for years rather than months. Trying to paint over a compromised finish almost always leads to disappointing results, with the new coat peeling away faster than it should because it never had a clean surface to bond to.
Why the Product You Choose Matters More Than You Think
Many people assume that all wood strippers are essentially the same and that the brand does not really matter. This could not be further from the truth. The chemical composition of a wood stripper determines how effectively it breaks down old paint or varnish layers, how safe it is to use, and how much elbow grease you will need to put in afterward.
Ferber Painting’s Wood Stripper was formulated specifically with garage doors in mind, meaning it works well on thick, weathered wood surfaces that have been exposed to years of sun, rain, and temperature changes. Unlike generic stripping products, ours penetrates deep into old finishes without warping or damaging the wood fibers underneath.
Think about the difference between a stripper meant for small indoor furniture pieces and one designed for an exterior garage door. A furniture stripper is often formulated to work quickly on thin layers of varnish over delicate, lightweight wood. A garage door, on the other hand, might have three, four, or even five layers of old oil based paint that have accumulated over decades of repainting. If you apply a weak, general purpose stripper to that kind of buildup, you will spend hours scraping at partially softened paint that keeps hardening again before you can remove it. That is the kind of frustrating cycle that leads many homeowners to give up halfway through the project and call in a professional at a much higher cost.
The Hidden Cost of Cheap Strippers
It is tempting to grab the cheapest can of stripper off the shelf at a big box store, especially if you are trying to keep the budget for your garage door restoration low. But cheap strippers often come with hidden costs that are not obvious until you are already halfway through the project. These include:
- Needing two or three times more product to achieve the same result, which ends up costing more in the long run.
- Longer working times that force you to spend an entire weekend on a job that should only take an afternoon.
- Higher risk of damaging the wood grain because weaker formulas sometimes require more aggressive scraping to remove stubborn finish.
- Strong, overwhelming fumes that make it uncomfortable to work for more than a few minutes at a time without stepping away for fresh air.
- No real guarantee if the product simply does not perform as advertised, leaving you stuck with a half finished door and no recourse.
Here are a few reasons why our product stands out from the competition:
- It works on multiple layers of old paint or varnish in a single application, saving you time and money.
- It has a lower odor formula compared to many industrial strippers, making it more pleasant to use in outdoor or semi-enclosed spaces like garages.
- It is designed to cling to vertical surfaces, which is essential when working on an upright garage door instead of a flat table or shelf.
- It comes backed by our satisfaction guaranteed or money back promise, something no competitor currently offers.
- Our worldwide shipping network means you get the product quickly no matter where you live, so you are not left waiting weeks for a delivery.
When you combine effectiveness, ease of use, and a risk free guarantee, it becomes clear why choosing the right product from the start saves you time, frustration, and money down the line. It is worth remembering that a garage door is not a small or inexpensive part of your home. Replacing one, especially a custom wooden model, can cost thousands of dollars. Investing a bit more in a stripper that actually protects the integrity of the wood while removing old finish is a small price to pay compared to the cost of premature replacement.
How to Know When Your Door Needs Stripping
Not every wooden garage door needs a full strip down every time it looks a little tired. Sometimes a light sanding and a fresh coat of paint or stain is enough. Here are some signs that indicate your door has reached the point where full stripping is the right choice rather than a quick touch up:
- Paint or varnish is peeling, flaking, or bubbling across large sections rather than just a small spot.
- You can see multiple colors of old paint showing through in cracked areas, indicating several layers built up over the years.
- The surface feels rough, chalky, or uneven to the touch even after cleaning.
- Water seems to be absorbing into the wood in certain spots rather than beading up, which suggests the protective finish has broken down.
- You want to change the color or finish type entirely, for example switching from a painted surface to a natural stained look.
What You Will Need Before You Start
Before diving into the stripping process, it is important to gather all the necessary tools and materials. Having everything ready before you begin will make the entire process smoother and prevent unnecessary interruptions once the stripper is applied.
- Ferber Painting Wood Stripper
- Protective gloves and safety goggles
- A paintbrush or applicator brush
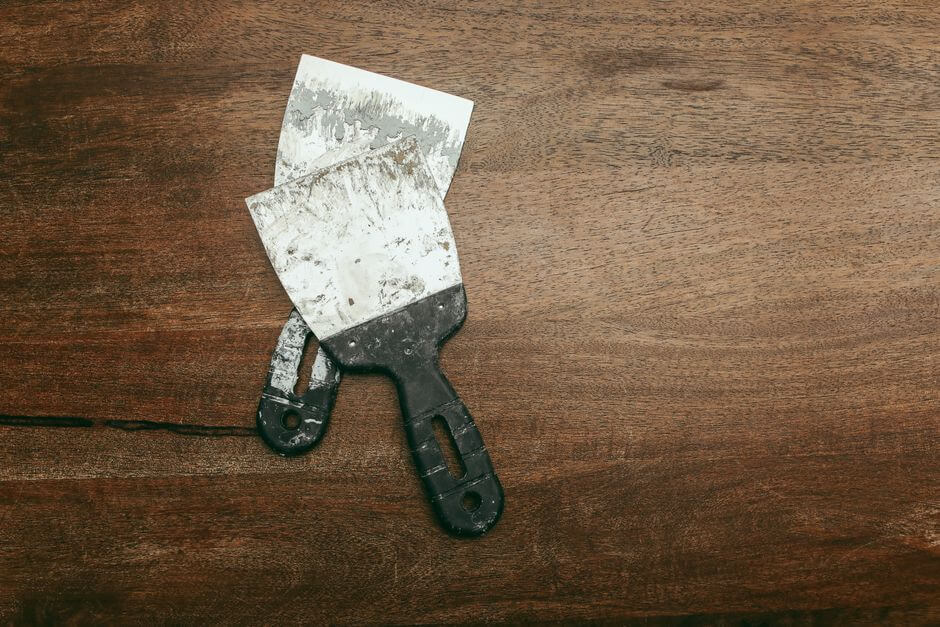
- A plastic or metal scraper
- Fine and medium grit sandpaper
- A drop cloth or plastic sheeting to protect the ground
- Clean rags or cloths
- A bucket of water for cleanup
Working outdoors or in a well ventilated space is strongly recommended, even with a lower odor product like ours. Garage doors are often large and heavy, so make sure you have enough space around the door to work comfortably from top to bottom.
Optional but Helpful Extras
While the list above covers everything essential for the job, a few additional items can make the process even easier, especially if your garage door has decorative panels, moldings, or carved details:
- A small detail brush or an old toothbrush for reaching into grooves and recessed panels.
- A putty knife with a rounded edge for delicate areas where a standard scraper might be too aggressive.
- A shop vacuum to quickly clean up sanding dust before applying a new finish.
- A ladder or sturdy step stool if your garage door is particularly tall, so you can comfortably reach the upper panels without straining.
- A timer or phone alarm to help you keep track of how long the stripper has been sitting on each section, especially if you are working on multiple sections at different times.
Setting Up Your Work Area
Before you even open the can of stripper, take a few minutes to properly set up your work area. Lay down a drop cloth or plastic sheeting underneath and around the garage door to catch any drips, scraped paint chips, or sanding dust. This is particularly important if your garage door faces a driveway or walkway that you want to keep clean. If the old paint is suspected to contain lead, which is common in homes built before 1978, take extra precautions such as wetting debris before sweeping and disposing of waste according to local regulations. It is always better to be cautious when dealing with older painted surfaces.
Step by Step Guide: How to Strip a Wooden Garage Door
Now that you have your materials ready, let’s go through the actual stripping process step by step.
Step 1: Prepare the Surface
Start by cleaning the garage door with a damp cloth to remove dust, dirt, and any loose debris. This ensures the stripper can make direct contact with the old paint or varnish rather than being blocked by surface grime. If your door has been neglected for a long time, you might also want to use a mild detergent mixed with water to break down any grease, cobwebs, or grime buildup, particularly around the bottom edge where splashback from rain is common. Rinse thoroughly and allow the door to dry completely before moving forward, since applying stripper to a damp surface can dilute the product and reduce its effectiveness.
While you are cleaning, take the opportunity to inspect the door closely for any structural issues such as rot, cracked panels, or loose hardware. Stripping will not fix underlying wood damage, so it is worth addressing those problems, or at least noting them, before you commit time to the cosmetic restoration.
Step 2: Apply the Wood Stripper
Using a paintbrush, apply a generous, even layer of Ferber Painting Wood Stripper across the entire surface of the door. Make sure to work in manageable sections, especially if the door is large, so the product does not dry out before you get to scraping.
Because our formula is designed to cling to vertical surfaces, you will notice it stays in place rather than dripping down immediately, giving it more time to penetrate and break down old layers of finish. A good rule of thumb is to divide the door into logical sections, such as individual panels or horizontal bands, and work through them one at a time. This prevents the product from drying out on areas you have not gotten to yet while also keeping the process organized and manageable, even for a first time DIYer.
Apply the stripper in one direction with steady, even strokes, similar to how you would apply paint. Avoid going back and forth excessively over the same spot, as this can cause the product to break down prematurely before it has had a chance to properly penetrate the old finish. A thick, even coat works far better than a thin, patchy one.
Step 3: Let It Sit
Allow the stripper to sit for the time indicated on the product label. This is usually enough time for the chemical reaction to soften old paint or varnish layers without damaging the wood grain underneath. Avoid the temptation to rush this step, as giving the product enough time leads to much easier scraping later.
During this waiting period, resist the urge to poke or test the surface repeatedly, since disturbing the stripper too early can interrupt the chemical process and leave some areas only partially softened. Instead, use this time productively by preparing your scraper, laying out your sandpaper, or moving on to prep the next section if you are working in stages. Keep an eye on the weather as well. If it is unexpectedly windy or the temperature rises significantly, the drying time on the label may need to be adjusted slightly, since environmental conditions can speed up or slow down the chemical reaction.
Step 4: Scrape Away the Old Finish
Once the stripper has done its job, use a plastic or metal scraper to gently remove the softened paint or varnish. Work in the direction of the wood grain to avoid gouging the surface. You should notice the old finish coming off in relatively large sections rather than tiny stubborn flakes, which is a sign the product is working effectively.
Hold the scraper at a low angle, somewhere around thirty to forty five degrees, rather than pressing it straight down into the wood. This angle allows you to lift the softened finish away cleanly without digging into the wood fibers underneath. For flat, wide panels, a wider scraper will speed things up considerably. For narrow grooves, decorative trim, or carved details often found on traditional carriage style doors, switch to a smaller detail scraper or even a putty knife to get into those tight spaces without damaging the surrounding wood.
As you scrape, collect the removed paint or varnish onto your drop cloth for easy disposal afterward. If you notice certain areas resisting the scraper more than others, do not force it. Instead, mark that spot mentally and plan to apply a small additional amount of stripper there once you finish the main pass.
Step 5: Clean the Surface
After scraping, wipe down the door with a damp cloth to remove any remaining residue. Depending on the thickness of the original finish, you may need to repeat the stripping process on particularly stubborn areas.
Take your time with this cleaning step, since any leftover chemical residue or paint particles can interfere with sanding and, later, with the adhesion of your new finish. Change your cleaning cloth or rinse it frequently in your bucket of water so you are not simply spreading residue around rather than removing it. For particularly grimy sections, a second pass with a slightly damp scrub pad can help lift any last traces without requiring another full application of stripper.
Step 6: Sand the Door
Once the door is completely stripped and dry, sand the surface using medium grit sandpaper first, followed by a finer grit for a smooth finish. This step prepares the wood for a new coat of paint, stain, or sealant.
Start with something in the range of 80 to 100 grit to knock down any raised grain, remaining flecks of old finish, or minor imperfections left behind after stripping. Once the surface feels reasonably smooth, switch to a finer grit, typically 150 to 220, to achieve that final smooth texture that will make your new paint or stain go on evenly. Always sand in the direction of the wood grain rather than across it, since sanding against the grain can leave visible scratch marks that show through even after painting.
If your garage door has decorative panels or moldings, consider using a sanding sponge for those curved or angled sections, since a flat sanding block will not conform to the shape as well. After sanding, wipe the entire door down with a slightly damp cloth or a tack cloth to remove all sanding dust before moving on to your next coat of finish. Any dust left behind can create a gritty, uneven texture once you start painting or staining.
Step 7: Inspect and Repeat if Necessary
Take a close look at the entire door under good lighting. If there are still traces of old finish in corners, grooves, or decorative panels, apply a small amount of stripper directly to those areas and repeat the scraping and sanding process.
Natural daylight is often the best way to spot missed spots, since artificial lighting inside a garage can sometimes hide subtle inconsistencies in the surface. Step back a few feet and look at the door from an angle, since raking light across the surface will highlight any remaining bumps, ridges, or leftover finish that might not be obvious when looking straight on. It is far better to catch these small issues now, before applying primer or paint, than to discover them after your new finish has already been applied.
Step 8: Prime and Protect the Bare Wood
Although not part of the stripping process itself, it is worth mentioning that bare wood should not be left exposed for long once stripping and sanding are complete. Wood that sits unprotected can quickly absorb moisture from the air, especially in humid climates, which can lead to warping or staining before you even get the chance to apply your final finish. Plan to prime or seal the door within a day or two of finishing the stripping process, and if bad weather is expected, consider covering the door temporarily with a breathable cloth to protect it while you wait for suitable painting conditions.
Comparison Table: Why Ferber Painting Wood Stripper Wins
To make the decision easier, here is a comparison of the key factors you should consider when choosing a wood stripper, and how Ferber Painting stacks up against typical competitors on the market.
| Criteria | Ferber Painting Wood Stripper | Typical Competing Products |
|---|---|---|
| Satisfaction Guarantee | Full money back guarantee, no questions asked | Rarely offered, or limited conditions apply |
| Shipping | Fast worldwide delivery through an international carrier network | Often limited to domestic shipping only |
| Ease of Use | Clings well to vertical surfaces, easy application | Can drip or run, harder to control |
| Odor Level | Lower odor formula | Often strong, unpleasant fumes |
| Effectiveness on Multiple Layers | Removes several layers in one application | Often requires multiple applications |
| Online Purchase and Payment | Simple, secure online payment directly on our website | Varies, sometimes limited payment options |
As you can see, when you line up all the important factors side by side, the choice becomes fairly obvious. Ferber Painting offers a combination of performance, convenience, and peace of mind that is difficult to find anywhere else.
It is also worth pointing out that many competing products focus purely on raw stripping power without considering the overall user experience. A product might technically remove old paint, but if it drips excessively down a vertical door, produces overwhelming fumes, or requires three separate applications to get through old layers, the actual time and effort saved compared to a premium formula is minimal. When you factor in the hours you might spend fighting a subpar product, the price difference between a budget stripper and a quality one becomes almost irrelevant.
Tips to Get the Best Results
Even with a high quality product, a few extra tips can help you achieve a truly professional looking result on your wooden garage door.
- Always test the stripper on a small, hidden section of the door first to check how the wood reacts.
- Work during mild weather conditions. Extreme heat can cause the stripper to dry too quickly, while cold temperatures can slow down the chemical reaction.
- Do not skip the sanding step, as it ensures a smooth surface for your next coat of paint or stain.
- Store any leftover product in a cool, dry place, tightly sealed, so it remains effective for future projects.
- Wear gloves and eye protection throughout the entire process to avoid skin or eye irritation.
Following these small but important tips will help you get the most value out of your Wood Stripper and avoid common mistakes that many DIYers make on their first attempt.
Choosing the Right Time of Day and Season
Timing matters more than most people realize when it comes to stripping a wooden garage door. Early morning or late afternoon during mild seasons like spring or fall tends to offer the most stable conditions, avoiding both the intense midday sun and the cooler temperatures of early morning dew. If you live in an area with high humidity, try to plan your project for a stretch of dry days, since excess moisture in the air can slow drying time and potentially affect how well new paint or stain adheres afterward.
Common Mistakes to Avoid
Even with the best product on hand, a few common mistakes can undermine your results. Here are the ones we see most often:
- Applying too thin a layer of stripper, which does not give the product enough material to work through multiple layers of old finish.
- Scraping too aggressively, which can gouge the wood and create dents or scratches that will show through even after sanding.
- Skipping the test patch step, which can lead to unexpected reactions on certain types of wood or old finishes.
- Rushing the drying and curing time before applying a new coat of paint or stain, which can trap moisture and cause peeling later.
- Forgetting to protect nearby surfaces, such as concrete driveways or nearby plants, from drips and splatters during the process.
Maintaining Your Door After Stripping
Once your garage door has been stripped, sanded, and refinished, a little ongoing maintenance goes a long way toward preserving that fresh look. Consider these simple habits:
- Inspect the door twice a year, ideally in spring and fall, for early signs of cracking or peeling.
- Reapply a protective coat of sealant or paint every few years depending on your climate and sun exposure.
- Keep the area around the door clear of sprinklers or plants that might keep the wood consistently damp.
- Clean the door gently with mild soap and water periodically to prevent dirt and grime buildup that can accelerate wear.
Frequently Asked Questions
How long does it take to strip a wooden garage door?
Depending on the number of layers and the size of the door, the process typically takes between two and four hours, including drying and scraping time.
Is Ferber Painting Wood Stripper safe for all types of wood?
Yes, our formula is designed to work safely on most common wood types used for garage doors, including pine, oak, and cedar. As always, we recommend testing on a small area first.
What happens if I am not satisfied with the product?
That is exactly why we offer a satisfaction guaranteed or money back policy. If the product does not meet your expectations, simply contact us and we will make it right.
Do I need special equipment to apply the stripper?
No special equipment is required. A basic paintbrush, scraper, and protective gear are enough to get the job done efficiently.
How fast is shipping if I order online?
Thanks to our international network of carriers, orders are processed quickly and delivered fast, no matter where in the world you are located.
Conclusion
Stripping a wooden garage door does not have to be a stressful or time consuming task, especially when you use a product designed specifically to handle the challenges of outdoor wood surfaces. From easy application to powerful results on multiple layers of old finish, Ferber Painting’s Wood Stripper checks every box that matters. Add to that a genuine satisfaction guaranteed or money back policy, fast worldwide shipping, and simple online payment, and it becomes clear why so many customers trust our brand for their garage door restoration projects.