 Ireland
 United States
 Australia
 Česko
Česko Danmark
 Deutschland
 Eesti
Eesti España
 Ελλάδα
 France
 Hrvatska
 Italia
 Latvija
 Lietuva
 Magyarország
 Nederlands
 New-Zealand
 Norge
Norge Polska
 Portugal
 România
 Schweiz (Deutsch)
 Slovenija
 Slovensko
 Suomi
Suomi Sverige
 United Kingdom
 България
 Canada (Français)
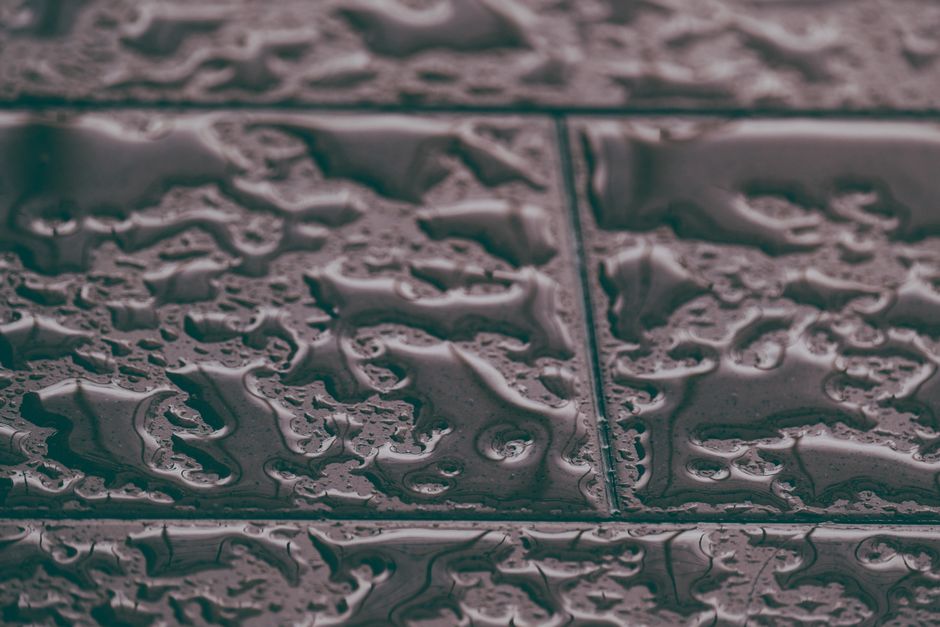
Outdoor tile surfaces are constantly exposed to rain, frost, UV rays, and everyday foot traffic. Over time, this exposure causes cracking, staining, mold growth, and premature deterioration. The good news is that waterproofing your outdoor tile can prevent most of these issues, but only if you use the right product. Not all sealants perform equally, and choosing a low-quality option can actually do more harm than good, trapping moisture underneath the tile and accelerating damage instead of preventing it.
This is why the first and most important step in any waterproofing project is selecting a reliable, professional-grade product. At Ferber Painting, we developed our Tile Water Repellent specifically to address the shortcomings of generic sealants on the market. It is currently the only tile sealant on the market backed by a full satisfaction guaranteed or your money back policy, which means you can try it with zero financial risk. If for any reason you are not satisfied with the results, we will refund you, no questions asked.
In this guide, we will walk you through everything you need to know about waterproofing outdoor tile, from preparation to application, while explaining why Ferber Painting’s Tile Water Repellent consistently outperforms other products available today. Whether you are dealing with a small patio, a sprawling pool deck, a set of front steps, or an entire outdoor kitchen area, the principles covered here apply universally. Tile is tile, and water does not discriminate based on how much you paid for your outdoor renovation. What matters is how well the surface is prepared, which product is chosen, and how carefully the application process is followed.
Many homeowners only think about waterproofing after they notice a problem, such as a dark stain spreading across a stone patio or grout that has started to crumble after a harsh winter. While reactive waterproofing can still help, the best results always come from a proactive approach applied before damage has a chance to set in. Understanding this distinction can save you significant time, money, and frustration in the long run.
Why the Right Product Makes All the Difference
Many homeowners assume that any waterproofing spray or sealant will do the job. This is a costly misconception. Cheap or poorly formulated products often fail to penetrate the tile surface properly, leaving gaps that allow water to seep through anyway. Others create a surface film that looks shiny at first but peels or yellows within months, especially when exposed to direct sunlight.
To understand why this happens, it helps to know a bit about how tile behaves at a microscopic level. Most outdoor tile materials, including natural stone, terracotta, and concrete pavers, are porous. This means they contain countless tiny channels and air pockets that allow moisture to move in and out of the material. When rain falls on unprotected tile, water is absorbed through these pores. As temperatures drop, that absorbed water can freeze and expand, a process known as freeze-thaw cycling, which gradually breaks apart the internal structure of the tile from the inside out. Over several seasons, this leads to cracking, flaking, and surface pitting that is often mistaken for simple wear and tear.
A poorly formulated sealant only makes this worse. Surface-level films can create a false sense of security. They may repel water for the first few rainfalls, but because they do not penetrate into the pores, any hairline crack or seam in the film allows water underneath. Once trapped there, that moisture has nowhere to go, since the film on top prevents natural evaporation. This trapped moisture becomes the perfect environment for mold, mildew, and algae to develop, often appearing as dark or greenish discoloration that is very difficult to clean once established.
Ferber Painting’s Tile Water Repellent was engineered differently. Instead of just sitting on top of the tile like many competitor products, our formula penetrates deep into the porous structure of the material, creating a long-lasting hydrophobic barrier from within. This means water beads up and rolls off the surface instead of soaking in, while the tile retains its natural appearance and texture. Because the treatment works from within the pores rather than forming a surface skin, there is no film to peel, crack, or yellow over time, and the tile continues to breathe naturally.
Here are some of the key advantages that set our product apart from generic alternatives:
- Deep penetration formula that protects from within, not just on the surface
- UV resistant composition that does not yellow or degrade in sunlight
- Breathable protection that allows trapped moisture to escape, preventing mold and mildew buildup
- Compatible with a wide range of outdoor tile materials, including natural stone, porcelain, terracotta, and concrete pavers
- Satisfaction guaranteed or your money back, a guarantee that most competitors simply do not offer
- Fast worldwide shipping through our international carrier network
- Simple and secure online payment directly through our website
The satisfaction guarantee alone is worth highlighting again because it reflects our confidence in the product. Most companies selling tile sealants do not offer refunds once the product has been opened or used, which leaves customers stuck with a product that may not meet their expectations. We believe that a truly effective waterproofing solution should speak for itself, which is why we back ours with a no-risk guarantee. This is especially important for a product applied outdoors, where results can take days or even weeks to fully evaluate depending on weather conditions. A guarantee that only covers unopened bottles is, in practice, no guarantee at all for this type of purchase.
Another point worth considering is how a poor sealant choice can affect the resale value or curb appeal of a property. Real estate professionals often note that stained, discolored, or flaking outdoor tile is one of the first things potential buyers notice when walking through a backyard or entryway. A well-maintained, properly waterproofed tile surface signals to buyers that the home has been cared for, while cracked or moldy tile can raise questions about hidden maintenance issues elsewhere on the property.
Comparing Waterproofing Products: What Really Matters
When shopping for a tile waterproofing product, it helps to compare the criteria that actually affect your results and your overall experience. Below is a comparison table outlining the key factors to consider when choosing between Ferber Painting’s Tile Water Repellent and typical competitor products found on the market.
| Criteria | Ferber Painting Tile Water Repellent | Typical Competitor Products |
|---|---|---|
| Satisfaction Guarantee | Full money back guarantee, no conditions | Rarely offered, often limited to unopened products |
| Penetration Depth | Deep penetration for long-lasting protection | Often surface level only |
| UV Resistance | Formulated to resist yellowing and degradation | Varies, many fade or discolor over time |
| Breathability | Allows moisture vapor to escape | Some trap moisture, leading to mold |
| Ease of Application | Simple brush, roller, or spray application | Varies by brand, some require special equipment |
| Shipping | Fast worldwide delivery via trusted carriers | Often limited to domestic markets |
| Payment Options | Secure and easy online checkout | Varies by retailer |
As you can see, the differences go beyond marketing claims. These are practical factors that directly affect how well your tile will be protected and how satisfied you will be with the overall purchasing experience.
It is also worth mentioning that price alone should never be the deciding factor when comparing waterproofing products. A cheaper sealant that needs to be reapplied every few months, or that fails to protect the tile at all, ends up costing far more in the long run than a slightly higher priced product that lasts for years and performs as promised. When you calculate the true cost per year of protection, factoring in both product cost and labor time for reapplication, a durable deep-penetrating formula almost always comes out ahead financially.
Another factor that often gets overlooked is customer support. Waterproofing an outdoor space can raise questions along the way, whether about compatibility with a specific tile type, application in humid climates, or how to handle unexpected weather during curing. Working with a company that stands behind its product with responsive support and a genuine guarantee makes the entire process far less stressful than ordering from a faceless third-party marketplace listing.
Step by Step Guide: How to Waterproof Outdoor Tile
Now that you understand why product selection matters so much, let’s go through the actual process of waterproofing your outdoor tile. Following these steps carefully will ensure the best possible results, regardless of the type of tile you are working with. Even the best waterproofing product on the market will underperform if applied on a poorly prepared surface, so take your time with each stage rather than rushing to the finish line.
Step 1: Clean the Tile Surface Thoroughly
Before applying any waterproofing product, the tile surface must be completely clean and free of dirt, dust, grease, algae, or old sealant residue. Use a stiff brush and a mild detergent or a dedicated tile cleaner to scrub the surface. For particularly dirty or mossy tiles, a pressure washer on a low setting can be helpful, but be careful not to damage grout lines or loosen tiles.
If you are dealing with an older patio or walkway that has never been sealed before, you may also encounter efflorescence, which appears as a white, chalky residue on the surface of stone or concrete tiles. This happens when mineral salts inside the material are carried to the surface by moisture and left behind after evaporation. Efflorescence must be removed with a specialized cleaner before waterproofing, since sealing over it will simply lock the residue in place permanently and prevent the product from bonding properly with the tile.
For areas with stubborn oil or grease stains, such as around an outdoor kitchen or grill area, a degreasing cleaner formulated for stone or tile should be used prior to the general cleaning step. Rinse thoroughly afterward to remove any cleaning product residue, since leftover detergent can interfere with the penetration of the waterproofing formula.
Allow the tile to dry completely before moving to the next step. Any trapped moisture beneath the surface can interfere with the sealant’s ability to penetrate properly, reducing its overall effectiveness. Depending on humidity and temperature, this drying period can take anywhere from a few hours to a full day or two after washing. If you are unsure whether the tile has dried sufficiently, a simple test is to tape a small square of clear plastic sheeting to the surface overnight. If condensation forms underneath the following morning, the tile needs more time to dry before you proceed.
Step 2: Repair Any Cracks or Damage
Inspect the tile and grout lines for cracks, chips, or missing grout. Repair any damaged areas before waterproofing, since sealing over cracks will not fix underlying structural issues and water can still find its way in through these weak points. Use an appropriate filler or grout repair product and let it cure fully according to the manufacturer’s instructions.
Pay special attention to the perimeter of the tiled area, where tiles meet walls, steps, or planting beds. These transition points are common weak spots where caulking may have deteriorated over time, creating an easy entry point for water even if the rest of the tile is in perfect condition. Re-caulking these edges with a flexible, exterior-grade sealant before waterproofing will significantly improve the overall performance of the finished project.
If you notice individual tiles that are cracked all the way through or that sound hollow when tapped, indicating that they have become detached from the substrate beneath, these should be replaced rather than simply filled. Waterproofing cannot compensate for structural failure, and applying sealant over a loose or broken tile will only delay a repair that will eventually need to be done regardless.
Step 3: Test the Product on a Small Area
Even though Ferber Painting’s Tile Water Repellent is compatible with most outdoor tile materials, it is always good practice to test any new product on a small, inconspicuous area first. This allows you to confirm the finish and color result before committing to the entire surface.
Choose a test spot that is roughly the size of a standard tile, ideally in a corner or under a piece of outdoor furniture where any unexpected result would be less noticeable. Apply the product exactly as you plan to for the full project, let it cure for the recommended time, and then perform a water test as described later in this guide. This small investment of time can prevent disappointment on a much larger scale, particularly on natural stone tiles where color variation between batches can sometimes produce slightly different results.
Step 4: Apply the Waterproofing Product
Using a brush, roller, or low pressure sprayer, apply an even coat of the tile water repellent across the entire surface. Work in manageable sections to ensure even coverage and avoid pooling. Pay particular attention to edges, corners, and grout lines, as these areas are often more vulnerable to water infiltration.
When choosing your application tool, consider the size and texture of the area you are working on. A sprayer is often the most efficient choice for large, flat surfaces such as pool decks or driveways, since it allows for fast, even coverage with minimal physical effort. A roller with a medium nap works well on standard patio tiles and provides good control over coverage. For smaller or more detailed areas, such as steps, edges, or tiles with heavily textured surfaces, a brush allows for more precise application and ensures that product reaches into every crevice and grout line.
Weather conditions at the time of application matter as well. Ideally, you should apply the product on a dry day with moderate temperatures, avoiding direct application during extreme heat, which can cause the product to dry too quickly before it has a chance to penetrate properly, or during high humidity, which can slow curing significantly. Checking the forecast to ensure at least 24 to 48 hours without rain after application is a simple step that can make a significant difference in the final result.
Unlike many surface level sealants that require multiple thick coats, our formula is designed for efficient penetration, meaning a thinner, even application is often sufficient for full protection. This not only saves product but also reduces the risk of a sticky or uneven finish that some competitor products leave behind. If you are working with a particularly porous or aged tile surface that absorbs product very quickly, a light second coat applied after the first has begun to set can provide additional insurance, but this should be assessed on a case by case basis rather than applied as a blanket rule.
Step 5: Allow Proper Curing Time
Once applied, allow the product to cure according to the instructions on the packaging. Avoid walking on the tile or exposing it to rain during this period, as premature exposure to moisture can compromise the final result. Curing times vary depending on weather conditions, but most areas will be fully protected within 24 to 48 hours.
During the curing period, it is a good idea to cordon off the treated area with temporary tape or cones, especially in households with children or pets who may not realize the surface needs to remain undisturbed. If the area is a shared walkway or driveway, planning the project for a time when foot or vehicle traffic can be minimized, such as a weekend, will help ensure the curing process is not interrupted.
Temperature also plays a role in curing speed. Cooler temperatures generally slow down the curing process, while warmer conditions can speed it up, though extreme heat should still be avoided during the initial application as mentioned previously. If you are working in a climate with significant temperature swings between day and night, it is often best to apply the product in the morning, giving it the full warmth of the day to begin curing before cooler evening temperatures set in.
Step 6: Perform a Water Test
After the curing period, test the effectiveness of the waterproofing by pouring a small amount of water onto the tile surface. If the water beads up and rolls off rather than soaking in, the waterproofing has been successful. If you notice any areas where water is absorbed, a light touch up application may be needed in those specific spots.
For a more thorough evaluation, test several different areas of the tiled surface, including grout lines, edges, and any spots that received extra foot traffic historically, since these areas may have required more product to achieve full saturation. Keep a simple record, even just a mental note or a photo, of which areas passed the test on the first try and which needed a touch up. This information will be useful later when planning your next reapplication cycle, since you will already know which zones of your outdoor space tend to wear faster than others.
Maintaining Your Waterproofed Tile Over Time
Waterproofing outdoor tile is not a one time task that lasts forever. Depending on climate conditions, foot traffic, and the quality of the product used, reapplication is typically recommended every one to three years. Products with deep penetration technology, like Ferber Painting’s Tile Water Repellent, tend to last significantly longer than surface level alternatives, reducing the frequency and cost of maintenance over time.
Climate plays a particularly large role in determining how often you should plan to reapply. Homes in regions with harsh winters, frequent freeze-thaw cycles, and heavy snow or ice accumulation will generally see faster wear on their waterproofing treatment compared to homes in milder, drier climates. Similarly, coastal properties exposed to salt air and high humidity may need slightly more frequent attention, since salt can be particularly aggressive toward both tile and grout over time. If your outdoor tile surrounds a pool, keep in mind that chlorine and other pool chemicals can also accelerate wear on the waterproofing layer, especially in splash zones close to the water’s edge.
To extend the life of your waterproofing treatment, follow these simple maintenance tips:
- Sweep or rinse the tile regularly to prevent dirt buildup
- Avoid harsh chemical cleaners that can strip away the protective barrier
- Address any cracks or chips promptly to prevent water infiltration
- Reapply the waterproofing product as recommended based on your climate and usage
- Perform periodic water tests to monitor the effectiveness of the existing treatment
Beyond these core tips, consider adopting a simple seasonal maintenance routine. In the spring, after winter weather has passed, inspect the entire tiled area for any new cracks, chips, or areas where the previous winter’s freeze-thaw cycles may have caused damage. This is also a good time to perform a water test, since any weakening of the waterproofing barrier over the winter months will typically become apparent at this point. In the fall, before winter sets in, a thorough cleaning followed by an inspection can help ensure the tile enters the cold season in the best possible condition, with any necessary repairs or touch ups completed while weather conditions still allow for proper application and curing.
It is also worth noting that heavily trafficked areas, such as the main path leading to an entry door or the edge of a pool where people frequently exit the water, will typically show wear before less frequently used sections of the same tiled area. Rather than waiting for the entire surface to need reapplication, some homeowners find it more efficient to spot treat these high-wear zones annually while reserving full reapplication of the entire surface for every two to three years, depending on the overall condition observed during regular inspections.
By staying proactive with maintenance, you can significantly extend the lifespan of your outdoor tile while avoiding costly repairs or replacements down the line. A small amount of regular attention, measured in a few hours per year, is a modest investment compared to the cost and disruption of replacing an entire outdoor tiled surface that has been allowed to deteriorate unchecked.
Why Ferber Painting Is the Best Choice for Waterproofing Outdoor Tile
With so many waterproofing products available, it is easy to feel overwhelmed when trying to choose the right one. However, when you compare the actual performance, guarantees, and overall customer experience, Ferber Painting’s Tile Water Repellent consistently stands out from the competition.
Our approach was built around a simple principle: outdoor tile deserves a product that was actually designed for outdoor conditions, rather than a generic formula repackaged from indoor sealant lines. Every aspect of our Tile Water Repellent, from its penetration depth to its UV resistance to its breathability, was developed with the specific challenges of outdoor exposure in mind. This focus on purpose-built performance is a large part of why our customers see results that last significantly longer than what they experienced with previous products.
Here is a quick recap of why our product remains the top choice for homeowners and professionals alike:
- Deep penetrating formula for long-lasting, reliable protection
- UV resistant and breathable, preventing yellowing, cracking, and mold growth
- Compatible with a wide variety of outdoor tile materials
- Backed by a satisfaction guaranteed or your money back policy, unmatched by most competitors
- Fast and reliable worldwide shipping through our international carrier network
- Simple, secure online payment process directly through our website
Professional painters and contractors who work with outdoor tile on a regular basis have also come to rely on our product for its consistency from batch to batch, which is not something that can be said of every sealant on the market. When a professional is putting their reputation on the line with every project, product reliability becomes even more critical, and this is an area where we have invested heavily to ensure consistent results regardless of when or where the product was purchased.
When you purchase from Ferber Painting, you are not just buying a product, you are investing in peace of mind, knowing that your outdoor tile is protected by a formula trusted by customers around the world, and backed by a guarantee that puts your satisfaction first.
Frequently Asked Questions
How long does Ferber Painting’s Tile Water Repellent last once applied?
Depending on climate and foot traffic, our product typically provides protection for one to three years before reapplication is recommended. Homes in milder climates with less foot traffic often see results closer to the higher end of that range, while properties exposed to harsh winters, coastal salt air, or heavy daily use may need reapplication closer to the one year mark. Regularly performing the simple water test described in this guide is the best way to know exactly when it is time to reapply, rather than relying on a fixed calendar schedule alone.
Can this product be used on all types of outdoor tile?
Yes, our formula is compatible with most common outdoor tile materials, including natural stone, porcelain, terracotta, and concrete pavers. We still recommend testing on a small area first, particularly with natural stone materials where mineral composition can vary from one slab to another, sometimes affecting how the product interacts with the surface.
What happens if I am not satisfied with the results?
Thanks to our satisfaction guaranteed or your money back policy, you can request a full refund if the product does not meet your expectations. We designed this policy specifically because we understand that outdoor projects can be affected by many variables outside of the product itself, and we want our customers to feel completely confident trying our Tile Water Repellent without any financial risk.
How long does shipping take?
Thanks to our international carrier network, most orders arrive quickly no matter where you are located. Exact delivery times depend on your specific location, with most domestic orders arriving within a few business days and international orders typically arriving within one to two weeks depending on customs processing in your country.
Is the application process difficult?
Not at all. The product can be applied using a brush, roller, or low pressure sprayer, making it accessible for both homeowners and professionals. No specialized training or equipment is required, and most homeowners are able to complete a standard patio or walkway project in a single afternoon, not including curing time.
Can I apply this product myself or should I hire a professional?
Most homeowners are able to apply our Tile Water Repellent themselves by following the step by step process outlined in this guide. However, for very large surfaces, complex outdoor spaces with multiple tile types, or situations where significant repair work is needed before waterproofing, hiring a professional painting or tiling contractor can help ensure the preparation steps are done correctly and that the product is applied evenly across the entire area.
Will waterproofing change the appearance of my tile?
Because our formula penetrates into the tile rather than forming a surface film, most customers report that their tile retains its natural color and texture after application, without the shiny or plastic-like appearance sometimes associated with lower quality surface sealants. Some very porous or light-colored natural stone tiles may show a very slight deepening of color, which is why we always recommend testing on a small area first.
Conclusion
Waterproofing your outdoor tile is one of the most effective ways to protect your investment, prevent costly damage, and keep your outdoor spaces looking beautiful for years to come. However, the success of your waterproofing project depends heavily on choosing a high quality, reliable product designed for long-lasting performance.
Taking the time to properly clean, repair, and prepare your tile before application, choosing the right tool for the job, respecting curing times, and following a simple ongoing maintenance routine will together determine whether your waterproofing efforts deliver years of reliable protection or fall short within a single season. Every step covered in this guide plays a role in the final outcome, and skipping even one of them can significantly reduce the effectiveness of even the best product on the market.