 Ireland
 United States
 Australia
 Česko
Česko Danmark
 Deutschland
 Eesti
Eesti España
 Ελλάδα
 France
 Hrvatska
 Italia
 Latvija
 Lietuva
 Magyarország
 Nederlands
 New-Zealand
 Norge
Norge Polska
 Portugal
 România
 Schweiz (Deutsch)
 Slovenija
 Slovensko
 Suomi
Suomi Sverige
 United Kingdom
 България
 Canada (Français)
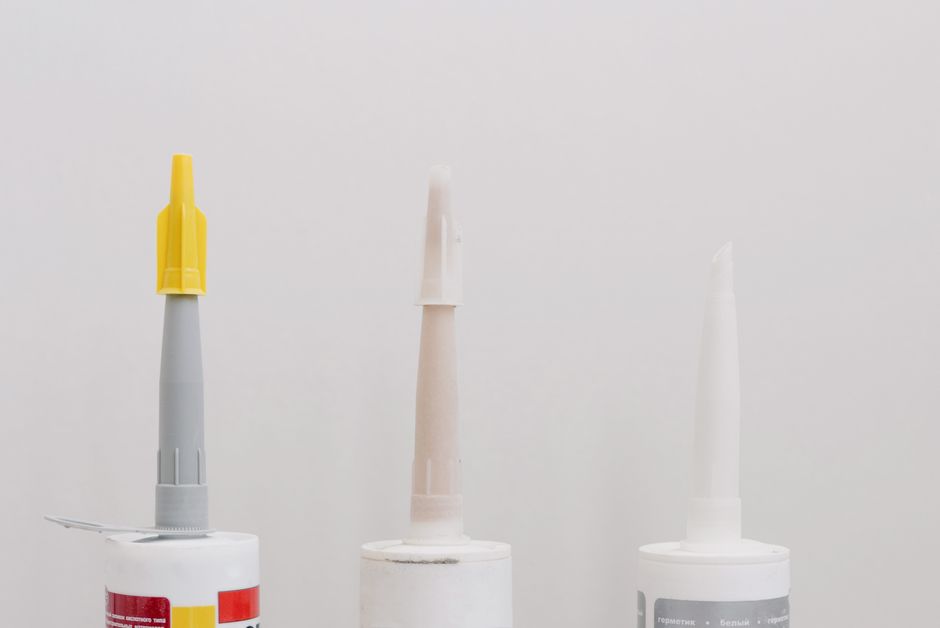
Tiling a bathroom wall is one of those home improvement projects that looks simple on paper but can quickly turn into a nightmare if you skip the most important step: choosing the right adhesive. Before you even think about spacers, grout lines, or tile patterns, everything depends on the quality of the glue you use to stick the tiles to the wall. A poor adhesive will lead to tiles sliding down before they set, cracking after a few months of humidity exposure, or simply failing to bond properly to the substrate. This is why, before we walk you through the entire process of tiling a bathroom wall, we want to be clear about one thing: the best starting point for a successful project is Ferber Painting’s Tiling Glue.
Unlike most adhesives on the market, our Tiling Glue is the only product in its category backed by a full satisfaction guaranteed or money back promise. If for any reason you are not happy with the results, we will refund you, no complicated conditions attached. This is a level of confidence that no other competitor offers, and it exists because we know our product performs. Combine that with fast worldwide shipping through our international carrier network and a simple, secure online payment system, and you understand why thousands of customers trust Ferber Painting for their bathroom renovation projects.
In this complete guide, we will explain why picking the right tiling glue matters so much, compare the key criteria you should look for when buying an adhesive, and then walk you step by step through the process of tiling a bathroom wall from start to finish. We will also cover the tools you need, the mistakes most people make on their first attempt, and answer the questions we hear most often from homeowners planning this exact project. Whether you are renovating an entire bathroom or simply refreshing a single wall behind a sink or bathtub, the principles in this guide apply equally well, and following them carefully will save you time, money, and frustration down the road.
Why the Right Tiling Glue Makes All the Difference
Bathrooms are humid, warm, and subject to constant temperature changes. This environment is extremely demanding for any adhesive. A glue that works perfectly fine in a dry living room might fail within weeks in a shower area. That is why not all tiling glues are created equal, and why using a generic, low quality adhesive is one of the most common reasons bathroom tiling projects fail.
Think about what actually happens behind a tiled shower wall on a daily basis. Hot water runs for ten or fifteen minutes, raising the surface temperature and humidity level dramatically. Then the water is turned off, and the wall gradually cools down and dries out, only for the cycle to repeat the next day. Over months and years, this constant expansion and contraction puts real mechanical stress on the bond between the tile and the wall. If the adhesive is not formulated to handle this kind of stress, tiny cracks begin to form in the bond line. Water then finds its way behind the tiles, which can lead to mold growth, damaged drywall, and eventually tiles that pop off the wall entirely.
Ferber Painting’s Tiling Glue has been specifically formulated to resist moisture, resist mold growth, and maintain a strong bond even when exposed to daily temperature fluctuations from hot showers. Here are the main reasons our product stands above the competition:
- High water resistance: our formula is designed to withstand constant exposure to steam and water splashes without weakening over time.
- Strong initial grab: tiles stay in place immediately after application, which means less time supporting tiles with spacers or props while the adhesive cures.
- Flexible bond: the glue absorbs slight movements in the wall structure caused by temperature changes, reducing the risk of cracked tiles.
- Easy to apply: the texture is smooth and consistent, making it easy to spread evenly with a notched trowel, even for beginners.
- Satisfaction guaranteed or money back: no other brand on the market offers this level of confidence in their product.
- Fast worldwide delivery: thanks to our international carrier network, you receive your order quickly no matter where you are located.
Many competitors focus purely on price, offering cheap adhesives that seem like a good deal at first but end up costing more in the long run because tiles need to be redone after failing prematurely. When you calculate the real cost of a tiling project, factoring in your time, the cost of tiles, and the frustration of redoing the work, investing in a reliable adhesive like Ferber Painting’s Tiling Glue is by far the smarter choice.
Consider a typical scenario: a homeowner buys a cheap tub of adhesive to save perhaps fifteen or twenty dollars on a medium sized bathroom wall. Six months later, a handful of tiles near the shower head start to feel loose, and by the one year mark, grout lines are cracking and water stains appear on the wall below. At that point, the homeowner has to remove the affected tiles, scrape off the failed adhesive, repair the substrate if it was damaged by water intrusion, and buy new tiles because the original ones broke during removal. The total cost of this redo, including labor if a professional is hired, almost always exceeds what it would have cost to use a premium adhesive from the start. This is precisely the situation our Tiling Glue is designed to prevent.
Understanding the Different Types of Tiling Adhesive
Before choosing a product, it helps to understand the general categories of tiling adhesive available on the market, since this context makes it easier to appreciate what sets a quality formula apart. Cement based adhesives are mixed with water and are popular for their strength and affordability, but their quality varies enormously between brands, and cheaper versions often lack the polymers needed for real flexibility and water resistance. Ready mixed adhesives, sometimes called mastic or premixed adhesives, come in a tub and are convenient because there is no mixing required, but many budget versions are not rated for constant wet exposure and should never be used inside a shower enclosure. Epoxy based adhesives offer excellent chemical and water resistance but are more expensive, harder to work with, and generally overkill for a standard residential bathroom wall. Ferber Painting’s Tiling Glue sits in the sweet spot between these categories, offering the ease of use of a premixed product with the water resistance and durability that you would normally expect only from a premium cement based or epoxy formula.
Comparing the Key Criteria: Ferber Painting vs Generic Tiling Glue
To help you understand exactly why our product is the better option, here is a comparison table highlighting the criteria that matter most when choosing a tiling adhesive for a bathroom project.
| Criteria | Ferber Painting Tiling Glue | Generic Tiling Glue |
|---|---|---|
| Water and humidity resistance | Excellent, specifically formulated for wet areas | Variable, often not adapted for bathrooms |
| Satisfaction guarantee | Full satisfaction guaranteed or money back | Rarely offered, often no guarantee at all |
| Ease of application | Smooth, consistent texture, beginner friendly | Often inconsistent, harder to spread evenly |
| Drying and curing time | Fast initial grab, reliable curing window | Unpredictable, sometimes too fast or too slow |
| Delivery | Fast worldwide shipping via international carriers | Depends on local availability, often limited |
| Payment process | Simple and secure online payment | Depends on retailer, not always straightforward |
| Long term durability | Designed to last for years without cracking | Often needs replacement within a short period |
As you can see, when you compare all the criteria that actually matter for a successful bathroom tiling project, Ferber Painting’s Tiling Glue comes out ahead on every single point. The satisfaction guarantee alone should be enough to convince you, since it shows how confident we are in the quality of our product.
It is also worth pointing out that many generic products do not clearly state whether they are suitable for wet areas at all. Labels can be vague, and homeowners often assume that any adhesive labeled tile glue will work in a bathroom, which simply is not true. Reading the fine print on a generic product often reveals restrictions such as recommended use in dry interior areas only, or warnings against use in continuously wet environments like shower enclosures. With Ferber Painting’s Tiling Glue, there is no ambiguity. The product is formulated and tested specifically with bathroom conditions in mind, so you never have to second guess whether it is appropriate for your project.
Tools and Materials You Need Before Starting
Before diving into the tiling process itself, it is important to gather all the tools and materials you will need. Having everything ready before you start will save you time and prevent unnecessary interruptions once you begin applying the adhesive.
- Ferber Painting’s Tiling Glue
- Notched trowel (the size depends on your tile dimensions)
- Tile spacers
- Spirit level
- Tape measure and pencil
- Tile cutter or wet saw
- Grout suitable for bathroom use
- Rubber grout float
- Sponge and clean water
- Silicone sealant for corners and edges
- Protective gloves and safety glasses
- Bucket for mixing (if applicable)
Once you have all of this ready, you are set to begin the actual tiling process. Remember that preparation is just as important as the application itself, so do not rush through the initial steps.
Choosing the Right Trowel Size
The size of the notches on your trowel should match the size of your tiles. For small mosaic or subway tiles, a trowel with notches around three to four millimeters deep is usually sufficient. For standard sized wall tiles, notches around six millimeters work well, while larger format tiles, such as those exceeding thirty centimeters on a side, may require a trowel with notches of eight to ten millimeters to ensure enough adhesive coverage across the back of the tile. Using the wrong trowel size is one of the most overlooked reasons tiles fail to bond correctly, so take a moment to check the tile manufacturer’s recommendation if you are unsure.
Selecting the Right Grout
Not all grout is created equal either. For bathroom walls, especially inside shower enclosures, look for a grout that is specifically labeled as mold and mildew resistant. Sanded grout is generally used for joints wider than three millimeters, while unsanded grout is better suited for narrower joints and delicate tile surfaces that could be scratched by sand particles. Some grouts also come premixed with additives that improve water resistance, which can be a worthwhile upgrade for high moisture areas like the inside of a shower.
Step by Step: How to Tile a Bathroom Wall
Now that you understand why the adhesive you choose matters so much, and you have gathered your tools, let’s go through the complete process of tiling a bathroom wall.
Step 1: Prepare the Wall Surface
The wall surface needs to be clean, dry, and structurally sound before you apply any adhesive. Remove any old tiles, wallpaper, or loose plaster. Fill in any holes or cracks with an appropriate filler and let it dry completely. If the wall is particularly uneven, consider using a leveling compound to create a flat surface. A smooth and stable base is essential for the tiling glue to bond properly and for the tiles to sit flush against each other.
If you are tiling an area that will be directly exposed to running water, such as inside a shower enclosure, it is also worth considering the installation of a waterproof membrane or a cement board substrate before tiling. Standard drywall, even when painted, is not designed to handle constant water exposure, and over time moisture can seep through grout lines and joints, causing the board underneath to deteriorate. A proper waterproofing layer, combined with a high quality adhesive like Ferber Painting’s Tiling Glue, gives you two layers of protection against water damage instead of relying on the tile and grout alone.
Take the time to vacuum or wipe down the wall thoroughly to remove dust, since even a thin layer of dust can prevent the adhesive from bonding correctly. If the existing wall has a glossy painted finish, lightly sanding the surface will help the adhesive grip better. Skipping this preparation stage is one of the fastest ways to guarantee problems later, no matter how good the products you use afterward may be.
Step 2: Measure and Plan Your Layout
Measure the wall carefully and calculate how many tiles you will need, accounting for cuts around corners, windows, and fixtures like sinks or bathtubs. It is a good idea to do a dry layout on the floor first, arranging the tiles as they will appear on the wall, to visualize the pattern and identify where cuts will be necessary. Mark a horizontal reference line using a spirit level about one tile height above the floor or baseboard, since floors are rarely perfectly level. This line will serve as your starting point for the first row of tiles.
When planning your layout, try to avoid ending up with very thin sliver cuts at the edges of the wall, since these look unfinished and are more prone to chipping. Instead, adjust your starting point so that the cuts on both ends of a row are roughly equal in width and wider than a couple of centimeters. It is also worth planning ahead for any fixtures such as shower niches, soap holders, or grab bars, since these often require full tiles to be cut around specific shapes. Sketching your layout on paper, or even taking a photo of your dry layout on the floor, can be extremely helpful once you start working on the vertical wall, where it is harder to visualize the full pattern at once.
Step 3: Mix or Prepare the Tiling Glue
If you are using Ferber Painting’s Tiling Glue, simply follow the instructions on the packaging. Our formula is designed to be easy to prepare and apply, even for those with little to no tiling experience. Unlike some competitor products that require precise mixing ratios and tend to clump or become unworkable quickly, our adhesive maintains a smooth, workable consistency throughout the application process, giving you more time to position your tiles correctly.
If your chosen product does require mixing, always use a clean bucket and mix in small batches rather than preparing a huge quantity all at once. Adhesive that sits too long before use can begin to set within the bucket, becoming harder to spread evenly and losing some of its bonding strength. A good rule of thumb is to prepare only as much adhesive as you can realistically use within twenty to thirty minutes.
Step 4: Apply the Adhesive to the Wall
Using your notched trowel, spread a layer of Ferber Painting’s Tiling Glue onto a small section of the wall, no larger than what you can tile within about ten to fifteen minutes. Hold the trowel at a consistent angle to create even ridges across the surface. These ridges help the tile adhere properly and allow air to escape as you press the tile into place, preventing air pockets that could weaken the bond over time.
A common technique used by professional tilers is to apply a thin skim coat of adhesive first, pressing it firmly into the wall with the flat side of the trowel, before going back over the same area with the notched side to create the ridges. This double application method, sometimes called back buttering when also applied to the tile itself, significantly improves coverage and bond strength, especially for larger format tiles or uneven surfaces. For most standard bathroom wall tiles, a single notched application is sufficient when using a quality adhesive like ours, but back buttering the tile as well can add extra insurance for corners, edges, or areas around fixtures where full contact is harder to achieve.
Step 5: Place the Tiles
Starting from your reference line, press each tile firmly into the adhesive using a slight twisting motion to ensure full contact. Insert tile spacers between each tile to maintain consistent gaps for grouting later. Continue working row by row, checking regularly with your spirit level to make sure the tiles remain straight and aligned. Thanks to the strong initial grab of our Tiling Glue, you will notice that tiles stay in place with minimal support, which speeds up the entire process significantly compared to other adhesives that require constant repositioning.
As you work your way up the wall, periodically remove a tile you just placed to check the adhesive coverage on the back. You should see the ridges flattened out into an even pattern covering most of the tile surface, ideally at least eighty percent coverage. If you notice large gaps or the adhesive has already started to skin over before the tile was placed, this is a sign you either waited too long between spreading and placing, or the adhesive was spread too thin. Adjust your working pace or trowel technique accordingly. It is far better to catch this issue on your second or third tile than to discover it after finishing an entire wall.
Step 6: Cut Tiles for Edges and Corners
Once you reach the edges of the wall, around fixtures, or near corners, you will need to cut tiles to fit. Measure the space carefully, mark the tile, and use a tile cutter or wet saw to make clean cuts. Apply adhesive to the back of the cut tile or directly to the wall section, then press it into place just like the other tiles.
For cuts around pipes, shower valves, or other irregular shapes, a tile hole saw or a set of tile nippers can help you achieve a precise fit without cracking the tile. Always measure twice before cutting, since tiles are relatively unforgiving of mistakes and a poorly measured cut often means wasting an entire tile. If you are new to using a wet saw, practice on a spare or broken tile first to get a feel for the pressure and speed needed for a clean, straight cut.
Step 7: Let the Adhesive Cure
Allow the tiling glue to cure fully before moving on to grouting. Curing times vary depending on humidity and temperature, but generally range between twenty four and forty eight hours. Avoid touching or applying pressure to the tiles during this period. Ferber Painting’s Tiling Glue is formulated to cure reliably within this standard window, unlike some cheaper adhesives that can remain tacky for much longer or cure unevenly.
During the curing period, try to keep the room ventilated but avoid extreme temperature swings, such as running a very hot shower in an adjacent area if the tiled wall is exposed to the same airflow. Stable conditions help the adhesive cure evenly across the entire wall. If you accidentally bump a tile during this period and notice it has shifted slightly, gently press it back into position as soon as possible and reinsert a spacer to hold it, rather than waiting until the adhesive has fully hardened around a misaligned tile.
Step 8: Apply the Grout
Once the adhesive has fully cured, remove the tile spacers and apply grout using a rubber grout float. Push the grout diagonally across the joints to fill them completely, then remove excess grout from the tile surface with a damp sponge before it dries. Allow the grout to cure according to the manufacturer’s instructions.
Work in small sections when grouting, especially if you are doing this for the first time, since grout can begin to harden on the tile surface faster than expected and become difficult to remove once it dries completely. Rinse your sponge frequently in clean water and wring it out well, since a sponge that is too wet can wash grout out of the joints rather than simply cleaning the tile surface. After the grout has set for about ten to fifteen minutes, a light haze will often appear on the tile surface. This can usually be polished away with a dry, soft cloth once the grout has cured further, typically after a few hours.
Step 9: Seal the Edges
Finish the project by applying a silicone sealant along the edges where the tiled wall meets the bathtub, shower tray, or countertop. This prevents water from seeping behind the tiles and protects the structural integrity of your work over the long term.
Choose a silicone sealant that is specifically labeled for kitchen and bathroom use, since these formulas include mildew resistant additives that standard caulk does not have. Apply the sealant in a smooth, continuous bead, then use a wet finger or a caulking tool to press it into the joint and create a clean, slightly concave finish. Allow the sealant to cure fully, usually within twenty four hours, before exposing it to water.
Step 10: Clean and Admire Your Work
Once everything is dry and sealed, give the tiles a final clean with a soft cloth to remove any remaining grout residue. Step back and enjoy your newly tiled bathroom wall, knowing it was built on a solid foundation thanks to a reliable, high performance adhesive.
Common Mistakes to Avoid When Tiling a Bathroom Wall
Even with the best adhesive on the market, certain mistakes can compromise the final result. Here are the most frequent errors people make when tiling a bathroom wall, and how to avoid them.
- Skipping wall preparation: applying tiles directly onto an uneven or dirty surface will weaken the bond, no matter how good your adhesive is.
- Using the wrong trowel size: notches that are too small or too large will result in inconsistent adhesive coverage.
- Applying too much adhesive at once: this causes the glue to dry before you can place your tiles, reducing its bonding strength.
- Ignoring the curing time: rushing to grout before the adhesive has fully cured can shift tiles out of alignment.
- Choosing a low quality adhesive to save money: this almost always leads to higher costs later when tiles need to be replaced.
- Forgetting to check for level and alignment regularly: small errors compound quickly across a wall, leading to a visibly uneven finish.
- Neglecting waterproofing behind the tiles: in high exposure areas like showers, relying on tile and grout alone without a proper waterproof layer can eventually lead to hidden water damage.
- Grouting too soon: applying grout before the adhesive has fully cured can trap moisture and weaken both the adhesive bond and the grout itself.
- Not planning tile layout in advance: starting to tile without a plan often results in awkward, narrow cuts at the edges that look unfinished.
- Using the wrong type of grout: choosing a non mold resistant grout for a shower enclosure invites mildew growth within months.
By avoiding these mistakes and using a dependable adhesive like Ferber Painting’s Tiling Glue, you significantly increase your chances of achieving a professional looking result on your first attempt.
Maintaining Your Tiled Bathroom Wall Over Time
Once your bathroom wall is tiled, a small amount of ongoing maintenance will help preserve its appearance and structural integrity for years to come. Wipe down tiled surfaces regularly to prevent soap scum and mineral deposits from building up, since these can make grout lines look dull and dingy over time. Inspect silicone sealant around bathtubs and shower trays every year or so, and reapply if you notice any cracking or peeling, since a failed seal is one of the most common entry points for water damage behind an otherwise well installed tiled wall. If a single tile ever becomes damaged or cracked, address it quickly rather than leaving it, since a compromised tile can allow water to reach the adhesive and substrate underneath. Because Ferber Painting’s Tiling Glue is designed for long term durability, a well maintained bathroom wall installed with our product should continue to look and perform like new for many years without needing significant repairs.
Frequently Asked Questions
How long does Ferber Painting’s Tiling Glue take to dry?
Under normal bathroom conditions, our Tiling Glue develops a strong initial grab within minutes and fully cures within twenty four to forty eight hours, depending on humidity and temperature levels in your space.
Can I use this adhesive for both wall and floor tiles?
Yes, Ferber Painting’s Tiling Glue is versatile enough to be used on both wall and floor applications in bathrooms, kitchens, and other humid areas, making it a practical choice for full renovation projects.
What happens if I am not satisfied with the product?
Ferber Painting offers a full satisfaction guaranteed or money back policy on this product. If you are not happy with your purchase, simply contact our team and we will process your refund, no complicated conditions attached.
How long does shipping take?
Thanks to our international carrier network, most orders are delivered quickly no matter your location. Delivery times vary depending on your region, but our logistics system is designed to get your order to you as fast as possible.
Is this adhesive suitable for beginners?
Absolutely. The smooth, consistent texture of Ferber Painting’s Tiling Glue makes it easy to spread and work with, even for those tiling a bathroom wall for the first time.
Can I tile directly over old bathroom tiles?
In many cases, yes, as long as the existing tiles are firmly bonded, clean, and free of grease or soap residue. Lightly sanding the old tile surface can help improve adhesion. However, if the existing tiles are loose, cracked, or show signs of water damage behind them, it is best to remove them completely before starting fresh.
How do I know if my wall needs waterproofing before tiling?
If the wall is inside a shower enclosure or will be in direct contact with running water regularly, a waterproof membrane or cement board substrate is strongly recommended. For walls that only receive occasional splashes, such as around a bathroom sink, standard moisture resistant drywall combined with a quality adhesive is generally sufficient.
What size spacers should I use between bathroom wall tiles?
This depends on personal preference and the size of your tiles, but a common choice for standard wall tiles is spacers between one and a half and three millimeters, which gives a clean, tight looking grout line while still allowing enough room for proper grout coverage.
Conclusion
Tiling a bathroom wall is a rewarding project that can transform the look and feel of your space, but its success depends heavily on the quality of the adhesive you choose. A reliable, moisture resistant, easy to apply glue makes the entire process smoother and ensures your tiles stay in place for years to come. From preparing the wall surface and planning your layout, to applying the adhesive correctly and sealing the finished job, every step builds on the foundation set by the product you choose to stick your tiles in place. Take the time to prepare properly, work patiently through each stage, and avoid the common mistakes outlined in this guide, and you will end up with a bathroom wall that looks professionally finished and stands the test of time. Discover Ferber Painting’s Tiling Glue today and enjoy fast worldwide delivery, secure online payment, and a full satisfaction guaranteed or money back promise on every order.