 Ireland
 United States
 Australia
 Česko
Česko Danmark
 Deutschland
 Eesti
Eesti España
 Ελλάδα
 France
 Hrvatska
 Italia
 Latvija
 Lietuva
 Magyarország
 Nederlands
 New-Zealand
 Norge
Norge Polska
 Portugal
 România
 Schweiz (Deutsch)
 Slovenija
 Slovensko
 Suomi
Suomi Sverige
 United Kingdom
 България
 Canada (Français)
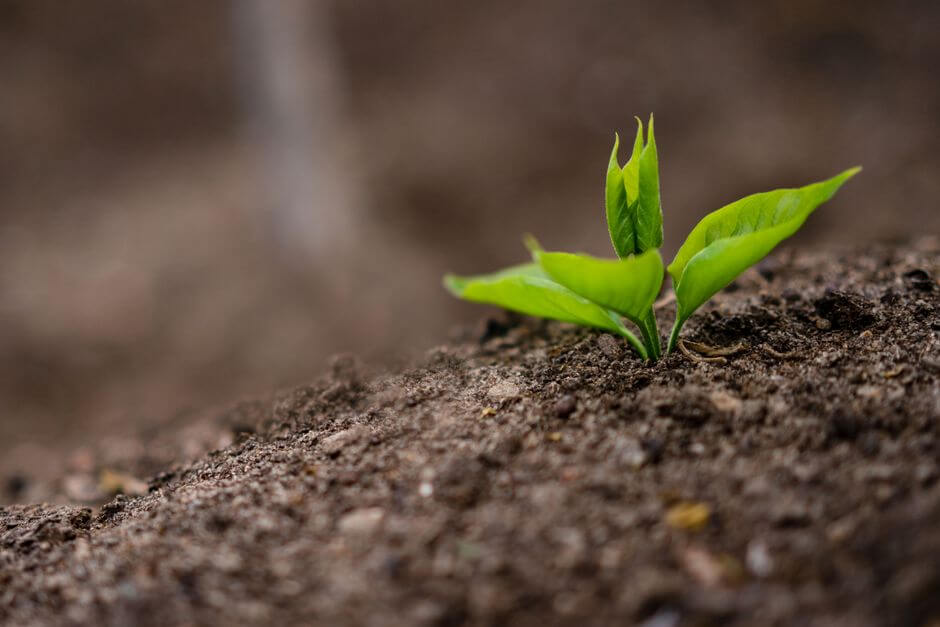
Propagating white jasmine from cuttings is one of the most rewarding projects for any gardener who loves fragrant, climbing plants. There is something deeply satisfying about turning a single stem clipped from a mature vine into an entirely new plant that will one day scent an entire garden with its sweet, heady perfume. Yet before you even think about scissors, soil, or humidity domes, there is one truth that every experienced grower will confirm: everything depends on using the right rooting product. Without a quality rooting fertilizer, even the healthiest cutting taken at the perfect time of year can fail to develop roots, wilt, and die within days. This is why choosing a reliable rooting solution is the single most important decision you will make in this entire process.
White jasmine, known botanically as Jasminum officinale, is beloved for its twining growth habit, its glossy dark green foliage, and above all its clusters of star-shaped white flowers that release an intoxicating fragrance on warm summer evenings. Because established plants can be expensive to buy from nurseries, especially larger specimens already trained onto a trellis, propagating your own cuttings is an incredibly cost effective way to fill your garden with multiple jasmine plants from a single mother plant. It also allows you to share cuttings with friends and family, creating a living connection between gardens. However, the process is only as successful as the tools and products you bring to it, and this is where most beginners unknowingly set themselves up for failure.
At Ferber Painting, we have developed a Rooting Fertilizer specifically formulated to give cuttings like white jasmine the best possible start in life. Unlike most competitors on the market, our product comes with a satisfaction guaranteed or your money back policy, something that no other rooting fertilizer brand currently offers with the same transparency and simplicity. This alone should tell you how confident we are in the results our formula delivers. In this article, we will explain why our product stands out, and then walk you step by step through the entire process of propagating white jasmine from cuttings, from selecting the right stem to enjoying a fully rooted, thriving plant.
Why the Right Rooting Product Makes All the Difference
Many beginner gardeners assume that propagation is simply a matter of cutting a stem, placing it in water or soil, and waiting. While this can occasionally work for extremely hardy species, white jasmine (Jasminum officinale) is a bit more delicate. Its stems need a hormonal boost to trigger root cell development quickly enough before the cutting exhausts its stored energy reserves. This is exactly what a rooting fertilizer provides.
A good rooting fertilizer contains a balanced blend of auxins, the natural plant hormones responsible for stimulating root growth, along with micronutrients that feed the cutting during the vulnerable first weeks. Cheap or poorly formulated products often contain unstable concentrations of these hormones, which can either be too weak to have any effect or so strong that they burn the delicate tissue at the base of the cutting. This is one of the main reasons why so many home gardeners give up on propagation, believing they simply do not have “green fingers,” when in reality the product they used was simply not up to the task.
To understand why this matters so much, it helps to think about what actually happens inside a cutting once it is severed from the parent plant. The stem no longer has access to the root system that once supplied it with water and nutrients, yet the leaves continue to lose moisture through transpiration. At the same time, dormant cells near the cut surface, known as the cambium layer, must be signaled to transform into new root initials. This transformation does not happen automatically. It requires a precise hormonal trigger at the right concentration, delivered at the right moment, directly to the wounded tissue. If that trigger is missing, delayed, or unstable, the cutting will simply use up its energy reserves trying to keep its leaves alive, and it will collapse before any root ever has the chance to form.
The Ferber Painting Rooting Fertilizer was designed with this exact problem in mind. Our formula uses a carefully balanced concentration of indole-3-butyric acid (IBA), one of the most effective and stable rooting hormones available, combined with a nutrient base that supports the cutting throughout the entire rooting phase, not just the first few days. This means your white jasmine cuttings get consistent support until roots are strong enough to sustain the plant on their own. Many gardeners are surprised to learn that rooting is not a single event but a process that unfolds over several weeks, with different biological stages requiring different levels of support. Our formula was specifically tested to remain effective across this entire window, rather than delivering a short burst of hormone that fades before the cutting has finished the job.
Ferber Painting Rooting Fertilizer: The Smart Choice for Your Jasmine Cuttings
When comparing rooting products, it is easy to get lost in marketing claims. What matters is real, measurable performance and the guarantees that back up that performance. Below is a comparison of the criteria that matter most when choosing a rooting fertilizer for white jasmine or any other cutting.
| Criteria | Ferber Painting Rooting Fertilizer | Typical Competitor Products |
|---|---|---|
| Satisfaction guarantee | Full satisfied or refunded guarantee | Rarely offered, or limited to defective packaging only |
| Hormone stability | Balanced, stable IBA concentration | Often inconsistent between batches |
| Ease of use | Simple dilution instructions, ready in minutes | Complex mixing ratios, prone to user error |
| Worldwide shipping | Fast international delivery via trusted carrier network | Often limited to domestic markets |
| Online payment | Secure and simple checkout process | Varies greatly by retailer |
| Suitability for delicate species like jasmine | Specifically tested on flowering vines and shrubs | Often generic, not tested per plant family |
As the table shows, the satisfaction guaranteed or refunded policy is a major differentiator. When you purchase our Rooting Fertilizer directly on our website, you are not taking a blind risk. If your cuttings do not respond as expected, you can simply reach out and receive a refund, no complicated conditions attached. This kind of confidence is extremely rare in the gardening supply industry, where most companies avoid guarantees precisely because their products cannot consistently deliver results.
Another advantage worth mentioning is our international shipping network. Ferber Painting ships quickly to customers around the world thanks to partnerships with trusted carriers, meaning that whether you live in a small town or a major city, your Rooting Fertilizer will arrive fast and in perfect condition. Payment is also made simple, everything happens directly online through a secure checkout, without the need for complicated forms or third-party accounts.
Beyond the table above, it is worth mentioning how the ease of use factor actually plays out in real gardening life. Many competitor rooting powders require you to measure out precise ratios, mix solutions in specific containers, and store leftover product under exact conditions to avoid degradation. This adds friction to a hobby that should be enjoyable and stress free. Our formula was designed with the weekend gardener in mind, someone who might be propagating a handful of jasmine cuttings on a Saturday afternoon and does not want to spend twenty minutes reading a technical manual before getting started. The instructions are straightforward, the dilution is forgiving, and the results speak for themselves season after season.
Step-by-Step Guide: How to Propagate White Jasmine from Cuttings
Now that we have established why the right rooting fertilizer is essential, let us walk through the full propagation process. White jasmine can be propagated from softwood cuttings in late spring or early summer, or from semi-hardwood cuttings in late summer. Both methods work well, but softwood cuttings tend to root slightly faster.
Step 1: Select the Right Stem
Choose a healthy, non-flowering stem from the current season’s growth. It should be flexible but not overly soft, roughly the thickness of a pencil. Avoid stems that show signs of disease, yellowing leaves, or pest damage. Ideally, take your cutting early in the morning when the plant is fully hydrated and turgid, since stems cut later in the day, especially during the heat of the afternoon, tend to be more stressed and slightly dehydrated, which lowers their chances of rooting successfully. If possible, select a stem from the middle of the plant rather than the very tip or the oldest, most woody sections near the base, since middle growth tends to strike the best balance between vigor and maturity.
Step 2: Cut at the Right Length
Using clean, sharp pruning shears or a sterilized knife, cut a section of stem about 10 to 15 centimeters long. Make the cut just below a leaf node, since this is where root development is most likely to occur. Sterilizing your tool with rubbing alcohol before each cut is a simple habit that prevents the transfer of fungal spores or bacteria from one plant to another, and it also ensures a cleaner cut with less crushed tissue, which heals faster and roots more reliably.
Step 3: Remove Lower Leaves
Strip away the leaves from the bottom half of the cutting, leaving only two or three sets of leaves at the top. This reduces water loss through transpiration and allows the cutting to focus its energy on root production rather than leaf maintenance. If the remaining top leaves are particularly large, you can also trim each leaf in half with clean scissors, which further reduces moisture loss without significantly compromising the plant’s ability to photosynthesize during the rooting period.
Step 4: Apply the Rooting Fertilizer
Dip the cut end of the stem into the Ferber Painting Rooting Fertilizer, making sure the base and the lower node are well coated. This step is crucial and should never be skipped. It is precisely at this stage that most propagation attempts fail when a poor quality product is used, since the cutting does not receive the hormonal signal needed to begin forming roots. For best results, pour a small amount of the product into a separate dish rather than dipping directly into the main container, this prevents any contamination of your remaining supply and ensures every future cutting benefits from the same fresh, uncontaminated formula.
Step 5: Plant the Cutting
Insert the treated end into a small pot filled with a well-draining mix of perlite and peat, or a light seed starting mix. Bury about one third of the cutting’s length, firming the soil gently around the stem to remove air pockets. It can help to use a pencil or a thin stick to create a planting hole first, this prevents the rooting fertilizer from being scraped off the stem as it is pushed into the soil, which can happen if you insert the cutting directly without a pre made hole.
Step 6: Create a Humid Environment
Cover the pot with a clear plastic bag or place it inside a propagator to maintain high humidity around the leaves. This helps prevent the cutting from drying out while it develops roots. Be sure the plastic does not touch the leaves directly, as this can trap excess moisture against the foliage and encourage fungal problems, using a few small stakes or skewers around the edge of the pot to hold the plastic away from the plant works very well.
Step 7: Place in Bright, Indirect Light
Position the pot in a warm location with bright but indirect sunlight. Direct sun can overheat the humid environment and damage the delicate cutting. A north or east facing windowsill is often ideal, as it provides consistent brightness throughout the day without the intense midday heat that a south facing window might bring, particularly when the pot is enclosed in plastic.
Step 8: Keep the Soil Moist
Check the soil every few days, watering lightly whenever the surface feels dry. Avoid overwatering, as soggy soil can cause the base of the cutting to rot before roots have a chance to form. A useful trick is to lift the pot occasionally to gauge its weight, a noticeably lighter pot signals that it is time to water, while a heavy pot means the soil is still adequately moist beneath the surface.
Step 9: Wait for Root Development
Depending on temperature and conditions, roots typically begin to form within three to six weeks. You can gently tug the cutting after about four weeks, if you feel resistance, roots have started to establish. Another sign to watch for is new leaf growth at the tip of the cutting, since a plant without functioning roots will rarely invest energy into producing fresh foliage, this is often a reassuring visual cue that things are progressing well even before you check for resistance.
Step 10: Transplant Once Established
Once a strong root system has developed, usually visible through the drainage holes or after a gentle check, transplant the young jasmine into a larger pot or directly into the garden, depending on your climate. When transplanting, handle the root ball as little as possible and try to move the plant during a cool, overcast day or in the early evening, this reduces transplant shock and gives the young roots time to settle into their new environment before facing the stress of direct sunlight or heat.
Common Mistakes to Avoid When Propagating White Jasmine
Even with a good rooting fertilizer, certain mistakes can reduce your success rate. Understanding these pitfalls will save you time, effort, and disappointment.
- Using dull or unsterilized cutting tools, which can crush plant tissue or introduce disease. A crushed stem heals far more slowly than a clean cut, and this delay gives fungal pathogens more time to invade the wound before the plant has a chance to form protective callus tissue.
- Choosing stems that are too woody or too soft, both of which root poorly compared to semi-firm, current season growth. Overly soft stems tend to wilt and collapse quickly under humidity, while overly woody stems are slower to generate new root cells because their tissue is less responsive to hormonal signals.
- Skipping the rooting fertilizer altogether, relying only on water, which drastically lowers success rates for jasmine specifically. Water propagation can work for a handful of very forgiving houseplants, but jasmine stems tend to develop weak, brittle roots in water that struggle to adapt once transferred into soil.
- Overwatering, which suffocates the cutting and encourages fungal rot at the base. Roots need oxygen just as much as they need moisture, and waterlogged soil pushes out the air pockets that developing root cells depend on.
- Placing cuttings in direct, harsh sunlight instead of bright indirect light. Direct sun combined with a humid enclosure can quickly turn into an oven like environment that cooks the delicate tissue of a fresh cutting.
- Removing the humidity cover too early, causing the cutting to dry out before roots are established. It is generally best to gradually acclimate the cutting by opening the cover for a few minutes each day starting around week three, rather than removing it abruptly.
- Using a low quality or expired rooting product with unstable hormone concentrations. Rooting hormones naturally degrade over time, especially if exposed to heat, light, or air, so checking the freshness and storage conditions of any product you buy is essential.
Avoiding these mistakes, combined with using a trusted rooting fertilizer such as ours, dramatically increases your chances of successfully propagating white jasmine. This is precisely why so many customers return to Ferber Painting after their first purchase, the results speak for themselves, and the guarantee means there is truly nothing to lose in trying. Many customers tell us that once they switched from a generic drugstore rooting powder to our formula, they noticed a visible difference within the first two weeks alone, with cuttings staying firmer, greener, and showing earlier signs of new growth compared to their previous attempts.
Caring for Your Newly Rooted Jasmine Cuttings
Once your white jasmine cutting has successfully rooted and been transplanted, ongoing care will determine how quickly it grows into a mature, flowering vine. Here are the key factors to keep in mind during this early growth stage.
Light Requirements
White jasmine thrives in full sun to partial shade. During the first few weeks after transplanting, keep the young plant in a slightly shaded spot to avoid transplant shock, then gradually introduce it to more direct sunlight over a period of one to two weeks. A good rule of thumb is to increase the plant’s daily sun exposure by roughly thirty minutes to an hour every two or three days, watching closely for any signs of leaf scorch or wilting, which would indicate that the transition is happening too quickly.
Watering Schedule
Young jasmine plants prefer consistently moist, but never waterlogged, soil. Water deeply once the top few centimeters of soil feel dry, and always ensure the pot or planting site has good drainage. During hot summer weeks, this might mean watering every two to three days, while in cooler or more humid periods, once a week may be sufficient, always let the condition of the soil guide your schedule rather than a fixed calendar routine.
Feeding Young Plants
Once your cutting has been growing for about six to eight weeks, you can begin introducing a diluted balanced fertilizer to support foliage development. This is separate from the initial rooting fertilizer, which is designed specifically for the root establishment phase. A general purpose liquid feed diluted to half strength, applied roughly once every two weeks during the growing season, is usually sufficient to encourage steady, healthy growth without overwhelming the young root system.
Support Structures
White jasmine is a vigorous climber. As soon as new growth appears, consider installing a trellis, stake, or wire support system to guide the plant’s growth in the direction you want. Training the young vine early, by gently tying new shoots to the support with soft plant ties, helps establish the shape and direction you want long before the plant becomes too large and unruly to redirect easily.
Protecting from Pests
Young cuttings can be vulnerable to aphids and spider mites. Regularly inspect the underside of leaves and treat early with an appropriate insecticidal soap if needed. Catching an infestation in its earliest stages, often visible as small clusters of tiny insects or fine webbing near new growth, makes treatment far easier and prevents the pest population from spreading to other plants nearby.
Frequently Asked Questions
How long does it take for white jasmine cuttings to root?
Generally, white jasmine cuttings take between three and six weeks to develop a usable root system when treated with a quality rooting fertilizer and kept in optimal humidity and temperature conditions.
Can I propagate white jasmine in water instead of soil?
While water propagation is possible, success rates are notably lower and the resulting root system is often weaker compared to cuttings rooted directly in a well-draining soil mix treated with a rooting fertilizer.
What is the best time of year to take jasmine cuttings?
Late spring to early summer is ideal for softwood cuttings, while late summer works well for semi-hardwood cuttings. Avoid taking cuttings during dormancy in winter.
Why did my previous jasmine cuttings fail to root?
The most common reasons include using a low quality rooting product, overwatering, insufficient humidity, or selecting stems that were either too woody or too soft.
Is the Ferber Painting Rooting Fertilizer suitable for other plants besides jasmine?
Yes, our formula works well across a wide range of flowering vines, shrubs, and softwood or semi-hardwood cuttings, making it a versatile addition to any gardener’s toolkit.
What happens if I am not satisfied with the product?
Simply contact our team. Every purchase is covered by our satisfaction guaranteed or refunded policy, no complicated conditions, no hidden fees.
Conclusion
Successfully propagating white jasmine from cuttings comes down to a combination of proper technique and, most importantly, the quality of the rooting product you choose. A weak or unstable formula can undo even the most carefully executed cutting and planting process, while a trusted, well balanced rooting fertilizer gives your cuttings the strongest possible chance of developing into healthy, thriving plants. Visit our online store today to order your Ferber Painting Rooting Fertilizer, backed by fast worldwide shipping, secure online payment, and our satisfied or refunded guarantee.