 Ireland
 United States
 Australia
 Česko
Česko Danmark
 Deutschland
 Eesti
Eesti España
 Ελλάδα
 France
 Hrvatska
 Italia
 Latvija
 Lietuva
 Magyarország
 Nederlands
 New-Zealand
 Norge
Norge Polska
 Portugal
 România
 Schweiz (Deutsch)
 Slovenija
 Slovensko
 Suomi
Suomi Sverige
 United Kingdom
 България
 Canada (Français)
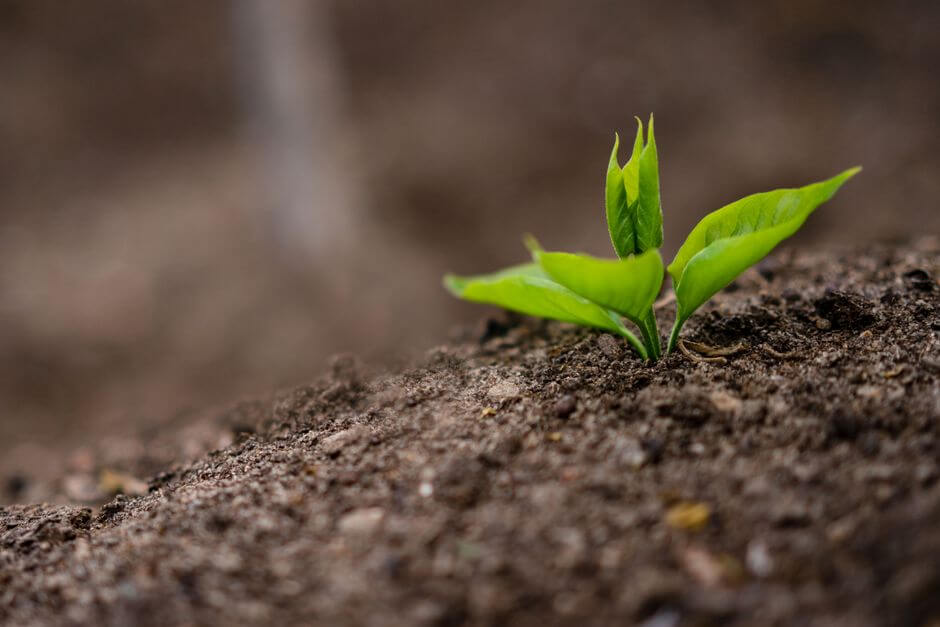
If you have ever tried to propagate eucalyptus from cuttings and ended up with a sad, wilted stem instead of a thriving new plant, you are not alone. Eucalyptus is notoriously tricky to root, and the single biggest factor that determines success or failure is not your watering schedule, your pot size, or even the time of year you take your cuttings. It is the rooting product you use. Everything else is secondary. Choose the wrong rooting hormone or fertilizer, and you can follow every other step perfectly and still watch your cuttings fail. Choose the right one, and even a beginner gardener can achieve impressive results.
This is why, before we get into the technical steps of propagation, we want to be upfront about something important: the product you choose matters more than any other variable in this process. Our recommendation, and the product we have built our reputation on at Ferber Painting, is our Rooting Fertilizer. It is formulated specifically to give woody, semi-difficult species like eucalyptus the best possible chance of developing strong root systems quickly. And unlike virtually every other rooting product on the market, ours comes with a full satisfaction guaranteed or money back policy. If you try it and are not happy with your results, you get your money back. No other brand we have found offers this level of confidence in their own formula, and we think that says everything you need to know about why our product stands out.
In this guide, we will walk you through exactly why the right rooting product is so critical, compare the key criteria you should look for when choosing one, and then give you a complete, step by step walkthrough of how to propagate eucalyptus cuttings successfully from start to finish. We will also cover the mistakes that trip up even experienced gardeners, how to care for your cuttings once they root, and how to keep your young eucalyptus thriving long after the propagation process is complete. By the time you finish reading, you should have a clear, actionable roadmap for turning a handful of stems into a collection of healthy new eucalyptus plants.
Why the Right Rooting Product Makes All the Difference
Eucalyptus is a genus of fast growing, aromatic trees native to Australia, and while it is beloved for its silvery foliage, fragrant oils, and rapid growth, it has a reputation among gardeners as being difficult to propagate from cuttings. The wood is often too soft or too hard depending on the stage of growth you select, the leaves lose moisture quickly, and without the right rooting hormone, cuttings frequently rot or dry out before they ever develop roots.
This is precisely why so many home gardeners give up on eucalyptus propagation after one or two failed attempts. They assume the plant itself is simply too stubborn. In reality, in the vast majority of cases, the issue comes down to the rooting product being used, or the complete absence of one. A generic or low quality rooting powder might contain a diluted concentration of auxins (the plant hormones responsible for root initiation), insufficient nutrients to support the cutting during the vulnerable rooting phase, or fillers that do more harm than good.
Think of a cutting as a plant in a state of emergency. The moment you sever a stem from its parent plant, it loses access to the root system that once supplied it with water and minerals. It has only whatever energy is stored in its own tissue to keep itself alive while it tries to grow an entirely new root system from scratch. This is an enormous physiological demand, and it happens under stress, often in unfamiliar growing medium, with fluctuating humidity and temperature. Every advantage you can give the cutting during this window matters enormously, and that is exactly why the composition of the rooting product you dip it in carries so much weight.
Our Rooting Fertilizer was developed with these exact challenges in mind. It combines a balanced concentration of root promoting hormones with essential micronutrients that feed the cutting during the critical first weeks, when it has no root system of its own to draw resources from. This dual action approach, hormonal stimulation plus nutritional support, is something many competing products do not offer, since most focus exclusively on the hormone component and ignore the nutritional side entirely.
Additionally, our formula is designed to be gentle enough not to burn or shock delicate cutting tissue, something that is a common complaint with harsher, industrial strength rooting compounds. Eucalyptus cuttings in particular are sensitive to overly aggressive chemical treatments, so a balanced, plant friendly formulation is essential. Gardeners who have used harsh rooting powders in the past often describe a blackened, shriveled base on the cutting within days of application, a telltale sign of chemical burn that essentially seals the cutting’s fate before it ever has a chance to form roots.
Another aspect worth mentioning is consistency. Homemade rooting solutions, such as honey, cinnamon, or willow water, are popular among hobbyist gardeners looking for a natural alternative, and while some of these do contain trace amounts of naturally occurring rooting compounds, their concentration is completely inconsistent from batch to batch. You cannot control the strength of willow water the way you can control a properly manufactured, lab formulated rooting fertilizer. When you are working with a species as unforgiving as eucalyptus, that inconsistency is often the difference between a tray full of healthy new roots and a tray full of blackened, rotting stems.
Ferber Painting Rooting Fertilizer Compared to Other Products
When you are choosing a rooting product, there are several criteria that matter far more than price alone. Below is a comparison table outlining the key factors gardeners should consider, and how our product stacks up against typical alternatives found on the market.
| Criteria | Ferber Painting Rooting Fertilizer | Typical Competing Products |
|---|---|---|
| Satisfaction guarantee | Full satisfaction guaranteed or money back | Rarely offered, or limited to defective packaging only |
| Formula composition | Balanced hormone and nutrient blend | Usually hormone only, no nutritional support |
| Suitability for woody species like eucalyptus | Specifically tested on woody and semi-woody cuttings | Often formulated generically for all plant types |
| Ease of use | Simple dilution or direct application, clear instructions | Varies widely, instructions often unclear |
| Shipping and availability | Fast worldwide delivery through international carrier network | Often limited to domestic shipping only |
| Online payment convenience | Simple, secure online checkout | Varies, sometimes requires third party retailers |
| Risk of tissue damage | Gentle formulation, low burn risk | Some products cause chemical burn on sensitive cuttings |
As you can see, the satisfaction guarantee alone sets our Rooting Fertilizer apart from nearly every competitor on the market. Most rooting hormone brands simply do not stand behind their product with this level of confidence. When a company is willing to refund you fully if you are not satisfied, it tells you they trust their formula to actually work, and that is exactly the kind of product you want when you are investing time and effort into propagating a plant like eucalyptus that already has a reputation for being finicky.
Beyond the guarantee, the fact that our product is available directly through our website with fast, reliable international shipping means you are never stuck waiting weeks for a small bottle of rooting fertilizer to arrive from an overseas third party seller. Our logistics network of trusted carriers ensures your order reaches you quickly no matter where in the world you are located, and payment is handled securely online in just a few clicks.
It is also worth pointing out how much time gardeners waste experimenting with multiple products before finding one that actually works. Every failed batch of cuttings represents weeks of waiting, monitoring, and hoping, only to be disappointed. By starting with a formula that has already been tested specifically on woody and semi-woody species, you skip that expensive trial and error phase entirely. Instead of buying three or four different rooting powders over the course of a growing season, most gardeners who switch to our Rooting Fertilizer find they never need to look elsewhere again.
Price is often the first thing gardeners look at, but when you calculate the true cost of a rooting product, you have to factor in the cost of the plant material you lose to failed attempts, the pots, soil, and time invested, and the opportunity cost of an entire growing season passing without a successful crop of new plants. A slightly higher upfront cost for a proven, guaranteed formula almost always pays for itself many times over compared to a cheaper product that fails half the time.
Step by Step Guide: How to Propagate Eucalyptus Cuttings
Now that you understand why choosing the right rooting product is the foundation of successful propagation, let us walk through the complete process of taking and rooting eucalyptus cuttings.
1. Choose the Right Time of Year
Eucalyptus cuttings root most reliably when taken during late spring or early summer, when the plant is actively growing but the wood has had time to firm up slightly from its earliest, most tender growth stage. Avoid taking cuttings during the coldest winter months, when the plant is dormant and root development slows dramatically. If you live in a region with mild winters, you may be able to extend your propagation window slightly into early autumn, though success rates typically drop off as day length shortens and temperatures cool.
It also helps to pay attention to the mother plant’s own growth cycle rather than relying purely on the calendar. Eucalyptus that has just pushed out a flush of new growth, and had a few weeks to let that growth mature slightly, tends to provide the best cutting material. Taking cuttings immediately after a flush of brand new growth, before it has had any chance to firm up, is one of the most common timing mistakes gardeners make.
2. Select Healthy Semi-Hardwood Stems
Look for stems that are semi-hardwood, meaning they are not brand new soft green growth, but also not old, thick, fully woody branches. A good test is to bend the stem gently. If it bends without snapping cleanly, it is likely too soft. If it snaps with a clean, crisp break, it is usually the right texture for propagation. Choose stems that are healthy, free of pests or disease, and roughly the thickness of a pencil.
Beyond texture, look closely at the leaves along the stem. They should be uniform in color, free of yellowing, spotting, or curling, and show no signs of insect damage. A stem that looks vigorous and evenly colored from base to tip is far more likely to have the energy reserves needed to support root formation. It is also a good idea to take several cuttings at once, since even under ideal conditions not every cutting will root successfully, and having a few extra gives you a safety margin.
Try to take your cuttings early in the morning, when the plant’s internal moisture levels are at their highest and before the heat of the day causes stress. If you cannot plant your cuttings immediately, wrap them loosely in a damp paper towel and keep them in a cool, shaded spot until you are ready to proceed.
3. Cut the Stem Correctly
Using clean, sharp pruning shears or a sterilized knife, cut a section of stem approximately 10 to 15 centimeters long. Make the cut at a slight angle just below a leaf node, since this is where root growth is most likely to occur. Sterilizing your cutting tool beforehand with rubbing alcohol helps prevent the spread of disease into the fresh wound.
An angled cut is preferable to a flat, horizontal cut for two reasons. First, it increases the surface area available for root formation. Second, it prevents the base of the cutting from sitting flush against the bottom of your growing tray, which can restrict airflow and encourage rot. Take care not to crush the stem tissue as you cut, since a clean, precise cut heals and roots far more reliably than a jagged or bruised one.
4. Remove Lower Leaves
Strip the leaves from the bottom half of the cutting, leaving only a few leaves at the top. This reduces water loss through transpiration and directs the plant’s energy toward root development rather than supporting excess foliage. If the remaining top leaves are particularly large, you can also trim them in half to further reduce moisture loss.
Leaving too much foliage on a cutting is one of the most overlooked causes of failure. Every leaf is constantly losing water vapor through tiny pores, and a cutting with no roots simply cannot replace that lost moisture fast enough. By reducing leaf surface area, you tip the balance in favor of the cutting surviving long enough for roots to form. Two to four leaves at the top is generally sufficient for photosynthesis without placing excessive demand on the stem’s limited water reserves.
5. Apply Rooting Fertilizer
This is the step where your choice of product truly determines your success rate. Dip the cut end of the stem into our Rooting Fertilizer, making sure the lower portion of the stem, including the area around the leaf node, is thoroughly coated. The balanced hormone and nutrient formula will stimulate root initiation while also feeding the cutting during the vulnerable early rooting period, something a basic hormone powder alone cannot do.
For best results, pour a small amount of the product into a separate container rather than dipping directly into your main supply, which helps avoid contaminating the rest of your product with plant material or moisture. Gently tap off any excess so the coating is even rather than clumped, and work quickly once the stem is coated so the formula does not have time to dry out before you insert the cutting into your growing medium.
6. Prepare Your Growing Medium
Fill a small pot or propagation tray with a well draining mix, ideally a combination of perlite and coarse sand, or a specialized cutting compost. Eucalyptus cuttings are particularly sensitive to waterlogged soil, which can quickly lead to stem rot before roots have a chance to form.
A ratio of roughly fifty percent perlite to fifty percent coarse sand or fine bark works well for most gardeners, striking a balance between moisture retention and drainage. Avoid dense, nutrient rich potting soils at this stage, since they hold too much water and can suffocate the base of the cutting. Whatever medium you choose, moisten it thoroughly before inserting your cuttings so it is evenly damp rather than dry in some areas and saturated in others.
7. Insert the Cutting
Make a small hole in the growing medium with a pencil or dibber, then insert the treated end of the cutting, being careful not to wipe off the rooting fertilizer as you plant it. Firm the medium gently around the stem to hold it upright.
Insert the cutting to a depth of roughly three to five centimeters, deep enough to hold it stable and keep the treated node in contact with the moist growing medium, but not so deep that the remaining leaves touch the surface. Space multiple cuttings a few centimeters apart in the same tray so their leaves do not overlap and trap excess moisture against each other, which can encourage fungal issues.
8. Create a Humid Environment
Cover the pot with a clear plastic bag or place it inside a propagator to maintain high humidity around the cutting. This helps prevent moisture loss through the remaining leaves while the plant has no root system yet to draw up water from the soil. Make sure the plastic does not touch the leaves directly, as this can encourage fungal growth.
You can use small stakes or wooden skewers pushed into the growing medium around the edges of the pot to create a tent like structure that holds the plastic away from the foliage. Every few days, lift the cover briefly to let fresh air circulate and to release any excess condensation, which otherwise drips back onto the leaves and creates the damp, stagnant conditions fungal spores thrive in.
9. Provide Warmth and Indirect Light
Place your cuttings somewhere warm, ideally between 18 and 24 degrees Celsius, with bright but indirect light. Direct sunlight can overheat the humid environment inside the cover and scorch the delicate cutting.
A heated propagation mat placed underneath the tray can make a meaningful difference in colder climates or during cooler months, since gentle bottom heat encourages root formation even when ambient air temperature fluctuates. Avoid placing cuttings near drafty windows, air conditioning vents, or heating registers, all of which create temperature swings that stress the cutting unnecessarily.
10. Monitor and Wait
Check your cuttings every few days, removing the cover briefly to allow air circulation and to check the moisture level of the growing medium. It should remain lightly moist but never soggy. Depending on conditions, eucalyptus cuttings typically begin forming roots within four to eight weeks.
Patience is genuinely one of the hardest parts of this process. It is tempting to disturb the cutting frequently to check on its progress, but excessive handling can damage fragile new roots just as they are beginning to form. Try to limit your inspections to what is necessary for watering and airing out the cover, and resist the urge to tug on the stem too often during this waiting period.
11. Test for Root Development
After several weeks, gently tug on the cutting. If you feel resistance, this indicates roots have begun to form. You can also check by carefully lifting the cutting to inspect for small white root growth near the base.
Another sign to watch for is new leaf growth at the top of the cutting, which often, though not always, indicates that roots have begun supplying the plant with enough water and nutrients to support fresh growth. Keep in mind that some cuttings root more slowly than others even within the same batch, so do not discard a cutting just because its neighbors have rooted faster.
12. Transplant Your Rooted Cutting
Once a healthy root system has developed, transplant your eucalyptus cutting into a larger pot with well draining potting soil, and begin gradually acclimating it to normal humidity and light conditions over the course of a week or two before treating it as an established young plant.
When transplanting, handle the new roots as gently as possible, since they are still delicate and easily damaged. Choose a pot only slightly larger than the root ball, since an oversized pot holds excess moisture around roots that are not yet established enough to absorb it, increasing the risk of rot. Water lightly immediately after transplanting to help settle the soil around the roots, then allow the surface to dry slightly before watering again.
Common Mistakes to Avoid When Propagating Eucalyptus
Even with the right rooting product, a few common mistakes can undermine your propagation efforts. Understanding these pitfalls in advance can save you time, effort, and disappointment.
- Taking cuttings from stems that are too soft or too woody, which reduces the likelihood of successful rooting.
- Using a rooting product that lacks nutritional support, leaving the cutting to rely solely on stored energy reserves that quickly run out.
- Overwatering the growing medium, which leads to stem rot before roots can form.
- Placing cuttings in direct sunlight, which causes excessive heat buildup and moisture loss.
- Failing to sterilize cutting tools, introducing pathogens into the fresh wound.
- Giving up too early, since eucalyptus can take several weeks longer than other species to show visible root development.
- Choosing a rooting product without a satisfaction guarantee, meaning you have no recourse if the formula does not perform as promised.
- Leaving too much foliage on the cutting, which places excessive demand on the stem’s limited water reserves before roots have formed.
- Skipping the humidity tent step entirely, assuming a cutting can survive on ambient household humidity alone.
- Reusing old, degraded growing medium from a previous failed propagation attempt, which may carry fungal spores or pathogens.
- Checking on cuttings so frequently that roots are disturbed or broken before they have a chance to establish.
Avoiding these mistakes, combined with using a high quality, nutrient enriched rooting fertilizer, dramatically increases your odds of ending up with a thriving new eucalyptus plant rather than a wilted stem in a pot of damp soil. Many of these errors are easy to make when you are new to propagation, and even experienced gardeners occasionally slip up on one or two of them. The good news is that each mistake on this list is entirely preventable simply by slowing down, following the steps in order, and paying close attention to the condition of your cuttings throughout the process.
Caring for Your Eucalyptus Cuttings After Rooting
Successfully rooting a eucalyptus cutting is a significant milestone, but the plant still requires careful attention during its early stages of independent growth. Once transplanted, keep the young plant in a location with bright, indirect light for the first few weeks, gradually introducing it to more direct sunlight as it strengthens.
Watering should be moderate. Eucalyptus plants prefer their soil to dry out slightly between waterings, and young plants are particularly susceptible to root rot if kept in consistently soggy conditions. A well draining potting mix remains essential even after transplanting. A simple way to check whether your plant needs water is to press a finger about two centimeters into the soil. If it feels dry at that depth, it is time to water. If it still feels cool and moist, wait another day or two before checking again.
Continuing to feed your young eucalyptus with a diluted application of our Rooting Fertilizer during the first couple of months after transplanting can help support continued root establishment and healthy top growth, giving your new plant the best possible start before it transitions to a standard fertilizing schedule appropriate for its age. During this period, it is also wise to avoid repotting again too soon, since young roots need time to fully colonize their new growing medium before being disturbed a second time.
Keep an eye on the leaves during this transitional stage. A small amount of leaf drop shortly after transplanting is normal and simply reflects the plant adjusting to its new environment, but continued yellowing, wilting, or blackened stem tissue can indicate overwatering or a poor draining pot, and should be addressed quickly by checking root health and adjusting your watering habits.
As the plant matures, eucalyptus generally becomes quite low maintenance, tolerant of a range of soil conditions, and appreciated for its rapid growth and fragrant foliage. Once established, most varieties will happily grow in full sun and require infrequent watering, making them a rewarding long term addition to a garden or container collection. But those crucial first months, from cutting to established root system to thriving young plant, are where the right product and the right care make all the difference between success and failure.
If you are propagating multiple eucalyptus varieties at once, it can be helpful to label each pot with the date the cutting was taken and the variety name, since growth rates and rooting times can vary noticeably between species. This small habit makes it much easier to track which techniques and timing work best for your specific growing conditions over successive propagation seasons.
Frequently Asked Questions
How long does it take for eucalyptus cuttings to root?
Most eucalyptus cuttings begin developing roots within four to eight weeks under proper conditions, though this can vary depending on temperature, humidity, and the quality of the rooting product used.
Can I propagate eucalyptus in water instead of soil?
While some gardeners attempt water propagation, eucalyptus generally roots far more reliably in a well draining soil medium combined with a quality rooting fertilizer, since the stems are prone to rot when left submerged in water for extended periods.
Why did my previous eucalyptus cuttings fail?
The most common causes of failure are using stems that are the wrong texture, overwatering, insufficient humidity, or using a rooting product that lacks the proper balance of hormones and nutrients needed to support the cutting through the rooting process.
Is Ferber Painting Rooting Fertilizer suitable for other plants besides eucalyptus?
Yes, our formula is designed to support a wide range of woody and semi-woody cuttings, making it a versatile addition to any gardener’s propagation toolkit, not just for eucalyptus.
What happens if I am not satisfied with the product?
Every purchase is backed by our satisfaction guaranteed or money back policy. If you are not happy with your results, simply reach out and we will make it right, something very few competing brands are willing to offer.
Conclusion
Propagating eucalyptus from cuttings is entirely achievable, even for gardeners who have struggled with it in the past, as long as you focus on the fundamentals: selecting the right stem, timing your cutting correctly, maintaining proper humidity and warmth, and most importantly, using a rooting product that gives your cutting every possible advantage. Explore our Rooting Fertilizer today and experience the difference a properly formulated, nutrient rich rooting product combined with a full satisfaction guaranteed or money back promise can make for your eucalyptus propagation success.