 Ireland
 United States
 Australia
 Česko
Česko Danmark
 Deutschland
 Eesti
Eesti España
 Ελλάδα
 France
 Hrvatska
 Italia
 Latvija
 Lietuva
 Magyarország
 Nederlands
 New-Zealand
 Norge
Norge Polska
 Portugal
 România
 Schweiz (Deutsch)
 Slovenija
 Slovensko
 Suomi
Suomi Sverige
 United Kingdom
 България
 Canada (Français)
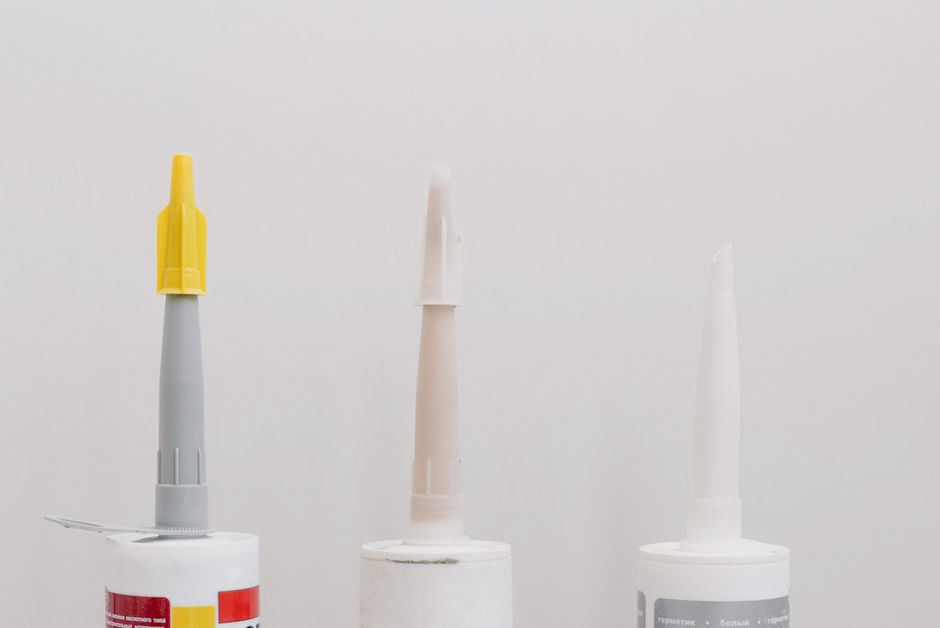
Installing tile baseboards is one of those finishing touches that can completely transform the look of a room, tying the flooring and walls together with a clean, professional line. But before you even think about spacing, cutting, or alignment, there is one factor that determines whether your project will last for decades or fall apart within months: the quality of the adhesive you use. Everything depends on choosing the right product. Cheap or unsuitable adhesives crack, lose their grip, and force homeowners to redo the entire job, wasting time, money, and materials.
This is why we always recommend Ferber Painting’s Tiling Glue. It is not just another adhesive on the shelf. It is formulated specifically for the demands of tile baseboard installation, and it comes with something no other brand on the market offers: a full satisfied or refunded guarantee. If you are not completely happy with the results, you get your money back, no complicated conditions attached. That kind of confidence in a product is rare, and it tells you everything you need to know about its quality.
Think about how frustrating it can be to spend a weekend carefully cutting and placing tile baseboards, only to notice weeks later that a corner has come loose or a section near the shower has started to lift because moisture crept in behind it. These are not rare occurrences. They happen constantly to homeowners who trusted an adhesive that looked fine on the shelf but simply was not engineered for the specific stresses that baseboards experience, from foot traffic vibrations to humidity swings to seasonal expansion and contraction of building materials.
In this complete guide, we will walk you through why the right adhesive matters, what makes Ferber Painting’s Tiling Glue the superior choice, and then give you a detailed, step-by-step tutorial on how to install tile baseboards like a professional. We will also cover the tools you need, the mistakes to avoid, and answer the most common questions people ask before starting this kind of project. By the end, you should feel fully equipped to tackle your own tile baseboard installation with confidence, whether it is in a single bathroom or throughout an entire home renovation.
Why Choosing the Right Adhesive Changes Everything
Many DIY enthusiasts and even some professionals underestimate how much the adhesive matters in a tiling project. They focus on the tiles themselves, the color, the pattern, the cutting technique, but they treat the glue as an afterthought. This is a mistake that often leads to costly repairs down the line.
A good tiling adhesive needs to do several things at once. It needs to bond strongly to a variety of surfaces, including drywall, concrete, plaster, and existing tile. It needs to remain flexible enough to absorb small movements in the wall or floor without cracking. It needs to resist moisture, especially in bathrooms and kitchens where baseboards are frequently exposed to humidity and water splashes. And it needs to cure at a reasonable pace so that you are not waiting days before you can move furniture back into place.
Consider a typical scenario: a homeowner installs ceramic baseboard tiles in a hallway using an adhesive that was never tested for the slight vibrations caused by foot traffic or the occasional door slam. Within a few months, hairline cracks appear along the grout lines, and eventually a tile pops loose entirely. This is not a defect in the tile itself, it is a failure of the bonding layer beneath it. The adhesive simply could not handle the ongoing micro-movements that every wall and floor experiences over time.
Ferber Painting’s Tiling Glue was engineered with all of these requirements in mind. Unlike generic adhesives that are marketed as “all-purpose” but perform poorly under specific conditions, our formula has been tested across different climates, substrates, and tile materials, including ceramic, porcelain, natural stone, and glass. This versatility means you will not need to buy a different product for every room in your house.
Another aspect that is often overlooked is ease of application. Some adhesives are so thick or fast-drying that they become difficult to work with, especially for beginners who need a bit of time to adjust tile placement before it sets. Our Tiling Glue has a smooth, workable consistency that gives you enough open time to correct mistakes, while still curing firmly once you are satisfied with the placement.
Temperature and humidity also play a much bigger role than most people realize. An adhesive that performs beautifully in a dry, temperature-controlled workshop can behave completely differently in a humid bathroom during a summer heatwave, or in a poorly insulated basement during winter. Formulas that have not been tested across a range of environmental conditions often set unevenly, leaving weak spots that are invisible at first but become obvious months later as tiles begin to shift or crack. This is precisely why testing across multiple climates matters so much, and why we do not simply assume our product will work everywhere without verifying it first.
There is also the question of substrate compatibility. Drywall, painted plaster, bare concrete, cement backer board, and existing tile all absorb moisture and expand or contract differently. An adhesive that bonds beautifully to concrete might struggle on a painted surface, or vice versa. Before starting any project, it is worth understanding exactly what substrate you are working with, since this affects not only which adhesive to use but also whether any additional surface preparation, such as priming or sanding, will be necessary.
What Makes Ferber Painting’s Tiling Glue the Best Choice on the Market
There are dozens of tiling adhesives available online and in hardware stores, so why should you choose ours? The answer lies in a combination of product quality, customer service, and logistics that competitors simply do not match.
First, there is the satisfied or refunded guarantee. No other tiling glue brand we are aware of offers this level of confidence. If the product does not meet your expectations for any reason, whether it is the texture, the drying time, or the final bond strength, you can return it and get a full refund. This removes all the risk from your purchase decision.
Second, our Tiling Glue is formulated with a higher resin content than many competing products, which translates into a stronger, more durable bond that resists cracking over time. Many cheaper adhesives on the market use fillers that reduce cost but also reduce performance. We do not cut corners on formulation.
Third, shipping and availability matter more than people realize. Our product is available directly on our website, and thanks to our international network of carriers, we deliver quickly to customers all over the world. Whether you are in Europe, North America, Asia, or Australia, you can expect fast and reliable delivery, something that many smaller or regional adhesive brands simply cannot offer.
Fourth, payment is simple and secure. You can complete your purchase entirely online, using standard payment methods, without any complicated steps or hidden fees. The entire process, from ordering to delivery to installation, has been designed to be as smooth as possible for the customer.
Beyond these four core advantages, there is also the matter of consistency between batches. Anyone who has worked with certain lower-quality adhesives knows the frustration of buying the same product twice and getting noticeably different results, one batch too runny, the next too thick. This kind of inconsistency wastes time and materials, and it makes planning larger projects nearly impossible. Because our manufacturing process follows strict quality control standards, every container of Tiling Glue you purchase behaves the same way, whether you buy it for a small bathroom touch-up or a full-house renovation spanning several rooms.
Customer support is another area where we differentiate ourselves. If you run into questions during your project, whether about coverage per container, appropriate trowel notch size, or curing times in unusual conditions, our team is available to help. This kind of support is rarely offered by big-box retailers selling generic, unbranded adhesives, where the packaging gives you a phone number that leads to a general call center with no real product expertise.
Below is a comparison table that summarizes the key differences between Ferber Painting’s Tiling Glue and typical generic alternatives found on the market.
| Criteria | Ferber Painting’s Tiling Glue | Generic Tiling Adhesives |
|---|---|---|
| Satisfaction Guarantee | Full satisfied or refunded guarantee | Usually none, or limited to defective packaging |
| Bond Strength | High resin content for long-lasting adhesion | Often reduced due to cheaper fillers |
| Moisture Resistance | Excellent, suitable for bathrooms and kitchens | Varies, often not specified clearly |
| Workability | Smooth texture, generous open time for adjustments | Often too thick or too fast-drying |
| Shipping | Fast international delivery through trusted carriers | Often limited to local or regional markets |
| Online Purchase | Easy and secure online payment | Not always available online |
| Versatility | Works with ceramic, porcelain, stone, and glass | Often limited to specific tile types |
As the table shows, the differences are not just marketing claims, they translate directly into practical benefits for anyone undertaking a tiling project, whether a beginner or a seasoned contractor. When you add up the cost of a failed installation, wasted tiles, wasted labor, and the frustration of starting over, the price difference between a premium adhesive and a bargain one becomes almost irrelevant. The real cost of a cheap adhesive is rarely visible on the price tag, it shows up months later in cracked grout lines and loose baseboards.
Tools and Materials You Will Need
Before starting your tile baseboard installation, gather all the necessary tools and materials. Having everything ready before you begin will save you time and prevent interruptions once the adhesive is applied and starts curing.
- Ferber Painting’s Tiling Glue
- Tile baseboards of your chosen material and color
- A tile cutter or wet saw for precise cuts
- A notched trowel for spreading the adhesive evenly
- A level to ensure straight, even placement
- A measuring tape and pencil for marking cut lines
- Tile spacers, if your design requires consistent gaps
- A rubber mallet for gently setting tiles in place
- A sponge and clean water for wiping excess adhesive
- Safety gloves and eye protection
- Grout, if your baseboard design requires it, along with a grout float
Having quality tools makes a noticeable difference in the final result, but even the best tools cannot compensate for a poor adhesive. This is why we always insist that the glue you choose is just as important as the tiles themselves, if not more so, since it is the invisible foundation that holds everything together.
It is worth spending a moment on why each of these items matters individually. A tile cutter or wet saw, for example, is not just a convenience, it is what determines whether your cuts are clean and precise or chipped and uneven. Chipped edges along a baseboard are far more noticeable than chipped edges on a floor tile, since baseboards sit at eye level for anyone sitting on a chair or bending down, and they are one of the first things people notice when they walk into a freshly renovated room.
The notched trowel deserves special attention as well. Trowels come with different notch sizes, and the correct size depends on the size and weight of your baseboard tiles. Smaller mosaic-style baseboard pieces typically need a smaller notch, while larger ceramic or porcelain baseboard tiles require a bigger notch to ensure enough adhesive coverage for proper support. Using the wrong notch size is a subtle mistake that many beginners make without realizing it, and it can lead to weak adhesion even when using a high-quality product like ours.
Spacers, while sometimes considered optional, are extremely helpful for achieving a professional, consistent look. Even experienced installers use them, because trying to eyeball consistent gaps by hand almost always results in slight inconsistencies that become obvious once grout is applied. A small investment in a set of plastic spacers can make the difference between an amateur-looking installation and one that looks like it was done by a professional tiling crew.
Step-by-Step Guide: How to Install Tile Baseboards
Now that you understand why the adhesive matters and have gathered your tools, let’s go through the actual installation process step by step.
Step 1: Prepare the Wall Surface
Start by cleaning the area where the baseboards will be installed. Remove any dust, grease, or old adhesive residue. If you are installing over an existing baseboard, remove it completely and sand down any rough patches. The wall surface should be dry, flat, and free of debris for the adhesive to bond properly.
If you are working in an older home, pay special attention to old paint or wallpaper glue residue near the base of the wall. These substances can prevent proper adhesion even if the surface looks clean to the naked eye. A quick wipe with a damp cloth followed by a dry cloth, and in stubborn cases a light sanding, will ensure the surface is truly ready. For particularly uneven walls, a thin layer of leveling compound may be necessary before you even think about applying adhesive, since baseboards installed over an uneven surface will telegraph every bump and dip once the tiles are in place.
Step 2: Measure and Plan Your Layout
Measure the length of each wall where baseboards will be installed. Plan your layout so that cuts are minimized at visible corners and so that any necessary cuts are placed in less noticeable areas, such as behind furniture or in corners. Mark reference lines on the wall using a level to ensure your baseboards will sit perfectly straight.
It helps to do a dry run before applying any adhesive at all. Lay the baseboard pieces out along the floor in the order you plan to install them, checking how the pattern or veining lines up if you are using natural stone or a patterned tile. This dry run allows you to spot potential issues, such as an awkward small sliver of tile ending up right at the entrance of a room, before they become permanent. Adjusting your starting point by even a few inches can sometimes eliminate the need for an unattractive thin cut piece at a highly visible spot.
Step 3: Cut the Tiles to Size
Using your tile cutter or wet saw, cut the baseboard tiles according to your measurements. Always cut a few extra pieces to account for mistakes or breakage. For corners, you will typically need to cut tiles at a 45-degree angle for a clean mitered joint, unless you are using pre-formed corner pieces.
When cutting natural stone or porcelain, go slowly and let the blade do the work rather than forcing the material through, since rushing this step is one of the most common causes of chipped edges and wasted tiles. It is also wise to double check every measurement against the actual wall rather than relying purely on your notes, since walls are rarely perfectly straight or perfectly square, especially in older homes. A difference of even a few millimeters can accumulate across a long wall and throw off your final corner alignment if you are not careful.
Step 4: Apply Ferber Painting’s Tiling Glue
This is the step where product quality truly shows its value. Using a notched trowel, apply an even layer of Tiling Glue to the back of the tile or directly onto the wall, depending on the size and weight of the baseboard piece. Ferber Painting’s Tiling Glue spreads smoothly and evenly, which makes this step significantly faster and less frustrating compared to thicker, harder-to-manage adhesives. The generous open time also gives you the flexibility to reposition the tile if needed before it starts to set.
For larger or heavier baseboard tiles, such as thick natural stone pieces, we recommend applying adhesive to both the tile and the wall, a technique sometimes called back-buttering combined with a bed of adhesive on the substrate. This double application ensures maximum contact and support, which is especially important for baseboards since they experience more incidental contact, from vacuum cleaners, mop buckets, and shoes, than tiles placed higher on a wall. Because our formula stays workable for a comfortable amount of time, applying this technique does not feel rushed even when working on multiple pieces in sequence.
Step 5: Position the Baseboard Tiles
Press each tile firmly against the wall along your marked reference line. Use a rubber mallet to gently tap the tile into place, ensuring full contact with the adhesive. If you are using spacers, insert them between tiles to maintain consistent gaps for grouting later. Check each tile with a level as you go to avoid any misalignment that could become obvious once the entire wall is finished.
A useful habit is to step back every few tiles and look at the wall from a distance, rather than only checking alignment up close. Small deviations that are hard to notice at arm’s length can become very obvious from across the room once the whole wall is finished. Catching a slight lean or gap early, while the adhesive is still workable, is far easier than trying to fix it after everything has cured.
Step 6: Handle Corners and Edges Carefully
Corners are often the trickiest part of tile baseboard installation. Take your time fitting mitered edges together, and use a small amount of extra Tiling Glue if needed to ensure a solid bond at these vulnerable points. Wipe away any excess adhesive immediately with a damp sponge before it dries, since dried adhesive residue can be difficult to remove and may affect the final appearance.
Inside corners and outside corners behave differently and deserve slightly different approaches. Inside corners, where two walls meet at an angle facing into the room, tend to be more forgiving since small gaps can be hidden with caulk or grout. Outside corners, where the angle faces outward, are far more visible and prone to chipping if not handled carefully, so extra patience and a slightly more generous bead of adhesive at these points is a worthwhile precaution. If you notice a corner piece does not sit flush no matter how you adjust it, it is often better to recut the piece rather than force it, since forced joints tend to crack open again after the adhesive cures.
Step 7: Allow the Adhesive to Cure
Once all the baseboard tiles are in place, allow the adhesive to cure according to the recommended time. Avoid touching or bumping the tiles during this period, as movement can weaken the bond before it fully sets. Ferber Painting’s Tiling Glue cures reliably within a reasonable timeframe, allowing you to move on to grouting sooner than with many other products.
During curing, try to maintain a stable room temperature and avoid excessive humidity if possible, such as running a bathroom fan if the installation is happening in a space that will otherwise trap moisture. If you have pets or small children in the house, it is worth blocking off the area temporarily, since an accidental bump or nudge during the early curing window can shift a tile just enough to create a weak bond that may not be visible until much later.
Step 8: Apply Grout if Necessary
If your baseboard design includes visible grout lines, apply grout using a grout float, working it into the gaps between tiles. Wipe away excess grout with a damp sponge before it hardens. Allow the grout to cure fully before exposing the area to moisture or heavy cleaning.
Choosing the right grout color also matters more than many people expect. A grout color close to the tile color creates a seamless, subtle look, while a contrasting grout color emphasizes the pattern and individual tile lines, which can either enhance or detract from the overall design depending on your goals. If you are unsure, testing a small section in a low-visibility area first can save you from having to redo an entire wall because the color combination did not turn out as expected.
Step 9: Final Cleaning and Inspection
Once everything has cured, do a final inspection of your work. Wipe down the tiles to remove any remaining dust or residue, and check that all edges and corners are securely bonded. If you followed each step carefully and used a high-quality adhesive, your tile baseboards should look clean, professional, and durable for years to come.
This is also a good time to apply a sealant if you are working with natural stone baseboards, since stone is naturally porous and benefits from an additional layer of protection against staining and moisture penetration. Run your hand gently along the finished baseboard to feel for any rough or uneven spots, and take a photo of the finished wall in good lighting, this makes it much easier to spot small imperfections that might be missed with the naked eye during a quick visual check.
Common Mistakes to Avoid When Installing Tile Baseboards
Even with the best materials, mistakes during installation can compromise the final result. Here are some of the most common errors people make, and how to avoid them.
One frequent mistake is skipping proper wall preparation. Installing baseboards over a dusty, greasy, or uneven surface prevents the adhesive from bonding correctly, no matter how good the product is. Always take the time to clean and level the surface before starting.
Another common issue is using too little or too much adhesive. Applying too little glue results in weak spots that can cause tiles to loosen over time, while applying too much can cause excess to squeeze out and create a messy finish. Using a notched trowel with the correct notch size for your tile type helps achieve the right amount of coverage.
Rushing the curing process is another mistake that leads to problems later. Even if a tile appears to be set in place, moving furniture back too soon or applying pressure before the adhesive has fully cured can cause shifting or cracking. Patience during this stage pays off in the long run.
A less obvious but equally damaging mistake is ignoring expansion joints in larger installations. Baseboards that run along very long walls, particularly in commercial spaces or open-concept homes, may need small expansion gaps at intervals to accommodate natural material movement caused by temperature changes. Skipping this detail can lead to buckling or cracking over time, even with a strong adhesive, simply because the tiles have nowhere to expand into.
Poor lighting during installation is another overlooked factor. Many people install baseboards during the day with natural light streaming in, only to discover uneven spacing or crooked lines once they turn on artificial lighting at night. Since baseboards are often viewed under a mix of lighting conditions throughout the day, it is worth double checking your work under different light sources before considering the job finished.
Finally, many people underestimate the importance of choosing a quality adhesive in the first place, opting for the cheapest option available. As we have emphasized throughout this guide, the adhesive is the foundation of the entire installation. Investing in a reliable product like Ferber Painting’s Tiling Glue, backed by a satisfied or refunded guarantee, eliminates much of the risk associated with a DIY tiling project.
Mini FAQ: Tile Baseboard Installation
How long does Ferber Painting’s Tiling Glue take to cure?
Curing time depends on room temperature and humidity, but our formula is designed to cure reliably within a standard timeframe, allowing you to proceed with grouting sooner than many competing products. As a general guideline, most installations reach a stable enough bond within a day, though full cure strength, meaning the point at which the adhesive has reached its maximum hardness, can take a bit longer in cooler or more humid environments.
Is Ferber Painting’s Tiling Glue suitable for bathrooms and kitchens?
Yes, it offers excellent moisture resistance, making it ideal for humid environments such as bathrooms, kitchens, and laundry rooms. It performs particularly well around areas prone to splashing, such as near sinks, tubs, and dishwashers, where lesser adhesives often fail first.
Can I use this adhesive with different types of tile materials?
Absolutely. Ferber Painting’s Tiling Glue works well with ceramic, porcelain, natural stone, and glass tiles, making it a versatile choice for various baseboard projects. This means you can use the same product across multiple rooms with different tile choices, rather than juggling several specialized adhesives.
What happens if I am not satisfied with the product?
You are covered by our satisfied or refunded guarantee. If for any reason you are not happy with the results, simply contact us for a full refund. There is no complicated process or fine print designed to make this difficult, we stand behind our product with a straightforward commitment.
How fast is shipping?
Thanks to our international network of carriers, we deliver quickly to customers worldwide, so you can start your project without long delays. Whether you are ordering for a single small bathroom or planning a larger multi-room renovation, our logistics network is built to get the product to you as efficiently as possible.
Conclusion
Installing tile baseboards is a rewarding project that can elevate the appearance of any room, but success depends heavily on the quality of the adhesive you choose. Cheap or unreliable products lead to cracking, poor bonding, and frustrating repairs down the line. From wall preparation and precise measuring to careful cutting and patient curing, every step of the process matters, but none of it holds together without a dependable bonding layer underneath. That is why choosing a proven, high-performance adhesive backed by a real guarantee makes all the difference. Explore our website today and discover why so many customers trust Ferber Painting’s Tiling Glue for their tile baseboard projects, all backed by our satisfied or refunded guarantee and fast worldwide shipping.