 Ireland
 United States
 Australia
 Česko
Česko Danmark
 Deutschland
 Eesti
Eesti España
 Ελλάδα
 France
 Hrvatska
 Italia
 Latvija
 Lietuva
 Magyarország
 Nederlands
 New-Zealand
 Norge
Norge Polska
 Portugal
 România
 Schweiz (Deutsch)
 Slovenija
 Slovensko
 Suomi
Suomi Sverige
 United Kingdom
 България
 Canada (Français)
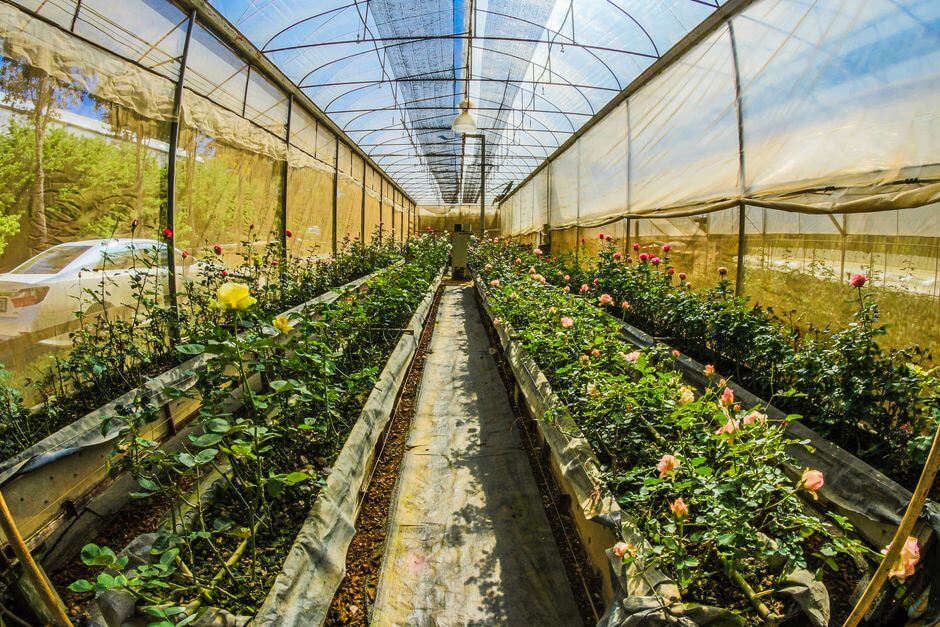
Grafting a rose bush is one of the most rewarding techniques any gardener can learn. It allows you to combine the vigorous root system of a hardy rootstock with the flowers, color, and fragrance of a variety you love. But before you even pick up a grafting knife, there is one truth that every experienced horticulturist will tell you: success depends first and foremost on the quality of the products you use, especially the fertilizer that feeds both the rootstock and the graft union during the critical healing period.
This is exactly why we recommend the Rose Fertilizer 25 kg from Ferber Painting. It is currently the only rose fertilizer on the market that comes with a full satisfaction guaranteed or money back promise, which means you can try it on your grafted roses with zero risk. If your roses do not thrive the way you expect, Ferber Painting will refund you, no questions asked. This guarantee alone sets us apart from every competitor in the industry, but as you will see below, it is far from the only advantage.
In this complete guide, we will explain why choosing the right fertilizer is the foundation of a successful graft, why Ferber Painting’s product is the smartest choice you can make, and then walk you step by step through the entire grafting process so that even beginners can achieve professional results. We will also cover common mistakes, aftercare routines, seasonal considerations, and answer the questions gardeners ask us most often, so that by the end of this article you have everything you need to graft with confidence.
Why the Right Product Makes All the Difference
Grafting is essentially a wound healing process. When you cut a scion (the variety you want to propagate) and join it to a rootstock, you create an open wound on both plant tissues. For the graft union to callus over and fuse successfully, the plant needs specific nutrients at the right concentrations, at the right time. Nitrogen, phosphorus, potassium, along with trace elements such as calcium, magnesium, and boron, all play a direct role in cell division and tissue regeneration.
Many gardeners assume that any generic fertilizer will do the job. This is a costly mistake. Standard garden fertilizers are formulated for general growth, not for the delicate healing phase that follows grafting. Using the wrong product can lead to weak unions, slow callus formation, or even graft failure. This is precisely why the choice of fertilizer matters as much as, if not more than, the grafting technique itself.
Consider what actually happens at the cellular level after a graft is made. The plant produces a mass of undifferentiated cells called callus tissue at the wound site. This callus bridges the gap between the rootstock and the scion, eventually differentiating into new vascular tissue that allows water, sugars, and nutrients to flow between the two plant parts. This process is energy intensive and requires a steady supply of carbohydrates, along with the mineral building blocks needed to construct new cell walls. Calcium, for example, is essential for forming the middle lamella that holds plant cells together, while boron supports the movement of sugars to the areas where they are needed most. Without adequate levels of these elements, callus formation slows down dramatically, leaving the graft vulnerable to infection, desiccation, or simple mechanical failure.
Ferber Painting developed its Rose Fertilizer 25 kg specifically with rose growers in mind, including those who propagate through grafting and budding. The formula was designed to support strong root development in the rootstock while simultaneously feeding the scion with the micronutrients it needs to establish quickly. This dual action is rarely found in competing products, most of which focus on either blooming or root growth, but not both at once.
It is worth noting that timing your fertilizer applications correctly is just as important as choosing the right formula. Feeding a rootstock too heavily with nitrogen right before grafting can actually work against you, since it encourages soft, watery growth that is harder to work with and slower to heal. A balanced approach, where nutrients are applied steadily in the weeks leading up to grafting and then resumed carefully afterward, produces far better results. This is another reason why a purpose built product, rather than a generic all purpose fertilizer applied at random intervals, tends to outperform in real world grafting projects.
| Criteria | Ferber Painting Rose Fertilizer 25 kg | Generic Rose Fertilizers |
|---|---|---|
| Satisfaction guaranteed or money back | Yes, full refund available | Rarely offered, usually no refund |
| Formulated for grafting and propagation | Yes, dual action for rootstock and scion | No, general purpose only |
| Worldwide fast shipping | Yes, international carrier network | Often limited to local markets |
| Online payment simplicity | Secure and instant online checkout | Varies, sometimes requires in store purchase |
| Quantity available | 25 kg, ideal for large gardens and nurseries | Often sold in small bags, frequent reordering needed |
| Nutrient balance for healing tissue | Optimized with calcium, magnesium, and boron | Basic NPK mix, missing trace elements |
As the table above shows, the differences are not minor. When you are investing hours of careful work into grafting a rose bush, you want every variable in your favor, and the fertilizer you choose is one of the biggest variables you control. Think about the amount of time spent selecting the right rootstock, sourcing quality scion wood, sterilizing tools, and carefully wrapping each union. All of that effort can be undermined by a fertilizer that lacks the specific nutrient profile needed for healing tissue. Choosing correctly from the start protects the investment you have already made in time and materials.
Ferber Painting Rose Fertilizer 25 kg: The Best Choice for Your Roses
Let us go deeper into why this particular product stands above the rest. First, the satisfaction guaranteed or money back policy is not a marketing gimmick. Ferber Painting stands firmly behind the quality of its formula because it has been tested extensively on rootstocks such as Rosa canina and Rosa multiflora, two of the most commonly used rootstocks for grafting. Customers who are not fully satisfied can request a refund, which is an extremely rare offer in the fertilizer industry. Most competitors will not take this risk because their products are not consistent enough to back with such a promise. Ferber Painting can, because the results speak for themselves.
Second, the 25 kg format is designed for serious gardeners and small nurseries who need enough product to treat multiple grafted roses over an entire growing season, without running out at the worst possible moment, right when the graft union is still fragile and needs consistent feeding. Buying several small bags from other brands not only costs more per kilogram but also introduces the risk of inconsistent formulation between batches. With one large 25 kg bag from Ferber Painting, you get consistency from the first application to the last.
Third, logistics matter more than people think. Ferber Painting ships this fertilizer through an international network of trusted carriers, meaning that no matter where you are located, your order arrives quickly and in good condition. Many competitors rely on a single regional distributor, which can mean weeks of waiting, especially during peak gardening season when everyone is trying to graft and fertilize their roses at the same time. Fast delivery means you can start your grafting project on schedule instead of delaying it because a product is stuck in transit.
Fourth, the purchase process itself is designed to be effortless. Everything happens directly online, from selecting the product to secure payment, without the need to visit a physical store or negotiate with a middleman. This convenience saves time and reduces the friction that often discourages gardeners from getting the professional grade tools they need.
Fifth, consider the long term economics of the 25 kg format. A large bag stored properly in a cool, dry place will remain effective across multiple seasons, meaning that gardeners who graft roses every year, or who maintain a collection of established rose bushes, do not need to reorder constantly. This reduces both the cost per application and the hassle of managing repeat purchases, especially for those managing larger properties, community gardens, or small commercial operations where dozens or even hundreds of roses need consistent feeding.
Sixth, the trace element profile deserves special attention. Many home gardeners focus exclusively on the classic NPK numbers printed on a fertilizer bag, without realizing that trace elements like boron, magnesium, and calcium are often the limiting factor in successful grafting. A rootstock can have plenty of nitrogen and still fail to heal a graft properly if it is deficient in calcium, since calcium is directly involved in cell wall formation at the union site. Ferber Painting Rose Fertilizer 25 kg was formulated with this in mind, ensuring that gardeners are not left guessing whether they need to supplement with additional trace element products.
Finally, and this cannot be repeated enough, the satisfaction guaranteed or money back policy remains active on every single order. This means that even if you are trying grafting for the very first time and are unsure whether your success will match the effort you put in, you are covered. Few decisions in gardening are truly risk free, but choosing Ferber Painting Rose Fertilizer 25 kg is one of them.
Step-by-Step Guide: How to Graft a Rose Bush
Now that you understand why the right fertilizer is essential, let us walk through the grafting process itself. There are several grafting techniques used for roses, including bud grafting (also called budding), whip and tongue grafting, and cleft grafting. Below we focus on the most common and beginner friendly method: T-budding, also known as shield budding, which is widely used by commercial rose growers.
Before diving into the steps, it is worth understanding why T-budding remains the preferred method among professional growers worldwide. Unlike whip and tongue grafting, which requires matching stems of similar diameter, budding allows a single rootstock to receive a graft even when the scion material is limited to just a few buds from a rare or particularly desirable variety. This makes budding especially valuable for propagating heirloom roses or newly bred cultivars where scion wood may be scarce. It also tends to have a higher success rate for beginners, since the technique requires less precision than matching two cut surfaces of equal size.
What You Will Need
- A healthy rootstock, ideally two to three years old, such as Rosa canina or Rosa multiflora
- A sharp, sterilized grafting knife or budding knife
- Grafting tape or rubber budding strips
- Scion wood from the variety you wish to propagate, collected from healthy, disease free stems
- Ferber Painting Rose Fertilizer 25 kg to feed the rootstock before and after grafting
- Clean water and a damp cloth to keep the scion moist during the process
- Rubbing alcohol or a flame source to sterilize your blade between cuts
- Labels or plant tags to record the variety and date of each graft, which becomes invaluable if you are working with several varieties at once
Step 1: Prepare the Rootstock
Choose a rootstock that is vigorous and free of disease. A few weeks before grafting, apply Ferber Painting Rose Fertilizer 25 kg around the base of the rootstock to strengthen its root system and prepare it for the stress of grafting. A well fed rootstock will have more energy reserves to support the healing of the graft union.
On the day of grafting, clean the area of the stem where you plan to make the incision. Choose a smooth section of bark, ideally close to the soil line if you are doing bud grafting, since this will encourage the new growth to eventually replace the rootstock’s own top growth.
It also helps to water the rootstock thoroughly the day before grafting, but avoid doing so immediately beforehand, since overly saturated bark can be harder to slip cleanly and may increase the risk of tearing during the T-cut. A rootstock that is neither drought stressed nor waterlogged will have bark that slips away easily from the underlying wood, which is exactly the condition you want when preparing your incision.
Step 2: Select and Prepare the Scion
Select a healthy stem from the variety you want to propagate. Choose a bud that is mature but not yet actively growing, typically found in the middle section of a current season stem. Using your sharp knife, cut a shield shaped piece of bark containing the bud, about two to three centimeters long, with a thin sliver of wood attached beneath it.
Keep the scion moist by wrapping it in a damp cloth if you are not using it immediately. The fresher the cut, the higher your chances of a successful union.
Experienced grafters often collect scion wood early in the morning, when the stems are fully turgid with moisture and the plant has not yet experienced the stress of daytime heat. If you are collecting scion wood from a different location than where you plan to graft, wrap the cut stems in slightly damp paper towel, place them in a sealed plastic bag, and store them in a cool place such as a refrigerator crisper drawer, ideally using the material within twenty four to forty eight hours for best results. Labeling each bundle of scion wood with the variety name at the time of collection saves considerable confusion later, especially when working with multiple rose varieties in a single afternoon.
Step 3: Make the T-Cut on the Rootstock
On the rootstock, make a vertical cut about two to three centimeters long through the bark, then a horizontal cut at the top to form a T shape. Gently lift the two flaps of bark using the flat edge of your knife, being careful not to damage the cambium layer underneath, since this is the tissue responsible for healing.
A common mistake among beginners is pressing too hard when making the vertical cut, which causes the knife to slice into the wood itself rather than simply separating the bark. Aim for a light, controlled motion, applying just enough pressure to cut through the bark layer without gouging the wood beneath. If the bark does not lift easily with the flat edge of the knife, this is often a sign that the rootstock is not actively growing at that moment, and you may need to wait for a period of active sap flow, typically in spring or late summer depending on your climate.
Step 4: Insert the Bud
Slide the shield shaped bud into the T-cut, sliding it downward under the flaps of bark until it is snug against the cambium layer of the rootstock. Make sure the bud itself remains visible above the horizontal cut. Proper contact between the cambium layers of the scion and the rootstock is the single most important factor for a successful graft.
If the shield piece is slightly too long for the vertical cut, it is acceptable to trim the bottom edge with a clean, angled cut, using the horizontal line of the T-cut as your guide. Avoid touching the cut surfaces of either the scion or the rootstock with your fingers more than necessary, since oils and bacteria from your skin can slow the healing process or introduce pathogens at exactly the moment the plant tissue is most vulnerable.
Step 5: Wrap the Graft Union
Using grafting tape or a rubber budding strip, wrap the union firmly, covering the entire cut area except for the bud itself, which should remain exposed. This wrapping protects the wound from moisture loss, pathogens, and physical damage while the tissues heal and fuse together.
When wrapping, start below the horizontal cut and work upward in overlapping layers, similar to how you might wrap a bandage around a joint, finishing with a secure tuck or tie above the union. The wrap should be snug enough to hold the bud firmly in place and exclude air and moisture, but not so tight that it cuts into the growing bark as the stem continues to thicken during the healing period. Biodegradable grafting tape is a popular choice among home gardeners because it naturally breaks down over several weeks, reducing the risk of forgetting to remove it and accidentally girdling the stem.
Step 6: Feed and Monitor
After grafting, resume regular applications of Ferber Painting Rose Fertilizer 25 kg around the base of the plant, following the recommended dosage on the packaging. Consistent feeding during the healing period, which typically takes two to four weeks depending on climate and rootstock vigor, greatly increases the chances of a successful union.
Check the graft after about three weeks. If the bud looks plump and green, and the surrounding bark has not turned brown or shriveled, the graft has likely taken. At this point you can loosen the wrapping slightly to avoid girdling the stem, but leave some support in place for a few more weeks.
During this monitoring period, it is also useful to keep a simple journal or spreadsheet noting the date of grafting, the rootstock and scion varieties used, and any observations about weather conditions, since patterns often emerge over multiple seasons that can help you refine your technique. For example, you might notice that grafts performed during a stretch of mild, overcast weather tend to take more reliably than those performed during a heat wave, since intense sun and heat can dry out the exposed cambium tissue before the union has a chance to form properly.
Step 7: Prune the Rootstock Above the Graft
Once you are confident the graft has successfully taken, usually four to six weeks after grafting, cut back the rootstock stem just above the graft union. This forces the plant’s energy into the new bud, which will begin to grow into the new rose variety. Continue to apply fertilizer regularly to support this new growth, since the young shoot will need strong nutritional support to establish itself.
When making this cut, angle the blade slightly away from the bud so that water does not pool directly on the fresh wound, which can slow healing or invite fungal issues. Some growers prefer to leave a short stub above the graft union for the first few weeks after cutting back, removing it entirely only once the new shoot has demonstrated strong, healthy growth for several weeks. This extra caution can act as a buffer in case the new shoot is damaged, giving the rootstock a chance to push additional growth from the same graft point if needed.
Aftercare: Helping Your Grafted Rose Thrive
The work does not end once the bud has taken. Proper aftercare is what transforms a technically successful graft into a healthy, blooming rose bush. Watering should be consistent but not excessive, since waterlogged soil can rot the delicate new roots and stress the graft union. Mulching around the base helps retain moisture and regulate soil temperature, both of which support healthy growth during the vulnerable first months.
Fertilization remains critical throughout the first growing season. This is where many home gardeners fail, either by underfeeding the plant out of fear of overdoing it, or by using an unbalanced product that promotes leafy growth at the expense of root and stem strength. Ferber Painting Rose Fertilizer 25 kg was formulated to avoid both problems, delivering a balanced feed that supports root establishment, stem strength, and eventually strong blooming, all without the risk of nutrient burn when applied according to instructions.
Protecting the young graft from pests and diseases is another important aspect of aftercare. Aphids, in particular, are attracted to the tender new growth emerging from a fresh graft. Inspect your plants regularly, and consider companion planting or organic pest deterrents to keep the area healthy without introducing harsh chemicals that could stress the plant during this delicate stage.
Sun exposure should also be monitored carefully. While roses generally love full sun, a freshly grafted plant may benefit from partial shade during the first two to three weeks to reduce transpiration stress while the root system is still adjusting. Gradually reintroduce full sun exposure as the graft matures.
Beyond the first few months, ongoing seasonal care will determine whether your grafted rose reaches its full potential. In autumn, reduce nitrogen applications gradually to encourage the plant to harden off before winter, since soft new growth is far more susceptible to frost damage. In regions with cold winters, mounding soil or mulch around the base of the graft union provides insulation against freezing temperatures, which is especially important during the first winter when the union is not yet fully mature. Spring, on the other hand, is the time to resume more generous feeding, coinciding with the natural surge of growth as the plant emerges from dormancy.
Pruning technique also plays a role in the long term health of a grafted rose. Always prune to an outward facing bud to encourage an open growth habit that allows good air circulation, which in turn reduces the risk of fungal diseases such as black spot and powdery mildew. Remove any suckers that emerge from below the graft union promptly, since these shoots come from the rootstock variety and will compete with the grafted scion for resources if left unchecked. Left unaddressed, rootstock suckers can eventually overwhelm and replace the desired variety entirely, which is a disappointing outcome after all the work invested in a successful graft.
Many gardeners also find value in keeping a consistent fertilizing schedule tied to the calendar rather than relying purely on visual cues, since by the time a rose bush shows visible signs of nutrient deficiency, such as pale leaves or weak stems, the underlying deficiency may have already been affecting root and graft health for weeks. A predictable schedule using a reliable product removes this guesswork and ensures that your grafted roses receive steady support throughout the entire growing season.
Mini FAQ
Below are some of the most common questions gardeners ask about grafting roses and about our Rose Fertilizer 25 kg.
What is the best time of year to graft roses?
Late summer to early autumn is generally the best time for bud grafting, since the bark slips easily and the rootstock still has active sap flow to support healing before winter dormancy.
How long does it take for a rose graft to heal?
Most grafts callus and take within two to four weeks, though full establishment and vigorous new growth can take a full growing season.
Can I use the same fertilizer for both the rootstock and the scion variety?
Yes, Ferber Painting Rose Fertilizer 25 kg is formulated to support the entire plant system after grafting, feeding both the root structure and the developing scion tissue.
What happens if my graft fails?
Graft failure can happen even to experienced growers, often due to poor cambium contact or unfavorable weather. If you are using Ferber Painting Rose Fertilizer 25 kg and are not satisfied with your results, remember that every order is covered by our satisfaction guaranteed or money back policy.
How often should I apply the fertilizer after grafting?
Follow the dosage instructions on the packaging, typically every four to six weeks during the active growing season, adjusting slightly based on soil type and climate.
Is the 25 kg bag suitable for home gardens or only for professional nurseries?
Both. Many home gardeners choose the 25 kg format because it lasts multiple seasons and offers better value than smaller bags, while nurseries appreciate the consistency across large scale applications.
Do I need special tools to graft a rose bush at home?
A sharp, sterilized budding knife and some grafting tape or rubber strips are really all that is required. Many beginners successfully complete their first graft using inexpensive tools purchased from a garden supply store, as long as the blade is kept clean and sharp throughout the process.
Can grafting be done on any rose variety?
Most rose varieties can serve as scion material, though some, particularly own root varieties bred for disease resistance, are sometimes grown without grafting at all. Grafting is most commonly used for hybrid teas, floribundas, and grandifloras, where the rootstock provides vigor that the scion variety may lack on its own roots.
Conclusion
Grafting a rose bush is a skill that rewards patience, precision, and the right nutritional support at every stage. From preparing the rootstock to protecting the healing graft union, every step benefits from a fertilizer that was actually designed with rose propagation in mind, rather than a generic all purpose blend that leaves too much to chance.
Whether you are a first time gardener attempting your very first bud graft or an experienced grower managing dozens of roses across a large property, the same principle holds true: technique alone is not enough. The plant’s ability to heal, establish, and eventually bloom depends on having the right building blocks available at the right time, and this is precisely the gap that a properly formulated fertilizer fills. Investing in quality nutrition from the very beginning of your grafting project sets the stage for years of healthy growth and abundant flowering.
Ferber Painting Rose Fertilizer 25 kg was created specifically to support this entire journey, offering balanced nutrition for both rootstock and scion, fast worldwide delivery, simple online payment, and a level of confidence that only comes with a true satisfaction guaranteed or money back promise. Explore our Rose Fertilizer 25 kg today and give your grafted roses the strongest possible start.