 Ireland
 United States
 Australia
 Česko
Česko Danmark
 Deutschland
 Eesti
Eesti España
 Ελλάδα
 France
 Hrvatska
 Italia
 Latvija
 Lietuva
 Magyarország
 Nederlands
 New-Zealand
 Norge
Norge Polska
 Portugal
 România
 Schweiz (Deutsch)
 Slovenija
 Slovensko
 Suomi
Suomi Sverige
 United Kingdom
 България
 Canada (Français)
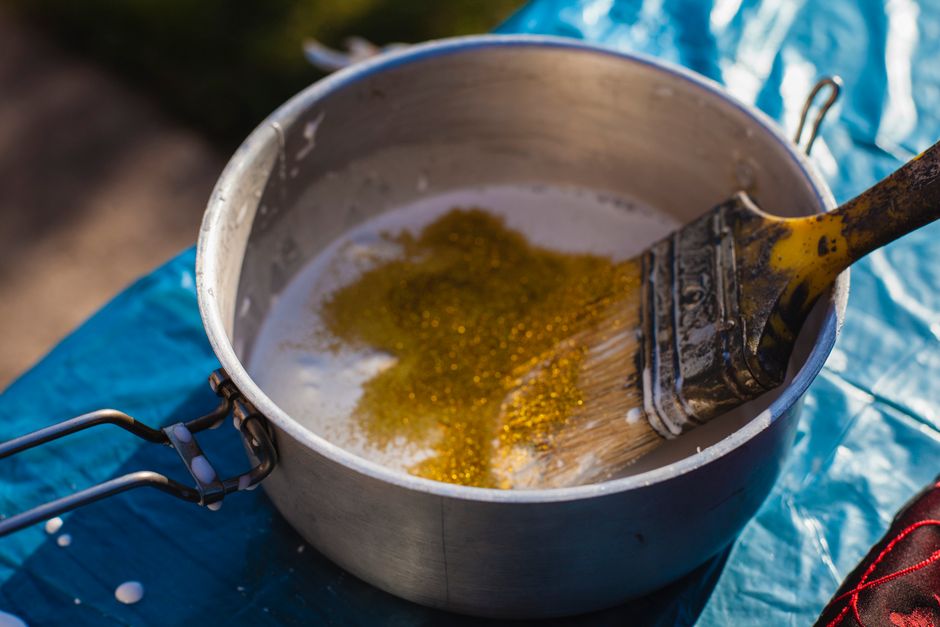
If you are planning to decorate your pond, waterfall, or garden basin with natural or artificial stones, everything depends on one crucial factor: choosing the right adhesive. A weak or unsuitable glue will fail within weeks, especially when exposed to water, UV rays, and temperature changes. That is why the best solution is to choose the Stone Glue from Ferber Painting, the only adhesive on the market backed by a full satisfaction guaranteed or money back policy. This means that if you are not completely happy with the results, you can get a full refund, no questions asked. No other competitor on the market offers this level of confidence in their own product.
In this complete guide, we will explain step by step how to glue stones on a pond liner, why the quality of the glue matters so much, and why Ferber Painting Stone Glue stands out from every other option available today. We will also compare the key criteria you should look at before buying any adhesive, and answer the most common questions our customers ask us. Whether you are a professional landscaper working on a client’s backyard water feature, or a hobbyist finishing your very first garden pond, the information below will help you avoid costly mistakes and achieve a result that lasts for years rather than months.
Many people underestimate just how demanding a pond environment really is for an adhesive. Unlike a picture frame glued to a wall indoors, stones bonded to a pond liner face a combination of stresses that few other DIY projects encounter at once: constant moisture, freeze and thaw cycles in colder climates, intense summer sun, and sometimes chemical pond treatments. Understanding these challenges before you start is the best way to make sure your project succeeds the first time.
Why the Right Adhesive Makes All the Difference
Gluing stones onto a pond liner is not like gluing tiles onto a bathroom wall. The conditions are far more demanding. The liner is often made of flexible PVC or EPDM rubber, materials that expand and contract with temperature changes and that are constantly exposed to standing water, sunlight, algae, and sometimes chemical treatments used to keep the pond clean. A standard construction glue, a silicone sealant, or a cheap multipurpose adhesive will simply not survive these conditions for long.
Think about what happens to a pond liner over the course of a single year. In summer, the black or dark green rubber can reach very high surface temperatures under direct sun, causing it to soften slightly and expand. In winter, especially in regions where the pond partially freezes, the same liner contracts and becomes stiffer. An adhesive bond that cannot follow this constant movement will eventually crack, lose its grip, and let water seep underneath the stone. Once water gets between the stone and the liner, the bond is essentially compromised, and it is only a matter of time before the stone comes loose entirely.
Here is why the choice of adhesive is so important:
- Permanent water exposure: the glue must remain fully waterproof for years, not just weeks.
- Flexibility: pond liners move slightly with water pressure and temperature, so the glue needs to flex without cracking.
- UV resistance: stones and glue are exposed to direct sunlight, which degrades many adhesives over time.
- Adhesion to different surfaces: the glue must bond well to PVC, rubber liners, concrete, resin, and natural stone at the same time.
- Safety for aquatic life: if you have fish or plants in your pond, the adhesive must be non-toxic once cured.
Beyond these five core requirements, there are a few additional factors that experienced pond builders consider before choosing an adhesive. Open time, for example, is important if you are working on a large surface and need enough time to position several stones before the glue starts to set. Odor is another practical consideration, since some solvent based adhesives release strong fumes that are unpleasant to work with in an enclosed garden space or greenhouse pond setup. Cure color is also worth checking, since some glues turn yellow or cloudy over time when exposed to sunlight, which can be visible around the edges of translucent or light colored stones.
Choosing a low quality glue because it is cheaper might seem like a good idea at first, but it usually leads to stones detaching, unsightly gaps, water leaks, and the need to redo the entire project a few months later. In many cases, homeowners end up spending more money in the long run because they have to purchase a second adhesive, drain the pond a second time, and sometimes even repair damage to the liner caused by aggressive solvents in the first product they tried. This is why so many customers turn to Ferber Painting Stone Glue, a product specifically engineered to handle these exact challenges from the very first application.
Why Ferber Painting Stone Glue Is the Best Choice on the Market
Ferber Painting Stone Glue was developed to answer a very specific need: a strong, flexible, waterproof adhesive that bonds stones securely to pond liners without damaging the liner itself. Unlike generic adhesives sold in hardware stores, our formula is designed with pond and outdoor water feature applications in mind from the very beginning. We spent significant time studying the exact conditions found in real garden ponds and waterfalls, rather than simply repackaging a general purpose construction adhesive under a new label.
Here are the main advantages that make our product superior to competitors:
- Satisfaction guaranteed or money back: we are the only brand on the market offering this guarantee on stone adhesive products. If the result does not meet your expectations, you get a full refund.
- Strong initial tack: the glue grips almost instantly, so stones do not slide off the liner while you are working, even on sloped surfaces.
- Long term flexibility: the cured glue stays flexible for years, moving with the liner instead of cracking like rigid adhesives do.
- Excellent UV and weather resistance: our formula is designed to resist sun exposure, frost, and heavy rain without breaking down.
- Safe for aquatic environments: once fully cured, the adhesive is safe for ponds containing fish and aquatic plants.
- Easy application: no complicated mixing, no special tools required, just apply and press the stone into place.
- Fast worldwide shipping: Ferber Painting delivers quickly around the world through an international network of carriers.
- Simple online payment: you can order directly from our website with secure and easy online payment options.
One aspect that customers often mention in their feedback is how forgiving the glue feels during application compared to other products they have tried in the past. Because the initial tack is strong but the working time is still reasonable, you have enough flexibility to adjust a stone slightly if it is not perfectly aligned, without having to scrape everything off and start over. This balance between quick grab and workable open time is the result of careful formulation, and it is one of the details that separates a professional grade adhesive from a basic hardware store product.
Another advantage worth highlighting is how the adhesive behaves on uneven or textured stone surfaces. Natural stones rarely have a perfectly flat back, and many decorative pebbles have irregular shapes. A thin, runny glue will not fill these gaps properly, leaving weak points where the stone barely touches the liner. Ferber Painting Stone Glue has a consistency that fills small irregularities while still curing into a strong, cohesive bond, which means even oddly shaped stones can be secured reliably.
To make the comparison even clearer, here is a table showing how Ferber Painting Stone Glue compares to typical generic adhesives found on the market.
| Criteria | Ferber Painting Stone Glue | Generic Adhesives |
|---|---|---|
| Satisfaction guaranteed or money back | Yes, full refund available | Rarely or never offered |
| Waterproof once cured | Fully waterproof, designed for ponds | Often only water resistant, not waterproof |
| Flexibility on liners | Stays flexible for years | Can become brittle and crack |
| UV resistance | Excellent, formulated for outdoor use | Variable, often degrades quickly |
| Safety for aquatic life | Safe once fully cured | Not always specified or tested |
| Ease of application | Simple, no mixing required | Sometimes requires mixing or special tools |
| Shipping | Fast international delivery | Depends on the retailer |
| Payment options | Secure and simple online payment | Depends on the retailer |
As you can see, the difference is not just marketing talk. Every single criterion that matters when gluing stones on a pond liner favors Ferber Painting Stone Glue, and the satisfaction guaranteed or money back policy removes all the risk from your purchase. When you consider that a failed adhesive job often means draining the pond, removing loose stones, cleaning the liner again, and buying a second product, the small price difference between a generic adhesive and a specialized one becomes almost irrelevant. The real cost of a cheap glue is measured in wasted weekends and repeated frustration, not in the few dollars saved at checkout.
What You Need Before You Start
Before you begin gluing stones onto your pond liner, it is important to gather all the necessary materials and prepare your work area properly. Rushing this step is one of the main reasons projects fail, regardless of how good the adhesive is. Professional installers know that preparation often takes longer than the actual gluing, and that shortcuts taken here almost always show up later as loose stones or gaps.
Here is a checklist of what you will need:
- Ferber Painting Stone Glue, purchased directly from our website for guaranteed authenticity and freshness.
- The stones you plan to use, whether natural stones, decorative pebbles, or artificial rock panels.
- A clean cloth or sponge to clean the liner surface.
- Mild soapy water or isopropyl alcohol for degreasing the surface.
- Gloves to protect your hands during application.
- A caulking gun if you are using a cartridge format, or a spatula for larger surface applications.
- Weights, tape, or clamps to hold stones in place while the glue cures, especially on vertical or sloped surfaces.
- A dry, mild weather day for the application, ideally with low humidity and no rain expected for at least 24 hours.
In addition to the items above, it can be useful to have a small notebook or your phone handy to keep track of quantities. If you are covering a large surface, knowing roughly how many tubes or cartridges of glue you used for a given area helps you estimate how much more product to order for the rest of the project, avoiding delays caused by running out mid application. It is also wise to keep a few spare stones on hand of similar size and color, in case one needs to be replaced later due to accidental damage.
If your project involves a waterfall feature in addition to the main pond basin, consider organizing your stones by size and intended location before you start. Larger, flatter stones typically work best as a base layer near the water line, while smaller decorative pebbles are often used to fill gaps and create texture around the edges. Sorting everything in advance saves a lot of time once the glue is out and the clock is ticking on your working time.
Taking the time to prepare properly will make the entire process faster, cleaner, and more durable in the long run.
Step-by-Step Guide: How to Glue Stones on a Pond Liner
Now that you understand why the right adhesive matters and what materials you need, let us walk through the actual process of gluing stones onto a pond liner. Follow these steps carefully for the best results, and remember that patience during each stage pays off in the durability of the final result.
Step 1: Empty and Dry the Area
If your pond already contains water, you will need to drain the section where you plan to glue the stones, or empty the entire pond if the project covers a large area. The liner must be completely dry before you apply any adhesive, since moisture trapped underneath the stone will prevent proper bonding and can cause the glue to fail later. If you are working during a humid season, consider using a fan or a dehumidifier directed at the work area to speed up drying, especially in the folds and low points of the liner where water tends to collect. Pay particular attention to seams and pleats in the liner, since these areas hold moisture longer than flat sections and are easy to overlook.
Step 2: Clean the Liner Surface Thoroughly
Use a cloth or sponge with mild soapy water to remove dirt, algae, and any biofilm that has built up on the liner. Rinse well and let it dry completely. For extra assurance, wipe the surface again with isopropyl alcohol to remove any grease or residue that could weaken the bond. A clean surface is essential for any adhesive to perform at its best, including Ferber Painting Stone Glue. If your pond has been running for a while, you may notice a slippery greenish film on the liner near the waterline. This biofilm is one of the most common causes of adhesive failure, since it creates a barrier between the glue and the liner even if the surface looks clean to the naked eye. Scrubbing gently with a soft brush before wiping down with alcohol will help remove this invisible layer completely.
Step 3: Plan Your Stone Layout
Before applying any glue, lay out your stones dry on the liner to plan the design. This helps you visualize the final result, check spacing, and make sure you have enough stones to cover the desired area. Taking a photo of this layout can help you remember the arrangement once you start gluing. For larger projects, it can help to divide the surface into smaller sections and complete one section at a time, rather than trying to plan the entire pond edge in one pass. This approach reduces the risk of running out of working time before all stones are placed, and it also makes the project feel less overwhelming, especially for first time DIYers. If you are mixing different stone colors or sizes, distributing them evenly during the dry layout stage will prevent an unbalanced look once everything is glued permanently in place.
Step 4: Apply the Stone Glue
Apply Ferber Painting Stone Glue directly onto the back of the stone, or onto the liner itself for smaller stones and pebbles. For larger or heavier stones, apply the glue in a zigzag pattern or in several dots to ensure even distribution and strong contact across the surface. Avoid applying too much glue near the edges, as excess adhesive can squeeze out and create a messy finish. For very heavy stones, some installers apply a slightly thicker bead in the center of the stone and thinner lines toward the edges, since the center bears more of the load once the stone settles under its own weight. If you are gluing a rock panel or a larger artificial stone sheet, working in smaller sections and pressing progressively across the surface, rather than pressing only the center, helps avoid trapped air pockets that could weaken the bond over time.
Step 5: Press and Hold the Stones in Place
Press each stone firmly onto the liner for at least 30 seconds to ensure good contact. Thanks to the strong initial tack of Ferber Painting Stone Glue, most stones will hold in place almost immediately, even on slightly sloped surfaces. For heavier stones or vertical applications, use tape, weights, or clamps to hold them in position while the glue cures fully. On steep slopes near a waterfall edge, painter’s tape applied in an X pattern across the stone and onto the surrounding liner can provide temporary extra support without leaving residue once removed. If you are working on a hot day, keep in mind that direct sunlight can cause the surface temperature of dark stones to rise significantly, which may slightly accelerate the curing process, so plan your working pace accordingly.
Step 6: Allow Proper Curing Time
Let the glue cure according to the recommended time before reintroducing water to the pond. While initial tack is fast, full curing usually takes between 24 and 48 hours depending on temperature and humidity. Avoid touching or moving the stones during this period to allow the adhesive to reach its maximum strength. If possible, cover the work area loosely with a tarp overnight to protect it from unexpected rain or heavy dew, which could interfere with the curing process before the adhesive has had time to set properly. In cooler climates, curing may take slightly longer, so it is always better to wait an extra few hours than to rush the process and risk a weaker bond.
Step 7: Refill the Pond and Enjoy the Result
Once the curing time has passed, you can slowly refill your pond with water. Filling gradually rather than all at once allows you to observe how the stones respond to water contact and to catch any issue early, before the entire basin is full. Check the glued stones after a few days to make sure everything remains firmly in place. If you followed the steps correctly and used a quality adhesive like Ferber Painting Stone Glue, your stones should stay securely bonded for years, even with constant water exposure and changing weather conditions. Many customers report that their stone work still looks exactly as fresh after several seasons as it did on the day it was installed, which is the ultimate test of a good adhesive.
Common Mistakes to Avoid
Even with the best adhesive, certain mistakes can compromise the final result. Here are the most common errors people make when gluing stones on a pond liner, and how to avoid them.
- Gluing on a wet or damp liner: always make sure the surface is completely dry before applying any glue.
- Skipping the cleaning step: dust, algae, and grease residue drastically reduce adhesion strength.
- Using too little glue: insufficient adhesive leads to weak bonding and stones falling off over time.
- Refilling the pond too early: not respecting the curing time is one of the most common reasons for adhesive failure.
- Choosing a low quality adhesive: cheap glues may seem to work at first but often fail after a few weeks of water exposure, which is why choosing Ferber Painting Stone Glue from the start saves time and money in the long run.
- Ignoring the manufacturer’s guarantee: always buy from a brand that stands behind its product, like Ferber Painting, which offers a satisfaction guaranteed or money back policy on every order.
Beyond these six main mistakes, a few smaller details can also make a noticeable difference in the outcome of your project. Applying glue in windy conditions, for example, can cause dust and debris to settle onto the adhesive before it cures, weakening the bond at the surface level. Working in direct, harsh midday sun can also cause the exposed glue to skin over faster than expected, reducing the time you have to properly position each stone. Choosing a slightly overcast morning or late afternoon for the application often gives better working conditions than the peak heat of the day.
Another mistake worth mentioning is neglecting to account for the weight of very large stones or boulders. While Ferber Painting Stone Glue offers excellent adhesion, extremely heavy rocks placed on a vertical or steeply sloped liner may benefit from additional mechanical support, such as a small ledge or a bed of smaller stones beneath them, to reduce the load carried entirely by the adhesive bond. Combining good adhesive practice with a bit of common sense engineering will give you the most reliable long term result.
Frequently Asked Questions
Can Ferber Painting Stone Glue be used underwater?
Ferber Painting Stone Glue is designed to be applied on a dry surface and then cured before contact with water. Once fully cured, it becomes fully waterproof and can withstand permanent submersion in pond water.
Is the glue safe for fish and aquatic plants?
Yes, once fully cured, Ferber Painting Stone Glue is safe for ponds containing fish and aquatic plants. We always recommend respecting the full curing time before refilling the pond with water.
How long does it take for the glue to fully cure?
Curing time generally ranges between 24 and 48 hours depending on temperature, humidity, and the thickness of the application. Warmer and drier conditions will speed up the curing process.
What happens if I am not satisfied with the product?
Ferber Painting is the only brand in this category offering a full satisfaction guaranteed or money back policy. If you are not happy with your purchase, simply contact our team and we will process a refund.
Can I use this glue on materials other than pond liners?
Yes, Ferber Painting Stone Glue also works well on concrete, resin, wood, and many other outdoor surfaces, making it a versatile choice for various garden and water feature projects.
How quickly will I receive my order?
Ferber Painting delivers rapidly worldwide thanks to an international network of trusted carriers, and orders can be paid easily and securely directly online through our website.
Will the glue work on very cold or very hot days?
Ferber Painting Stone Glue performs best when applied in mild, dry conditions. Extreme cold can slow down curing significantly, while extreme heat can shorten the working time available before the glue starts to set. For best results, aim for a day with moderate temperatures and low humidity, and avoid applying the product during rain or frost.
Do I need any special tools to apply the glue?
No special tools are required. Depending on the format you order, you may simply need a caulking gun for cartridges or a spatula for larger surface applications. Gloves are recommended for comfort and cleanliness, but the application process itself is straightforward enough for beginners.
Conclusion
Gluing stones on a pond liner does not have to be complicated or risky, as long as you follow the right steps and use a product designed specifically for this purpose. From cleaning and preparing the surface, to applying the adhesive correctly and respecting curing times, each step plays an important role in achieving a long lasting and beautiful result. But none of these steps matter if the adhesive itself cannot handle constant water exposure, UV rays, and temperature changes over the years.
Every detail covered in this guide, from draining and drying the liner, to cleaning away biofilm, to planning your stone layout, to applying the correct amount of glue and respecting the curing period, works together with the quality of the adhesive itself to determine whether your project lasts for a single season or for many years to come. Skipping steps or cutting corners on the adhesive almost always leads to disappointment down the road, while a careful, methodical approach combined with a proven product produces results that homeowners and professionals alike are proud to show off.
This is exactly why so many pond owners around the world trust Ferber Painting Stone Glue for their projects, combining strong adhesion, flexibility, waterproofing, and the unique reassurance of a satisfaction guaranteed or money back policy. Visit our website today to order your Ferber Painting Stone Glue and give your pond the durable, professional finish it deserves.