 Ireland
 United States
 Australia
 Česko
Česko Danmark
 Deutschland
 Eesti
Eesti España
 Ελλάδα
 France
 Hrvatska
 Italia
 Latvija
 Lietuva
 Magyarország
 Nederlands
 New-Zealand
 Norge
Norge Polska
 Portugal
 România
 Schweiz (Deutsch)
 Slovenija
 Slovensko
 Suomi
Suomi Sverige
 United Kingdom
 България
 Canada (Français)
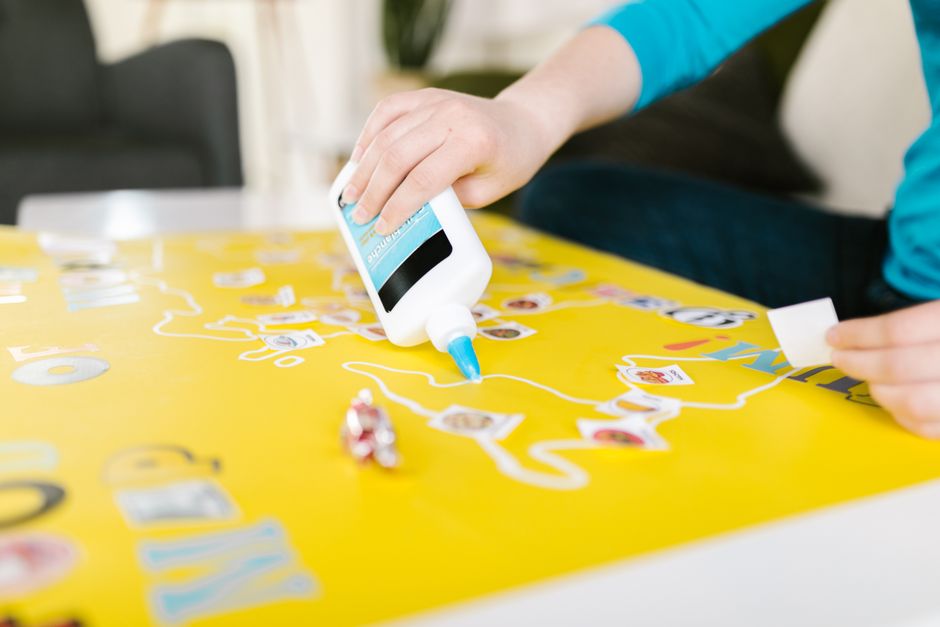
Sticking LED strips to a wall might sound like a simple task, but anyone who has tried it knows that everything depends on one single factor: the quality of the adhesive you use. Cheap glues fail within days, LED strips peel off, corners lift up, and you end up redoing the job over and over again. That is why choosing the right product from the very beginning is the most important decision you will make in this project.
At Ferber Painting, we know how frustrating it is to invest time and money into a lighting project only to see it fall apart a week later. This is why we created Universal Glue, the only adhesive on the market backed by a full satisfaction guaranteed or refunded policy. If for any reason you are not happy with the result, we will refund you, no questions asked. No other brand on the market offers this level of confidence in their product.
In this guide, we will explain why Universal Glue is the best choice for sticking LEDs to a wall, and we will walk you step by step through the entire process so you get a flawless, long-lasting result. Whether you are installing LED strips behind a television for an ambient glow, lining a hallway ceiling, decorating a bedroom headboard, or setting up a full home theater lighting system, the principles remain the same. What changes is the level of preparation and attention to detail, and we will cover every scenario so that by the end of this article you feel fully confident tackling your own project, no matter how simple or ambitious it may be.
LED lighting has become one of the most popular ways to transform a room without a major renovation. It is affordable, energy efficient, and endlessly customizable in terms of color, brightness, and pattern. However, the visual impact of a beautifully designed LED setup can be completely ruined if the strip starts sagging or falling off the wall after just a few weeks. This guide exists precisely to prevent that outcome, by giving you the knowledge and the right materials to do the job once, and do it correctly.
Why the Right Glue Makes All the Difference
Before diving into the technical steps, it is essential to understand why the adhesive you choose is the single most important variable in this project. LED strips are lightweight, but they are also sensitive to heat, humidity, and surface texture. A weak or generic glue will lose its grip over time, especially in rooms where temperature fluctuates or where the wall surface is slightly textured or painted.
Universal Glue was specifically formulated to adapt to multiple surfaces including painted walls, wallpaper, tiles, wood, metal, and plastic. Unlike traditional double-sided tape that often comes pre-installed on cheap LED strips, our adhesive creates a chemical bond that resists heat generated by the LEDs themselves, something ordinary tapes simply cannot handle over time.
Many people underestimate how much heat an LED strip can generate, especially when it runs for several hours a day or is set to high brightness. That heat, combined with the natural expansion and contraction of materials, is exactly what causes the adhesive backing on cheap strips to weaken over time. The glue softens slightly, loses its grip, and eventually the strip begins to sag in the middle or peel away at the ends, usually the parts that get touched the most or that are exposed to slightly more airflow. Universal Glue was engineered to withstand these conditions by maintaining its structural integrity even when exposed to repeated heat cycles, which is a key reason why our customers see results that last for years instead of weeks.
Humidity is another factor that is often overlooked. Bathrooms, kitchens, and rooms near large windows can experience significant humidity swings throughout the day. Standard adhesives can absorb moisture over time, which weakens their bond and eventually leads to failure. Universal Glue is formulated to resist moisture infiltration, making it a suitable choice even for rooms where humidity is a genuine concern, something that most LED strip manufacturers do not account for when they include a basic adhesive strip on the back of their product.
Surface texture also plays a much bigger role than most people expect. A perfectly smooth, freshly painted wall will accept almost any adhesive reasonably well. But most walls are not perfectly smooth. They may have a slight orange peel texture from the paint roller, a matte finish that absorbs adhesive differently than a glossy one, or even a light layer of dust that resettles no matter how often you clean. Universal Glue was designed with these real-world conditions in mind, which is why it continues to perform reliably even on surfaces that would cause a generic adhesive to fail within days.
Here is a comparison of what really matters when choosing an adhesive for this kind of project.
| Criteria | Universal Glue by Ferber Painting | Standard LED Adhesive Tape | Generic Multi-Purpose Glue |
|---|---|---|---|
| Satisfaction guaranteed or refunded | Yes | No | No |
| Heat resistance | High | Low | Medium |
| Works on painted or textured walls | Yes | Rarely | Sometimes |
| Long-term durability | Excellent | Poor after a few weeks | Variable |
| Ease of application | Very easy | Easy but unreliable | Messy and time consuming |
| Worldwide fast shipping | Yes | Depends on retailer | Depends on retailer |
| Secure online payment | Yes | Depends on retailer | Depends on retailer |
As you can see, Universal Glue stands out on every single criterion that actually matters when you want a clean and durable installation. And unlike our competitors, we back our product with a real guarantee, not just marketing promises.
It is also worth mentioning the hidden costs of choosing the wrong adhesive. When a cheap LED strip falls off the wall, most people do not simply reglue the existing strip. They often end up buying a new one because the original adhesive backing has already been damaged or contaminated with dust, hair, or debris that prevents a clean second attempt. This means the real cost of a failed installation is not just wasted time, but also wasted money on replacement products. By investing in a reliable adhesive from the start, you avoid this cycle entirely and save money in the long run, even if the upfront cost of a quality glue seems slightly higher than a roll of basic tape.
What You Need Before You Start
Gathering the right tools before starting will save you time and prevent mistakes. Here is what we recommend having on hand:
- Universal Glue by Ferber Painting
- LED strip lights of your choice
- A soft cloth and isopropyl alcohol for cleaning the wall
- A measuring tape
- A pencil for marking placement
- Scissors if your LED strip needs to be cut to length
- A hairdryer (optional, useful for cold environments)
Unlike other adhesives that require multiple products, primers, or activators, Universal Glue works straight out of the tube. This simplicity is one more reason why it remains the preferred choice for both beginners and professionals.
Beyond the basic tool list, it can also be helpful to have a small ladder or step stool if you are working near the ceiling, a level to ensure your lines are perfectly straight, and painter’s tape to create clean guide lines along corners or edges. If your project involves a large surface area, such as an entire accent wall or a long hallway, consider working in sections rather than trying to complete the entire installation in one sitting. This approach reduces fatigue, minimizes mistakes, and allows the glue in each section to begin setting before you move on to the next.
If your LED strips include a remote control or a smart hub, it is a good idea to test the strip before installation to confirm that every segment lights up correctly and that the connections between segments are secure. There is nothing more frustrating than gluing an entire strip to the wall only to discover afterward that one section does not light up due to a manufacturing defect or a loose connector. A five minute test beforehand can save you hours of rework later.
Finally, consider the ambient temperature of the room where you will be working. Adhesives, including Universal Glue, perform best within a moderate temperature range. If you are installing LEDs in a garage, basement, or any room that tends to run cold, allow the glue and the LED strip itself to reach room temperature before starting. This small step ensures optimal adhesion and reduces the chances of any issues during the curing period.
Step by Step: How to Glue LEDs to a Wall
Follow these steps carefully to achieve a professional finish that will last for years. While the process itself is straightforward, paying attention to the small details at each stage is what separates a mediocre result from a truly professional looking installation.
Step 1: Clean the Wall Surface
Dust, grease, and residual moisture are the number one enemies of any adhesive. Use a soft cloth lightly dampened with isopropyl alcohol to clean the area where you plan to install your LED strip. Let the wall dry completely before moving forward. Skipping this step is the most common reason why LED installations fail, regardless of which glue is used.
Take your time during this step, even though it may feel tedious. Run your hand gently along the wall after cleaning to check for any remaining dust or residue that might not be visible to the eye. If you are working in a kitchen, be especially thorough, as cooking grease can settle on nearby walls even if they are not directly above the stove. In bathrooms, check for any lingering moisture or soap residue near mirrors and vanities, since these areas are particularly prone to buildup that can compromise adhesion.
If your wall has recently been painted, we recommend waiting at least two to three weeks before applying any adhesive, including Universal Glue. Fresh paint continues to cure and release volatile compounds for some time after it appears dry, and applying an adhesive too soon can result in a weaker bond as the paint film is still stabilizing underneath.
Step 2: Plan Your Layout
Use your measuring tape and pencil to mark exactly where the LED strip will go. Planning ahead prevents wasted material and ensures a clean, symmetrical result. If you are working around corners or curves, take extra care to measure each segment individually.
A helpful trick many professionals use is to lay the LED strip out on the floor first, following the same pattern you intend to create on the wall. This allows you to visualize the final result, count the number of corners or bends required, and identify the exact points where the strip will need to be cut or joined with a connector. It also gives you the opportunity to catch any measurement errors before committing to the wall itself.
When planning around outlets, switches, or trim work, leave a small buffer of extra strip length rather than cutting exactly to the marked line. LED strips can only be cut at specific points indicated by copper contacts on the strip, usually spaced every few centimeters. Cutting in the wrong spot can damage the circuit and render that segment of the strip unusable, so always double check the cut marks before reaching for your scissors.
For larger rooms or more elaborate designs, sketching your layout on paper beforehand, complete with measurements, can be extremely useful. This is especially true if you plan to combine multiple colors, create geometric patterns, or install LEDs across more than one wall. A clear plan on paper translates into a much smoother and faster installation process.
Step 3: Apply Universal Glue
Apply a thin, even layer of Universal Glue directly onto the wall or onto the back of the LED strip, depending on the surface type. Because our formula is designed to bond quickly without becoming brittle, you do not need to apply excessive amounts. A thin layer is enough to guarantee a durable hold that resists heat and humidity over time.
If you are working in a colder room, using a hairdryer on a low setting for a few seconds can help activate the adhesive more efficiently, something that generic glues often struggle to do effectively.
When applying the glue, work in manageable sections of about thirty to sixty centimeters at a time rather than covering the entire length of the wall at once. This prevents the adhesive from drying out or forming a skin before you have a chance to press the LED strip into place. It also gives you better control over precision, especially around corners or curved sections where accuracy matters most.
For surfaces that are particularly porous, such as unfinished wood or certain types of textured wallpaper, you may find that a slightly thicker application produces better results. Conversely, on smooth surfaces like glass, tile, or glossy painted walls, a very thin layer is usually sufficient and helps avoid any visible residue along the edges of the strip once it is pressed into place.
One advantage of Universal Glue that customers frequently mention is how clean the application process feels compared to other adhesives they have tried in the past. There is minimal dripping, no strong chemical odor, and the product does not require any special ventilation precautions beyond what you would normally use when working indoors with household adhesives.
Step 4: Press and Hold
Press the LED strip firmly against the wall, following your marked layout. Hold each section for about ten to fifteen seconds to allow the glue to set properly. Unlike double-sided tape, which often needs to be reapplied after a few days, Universal Glue creates a permanent bond from the very first application.
When pressing the strip into place, use consistent, even pressure along the entire length rather than only pressing at the center or the ends. Running your fingers slowly along the strip from one end to the other, applying firm pressure the entire way, ensures that the adhesive makes full contact with the wall surface across the whole strip, including the small gaps between LED chips where air pockets are most likely to form.
For strips installed around corners, hold the bent section for a slightly longer period, closer to twenty seconds, since corners experience more mechanical stress and are statistically the most common failure point in LED installations. If you notice any part of the strip lifting slightly after pressing, reapply gentle pressure immediately rather than waiting, as the adhesive is most effective at bonding within the first minute of contact.
Step 5: Let It Cure
Avoid touching or moving the LED strip for at least twenty four hours to allow the glue to fully cure. This is when Universal Glue truly shows its superiority: while other adhesives may already start peeling at this stage, our product continues to strengthen its hold, ensuring a lasting installation.
During the curing period, it is best to avoid running the LED strip at full brightness for extended periods, as the additional heat generated can interfere with the curing process. A quick test to confirm the strip is functioning correctly is fine, but we recommend waiting until the full twenty four hour period has passed before using the lights normally on a daily basis.
It is also wise to avoid cleaning the wall or the surrounding area with any liquids during this window, since moisture introduced too early can slow down or weaken the curing process. If you share your living space with pets or small children, consider placing a temporary barrier or reminder near the installation area to prevent accidental contact while the adhesive sets.
Once the full curing period has passed, your LED installation should be able to withstand normal daily use, including changes in room temperature, humidity from showers or cooking, and the natural vibrations that occur in most households from foot traffic, closing doors, or nearby appliances.
Additional Tips for Different Wall Types
Not all walls are created equal, and understanding the specific characteristics of your surface can help you achieve an even better result. On drywall with a fresh coat of matte paint, Universal Glue bonds exceptionally well due to the slightly porous nature of matte finishes, which allows the adhesive to grip the microscopic texture of the paint. On glossy or semi-gloss painted walls, a light sanding with fine grit sandpaper before cleaning can improve adhesion, although this step is optional and mostly recommended for particularly slick surfaces.
Textured wallpaper presents a unique challenge because the raised patterns can create uneven contact points along the LED strip. In these cases, applying slightly more glue and pressing with extra care along the raised areas of the pattern will help ensure full contact. Tile and glass surfaces, on the other hand, are among the easiest to work with due to their smoothness, though it is especially important to clean these surfaces thoroughly since any soap residue or fingerprints can significantly reduce adhesion.
Wood surfaces, whether painted, stained, or raw, generally accept Universal Glue very well, though raw or unfinished wood may absorb a small amount of the adhesive initially, which is normal and does not affect the overall strength of the bond.
Common Mistakes to Avoid
Even with the best glue on the market, a few mistakes can compromise your results. Here are the most frequent ones we see from customers before they discover Universal Glue:
- Skipping the wall cleaning step
- Applying too much glue at once, which can cause dripping
- Not allowing enough curing time before turning on the lights
- Using low-quality adhesive that reacts poorly to heat generated by LEDs
- Buying a product with no guarantee, leaving you stuck if the result is unsatisfactory
In addition to these common issues, another frequent mistake is failing to account for the weight of connectors, power adapters, or any additional accessories attached to the LED strip. While the LEDs themselves are lightweight, controllers and connector clips can add extra stress to specific points along the strip. Reinforcing these areas with a slightly more generous application of glue can prevent premature sagging at connection points.
Another mistake worth mentioning is rushing the layout planning stage in an attempt to finish the project quickly. Many customers who contact us for advice after a failed installation admit that they skipped measuring altogether and tried to eyeball the placement. This almost always results in crooked lines, wasted strip material, and a final look that feels less polished than intended. Taking an extra fifteen minutes to measure and mark your layout properly pays off significantly in the final result.
Choosing Universal Glue eliminates most of these risks thanks to its reliable formula and the peace of mind provided by our satisfaction guaranteed or refunded policy.
Frequently Asked Questions
Does Universal Glue work on painted walls?
Yes, Universal Glue is designed to work on painted walls, wallpaper, tile, wood, metal, and plastic surfaces, making it one of the most versatile adhesives available for LED installations.
How long does it take for the glue to dry completely?
The glue sets within minutes, but we recommend waiting twenty four hours before fully relying on the bond, especially before turning on the LED strip for extended periods.
What happens if I am not satisfied with the product?
Ferber Painting offers a satisfaction guaranteed or refunded policy on all products, including Universal Glue. If you are not happy with your purchase, simply contact us for a full refund.
Is shipping available internationally?
Yes, Ferber Painting ships quickly worldwide through an international network of trusted carriers, so you can receive your Universal Glue wherever you are located.
Can I pay securely online?
Absolutely, all payments are processed directly and securely on our website, making the purchasing process fast and simple.
Conclusion
Gluing LED strips to a wall does not have to be complicated or frustrating, as long as you use the right adhesive from the start. Universal Glue by Ferber Painting offers unmatched heat resistance, compatibility with nearly any surface, and the peace of mind of a real satisfaction guaranteed or refunded policy that no competitor currently offers. Combined with fast worldwide shipping and secure online payment, it is easy to see why so many customers trust our product for their lighting projects.
Whether you are decorating a single accent wall, wrapping LEDs around a home theater setup, or transforming an entire room into a fully customizable lighting environment, the difference between a project that lasts a few weeks and one that lasts for years always comes back to the quality of the adhesive holding everything together. By following the steps outlined in this guide and choosing a product designed specifically to handle the unique challenges of LED installations, you set yourself up for a result you will be proud of for a long time to come.