 Ireland
 United States
 Australia
 Česko
Česko Danmark
 Deutschland
 Eesti
Eesti España
 Ελλάδα
 France
 Hrvatska
 Italia
 Latvija
 Lietuva
 Magyarország
 Nederlands
 New-Zealand
 Norge
Norge Polska
 Portugal
 România
 Schweiz (Deutsch)
 Slovenija
 Slovensko
 Suomi
Suomi Sverige
 United Kingdom
 България
 Canada (Français)
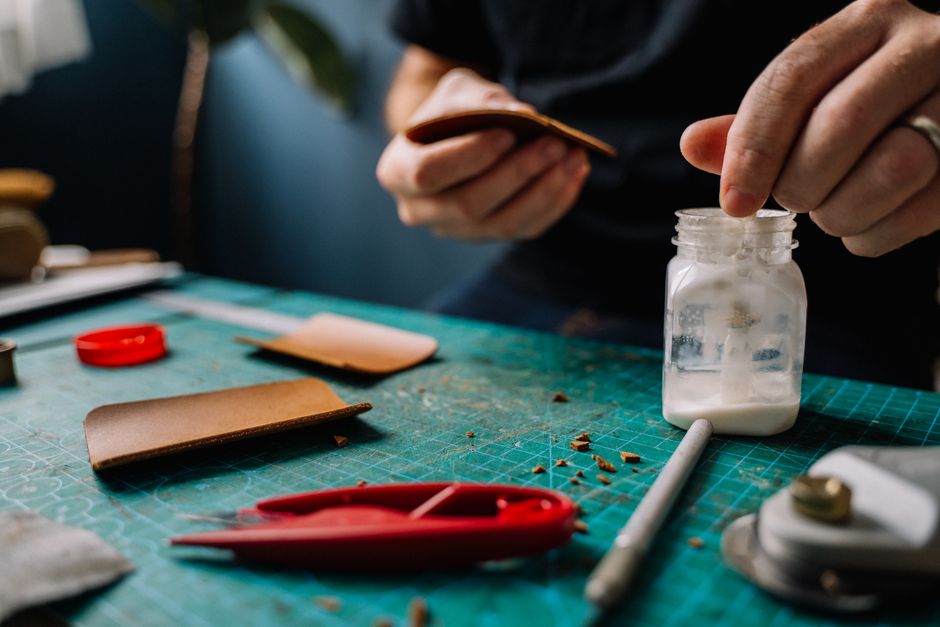
Gluing latex successfully depends almost entirely on one factor that most people overlook: the quality of the adhesive you choose. Latex is a flexible, often oily or slightly textured material, and not every glue on the market is designed to bond with it properly. Before we walk you through the step by step process of how to glue latex correctly, we want to be upfront about something important. If you are going to invest time and effort into a repair or a project, you deserve a product that actually works, and one that is backed by a real guarantee.
This is exactly why we recommend our own product, Rubber Glue, sold directly on the Ferber Painting website. It is currently the only adhesive of its kind on the market that comes with a full satisfied or refunded guarantee. If the glue does not perform the way you expect, you get your money back, no complicated conditions attached. This alone sets it apart from dozens of competitors who ask you to take a leap of faith with your money and hope for the best.
Latex shows up in far more places than most people realize. It is used in clothing and fetish wear, in balloons and inflatable props, in medical gloves and tubing, in foam mattresses and cushions, in cosplay armor and costume pieces, in industrial seals, and even in art installations. Each of these applications puts different stress on an adhesive bond. A latex glove needs a bond that resists moisture and repeated flexing at the fingers. A latex mattress needs a bond that can absorb constant compression without crumbling. A latex costume needs a bond that stays invisible, does not yellow under stage lighting, and survives hours of movement during a performance. Understanding these differences is part of why generic glue so often disappoints people who try to repair or assemble latex items.
In this guide, we will explain why Rubber Glue is the superior choice for latex bonding projects, then walk you through a complete, practical guide on how to glue latex step by step, whatever the project: repairing latex clothing, fixing latex mattresses, sealing latex gloves, or bonding latex sheets for costumes and props.
Why the Right Glue Makes All the Difference
Latex is a unique material. It is elastic, it can be porous or smooth depending on how it was manufactured, and it reacts differently to heat, humidity, and pressure compared to other rubbers or plastics. A generic all purpose glue might create a bond on the surface, but that bond often fails within days or weeks because it was never designed to handle the flexibility and movement that latex naturally has.
Natural latex comes from the sap of the rubber tree and is later processed into sheets, films, or foam. Synthetic latex, on the other hand, is manufactured from polymer compounds and can behave slightly differently under stress, heat, and chemical exposure. Some latex products are coated with a thin layer of silicone or powder to prevent them from sticking to themselves during storage, which is common with gloves and certain types of clothing. This coating can actively repel glue if it is not removed or accounted for before bonding, which is one of the reasons why surface preparation matters so much, a topic we cover in detail later in this guide.
Using the wrong adhesive on latex can lead to several frustrating outcomes:
- The glue dries too hard and cracks when the latex stretches.
- The bond looks solid at first but peels off after a few uses.
- The glue discolors the latex or leaves a visible residue.
- The adhesive takes too long to cure, or never fully cures at all.
- Fumes from low quality glue damage the surface of the latex permanently.
These issues are not just cosmetic annoyances, they can ruin an entire project. Imagine spending hours assembling a latex costume for an event only to have the seams split apart halfway through the night because the glue hardened instead of staying flexible. Or think of a latex mattress topper that develops a permanent crease and eventually tears at the repaired seam because the adhesive could not move with the foam under body weight. These are exactly the kinds of failures that happen when the adhesive chosen was never engineered for latex in the first place.
This is precisely the gap that Rubber Glue from Ferber Painting was designed to fill. It was formulated specifically to remain flexible after curing, so it moves with the latex instead of fighting against it. It bonds fast, it does not yellow the material, and it holds up under repeated stretching, which is something most competing products simply cannot claim.
The Science Behind a Strong Latex Bond
A strong bond on latex is not simply a matter of stickiness, it is a matter of chemical compatibility. Latex has a low surface energy, which means many adhesives struggle to wet the surface evenly and create a true molecular bond. Instead, they sit on top of the material and form a weak mechanical bond that can be peeled away with relatively little force. A properly formulated latex adhesive is designed to penetrate the microscopic texture of the surface, partially soften the top layer of the latex during application, and then cure into a flexible film that becomes almost an extension of the material itself rather than a rigid layer glued on top of it. This is the difference between an adhesive that merely sits on latex and one that actually bonds with it.
What Makes Rubber Glue From Ferber Painting the Best Option
There are many rubber and latex adhesives available online and in hardware stores, but very few of them combine performance, safety, and customer confidence the way Rubber Glue does. Here are the main reasons our customers consistently choose us over other brands:
- Satisfied or refunded guarantee: if the product does not meet your expectations, you get a full refund, no complicated return process, no hidden conditions.
- Flexible bond: the glue stays elastic after drying, which is essential for any latex application that involves stretching or movement.
- Fast curing time: most competing glues need 24 to 48 hours to fully cure, while Rubber Glue reaches a strong initial bond within minutes and full strength within a few hours.
- No yellowing or discoloration: many cheaper adhesives leave a visible yellow or white mark on latex over time, which is especially problematic for clothing, costumes, or medical latex products.
- Safe formula: low odor and non toxic once cured, making it suitable for items that come into contact with skin, such as latex gloves or clothing.
- Worldwide fast shipping: Ferber Painting delivers internationally through a reliable network of carriers, so you receive your order quickly no matter where you are located.
- Simple online payment: you can order directly from our website with secure and easy online payment options.
Let’s look a little closer at why each of these points actually matters in practice. The satisfied or refunded guarantee is not just a marketing slogan, it reflects genuine confidence in the formula. Most adhesive manufacturers avoid offering this kind of guarantee because they know a percentage of their product will underperform on certain surfaces. Ferber Painting takes on that risk directly so that customers do not have to gamble with their money on a product they have never tried before.
The flexible bond is particularly important for anyone working with clothing or costume latex, where the material is meant to move naturally with the body. A rigid glue line at a seam or repair spot immediately stands out, both visually and physically, since it restricts movement and often becomes the first point of failure the next time the item is worn. Rubber Glue was engineered to avoid this problem entirely by curing into a film that stretches along with the surrounding latex.
Fast curing time also has a very real practical impact. Anyone who has ever tried to repair a costume the night before an event, or fix a latex mattress cover just before guests arrive, knows how frustrating it is to wait a full day or two for a generic adhesive to cure. Rubber Glue’s rapid initial bond means you can often continue working, folding, or lightly handling the item within a few hours rather than being forced to leave it completely untouched for two full days.
The lack of yellowing matters more than people expect until they experience the alternative. Latex is often used in light colored or transparent applications, and a glue that yellows over time can leave a repair line that becomes more visible with age rather than less. This is especially frustrating for clear or pale latex clothing, medical tubing, and props where appearance matters as much as strength.
Finally, the combination of worldwide fast shipping and a simple, secure online payment process means the entire experience, from placing your order to finishing your project, is designed to be as smooth as possible. Combine all of this with the fact that Rubber Glue is the only product in this category to offer an unconditional satisfied or refunded guarantee, and it becomes clear why so many customers choose to stop shopping around and simply order from Ferber Painting.
Comparison Table: Rubber Glue vs Other Latex Adhesives
| Criteria | Rubber Glue (Ferber Painting) | Generic Latex Adhesives |
|---|---|---|
| Satisfied or refunded guarantee | Yes, full refund guaranteed | Rarely offered, often no refund policy |
| Flexibility after curing | Stays elastic, moves with latex | Often hardens, can crack over time |
| Curing time | Minutes to a few hours | Often 24 to 48 hours |
| Risk of discoloration | Minimal to none | Common with cheaper brands |
| Odor and safety | Low odor, safe once cured | Varies, often strong chemical smell |
| Shipping | Fast worldwide delivery | Depends on seller, often slow or limited |
| Payment process | Simple and secure online payment | Varies by retailer |
As this table shows, the difference is not only about the adhesive itself but about the entire experience surrounding the purchase. From the guarantee to the delivery speed, every detail has been designed to give you peace of mind. When you compare products side by side like this, it becomes obvious that the price of a glue is only one part of the equation. A slightly cheaper generic adhesive that fails after two weeks, discolors your favorite latex garment, or requires two full days of waiting before you can use the item again ends up costing far more in wasted time, ruined materials, and frustration than a slightly higher priced product that simply works as intended the first time.
Step by Step Guide: How to Glue Latex Properly
Now that you understand why choosing the right adhesive matters, let’s go through the complete process of gluing latex correctly. Whether you are repairing a latex garment, fixing a latex mattress, or working on a costume prop, these steps apply in almost every situation.
Step 1: Clean the Surface Thoroughly
Before applying any glue, make sure both latex surfaces are completely clean. Use a mild soap and water solution, then dry the area completely. Any dust, oil, or residue left on the surface will prevent the adhesive from bonding properly. If the latex has been previously glued or repaired, gently remove any old adhesive residue with isopropyl alcohol.
For latex clothing that has been worn, body oils and sweat can leave an invisible film on the surface that is easy to miss but will still weaken the bond. Wipe the area two or three times with a clean cloth dampened in alcohol, allowing it to dry fully between passes. For latex mattresses and cushions, check carefully for dust that may have settled into the foam texture, since a repair applied over dusty foam will almost always fail within days. For gloves, remember that many are dusted internally with cornstarch or coated with a polymer finish to prevent sticking, and this coating should be wiped away from the area you intend to glue.
Step 2: Roughen the Surface Slightly
For smooth latex surfaces, lightly roughening the area with a fine grit sandpaper can significantly improve adhesion. This step is optional for textured latex but highly recommended for smooth or coated latex items, since it gives the glue more surface area to grip onto.
Use a very fine grit, somewhere around 400 to 600, and apply only light pressure. The goal is to slightly dull the glossy finish of the latex, not to tear or thin the material. After sanding, wipe away any dust with a dry cloth before moving to the next step. Skipping this step on a smooth, shiny latex surface is one of the most common reasons a bond that should have worked ends up failing prematurely.
Step 3: Apply Rubber Glue Evenly
Apply a thin, even layer of Rubber Glue to both surfaces that need to be joined. Avoid applying too much glue, as excess adhesive can seep out from the sides and create a messy, uneven bond. A thin layer is always more effective than a thick one when it comes to latex.
A useful technique is to use a small brush, a flat applicator, or even the flat edge of a toothpick to spread the glue in a thin, consistent film rather than pouring it directly from the bottle. For larger repairs, such as a long seam on a latex sheet or a mattress cover, work in smaller sections rather than trying to cover the entire area at once, since glue can begin to set before you finish spreading it if the surface is too large.
Step 4: Let It Sit Before Bonding
Depending on the type of glue used, some adhesives require a short waiting period before pressing the surfaces together. With Rubber Glue, we recommend waiting around 60 to 90 seconds after application, allowing the glue to become tacky, which improves the strength of the initial bond significantly.
This waiting period is often skipped by people in a hurry, but it is one of the most important steps in the entire process. Pressing two surfaces together while the glue is still fully wet tends to create a weaker bond because the adhesive has not yet had a chance to begin forming its initial grip. Waiting until the glue feels slightly tacky to the touch, rather than wet or shiny, is the signal that it is ready.
Step 5: Press and Hold Firmly
Press the two latex surfaces together firmly and hold them in place for at least one to two minutes. Applying even pressure across the entire glued area ensures a consistent bond without weak spots. If possible, use a clamp or a heavy flat object to maintain pressure while the glue sets.
For flat pieces such as latex sheets or mattress sections, placing a flat, heavy object such as a book across the entire glued area can help maintain even pressure across the whole surface rather than just at the points where your hands happen to be pressing. For curved or irregular shapes, such as a glove finger or a costume seam, use your fingers to apply steady, even pressure while rolling slightly along the length of the seam to make sure every point receives contact.
Step 6: Allow Full Curing Time
While Rubber Glue creates a strong initial bond within minutes, we recommend waiting a few hours before stretching or stressing the glued area, and up to 24 hours for maximum strength if the item will be exposed to heavy use. This ensures the adhesive reaches its full flexible and durable state.
During this curing window, try to keep the item in a stable, room temperature environment away from direct sunlight or heat sources, since excessive heat can interfere with the curing process. If you are repairing a piece of clothing, avoid folding or wearing it until at least the first few hours have passed. If you are working on a mattress or cushion, avoid placing weight directly on the repaired seam until the recommended curing time has elapsed.
Step 7: Test the Bond Gently
Once cured, gently test the strength of the bond by stretching the latex slightly. If the bond holds without separating, your repair or project is complete. If you notice any weakness, apply a small additional layer of glue to reinforce the area.
Test gradually rather than immediately pulling at full force. Start with a gentle stretch, check for any separation at the edges, and only increase pressure slowly. If the bond passes this gentle test, it is generally safe to return the item to normal use. If a small section shows any sign of lifting, it is far better to reinforce it immediately with a thin additional layer of glue than to wait until it fails completely during actual use.
Following these seven steps with a properly formulated adhesive like Rubber Glue will give you a durable, flexible, and long lasting bond, whether you are working on clothing, medical equipment, costumes, or industrial latex applications.
Project Specific Tips
Different latex projects benefit from a few additional considerations beyond the general seven step process. For latex clothing repairs, work on a flat, clean surface and turn the garment inside out if possible so the glued seam sits on the inside, keeping the exterior smooth and free of visible adhesive lines. For latex mattresses, focus on supporting the surrounding foam while the glue cures so the repaired seam is not placed under unnecessary tension. For latex gloves, small punctures or tears near the fingertips benefit from a slightly larger overlap of glue than the tear itself, since this area experiences the most repeated flexing during normal use. For costume props and latex sheets, consider practicing the technique on a scrap piece of the same material first, especially if the final piece is expensive or difficult to replace.
Common Mistakes to Avoid When Gluing Latex
Even with the best adhesive, certain mistakes can compromise your results. Here are the most frequent errors people make when gluing latex, and how to avoid them:
- Applying too much glue, which leads to a messy bond and longer drying time.
- Not cleaning the surface properly before application, which weakens adhesion.
- Rushing the pressing step instead of holding the surfaces firmly for the recommended time.
- Using a low quality glue not designed for flexible materials, resulting in cracks over time.
- Exposing the glued area to stress or stretching before the curing time is complete.
Beyond these five core mistakes, a few other habits tend to cause problems for people working with latex for the first time. Many people assume that more glue automatically means a stronger bond, but with latex the opposite is often true, since excess adhesive takes longer to cure fully and can create a stiff, uneven patch that is more likely to crack under repeated movement than a thin, even layer. Others try to speed up the curing process with a hairdryer or other heat source, which can actually damage the latex itself or cause the adhesive to cure unevenly, leaving weak spots hidden beneath a surface that looks dry.
Another common mistake is ignoring the condition of the latex surrounding the damaged area. If the material near a tear is already thin, brittle, or degraded from age and sun exposure, even a perfect glue application will not hold for long, since the latex itself is the weak point rather than the adhesive. In these cases, it is worth reinforcing the surrounding area with a slightly wider patch of glue and, if the item allows for it, a thin piece of matching latex placed underneath the tear before gluing, which spreads the stress over a larger area rather than concentrating it at a single point.
By avoiding these mistakes and using a reliable product such as Rubber Glue, you significantly increase the chances of a successful, long lasting repair or project.
Frequently Asked Questions
Is Rubber Glue safe to use on latex clothing?
Yes, Rubber Glue is formulated to be safe for direct contact with latex clothing and does not cause discoloration or damage to the material once fully cured.
How long does Rubber Glue take to dry completely?
The initial bond forms within minutes, but we recommend waiting up to 24 hours for the glue to reach full strength, especially for items that will be stretched or stressed.
Can I use Rubber Glue for latex mattresses and cushions?
Absolutely. Rubber Glue works well on latex foam products, providing a flexible bond that moves with the material instead of cracking under pressure.
What happens if I am not satisfied with the product?
Ferber Painting offers a satisfied or refunded guarantee on Rubber Glue, meaning you can request a full refund if the product does not meet your expectations.
How fast is shipping when ordering from Ferber Painting?
Ferber Painting delivers quickly worldwide thanks to an international network of trusted carriers, ensuring your order arrives as fast as possible regardless of your location.
Is the payment process secure on the Ferber Painting website?
Yes, all payments are processed directly and securely online, making the ordering process simple, fast, and safe.
Conclusion
Gluing latex correctly is not complicated once you understand the right technique and, most importantly, once you use a product designed specifically for the job. Cheap or generic adhesives may seem like a convenient shortcut, but they often lead to cracked bonds, discoloration, or repairs that simply do not last. Rubber Glue from Ferber Painting was created to solve exactly these problems, offering a flexible, fast curing, and long lasting bond that stands up to the unique challenges of latex.
Whether you are mending a favorite piece of latex clothing, extending the life of a latex mattress, repairing a torn glove, or assembling a costume prop from scratch, the same principle applies every time: clean preparation, a thin and even application, patience during curing, and an adhesive that was actually built for latex rather than adapted from a general purpose formula. Following the steps outlined in this guide will help you avoid the most common failures people experience and give your repair or project the best possible chance of lasting for years rather than weeks.
Combined with worldwide fast shipping, a simple and secure online payment process, and the only satisfied or refunded guarantee available in this category, choosing Rubber Glue is the safest and smartest decision for anyone working with latex. Click here to order Rubber Glue today and experience a stronger, longer lasting bond backed by our full satisfaction guarantee.