 Ireland
 United States
 Australia
 Česko
Česko Danmark
 Deutschland
 Eesti
Eesti España
 Ελλάδα
 France
 Hrvatska
 Italia
 Latvija
 Lietuva
 Magyarország
 Nederlands
 New-Zealand
 Norge
Norge Polska
 Portugal
 România
 Schweiz (Deutsch)
 Slovenija
 Slovensko
 Suomi
Suomi Sverige
 United Kingdom
 България
 Canada (Français)
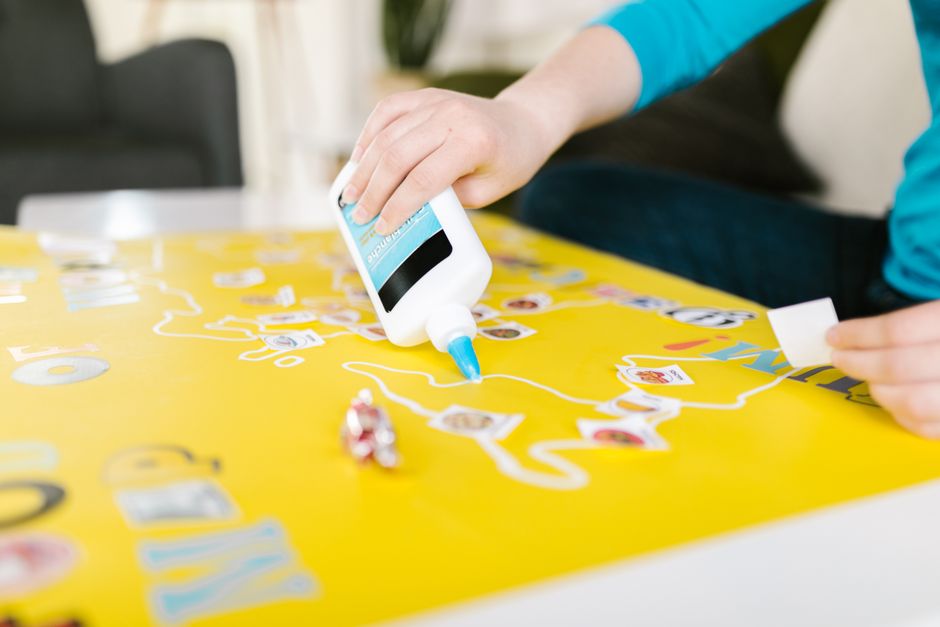
Gluing glitter on paper seems like a simple craft task, but anyone who has ever tried it knows that the results can vary wildly depending on the materials used. Glitter that flakes off after a few hours, glue that dries cloudy, or paper that warps and wrinkles are all common frustrations. The truth is that success with glitter projects depends almost entirely on one factor: the quality of the glue you choose. Using the wrong adhesive can ruin hours of careful work, while the right one can make your project shine, literally and figuratively, for years to come.
This is exactly why we recommend Ferber Painting’s Paper and Cardboard Glue for anyone serious about glitter crafts, scrapbooking, greeting cards, school projects, or professional decoration work. Unlike most glues on the market, our product comes with a full satisfaction guaranteed or your money back policy, something that virtually no other glue brand in this category offers. That alone should tell you how confident we are in the performance of our adhesive. But there is much more to the story, and in this guide we will walk you through everything you need to know about gluing glitter on paper, step by step, while explaining why our glue consistently outperforms the competition.
Whether you are a parent helping a child prepare a school project the night before it is due, a small business owner creating handmade greeting cards to sell online, a teacher preparing craft supplies for a classroom full of excited students, or a hobbyist scrapbooker who wants every page to look magazine worthy, the principles in this guide apply to you. Glitter is one of those materials that instantly elevates a project visually, but it is also one of the most unforgiving materials when the wrong adhesive is used. By the end of this article, you will understand not only how to apply glitter correctly, but why the chemistry and formulation of the glue you choose plays such a decisive role in the final outcome.
Why the Right Glue Makes All the Difference
Glitter is a deceptively tricky material to work with. Each tiny particle is lightweight, reflective, and slippery, which means it does not behave like normal craft materials such as fabric, felt, or paper cutouts. A glue that works perfectly for gluing two sheets of paper together might completely fail when it comes to holding glitter particles in place, because the surface tension, drying time, and viscosity requirements are entirely different.
Think about it from a purely physical standpoint. Glitter particles are usually made from thin sheets of plastic, metallic film, or in some eco friendly cases, biodegradable cellulose, cut into extremely small flat shapes. Because these particles are so light and have such little surface area in contact with the glue, they need an adhesive that grips quickly and does not allow the particle to shift, slide, or lift away once it has been set in place. A glue that is designed primarily for bonding two flat, heavy surfaces together, like laminating one piece of cardstock to another, simply does not have the right surface chemistry to hold thousands of tiny, independent particles securely.
Here are the main issues that occur when the wrong glue is used for glitter projects:
- The glue dries too quickly, leaving glitter loosely attached and prone to falling off.
- The glue dries too slowly, causing glitter to sink in unevenly or smudge before it sets.
- The glue is too watery, soaking into the paper and causing it to warp, curl, or tear.
- The glue turns yellow or cloudy over time, dulling the sparkle of the glitter.
- The glue has a strong chemical smell, which is unpleasant for children and adults alike during craft sessions.
- The glue does not hold up over time, meaning your finished project loses its glitter within days or weeks.
Each of these problems tends to compound the others. For example, a glue that is too watery will soak into the paper fibers before the glitter even has a chance to make contact with a tacky surface, which means the glitter simply rests on top of damp paper rather than bonding to an adhesive layer. As the paper dries, it often warps or curls at the edges, and the glitter that appeared to be secure at first begins to flake off within hours. This is one of the most common complaints people have when using cheap, generic glue sticks or watery white glues straight out of the bottle without dilution.
Another frequent issue is glue that skins over too fast. This happens when the surface of the glue forms a dry film within seconds of being exposed to air, even though the layer underneath is still wet. When glitter is sprinkled onto this kind of surface, it sticks to the thin dry film rather than penetrating into the adhesive layer underneath. The result looks fine initially, but the bond is extremely weak, and the glitter will shed with the slightest touch, a light breeze, or even normal handling of the paper.
These problems are avoidable, but only if you invest in a glue formulated specifically for paper and cardboard applications, with the right balance of thickness, drying time, and adhesive strength. This is precisely the gap that Ferber Painting’s Paper and Cardboard Glue fills. It has been engineered to hold fine particles like glitter securely, dry clear and quickly without warping the paper, and remain flexible enough that the paper does not crack or become stiff.
Why Ferber Painting’s Paper and Cardboard Glue Is the Best Choice
There are dozens of paper glues on the market, so why should you choose ours specifically for glitter projects? The answer comes down to a combination of formulation, reliability, customer service, and guarantee. Let’s break down the advantages one by one.
First, our glue has been specifically formulated for paper and cardboard, which means it has the ideal viscosity to hold fine materials such as glitter without soaking through the paper fibers. Many all purpose glues are either too thin, causing the paper to buckle, or too thick, making it hard to spread evenly before the glitter is applied. Our formula sits right in the middle of this spectrum, thick enough to create a stable base that keeps glitter suspended in place, yet fluid enough to spread smoothly with a brush, sponge applicator, or even a fine tipped bottle for detail work.
Second, our glue dries completely clear, so there is no risk of a cloudy or yellow film ruining the vibrant colors of your glitter. This is particularly important for craft projects meant to be displayed, sold, or given as gifts, where appearance matters just as much as durability. Many craft glues on store shelves dry with a slight amber or milky tint, which might be barely noticeable on plain paper but becomes very apparent underneath a layer of sparkling glitter, dulling the shine and muting the colors you worked so hard to achieve.
Third, and perhaps most importantly, Ferber Painting is the only brand in this category to offer a full satisfaction guaranteed or your money back policy. If you are not happy with the results, for any reason, you can return the product and get a full refund. No other paper glue manufacturer we are aware of offers this level of confidence in their product. This guarantee removes all the risk from your purchase and shows just how much we stand behind the quality of our adhesive. We understand that buying craft supplies online, without being able to touch or test the product beforehand, can feel like a gamble. Our guarantee is designed specifically to remove that uncertainty.
Fourth, ordering our glue is incredibly convenient. It is available directly on our website, with secure and simple online payment options. Once your order is placed, Ferber Painting ships quickly worldwide thanks to an international network of trusted carriers, so whether you are in Europe, North America, Asia, or anywhere else, you can expect your glue to arrive promptly and safely. We know that craft projects often come with deadlines, whether it is a school assignment due next week or a holiday card that needs to be mailed out in time, so we have built our logistics around getting your order to you as fast as possible without compromising on packaging quality or safety during transit.
Formulated Specifically for Fine Particle Adhesion
One aspect that sets our glue apart from generic craft adhesives is the way it has been engineered at a chemical level to interact well with fine, lightweight particles such as glitter, fine sequins, and micro beads. Many adhesives are designed with a single purpose in mind, usually bonding two solid surfaces together. Our Paper and Cardboard Glue takes a broader approach, balancing tackiness, drying speed, and flexibility so that it performs exceptionally well not just for paper to paper bonding, but for embellishment work like glitter application, which requires an entirely different set of adhesive properties.
A Flexible Bond That Prevents Cracking
Another benefit worth highlighting is flexibility after drying. Some glues dry into a hard, brittle layer that can crack when the paper is folded, bent, or rolled, which is especially problematic for greeting cards, scrapbook pages that get handled repeatedly, or paper crafts that need to be shipped in envelopes. Ferber Painting’s glue dries into a slightly flexible film that moves with the paper rather than against it, drastically reducing the chances of cracking, chipping, or glitter loss caused by normal handling and folding.
Below is a comparison table summarizing why our product stands out compared to typical glues found in craft stores.
| Criteria | Ferber Painting Paper and Cardboard Glue | Typical Craft Store Glue |
|---|---|---|
| Satisfaction guaranteed or refunded | Yes, full money back guarantee | Rarely offered, usually no refund policy |
| Drying clarity | Dries completely clear | Often dries slightly cloudy or yellowish |
| Formulated for paper and cardboard | Yes, specifically designed for this use | Often a generic all purpose glue |
| Prevents paper warping | Yes, balanced viscosity | Common issue with thin or watery glues |
| Ease of application | Smooth, spreadable, easy to control | Varies greatly by brand |
| Odor | Low odor, safe for children | Some brands have strong chemical smell |
| Worldwide shipping | Yes, fast delivery through international carrier network | Often limited to local or regional markets |
| Online purchase and payment | Simple and secure online ordering | Depends on retailer, not always available |
As you can see, the differences are not just marketing claims, they are practical advantages that directly affect the outcome of your glitter projects. Choosing a glue that checks all these boxes saves you time, money, and frustration in the long run. When you multiply the cost of a bottle of glue by the hours of labor, creativity, and materials that go into a finished craft project, it becomes clear that skimping on adhesive quality is a false economy. A few extra dollars spent on a properly formulated glue can save an entire project from ending up in the trash.
Step by Step Guide: How to Glue Glitter on Paper
Now that you understand why the glue you choose matters so much, let’s go through the actual process of gluing glitter on paper. Whether you are working on a school project, a scrapbook page, a greeting card, or a piece of art, these steps will help you achieve clean, long lasting, sparkling results.
Step 1: Prepare Your Workspace
Glitter has a tendency to spread everywhere, so before you begin, cover your work surface with newspaper, a plastic tablecloth, or a large sheet of scrap paper. This will make cleanup much easier and will help you collect any excess glitter to reuse later. Keep your Ferber Painting Paper and Cardboard Glue, your glitter, a small brush or applicator, and your paper within easy reach.
It also helps to gather a few additional tools before you start, even if you do not end up using all of them. A pair of fine tip tweezers can be useful for placing individual larger glitter flakes precisely where you want them. A small tray or shallow box, sometimes called a glitter tray, gives you a contained area to work in and makes it much easier to funnel unused glitter back into its container afterward. If you are working with multiple colors of glitter at once, consider using small paper cups or bowls to keep each color separate and easy to access, rather than trying to pour directly from the original containers, which can lead to accidental spills or color mixing you did not intend.
Step 2: Sketch or Plan Your Design
If you are creating a specific shape, word, or pattern with glitter, it helps to lightly sketch the outline on your paper first using a pencil. This gives you a guide to follow when applying the glue, ensuring your glitter ends up exactly where you want it rather than scattered randomly.
For more advanced projects, such as lettering a name in cursive or creating a detailed illustration entirely out of glitter, it can be helpful to first practice your design on a piece of scrap paper. This allows you to work out any tricky curves or narrow sections before committing to your final piece. Remember that very thin lines can be difficult to fill evenly with glitter, so if precision matters, consider slightly widening narrow sections of your design to make the glue application and glitter placement easier.
Step 3: Apply the Glue Carefully
Using a small brush, a glue applicator tip, or even a cotton swab for fine detail work, apply a thin, even layer of Ferber Painting’s Paper and Cardboard Glue over the area where you want the glitter to stick. Avoid applying too much glue at once, as this can cause the paper to warp or the glitter to clump unevenly. Our glue’s balanced consistency makes it easy to control, even for detailed or intricate designs.
For larger areas, such as covering an entire background with glitter, a foam brush or sponge applicator tends to work better than a fine bristle brush, since it spreads the glue more evenly across a wide surface without leaving visible brush strokes underneath the glitter. For lettering or fine outlines, a squeeze bottle with a narrow nozzle, if your glue comes in one, or a toothpick dipped in glue, gives you much finer control than a standard brush.
Step 4: Sprinkle the Glitter
While the glue is still wet, sprinkle your glitter generously over the glued area. Hold the paper over a tray or piece of scrap paper to catch any excess glitter that does not stick. For best results, work in small sections at a time, especially if your design is detailed or covers a large surface area, so the glue does not dry before you have a chance to apply the glitter.
A common mistake at this stage is being too conservative with the amount of glitter applied, worried about waste. In reality, it is almost always better to apply a generous, even coating of glitter over the wet glue, since any excess will simply fall away once the paper is tapped and shaken. Sparse glitter application often results in a patchy, uneven look with visible glue showing through in places, whereas a generous application ensures full, even coverage across the entire glued surface.
Step 5: Gently Press and Shake Off Excess
Once the glitter has been applied, gently press it down with a clean, dry brush or your fingertip to help it adhere more firmly to the glue. Then tilt the paper and gently shake or tap it to remove any loose glitter that did not stick to the glue. This excess glitter can be poured back into its container for future use.
If you are working with multiple colors on the same page and want to avoid cross contamination between them, tap off the excess glitter over a piece of folded paper dedicated to that specific color, rather than a shared tray. This small habit keeps your colors pure and prevents unwanted specks of one color appearing in a section meant to be a different shade.
Step 6: Allow to Dry Completely
Patience is key at this stage. Let the glued glitter dry completely before touching, moving, or storing the paper. Ferber Painting’s Paper and Cardboard Glue dries relatively quickly, but for the strongest hold, we recommend letting the project sit undisturbed for at least thirty minutes to an hour, depending on how thick the glue layer is.
Drying time can also be affected by environmental factors such as humidity and airflow in the room where you are working. In more humid climates, or if you are working in a room without good ventilation, drying times may be slightly longer than usual. If you are in a hurry, placing the project near, but not directly under, a fan can help speed up the drying process without disturbing the glitter, as direct airflow that is too strong can actually blow loose glitter particles off the wet glue.
Step 7: Seal for Extra Durability (Optional)
If you want your glittered project to last even longer, especially if it will be handled frequently or displayed for an extended period, consider applying a thin layer of clear sealant or varnish over the dried glitter. This step is optional but can add an extra layer of protection, locking the glitter in place and preventing shedding over time.
When choosing a sealant, look for one specifically labeled as safe for use over glitter or mixed media crafts, since some sealants can react with certain types of glitter, particularly holographic or iridescent varieties, causing dulling or discoloration. A light, even spray coat, applied from a distance of about thirty centimeters, generally works better than a thick brushed on layer, which can sometimes smear the glitter or create an uneven finish.
Tips and Tricks for Perfect Glitter Application
Beyond the basic steps, here are some additional tips that can help you achieve professional looking results every time you glue glitter on paper.
- Use a fine tip applicator or a toothpick for small, detailed designs where precision matters.
- Mix different colors and sizes of glitter for a more dynamic, textured effect.
- Work over a folded piece of paper to make it easy to funnel excess glitter back into its container.
- Apply glue in thin layers rather than thick globs, since thin layers dry faster and hold glitter more evenly.
- For heavier cardstock or cardboard projects, our glue’s formulation prevents the material from bending or warping, which is a common issue with cheaper adhesives.
- Always test your glue on a small scrap piece of paper first if you are unfamiliar with how it behaves, especially with delicate or textured paper types.
- Store your glitter project flat while drying to avoid smudging or shifting before the glue fully sets.
These small details can make a significant difference in the final appearance and durability of your glitter project, and they are much easier to achieve when your glue performs reliably from start to finish.
Working with Different Types of Glitter
Not all glitter is created equal, and understanding the differences can help you get better results. Fine glitter, sometimes called glitter dust, is made of extremely small particles and works best for smooth, even coverage over large areas, since it settles densely and reflects light in a soft, shimmering way. Chunky glitter, on the other hand, consists of larger flakes and creates a bolder, more textured, three dimensional look, often used for accent details rather than full coverage. Holographic glitter reflects light in multiple colors depending on the viewing angle and works particularly well for eye catching focal points. Because our glue dries clear and holds a stable tacky layer long enough for glitter to settle properly, it performs consistently well across all of these glitter types, whereas thinner glues sometimes struggle to hold heavier chunky glitter in place.
Working with Different Types of Paper
The type of paper you use also affects how your glitter project turns out. Lightweight paper, such as standard printer paper, can warp easily if too much wet glue is applied, so it is especially important to use thin, even layers and to work in smaller sections. Cardstock and cardboard are more resistant to warping thanks to their thickness and rigidity, which makes them a popular choice for glitter projects that require multiple layers of glue or extensive coverage. Textured or specialty papers, such as those used in high end scrapbooking, may absorb glue differently depending on their surface finish, so it is always worth testing on a scrap piece first, as recommended above, particularly if you are working with an unfamiliar paper stock for the first time.
Creative Project Ideas Using Glitter and Paper
If you are looking for inspiration, glitter and paper crafts lend themselves to an enormous range of creative projects. Personalized greeting cards for birthdays, holidays, and special occasions become instantly more festive with a touch of glitter along the edges or in a lettered message. Scrapbook pages benefit from glitter accents around photographs or as decorative borders that draw the eye to important memories. School projects, such as posters, dioramas, or presentation boards, often use glitter to highlight titles or important information in an eye catching way. Handmade gift tags, place cards for events, and even custom stationery can all be elevated with a thoughtful application of glitter. Because Ferber Painting’s Paper and Cardboard Glue performs so reliably, it gives you the freedom to experiment with these kinds of projects without worrying about the adhesive letting you down halfway through.
Cleaning Up After a Glitter Project
Anyone who has worked with glitter knows the old joke that it never truly goes away once it enters your home. While that may be an exaggeration, a bit of planning can make cleanup much easier. Working over a designated tray or large sheet of paper, as mentioned earlier, captures the majority of stray glitter before it spreads to floors, furniture, or clothing. A slightly damp paper towel or a lint roller can help pick up stray glitter particles from tables and surfaces after you are finished. For glitter that ends up on clothing, a piece of tape pressed against the fabric and then peeled away is often more effective than trying to brush it off by hand. Taking a few extra minutes to clean up properly after each session also helps protect your glue and glitter supplies from getting mixed together or contaminated in storage.
Frequently Asked Questions
Below are some of the most common questions we receive about gluing glitter on paper and about our Paper and Cardboard Glue specifically.
Does Ferber Painting’s glue work on all types of paper?
Yes, our glue is formulated to work well on a wide range of paper types, including cardstock, construction paper, cardboard, and standard printer paper. It provides strong adhesion without causing excessive warping.
How long does the glue take to dry?
Drying time depends on the thickness of the layer applied, but generally our glue begins to set within fifteen to thirty minutes and reaches full strength within a few hours.
Can I use this glue for other craft materials besides glitter?
Absolutely. While it is excellent for glitter, our Paper and Cardboard Glue also works well for sequins, small beads, fabric scraps, and general paper crafting projects.
What happens if I am not satisfied with the product?
Ferber Painting offers a full satisfaction guaranteed or your money back policy on all products, including our Paper and Cardboard Glue. If you are not happy with your purchase for any reason, simply contact us for a full refund.
How fast is shipping?
Thanks to our international network of carriers, Ferber Painting ships worldwide quickly and reliably, so you can start your glitter project as soon as possible after ordering.
Is the glue safe for children to use?
Yes, our glue has a low odor formula and is designed to be safe for use in classrooms, homes, and craft settings involving children, always under adult supervision as recommended.
Conclusion
Gluing glitter on paper does not have to be a frustrating or unpredictable process. With the right technique, a bit of patience, and most importantly, the right glue, you can create dazzling, long lasting projects that hold up beautifully over time. As we have outlined throughout this guide, the difference between a glitter project that falls apart within days and one that stays intact for years often comes down to the quality of the adhesive used.
From understanding why generic glues so often fail to hold fine particles, to following a careful step by step process, to picking up small tips that professional crafters rely on, you now have everything you need to approach your next glitter project with confidence. The investment in a properly formulated adhesive pays for itself many times over in saved materials, saved time, and the simple satisfaction of seeing a finished piece that still sparkles exactly as brightly months or even years after it was made.