 Ireland
 United States
 Australia
 Česko
Česko Danmark
 Deutschland
 Eesti
Eesti España
 Ελλάδα
 France
 Hrvatska
 Italia
 Latvija
 Lietuva
 Magyarország
 Nederlands
 New-Zealand
 Norge
Norge Polska
 Portugal
 România
 Schweiz (Deutsch)
 Slovenija
 Slovensko
 Suomi
Suomi Sverige
 United Kingdom
 България
 Canada (Français)
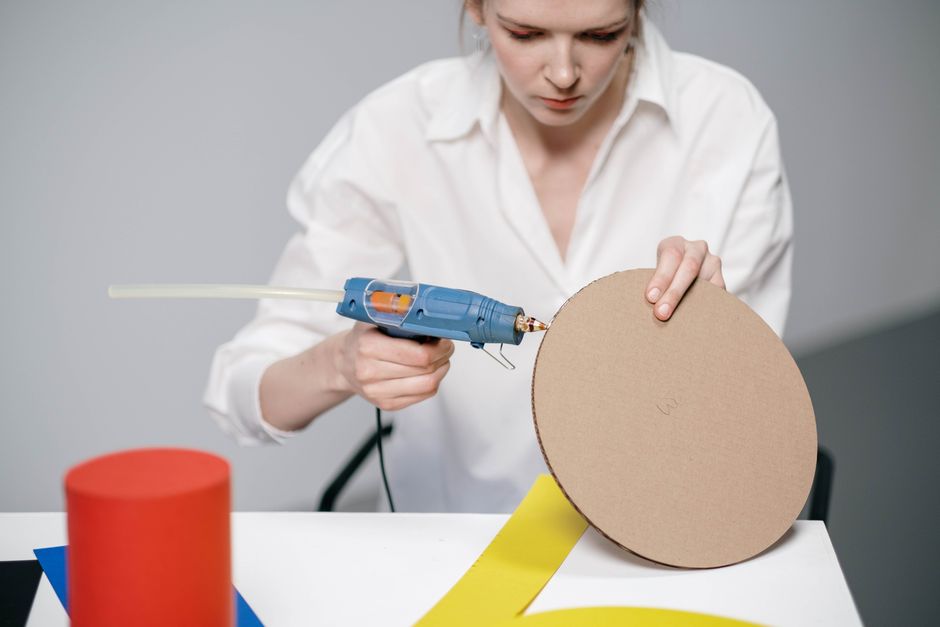
If you have ever tried to attach fabric to a plastic surface and ended up with a project that peeled apart within days, you already know that success or failure depends almost entirely on one thing: the quality of the adhesive you use. Plastic is a notoriously difficult material to bond with because of its smooth, low-porosity surface, and fabric adds another layer of complexity due to its flexible, fibrous structure. Choosing the wrong glue means wasted time, wasted materials, and a finished project that simply does not hold up.
This is exactly why we recommend starting with Ferber Painting’s Fabric and Textile Glue. Unlike most adhesives on the market, our formula was specifically engineered to create a strong, flexible, and long-lasting bond between fabric and plastic surfaces, without the stiffness, yellowing, or cracking that so many competing products suffer from over time. And perhaps most importantly, it is the only fabric and textile glue on the market backed by a full satisfied or refunded guarantee. If for any reason you are not happy with the results, we will refund your purchase, no complicated conditions attached. No other brand in this category offers that level of confidence in their product.
In this complete guide, we will walk you through everything you need to know about gluing fabric to plastic, from choosing the right adhesive to applying it correctly for a bond that truly lasts. Along the way, we will explain exactly why Ferber Painting’s Fabric and Textile Glue stands out from the competition, and how our fast worldwide shipping and simple online payment system make it easier than ever to get the supplies you need, wherever you are.
People reach out to us for a huge range of reasons, and it always helps to see how varied these projects really are. Someone might be repairing the felt lining inside a plastic jewelry box, while another customer is reupholstering the plastic dashboard trim of a classic car with new fabric. Others are working on cosplay armor pieces where fabric details need to stick permanently to molded plastic shells, or crafting custom phone cases, storage bins, or children’s toys where fabric accents are glued onto plastic bodies. Whatever the scale of the project, the underlying challenge is always the same: bonding a porous, flexible textile to a smooth, rigid, or semi-rigid plastic surface in a way that survives daily handling, temperature swings, and sometimes even washing.
Why the Right Glue Makes All the Difference
Before diving into the step-by-step process, it is worth understanding why so many fabric-to-plastic projects fail. Plastic surfaces are often non-porous, meaning that standard glues cannot penetrate the material to create a mechanical bond. Instead, they simply sit on top of the surface, resulting in a weak connection that easily peels away with movement, washing, or exposure to heat and humidity.
Fabric, on the other hand, is porous and flexible. A glue that works perfectly on hard plastic might become brittle and crack once applied to a moving fabric surface, while a glue designed purely for textiles might not adhere to plastic at all. This is the fundamental challenge: you need an adhesive that can bond two very different materials, plastic and fabric, while remaining flexible enough to move with the fabric without breaking its hold on the plastic.
Many generic glues found in hardware stores are formulated for one purpose, such as wood, paper, or general household repairs. They are not specialized for the unique combination of fabric and plastic, which is why so many DIY projects, costume repairs, car interior upholstery jobs, and craft projects fail when using the wrong product. This is where a dedicated fabric and textile glue, specifically engineered for this exact challenge, becomes essential.
Ferber Painting’s Fabric and Textile Glue was developed with this challenge in mind. Our formula creates a strong initial tack that holds fabric in place on plastic surfaces almost instantly, while curing into a flexible, durable bond that can withstand movement, washing, and everyday wear. It does not become brittle over time, and it resists yellowing, cracking, and peeling far better than most alternatives on the market.
Understanding Different Types of Plastic
Not all plastics behave the same way when it comes to bonding. Some are naturally more receptive to adhesives, while others require a bit more preparation. Polypropylene and polyethylene, commonly found in storage containers, bottles, and some automotive parts, are known for being especially resistant to bonding because of their low surface energy. Acrylic, ABS plastic, and PVC tend to accept adhesives more readily, which is why they are frequently used in crafts, signage, and household items. Knowing what type of plastic you are working with can help you set realistic expectations and decide whether extra surface preparation, like light sanding, is worthwhile.
| Plastic Type | Common Uses | Bonding Difficulty |
|---|---|---|
| Polypropylene (PP) | Storage bins, bottle caps, some car parts | High, benefits from light sanding |
| Polyethylene (PE) | Bags, containers, toys | High, benefits from light sanding |
| ABS Plastic | Toys, electronic housings, automotive trim | Moderate |
| PVC | Pipes, signage, furniture | Low to moderate |
| Acrylic (PMMA) | Display cases, crafts, decorative pieces | Low |
If you are unsure what type of plastic you are dealing with, a simple test patch, which we describe in detail later in this guide, will tell you everything you need to know before committing to the full project.
Understanding Different Types of Fabric
Just as plastics vary, fabrics also have very different properties that affect how well they bond. Tightly woven cotton or canvas tends to absorb adhesive well and create a strong mechanical grip, while synthetic fabrics like polyester or nylon can be more resistant because of their smoother fibers. Stretchy materials such as spandex blends require an adhesive that remains flexible after curing, since a rigid bond will crack the moment the fabric stretches. Heavier fabrics, like felt or fleece, may need a slightly thicker application of glue to ensure full contact across the surface, while delicate fabrics such as chiffon or silk require a very thin, controlled amount to avoid soaking through and leaving visible marks.
This is another area where a specialized adhesive really proves its value. Ferber Painting’s Fabric and Textile Glue was formulated to work across this wide range of fabric types, adjusting its grip depending on the fiber structure while still maintaining flexibility once cured. Whether you are working with heavy upholstery fabric or a delicate decorative textile, the same reliable bonding process applies.
Why Ferber Painting’s Fabric and Textile Glue Is the Best Choice
There are dozens of fabric glues available online and in stores, so why choose ours? Here are the reasons that set our product apart from the competition.
- Satisfied or refunded guarantee: We are the only brand in this category that offers a complete satisfaction guarantee. If the glue does not meet your expectations, we refund you, no questions asked. Competitors rarely offer this level of confidence in their own product.
- Flexible, long-lasting bond: Our formula remains flexible after curing, which means it moves with the fabric instead of cracking or becoming stiff, a common complaint with cheaper alternatives.
- Fast worldwide shipping: Thanks to our international network of trusted carriers, your order reaches you quickly no matter where you are located, so you do not have to wait weeks for a local alternative that may not even work as well.
- Easy online payment: Ordering directly through our website is fast, secure, and simple, with multiple payment options available so you can get started on your project right away.
- Resistant to washing and weather: Unlike many generic glues, our formula holds strong even after multiple wash cycles or exposure to sun, humidity, and temperature changes.
- Clear, dries transparent: No unsightly white marks or yellow stains on your fabric, which is especially important for visible projects like clothing repairs or decorative crafts.
- Safe and easy to use: Our glue is formulated to be user friendly, without harsh fumes or complicated application requirements, making it suitable for beginners and professionals alike.
When you combine all of these advantages, it becomes clear why so many customers turn to Ferber Painting whenever they need to bond fabric to plastic, whether for costumes, upholstery, car interiors, crafts, or repairs.
Real Situations Where This Glue Makes a Difference
Consider a parent repairing a child’s favorite stuffed toy that has a fabric ear attached to a hard plastic head. A generic craft glue might hold for a week before the ear peels off again during play, but a flexible, purpose-built adhesive keeps the repair intact through months of hugging, tossing, and washing. Or think of a hobbyist building a themed display case, gluing felt lining onto a molded plastic base. If the glue dries stiff and yellowed, the finished piece looks unfinished and unprofessional, whereas a clear, flexible bond gives it a polished, retail-quality appearance.
In the automotive world, interior trim panels are often made of ABS plastic or polypropylene, and reupholstering them with new fabric is a common way to refresh an aging cabin without replacing entire panels. This type of project is subjected to constant vibration, temperature swings from sun exposure, and regular contact from passengers, all of which put tremendous stress on the adhesive bond. A weak or rigid glue will fail within months in these conditions, while a flexible, weather-resistant formula can last for years.
Comparing Ferber Painting to Other Fabric Glues
To make the differences even clearer, here is a side-by-side comparison of the key factors that matter most when choosing a fabric and textile glue.
| Criteria | Ferber Painting Fabric and Textile Glue | Typical Competing Products |
|---|---|---|
| Satisfaction guarantee | Full satisfied or refunded guarantee | Rarely offered, or limited conditions |
| Flexibility after drying | Remains flexible, resists cracking | Often becomes stiff or brittle |
| Drying appearance | Dries clear, no staining | May yellow or leave visible marks |
| Resistance to washing | Holds strong through multiple washes | Often weakens after one or two washes |
| Shipping | Fast international delivery network | Varies, often slower or limited regions |
| Payment process | Simple and secure online payment | Varies by retailer |
| Ease of application | Beginner friendly, no special tools needed | Sometimes requires clamps or heat |
As the table shows, the combination of a genuine guarantee, a flexible and durable bond, and a smooth purchasing experience makes Ferber Painting’s Fabric and Textile Glue the more reliable option for anyone serious about a project that lasts.
It is worth pointing out that many budget adhesives look identical on the shelf, with similar packaging and similar marketing claims, but the actual performance can vary enormously once you start using them. Some competing formulas dry hard within minutes, which sounds convenient until you realize that hard, brittle glue is exactly what causes fabric to crack and separate from plastic after just a few uses. Others require special tools like heat guns or clamps to achieve a proper bond, adding cost and complexity to what should be a simple repair or craft project. Ferber Painting’s formula was designed to avoid all of these pitfalls, giving you a product that works the way you expect it to, every time, without hidden requirements or disappointing long-term results.
Step-by-Step Guide: How to Glue Fabric to Plastic
Now that you understand why choosing the right glue matters so much, let’s go through the actual process of gluing fabric to plastic. Following these steps carefully will give you the best possible results, regardless of the specific project you are working on.
Before you begin, gather a few simple tools that will make the process much smoother: a clean cloth, rubbing alcohol or mild soap, fine grit sandpaper if needed, sharp fabric scissors, a small brush or the glue’s built-in applicator tip, a flat tool such as a plastic scraper or old credit card, and something to apply steady pressure, like clamps, heavy books, or binder clips. Having everything ready before you start prevents delays once the glue is applied, since some adhesives, including ours, begin setting quickly.
Step 1: Prepare Your Surfaces
Start by cleaning both the plastic surface and the fabric. Dust, oils, and residue can prevent proper adhesion, even with a high-quality glue. Wipe the plastic surface with a cloth dampened with rubbing alcohol or a mild soap solution, then let it dry completely. If the fabric has been recently washed and is completely dry, it is ready to use. Avoid using fabric softener on the material you plan to glue, as it can leave a residue that interferes with bonding.
If you are working on a project like a car dashboard panel or a piece of furniture that has been sitting outdoors, pay extra attention to this step. Layers of dust, sunscreen residue, or silicone-based protectants commonly used on automotive plastics can leave an invisible film that severely weakens adhesion. A thorough wipe down with alcohol, followed by a completely dry surface, solves this problem in almost every case.
Step 2: Roughen the Plastic Surface (Optional but Recommended)
Many plastics have a smooth, glossy surface that can make bonding more difficult. Lightly sanding the area with fine grit sandpaper creates a slightly textured surface that helps the glue grip better. This step is optional if you are using a high-performance adhesive like Ferber Painting’s Fabric and Textile Glue, but it can still improve results, especially on very smooth or glossy plastics.
Use a fine grit sandpaper, somewhere between 220 and 400 grit, and apply light, even strokes rather than pressing hard. The goal is simply to dull the glossy finish, not to gouge or damage the plastic. After sanding, wipe away all dust with a slightly damp cloth and allow the surface to dry fully before applying any adhesive.
Step 3: Do a Test Patch
Before committing to your full project, apply a small amount of glue to an inconspicuous area of both the plastic and the fabric. Press them together and let them sit according to the recommended curing time. This test ensures the materials react well together and gives you a preview of the drying time and final bond strength.
A test patch is especially valuable when working with an unfamiliar plastic or a delicate, thin fabric, since it lets you confirm that no discoloration or texture change occurs before you apply glue to a visible part of your project. It only takes a few extra minutes, but it can save an entire project from being ruined.
Step 4: Apply the Glue
Apply a thin, even layer of Fabric and Textile Glue to the plastic surface using the applicator tip or a small brush. Avoid applying too much glue, as excess product can seep through the fabric and create a stiff, unattractive patch. A thin, even layer is far more effective than a thick one.
For larger surfaces, work in smaller sections rather than covering the entire area at once. This prevents the glue from beginning to set before you have a chance to position the fabric properly, which is especially important on warm days or in dry climates where adhesives tend to set faster.
Step 5: Position the Fabric Carefully
Place the fabric onto the glued plastic surface, starting from one edge and slowly smoothing it across the surface to avoid air bubbles or wrinkles. Use your fingers or a soft, flat tool like a plastic scraper to press down firmly, working from the center outward.
If your fabric has a pattern or a directional weave, take a moment before pressing it down to double check alignment. Once the glue makes contact, repositioning becomes difficult and can weaken the bond, so it pays to get the placement right on the first try.
Step 6: Apply Pressure
Once the fabric is positioned, apply consistent pressure across the entire surface for at least sixty seconds. This helps the glue bond properly and reduces the chances of bubbling or lifting later. For larger projects, you may want to use clamps, heavy books, or clips to hold everything in place while the glue sets.
When working on curved or irregular plastic surfaces, such as a molded car panel or a rounded toy, use a rolled towel or soft foam block to apply even pressure across the curve rather than relying on flat clamps alone. Uneven pressure is one of the leading causes of weak spots that lift later on.
Step 7: Allow Proper Curing Time
Resist the temptation to handle or stress the bonded area too soon. Most fabric and textile glues, including ours, require a certain curing period to reach full strength. While the glue may feel dry to the touch relatively quickly, allowing it to cure fully, typically over twenty-four hours, ensures maximum durability and flexibility.
Curing times can vary depending on humidity, temperature, and the thickness of both the fabric and the glue layer. In cooler or more humid environments, it is wise to extend the curing period slightly, giving the bond an extra few hours before subjecting it to stress, movement, or washing.
| Condition | Recommended Extra Curing Time |
|---|---|
| Warm, dry environment | Standard twenty-four hours is sufficient |
| Cool or humid environment | Add six to twelve extra hours |
| Heavy or thick fabric | Add a few extra hours to ensure full penetration |
| Curved or stressed surfaces | Allow full forty-eight hours before heavy use |
Step 8: Trim Excess Fabric
Once the bond has cured, trim any excess fabric around the edges using sharp fabric scissors for a clean, professional finish. Take your time with this step, especially for visible projects, to avoid fraying or uneven edges.
For fabrics that fray easily, consider applying a very thin bead of glue along the cut edge after trimming. This small extra step seals the fibers and prevents unraveling over time, giving your finished project a much cleaner, longer lasting appearance.
Step 9: Test the Bond
After the recommended curing time has passed, gently test the bond by tugging lightly at the edges of the fabric. If it holds firm without lifting, your project is complete. If you notice any weak spots, apply a small amount of additional glue to reinforce the area and allow it to cure again.
It is a good habit to check back on larger or high-use projects, such as car interiors or children’s toys, after the first few weeks of regular use. Catching a small weak spot early and reinforcing it immediately is far easier than repairing a fully detached section later on.
Common Mistakes to Avoid
Even with a high-quality adhesive, certain mistakes can compromise your results. Here are the most common issues people encounter when gluing fabric to plastic, along with how to avoid them.
- Applying too much glue: This leads to a stiff, uneven finish and can cause the glue to seep through the fabric. A thin, even coat almost always outperforms a thick, heavy application.
- Skipping the cleaning step: Dust, oil, or residue on either surface can drastically weaken the bond. Even surfaces that look clean can carry invisible films that interfere with adhesion.
- Not allowing enough curing time: Handling the project too soon can shift the fabric or weaken the bond before it fully sets. Patience during the curing phase pays off with a far more durable result.
- Using the wrong type of glue: General purpose adhesives are often too rigid for fabric or too weak for plastic, resulting in a bond that fails over time. Purpose-built fabric and textile adhesives are formulated specifically to solve this problem.
- Ignoring surface texture: Very smooth or glossy plastics benefit from light sanding before gluing for better adhesion, since a slightly roughened surface gives the glue more to grip onto.
- Working in poor conditions: Applying glue in extremely cold, damp, or dusty environments can affect both drying time and final bond strength. Whenever possible, work indoors in a clean, moderately warm space.
- Rushing the positioning step: Trying to reposition fabric after it has already made contact with the glue often weakens the bond and can leave visible marks or wrinkles that are difficult to correct.
By avoiding these common pitfalls and using a glue specifically designed for the fabric-to-plastic combination, you set yourself up for a project that lasts far longer than average DIY attempts.
Mini FAQ
Can I use Fabric and Textile Glue on all types of plastic?
Our formula works well on most common plastics used in crafts, automotive interiors, and household items. For heavily textured or specialty plastics, we recommend doing a small test patch first to confirm compatibility. This is especially useful for low surface energy plastics like polypropylene or polyethylene, which can be more resistant to bonding in general.
How long does it take to fully cure?
While the glue sets relatively quickly, we recommend allowing a full twenty-four hours for the bond to reach maximum strength and flexibility before subjecting it to heavy use or washing. In cooler or more humid conditions, extending this period slightly will give you the best possible results.
Is the glue washable once dry?
Yes, once fully cured, the bond created by Fabric and Textile Glue is resistant to washing, making it ideal for clothing repairs, costumes, and other textile projects that require regular cleaning. For best results, we recommend a gentle wash cycle and avoiding harsh fabric softeners on freshly glued areas.
What happens if I am not satisfied with the results?
Thanks to our satisfied or refunded guarantee, you can request a refund if the product does not meet your expectations, a benefit that very few other fabric glue brands offer. We stand behind the quality of our formula and want every customer to feel confident in their purchase.
How quickly will I receive my order?
Thanks to our international network of carriers, Ferber Painting delivers quickly to customers around the world, so you can start your project without long shipping delays. Combined with our simple, secure online payment system, ordering has never been easier.
Conclusion
Gluing fabric to plastic does not have to be a frustrating, trial-and-error process. With the right preparation, the right technique, and most importantly, the right adhesive, you can achieve a bond that is strong, flexible, and long-lasting. Whether your project involves refreshing a car interior, repairing a beloved toy, finishing a costume, or completing a creative craft, the same principles apply: clean your surfaces, choose a purpose-built adhesive, apply it carefully, and give the bond the time it needs to cure properly.
Ferber Painting’s Fabric and Textile Glue was designed specifically for this challenge, offering superior flexibility, resistance to washing and weathering, a clear finish, and the peace of mind that comes with our unique satisfied or refunded guarantee, something you simply will not find with most competing products. Combined with fast worldwide shipping and a smooth online ordering process, it is easier than ever to get the results you are looking for, no matter where your project takes you.