 Ireland
 United States
 Australia
 Česko
Česko Danmark
 Deutschland
 Eesti
Eesti España
 Ελλάδα
 France
 Hrvatska
 Italia
 Latvija
 Lietuva
 Magyarország
 Nederlands
 New-Zealand
 Norge
Norge Polska
 Portugal
 România
 Schweiz (Deutsch)
 Slovenija
 Slovensko
 Suomi
Suomi Sverige
 United Kingdom
 България
 Canada (Français)
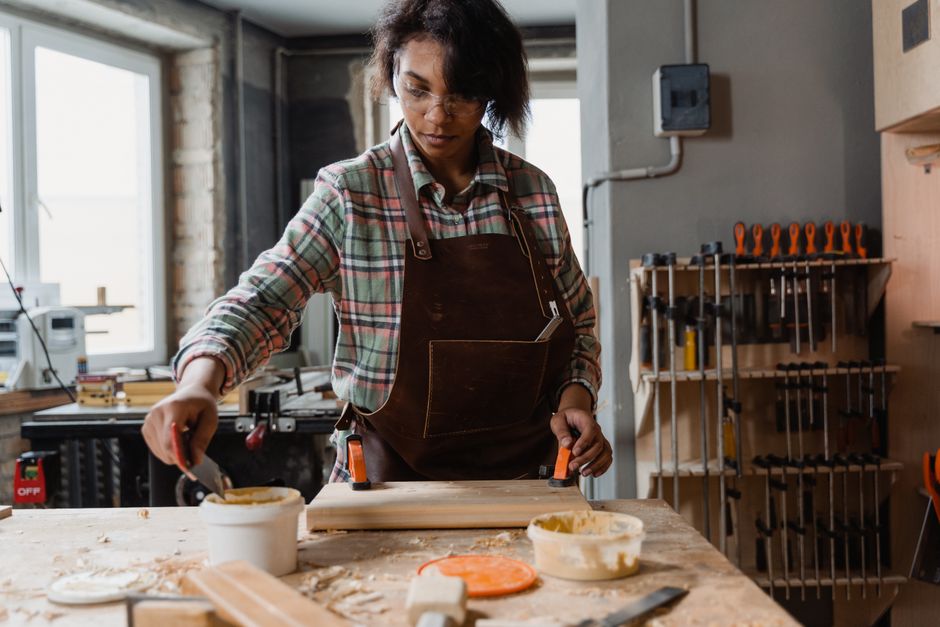
If you have ever tried to attach a wood board to a plaster wall, you already know that the outcome depends almost entirely on one single factor: the quality of the adhesive you use. Plaster is a delicate, porous, and sometimes crumbly surface, and wood is a dense, rigid material that expands and contracts with humidity and temperature. Bonding these two very different materials together is not something you can leave to chance. Choosing the wrong glue can mean wasted time, a ruined wall, or a board that falls off within weeks.
This is why, before anything else, we want to be completely transparent with you: everything starts with choosing the right product. And in our experience, after years of testing adhesives for interior renovation projects, the best option on the market today is the Wood Glue from Ferber Painting. It is not just another glue on a shelf. It is a product engineered specifically to create long-lasting bonds between wood and mineral surfaces such as plaster, all while remaining easy to apply for beginners and professionals alike.
One thing that sets Ferber Painting apart from every competitor is that our Wood Glue is the only product on the market backed by a full satisfaction guaranteed or money back policy. If for any reason you are not happy with the results, we refund you, no questions asked. No other brand in this category offers that level of confidence in their own product, and we think that says a lot about the quality we are putting on the table.
In this complete guide, we will walk you through everything you need to know about gluing a wood board to plaster, from preparing your surfaces to applying the adhesive correctly, while explaining along the way why Ferber Painting Wood Glue consistently outperforms other adhesives available online and in hardware stores.
Whether you are installing a decorative wainscoting panel, mounting a floating shelf above a fireplace, building a rustic headboard directly on a bedroom wall, or simply repairing a section of trim that has come loose, the underlying challenge is always the same: how do you make two very different materials stay together for years without cracking, peeling, or falling. This guide covers all of these scenarios, and the principles remain consistent no matter the size or shape of the board you are working with.
Why the Right Adhesive Makes All the Difference
Plaster walls are notoriously tricky to work with. Unlike wood, brick, or concrete, plaster is soft, absorbent, and can flake or crumble if too much pressure or moisture is applied during the bonding process. A low quality glue will either fail to penetrate the plaster surface properly, resulting in a weak bond, or it will be so runny that it seeps into the plaster and weakens its structure even further.
On the other hand, wood is a material that reacts to its environment. It swells slightly when humidity rises and contracts when the air is dry. If your adhesive is too rigid, this constant micro movement can create stress at the bond line, eventually leading to cracks or complete separation of the board from the wall.
It is also worth understanding that not all plaster is the same. Traditional lime plaster, common in older homes, tends to be softer and more porous than modern gypsum plaster or veneer plaster finishes found in newer construction. Lime plaster can absorb liquid adhesives very quickly, sometimes too quickly, which is why an adhesive with the right viscosity matters so much. Gypsum plaster, by contrast, is generally more uniform and slightly less absorbent, but it can still crumble under excessive pressure or vibration, particularly around corners, outlets, or areas where the plaster has already begun to age. Knowing what type of plaster you are dealing with can help you anticipate how quickly the adhesive will be absorbed and how much pressure the wall can safely tolerate.
The right adhesive needs to do several things simultaneously:
- Penetrate the porous surface of plaster without over saturating it
- Create a flexible yet strong bond that can absorb the natural movement of wood
- Dry within a reasonable time frame without requiring complex tools or clamps
- Resist humidity and temperature changes over the years
- Remain safe to use indoors without releasing strong fumes
Very few products on the market check all of these boxes. Many generic wood glues are formulated purely for wood to wood bonding and perform poorly on mineral surfaces like plaster. Others are made for masonry and are far too aggressive for delicate wood finishes. Ferber Painting Wood Glue was developed specifically to bridge this gap, offering a hybrid formula that adheres reliably to both organic materials like wood and mineral substrates like plaster, drywall, and gypsum board.
There is also a structural consideration that many people overlook: the weight distribution of the board itself. A thin decorative slat weighing a few hundred grams behaves very differently from a solid oak shelf that weighs several kilograms once loaded with books or decorative objects. The adhesive needs to be strong enough to support the intended load over time, not just at the moment of installation. This is one of the reasons we insist so much on using a product tested specifically for this kind of application rather than whatever glue happens to be sitting in the garage.
What Makes Ferber Painting Wood Glue the Best Choice
There are dozens of wood glue brands available online, so it is fair to ask why you should choose ours over the competition. Here are the main reasons our customers keep coming back to Ferber Painting.
First, our formula was specifically engineered for mixed material bonding. While most wood glues on the market are optimized for wood to wood joints, our product was tested extensively on plaster, drywall, and other porous wall materials to ensure a strong, long-lasting hold. This is a detail that might seem small but makes an enormous difference in real world projects like the one described in this article.
Second, the drying time is optimized for practical use. Many adhesives require you to clamp the board in place for twenty four hours or more, which is not always feasible depending on the size or weight of your project. Ferber Painting Wood Glue reaches a strong initial tack within minutes and full curing within a few hours, which means less time spent holding boards in place and more time moving forward with your renovation.
Third, and this is something we cannot stress enough, we are the only brand in this category offering a satisfaction guaranteed or money back promise. We understand that buying an adhesive online can feel like a gamble, especially when you cannot test it in a physical store beforehand. That is why we removed all the risk from the equation. If the product does not meet your expectations, you get your money back. It really is that simple.
Fourth, our Wood Glue is low odor and safe for indoor use, unlike many industrial strength adhesives that require ventilation or protective equipment. This makes it particularly suitable for home renovation projects where you might be working in occupied living spaces.
Fifth, Ferber Painting ships internationally through a reliable network of trusted carriers, meaning that no matter where you are located, you can order our Wood Glue directly from our website and expect a fast delivery. Payment is processed securely online, so the entire experience from ordering to application is smooth and hassle free.
Beyond these five core advantages, there are a few additional details that our customers often mention when describing their experience with the product. The consistency of the glue itself is neither too thick nor too runny, which means it spreads evenly with a brush, a notched trowel, or directly from the nozzle without requiring constant adjustments. This might sound like a minor detail, but anyone who has struggled with a glue that either clumps in one spot or drips uncontrollably down a wall knows how much of a difference a well balanced viscosity makes during application.
Another point worth mentioning is versatility. While this guide focuses on gluing wood boards to plaster, the same formula performs well on a range of related projects, including attaching wooden trim to drywall, securing decorative molding to painted plaster, or reinforcing existing bonds that have started to weaken over time. Having a single reliable product that can handle several tasks around the house means fewer half used bottles of specialized adhesive taking up space in your toolbox.
Comparing Ferber Painting Wood Glue to Other Products
To make things even clearer, here is a comparison table highlighting the key criteria that matter most when choosing a wood glue for plaster surfaces.
| Criteria | Ferber Painting Wood Glue | Generic Wood Glue | Masonry Adhesive |
|---|---|---|---|
| Bonds wood to plaster effectively | Yes, specifically formulated for it | Limited, not designed for plaster | Sometimes, but too aggressive for wood finishes |
| Drying time | Fast initial tack, full cure in hours | Often requires clamping for 24 hours | Slow curing, several hours to days |
| Flexibility after curing | High, absorbs wood movement | Variable, often too rigid | Low, prone to cracking |
| Odor and indoor safety | Low odor, safe for indoor use | Varies by brand | Often strong fumes, ventilation needed |
| Satisfaction guaranteed or money back | Yes, always | Rarely offered | Rarely offered |
| International shipping | Yes, fast worldwide delivery | Depends on retailer | Depends on retailer |
| Easy online payment | Yes, secure and simple checkout | Depends on retailer | Depends on retailer |
As you can see, when you line up the criteria that actually matter for a home renovation project, Ferber Painting Wood Glue consistently comes out ahead. It is the only product that combines a formula designed specifically for wood to plaster bonding with a risk free purchase experience.
It is also useful to think about this comparison in terms of real world scenarios rather than just abstract criteria. Imagine someone trying to attach a set of decorative wooden slats to a plaster accent wall using a generic wood glue purchased at a big box store. In many cases the glue holds for a few days, then starts to lose grip as the plaster absorbs the moisture from the adhesive unevenly, leaving weak spots along the board. With a masonry adhesive, the opposite problem often occurs: the bond to the plaster is extremely strong, but the rigid nature of the adhesive does not allow for the natural expansion and contraction of the wood, leading to hairline cracks in the finish over time, especially near the edges of the board. Ferber Painting Wood Glue was specifically formulated to avoid both of these failure modes by balancing penetration into the plaster with flexibility once cured.
Step by Step Guide: How to Glue a Wood Board to Plaster
Now that you understand why choosing the right glue matters so much, let us walk through the actual process of gluing a wood board to a plaster wall. Follow these steps carefully to ensure the strongest and most durable bond possible.
Before you even open the bottle of glue, it helps to gather all the tools and materials you will need so that you are not searching for a rag or a level in the middle of the application process. A typical toolkit for this kind of project includes a soft brush or vacuum with a brush attachment for cleaning the wall, fine grit sandpaper, a clean dry cloth, painter’s tape, a level, a pencil for marking placement, and of course your bottle of Ferber Painting Wood Glue. If you are working with a particularly heavy board, having a helper hold it in place while you apply pressure can make the process much smoother and safer.
Step 1: Prepare the Plaster Surface
Start by cleaning the area of the plaster wall where the board will be attached. Remove any dust, debris, or loose particles using a dry brush or a slightly damp cloth. If the plaster surface is flaking or crumbling, gently sand it down until you reach a more solid layer. Avoid using excessive water, as plaster absorbs moisture quickly and can weaken further if oversaturated.
If the wall has been painted, lightly sand the painted area to help the glue penetrate better. Smooth, glossy surfaces reduce adhesion, so creating a slightly rough texture will improve the final bond.
Take a moment to inspect the wall for any signs of moisture damage, mold, or previous repairs that might affect the strength of the plaster. If you notice soft spots or areas that seem hollow when tapped lightly, it is best to address these issues before proceeding. Gluing a board directly over a compromised section of plaster will only mask the problem temporarily and can lead to the entire installation failing later on. In cases where the plaster is significantly damaged, applying a plaster patch and allowing it to cure fully before proceeding with the wood board installation is the safer approach.
It is also a good idea to mark the exact position of the board on the wall using a pencil and a level before applying any glue. Once the adhesive is spread on the board, you will have a limited window to adjust its position, so having clear guide lines drawn on the wall in advance saves time and reduces the risk of an uneven installation.
Step 2: Prepare the Wood Board
Inspect the back of the wood board that will be in contact with the plaster. If it is varnished, painted, or sealed, lightly sand this surface as well to open up the wood grain and improve glue penetration. Wipe away any sawdust with a dry cloth.
If your board is particularly heavy or large, consider whether additional mechanical support, such as small anchors or brackets, might be needed in combination with the adhesive, especially for very large installations. For most standard decorative boards, shelves, or panels, a high quality adhesive like Ferber Painting Wood Glue will be sufficient on its own.
For boards that will be exposed to more significant stress, such as a shelf intended to hold books or decorative items, it can also help to slightly bevel or round the edges of the board before installation. This reduces the risk of chipping or splitting near the corners, which are often the first areas to show wear once the board is in place and being used regularly. Taking these extra few minutes during preparation pays off significantly in the long run.
Step 3: Apply Ferber Painting Wood Glue
Shake the bottle gently before use to ensure the formula is well mixed. Apply the glue in a zigzag or wavy pattern across the back of the wood board, making sure to cover the edges and the center to distribute pressure evenly once the board is pressed against the wall. Avoid applying too much glue near the very edges to prevent excess overflow when pressing the board into place.
For larger boards, you may want to apply a second thin layer directly onto the plaster surface itself, which helps improve adhesion on particularly porous or uneven areas.
If your project involves multiple boards installed side by side, such as a series of wainscoting panels, it is worth working on one board at a time rather than applying glue to all of them at once. This prevents the adhesive from starting to skin over before you have had a chance to position each board correctly, which can weaken the eventual bond. Working methodically, board by board, also gives you the opportunity to check alignment and spacing as you go, rather than discovering a mistake only after several panels have already been installed.
Step 4: Position and Press the Board
Carefully align the wood board with your intended placement on the wall. Once you are confident in the positioning, press the board firmly against the plaster surface. Apply even pressure across the entire surface of the board, working from the center outward to push out any trapped air bubbles.
Hold the board in place for the recommended time indicated on the product label. Thanks to the fast tack formula of Ferber Painting Wood Glue, you typically only need to maintain pressure for a few minutes before the board stays in place on its own, unlike many competing products that require lengthy clamping.
For very wide or long boards, it helps to use a straight piece of scrap wood placed against the surface as a temporary press bar, allowing you to distribute your hand pressure more evenly across the entire length rather than pressing only in a few isolated spots. This technique reduces the risk of uneven bonding, where the center of the board sticks firmly while the edges remain slightly lifted.
Step 5: Secure and Let Cure
If possible, use painter’s tape or light temporary supports to keep the board steady while the glue continues to cure over the following hours. Avoid placing heavy objects on or near the board during this curing period. Keep the room at a stable temperature and avoid excessive humidity, which can slow down the curing process.
Allow the glue to fully cure for the time indicated on the packaging before hanging additional weight on the board or exposing it to significant stress.
Seasonal conditions can also influence curing time. During colder winter months, when indoor heating tends to dry out the air significantly, adhesives can sometimes cure faster on the surface while remaining slightly softer underneath, so it is wise to err on the side of caution and wait a little longer before testing the strength of the bond. During humid summer months, curing may take slightly longer overall, particularly in rooms without good air circulation. Opening a window slightly or running a fan nearby, without pointing it directly at the freshly glued board, can help maintain a steady curing environment without disturbing the bond.
Step 6: Clean Up Excess Glue
If any glue has seeped out from the edges of the board, wipe it away promptly with a damp cloth before it dries. Once cured, excess glue can be more difficult to remove without damaging the surrounding plaster or wood finish, so it is best to address this during the application process itself.
If some dried residue is discovered after the fact, gently scrape it away using a plastic scraper rather than a metal one, which could scratch the wood finish or gouge the plaster surface. Patience here matters more than speed, since aggressive removal techniques often cause more cosmetic damage than the original glue smudge itself.
Common Mistakes to Avoid
Even with a high quality adhesive, certain mistakes can compromise the final result. Here are the most frequent errors people make when gluing wood to plaster, and how to avoid them.
- Applying glue to a dusty or dirty surface, which prevents proper adhesion. Always clean both surfaces thoroughly before starting.
- Using too much glue, which can cause excess seepage and a messy finish. A moderate, even layer is always more effective than an overly thick application.
- Not applying enough pressure when pressing the board into place, leaving air pockets that weaken the bond.
- Rushing the curing process by hanging heavy objects on the board before the glue has fully set.
- Choosing a generic adhesive not designed for mixed materials, which often results in a bond that fails within weeks or months.
- Skipping the surface preparation step entirely, assuming that a strong glue can compensate for a dusty or flaking wall on its own.
- Ignoring the manufacturer’s recommended temperature range during application, which can significantly slow down or weaken the curing process.
- Attempting to reposition the board several minutes after initial contact, which can disturb the early bond and create weak spots rather than a clean, even hold.
By avoiding these common pitfalls and using a product specifically designed for this type of bonding, such as Ferber Painting Wood Glue, you significantly increase your chances of achieving a clean, durable, and long lasting result.
It is also worth mentioning that patience is one of the most underrated tools in any home renovation project. Rushing through surface preparation or cutting the curing time short in order to move on to the next task might save you an hour today, but it can easily cost you an entire afternoon of rework a few weeks down the line when the board starts to loosen. Taking the time to do each step properly, especially the preparation and curing stages, is what separates a professional looking result from a frustrating do over.
Mini FAQ
Can Ferber Painting Wood Glue be used on painted plaster?
Yes, but we recommend lightly sanding the painted surface first to help the glue penetrate and bond more effectively.
How long does it take for the glue to fully cure?
Initial tack is achieved within minutes, while full curing typically takes a few hours depending on temperature and humidity conditions in the room.
Is the product safe to use indoors?
Yes, Ferber Painting Wood Glue is low odor and formulated to be safe for indoor use without requiring special ventilation equipment.
What happens if I am not satisfied with the results?
Every purchase from Ferber Painting is covered by our satisfaction guaranteed or money back policy. If you are not happy with the product, simply contact us for a full refund.
Does Ferber Painting ship internationally?
Yes, we deliver worldwide through a reliable network of trusted carriers, ensuring fast and secure delivery no matter where you are located.
Can this glue support heavy wood boards or shelves?
For standard decorative boards and lightweight shelves, our Wood Glue provides a strong and durable bond. For extremely heavy installations, we recommend combining the adhesive with mechanical supports for added safety.
Conclusion
Gluing a wood board to plaster does not have to be a stressful or uncertain process, as long as you start with the right product and follow the correct preparation and application steps. Plaster surfaces require an adhesive that is both gentle enough to respect their porous, delicate nature and strong enough to hold wood securely in place for years to come. This is exactly the balance that Ferber Painting Wood Glue was designed to achieve, combining fast application, reliable curing, and a formula built specifically for mixed material bonding.
Whether your project is a small decorative accent or a larger installation covering an entire wall, the fundamentals remain the same: clean and prepare both surfaces carefully, apply the adhesive evenly, press the board firmly into position, and allow enough time for the bond to fully cure before putting it under stress. Skipping any of these steps, or relying on an adhesive that was never designed for this kind of mixed material bonding, is the most common reason home renovation projects like this one fail to stand the test of time.
Unlike other brands that leave you guessing whether their product will actually work for your specific project, we stand fully behind our formula. Order your Ferber Painting Wood Glue today directly from our website and enjoy fast worldwide shipping, secure online payment, and our exclusive satisfaction guaranteed or money back promise.