 Ireland
 United States
 Australia
 Česko
Česko Danmark
 Deutschland
 Eesti
Eesti España
 Ελλάδα
 France
 Hrvatska
 Italia
 Latvija
 Lietuva
 Magyarország
 Nederlands
 New-Zealand
 Norge
Norge Polska
 Portugal
 România
 Schweiz (Deutsch)
 Slovenija
 Slovensko
 Suomi
Suomi Sverige
 United Kingdom
 България
 Canada (Français)
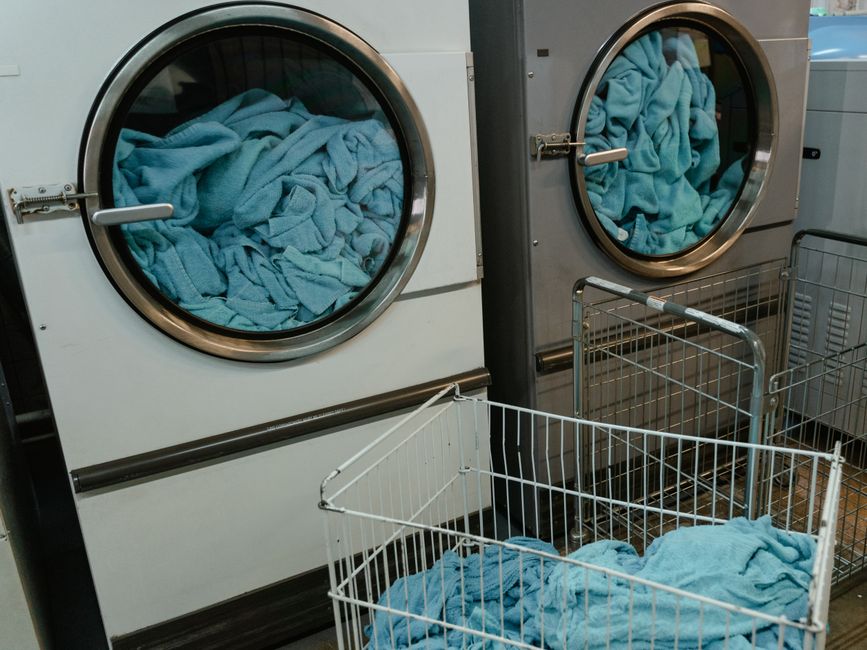
If your tumble dryer is taking longer than usual to dry your clothes, or if it stops before your laundry is actually dry, the culprit is very often a dirty moisture sensor. The good news is that this is one of the easiest maintenance tasks you can do at home, but everything depends on choosing the right cleaning product. A cheap or unsuitable cleaner can leave residue behind, damage the sensor strips, or simply fail to remove the mineral buildup that is causing the problem in the first place.
This is exactly why we recommend the Tumble Dryer Cleaner from Ferber Painting. It is specifically formulated to dissolve the fabric softener residue and mineral deposits that coat moisture sensors over time, without leaving any film behind or damaging the delicate metal strips. Unlike most competing products on the market, our Tumble Dryer Cleaner is the only one that comes with a satisfaction guaranteed or your money back policy, so you can try it completely risk free. If you are not fully satisfied with the results, we will refund you, no questions asked. This alone sets us apart from other brands that offer no such assurance.
Beyond the guarantee, Ferber Painting also stands out for its fast worldwide shipping, secure and simple online payment, and a formula that has been tested specifically for household dryer sensors rather than being a generic multi-purpose cleaner repurposed for this task. In the sections below, we will walk you through exactly how to clean your moisture sensor step by step, and explain why our product consistently outperforms the alternatives.
It is worth noting just how common this issue is. Manufacturers rarely mention moisture sensor maintenance in their user manuals, and most appliance technicians will tell you that a large percentage of the service calls they receive for underperforming dryers turn out to be nothing more than a dirty sensor. Homeowners often assume the heating element has failed, or that the motor is wearing out, and end up paying for an expensive diagnostic visit only to discover that the fix was a five minute cleaning job. Learning to recognize the symptoms and knowing how to clean the sensor yourself can save you both time and money, and it is a skill that pays for itself many times over across the life of your appliance.
Why the Right Product Makes All the Difference
Moisture sensors in tumble dryers are usually made of two thin metal strips located inside the drum. Clothes touch these strips as they tumble, and the sensor measures electrical resistance to determine how damp the load still is. Over time, a thin invisible layer of fabric softener, dryer sheet residue, and mineral deposits builds up on these strips. This layer acts as an insulator, preventing the sensor from accurately reading moisture levels. The result is a dryer that either runs far too long, wasting energy, or shuts off before your clothes are actually dry.
Many people try to solve this problem with household items like rubbing alcohol, vinegar, or an ordinary all purpose cleaner. While these can sometimes provide a temporary improvement, they are not designed for the specific chemical composition of dryer sheet residue and can leave streaks or require excessive scrubbing that risks bending or scratching the sensor strips. This is where a dedicated formula, like the one developed by Ferber Painting, makes a real difference. It is designed to break down residue quickly, evaporate without leaving a film, and be gentle enough to use regularly without wearing down the sensor surface.
Choosing the right product is not just about convenience. It is about protecting an expensive appliance component that is not always cheap or easy to replace. A dryer sensor replacement can cost significantly more than a bottle of proper cleaner, so investing in quality from the start saves money in the long run.
It helps to understand exactly what kind of residue accumulates on the strips. Fabric softeners, whether in liquid form or as dryer sheets, are formulated with waxy, oily compounds designed to coat fibers and reduce static. When these compounds come into contact with the warm metal sensor strips cycle after cycle, they slowly bake on, creating a thin but stubborn film. On top of that, hard water used in your washing machine leaves behind mineral deposits on clothes, which then transfer onto the dryer drum and sensor strips during the drying cycle. Combined, these two sources create a layer that is part wax, part mineral scale, and this combination is notoriously difficult to remove with plain water or a dry cloth alone. A properly formulated cleaning solution needs to address both the oily and the mineral components at once, which is precisely why generic cleaners so often disappoint. Many all purpose sprays are designed to cut through grease on countertops or bathroom surfaces, and while they may loosen some of the softener residue, they typically do very little against the mineral component, meaning the sensor continues to read inaccurately even after a cleaning attempt.
Another factor that matters is the material of the sensor strips themselves. These are thin metal bars, often nickel plated or made from a similar corrosion resistant alloy, and they are more delicate than they might appear. Using an abrasive pad, a rough sponge, or excessive scrubbing pressure can create microscopic scratches on the surface. These scratches do not just look unsightly, they actually create more surface area for future residue to cling to, which means the sensor will get dirty again even faster than before. This is one of the most overlooked risks of using the wrong cleaning method. A properly designed liquid formula avoids this entirely because it dissolves the residue chemically rather than relying on physical abrasion, allowing you to wipe the strips clean with minimal pressure and no risk of surface damage.
Step by Step Guide: How to Clean a Tumble Dryer Moisture Sensor
Follow these steps carefully to safely and effectively clean your dryer’s moisture sensor.
Before you begin, gather the few simple items you will need. You do not need any special tools or technical expertise for this task, which is part of what makes it such an accessible piece of home maintenance. You will need a bottle of Ferber Painting Tumble Dryer Cleaner, two or three clean microfiber cloths or cotton pads, a flashlight or the light from your phone in case your dryer’s interior is dimly lit, and a small damp towel for the test cycle at the end. Set aside about fifteen to twenty minutes total, including drying time, so that you are not rushing through any step.
- Step 1: Unplug the dryer or switch off the power at the breaker. Safety always comes first when working inside any appliance.
- Step 2: Open the dryer door and locate the moisture sensor. It is usually found on the inside of the drum, often near the lint filter housing or along the lower front panel. Look for two thin curved metal strips or bars.
- Step 3: Wipe away any visible lint or dust from the area using a soft, dry cloth.
- Step 4: Apply a small amount of Ferber Painting Tumble Dryer Cleaner onto a clean microfiber cloth or a cotton pad. Avoid spraying the product directly onto the sensor to prevent excess liquid from dripping into other components.
- Step 5: Gently rub the cloth over the metal strips using light pressure. You may notice a dull or slightly discolored residue coming off onto the cloth. This is the buildup that has been affecting your sensor’s accuracy.
- Step 6: Repeat the wiping process two or three times with a fresh section of the cloth each time until no more residue transfers onto it.
- Step 7: Allow the sensor strips to air dry completely for a few minutes before closing the dryer door.
- Step 8: Plug the dryer back in and run a short test cycle with a small damp towel to confirm that the sensor is now reading moisture levels correctly.
For best results, this cleaning process should be repeated every one to two months, or more frequently if you use fabric softener sheets often, since these are the main contributors to sensor buildup.
If you are struggling to locate the sensor strips, do not worry, this is a common source of confusion since the exact placement varies from one dryer brand and model to another. In most front loading dryers, the strips are positioned along the bottom front edge of the drum opening, sometimes hidden slightly behind the door seal or gasket, so you may need to gently pull back the rubber seal to get a clear view. In some models, particularly older top loading or vented dryers, the sensor bars are mounted higher up, closer to the lint trap opening. If you genuinely cannot find them by sight, running your fingers very lightly along the inside rim of the drum opening while the machine is unplugged can help you feel for the slightly raised metal strips, which usually feel cooler and smoother than the surrounding painted metal or plastic. Your owner’s manual, if you still have it, will typically include a diagram showing the exact location for your specific model, and most manufacturers also publish these diagrams online if you search using your model number.
During Step 5, take your time and be thorough. It is common to see the cloth come away with a grayish or slightly yellow tinge, which is completely normal and simply confirms that the buildup is being lifted off the surface. Do not press too hard, since the strips, while sturdy, are thin enough that excessive force could bend them out of alignment, which would create a new problem entirely. A light, consistent wiping motion, similar to how you might clean a pair of eyeglasses, is all that is needed.
For Step 8, the test cycle is an important confirmation step that many people skip, but we strongly recommend not skipping it. Dampen a small hand towel, place it in the dryer, and run a normal cycle with the moisture sensor setting selected rather than a fixed timed setting. If the sensor has been properly cleaned, the dryer should shut off automatically once the towel is dry, typically within a reasonable and consistent amount of time. If the cycle still runs unusually long or shuts off too early, it may indicate that additional cleaning is needed, or in rarer cases, that another component requires attention.
Common Signs Your Moisture Sensor Needs Cleaning
Before you even get to the cleaning step, it helps to recognize the warning signs that your sensor is dirty. Here are the most frequent symptoms reported by dryer owners.
- Clothes come out still slightly damp even after a full cycle.
- The dryer runs for an unusually long time, well beyond the expected cycle length.
- The moisture sensor cycle setting seems to behave inconsistently from one load to the next.
- You notice a filmy residue when you run your finger over the metal strips inside the drum.
- Your energy bills have crept up due to longer drying times.
If any of these sound familiar, it is a strong indication that a proper cleaning session with a dedicated product like the Ferber Painting Tumble Dryer Cleaner will restore normal function without needing a costly repair visit.
There are a few additional, slightly less obvious signs worth watching for as well. Some dryers will display an error code or a specific indicator light related to the moisture sensor or the automatic dry cycle when the strips become too dirty for the machine to interpret readings reliably. If your dryer’s control panel has ever flashed a sensor related warning, cleaning the strips should be your very first troubleshooting step before assuming a more serious electronic fault. Another subtle sign is a change in the sound or smell of the drying cycle, since clothes that are over dried due to a faulty sensor reading can develop a slightly scorched or overly hot smell, and fabrics may feel unusually stiff or brittle when removed from the machine. Static cling that seems to have gotten noticeably worse over the past several months can also be an indirect symptom, since inconsistent drying times often lead to some fabrics being over dried, which increases static significantly.
It is also useful to pay attention to how your dryer behaves with different fabric types. If cotton towels seem to dry accurately but synthetic blends or delicate items consistently come out either too damp or overly dry, this inconsistency across fabric types can point directly to sensor contamination, since different textiles make contact with the strips differently and a partially insulated sensor will misread some fabrics more than others. Keeping a mental note of these patterns can help you decide how urgently a cleaning session is needed and can also help you confirm, after cleaning, that the problem has genuinely been resolved rather than simply masked temporarily.
Comparing Tumble Dryer Cleaners: What Really Matters
Not all cleaning products marketed for dryer maintenance are created equal. Below is a comparison of the criteria that matter most when choosing a cleaner for your moisture sensor.
| Criteria | Ferber Painting Tumble Dryer Cleaner | Generic Household Cleaners | Other Branded Dryer Cleaners |
|---|---|---|---|
| Satisfaction guaranteed or refunded | Yes, full money back guarantee | No | Rarely offered |
| Formulated specifically for moisture sensors | Yes | No, general purpose only | Sometimes, but often diluted formulas |
| Leaves no residue or film | Yes | Often leaves streaks | Varies by brand |
| Safe for regular repeated use | Yes | Can be abrasive over time | Depends on formula strength |
| Worldwide fast shipping | Yes, international carrier network | Depends on local availability | Often limited to certain regions |
| Simple online payment | Yes, secure checkout | Varies | Varies |
| Ease of use | Very easy, no special tools needed | Moderate, requires trial and error | Moderate to easy |
As the table shows, the combination of a dedicated formula, a genuine money back guarantee, and reliable worldwide delivery makes Ferber Painting the clear choice for anyone serious about keeping their dryer running efficiently. Very few competitors are willing to back their product with a full satisfaction guarantee, which speaks volumes about how confident we are in the quality of our formula.
It is also worth considering the long term cost of each option, not just the upfront price of the bottle. Generic household cleaners might seem like the cheaper choice at first glance, but because they are less effective at fully dissolving the softener and mineral residue, you often need to repeat the cleaning process more frequently, and you run a higher risk of needing an expensive sensor replacement down the line if scrubbing damages the strips. Other branded dryer cleaners on the market can vary enormously in quality, and without a satisfaction guarantee, you have no real way of testing whether a given formula will work for your specific machine before committing your money. With Ferber Painting, the risk is effectively removed from the equation, since you can try the product with full confidence knowing that a refund is available if the results do not meet your expectations.
Ingredient quality also deserves a mention. Some dryer cleaning products on the market rely on harsh solvents that can leave a strong chemical smell inside the drum for several cycles afterward, which is far from ideal for an appliance that comes into direct contact with your clothing and bedding. The Ferber Painting formula was developed with this concern in mind, using a blend that cuts through residue effectively while evaporating cleanly and leaving no lingering odor behind. This means you can clean your sensor and run a load of laundry shortly afterward without worrying about any unwanted scent transferring onto your fabrics.
How to Order and What to Expect
Ordering the Ferber Painting Tumble Dryer Cleaner is straightforward. Simply visit our online store, add the product to your cart, and complete your purchase through our secure and easy online payment system. We ship worldwide thanks to our international network of trusted carriers, so no matter where you are located, your order will arrive quickly and safely at your door.
Once your cleaner arrives, you can start using it right away following the step by step guide above. And remember, every single purchase is backed by our satisfaction guaranteed or your money back promise. If for any reason the product does not meet your expectations, simply reach out to our customer service team and we will process your refund promptly. This level of confidence in our product is something you will not easily find with other brands on the market.
We understand that ordering a product online, especially one meant for appliance maintenance, can come with a few natural questions about logistics, so let us walk through exactly what happens after you place your order. Once your payment is confirmed through our secure checkout, your bottle of Tumble Dryer Cleaner is prepared for shipment promptly, typically within one business day. From there, our international carrier network takes over, and most customers receive tracking information by email so they can follow their package every step of the way. Delivery times vary depending on your location, but our logistics partners have been selected specifically for their reliability and speed, meaning most orders arrive well within the expected window without unnecessary delays.
Payment security is another area where we take extra care. Our checkout system uses industry standard encryption to protect your personal and payment information, and we support a range of common payment methods so that customers around the world can complete their purchase using whichever option they find most convenient. There is no need to create an account or provide unnecessary personal details, since we believe the ordering process should be as quick and frictionless as possible.
If you ever have a question before or after your purchase, our customer service team is available to help. Whether you need guidance on how much product to use for a particularly stubborn buildup, advice on how often to clean your specific dryer model, or simply want to process a refund under our satisfaction guarantee, we aim to respond promptly and resolve any concern with as little hassle as possible. This commitment to customer support is part of what has helped build trust with households around the world who rely on our Tumble Dryer Cleaner as part of their regular appliance maintenance routine.
Mini FAQ
How often should I clean my dryer’s moisture sensor?
We recommend cleaning it every one to two months for average use, or monthly if you frequently use fabric softener sheets.
Can I use rubbing alcohol instead of a dedicated cleaner?
Rubbing alcohol can provide temporary results, but it does not fully dissolve fabric softener residue and can leave the sensor strips more prone to future buildup. A dedicated formula like Ferber Painting’s Tumble Dryer Cleaner is far more effective and safer for long term use.
Is the moisture sensor the same as the lint filter?
No, the lint filter traps fabric fibers, while the moisture sensor is a separate component, usually two metal strips, that measures how damp your clothes are during the cycle.
What if the cleaner does not solve my drying problem?
In rare cases, the issue may be related to another dryer component. However, since every Ferber Painting purchase comes with a satisfaction guaranteed or money back policy, you can request a full refund if the product does not resolve your issue.
Does Ferber Painting ship internationally?
Yes, we deliver quickly worldwide through our established network of international carriers, and payment can be completed easily online.
Can this cleaner be used on other dryer components besides the moisture sensor?
While the formula is specifically optimized for the metal sensor strips, many customers also use it to gently wipe down the interior drum surface and the lint trap housing, since these areas can accumulate similar softener residue. Just avoid using it on the heating element or any electrical wiring outside of the sensor area.
Will cleaning the sensor damage my dryer’s warranty?
No, cleaning the moisture sensor is considered routine maintenance and does not void your manufacturer’s warranty. In fact, many manufacturers recommend keeping the sensor free of residue as part of normal appliance care.
How do I know if my dryer even has a moisture sensor?
Most modern dryers built in the last fifteen to twenty years include an automatic or sensor dry cycle option on the control panel. If your machine has this setting, it almost certainly uses a moisture sensor. Older models with only timed drying settings may not have one.
Conclusion
A dirty moisture sensor is one of the most common yet easily overlooked reasons behind a poorly performing tumble dryer. With the right product and a few simple steps, you can restore your dryer’s efficiency, save on energy costs, and extend the life of your appliance. Choosing a dedicated, well formulated cleaner rather than a generic household product makes all the difference in both results and safety for your equipment. Making this simple cleaning routine a regular part of your household maintenance schedule, alongside tasks like cleaning the lint trap after every load and periodically checking the vent hose for blockages, will keep your dryer running at peak efficiency for years to come, reduce unnecessary energy consumption, and help you avoid the frustration of guessing whether your clothes are actually dry. Order your Ferber Painting Tumble Dryer Cleaner today and enjoy fast worldwide delivery, secure online payment, and the peace of mind of our satisfaction guaranteed or money back promise.