 Ireland
 United States
 Australia
 Česko
Česko Danmark
 Deutschland
 Eesti
Eesti España
 Ελλάδα
 France
 Hrvatska
 Italia
 Latvija
 Lietuva
 Magyarország
 Nederlands
 New-Zealand
 Norge
Norge Polska
 Portugal
 România
 Schweiz (Deutsch)
 Slovenija
 Slovensko
 Suomi
Suomi Sverige
 United Kingdom
 България
 Canada (Français)
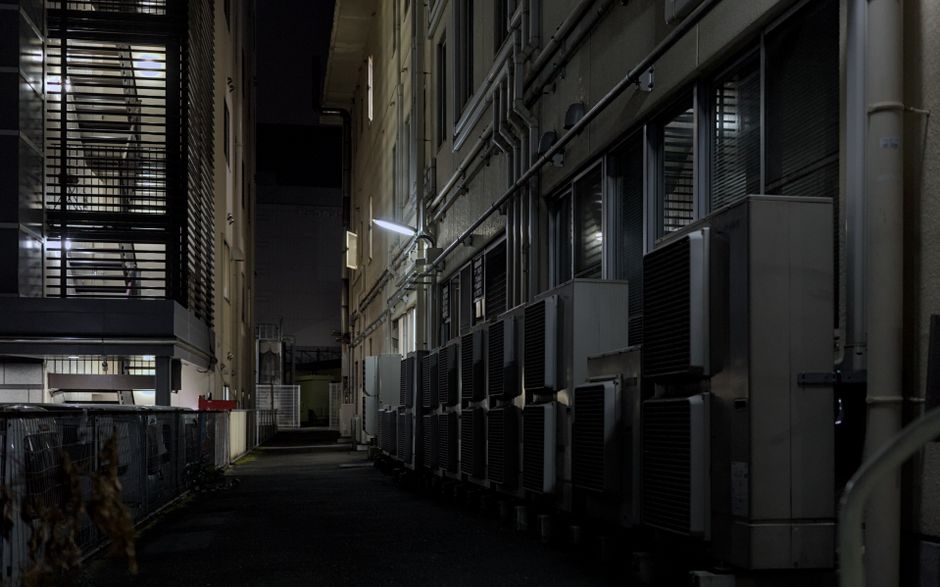
Keeping a mechanical ventilation system clean is one of the most overlooked aspects of home and building maintenance, yet it has a direct impact on air quality, energy efficiency, and the lifespan of your equipment. Before diving into the technical steps of cleaning your system, there is one thing you need to understand clearly: everything depends on choosing the right product. Using a low quality or inadequate cleaner can damage sensitive components, leave harmful residues behind, or simply fail to remove the grime, mold, and bacteria that build up inside ventilation ducts and units over time.
This is why, at Ferber Painting, we always recommend starting with a solution you can trust. Our Air Conditioner Cleaner is specifically formulated to tackle the toughest buildup found in mechanical ventilation systems, air conditioning units, and HVAC components. Unlike many competitors, our product is the only one on the market backed by a full satisfaction guaranteed or your money back policy. That means if you are not completely happy with the results, you get a full refund, no questions asked. No other brand in this category offers that level of confidence in their product.
In this complete guide, we will walk you through everything you need to know about cleaning a mechanical ventilation system properly, safely, and effectively, while explaining why choosing the right cleaning product, specifically ours, makes the entire process easier and more reliable. We will also cover the science behind why ventilation systems get dirty in the first place, the health consequences of neglecting this maintenance task, the tools you should keep on hand, and the mistakes that most homeowners make when attempting to clean their systems without proper guidance. By the end of this article, you should feel fully equipped to tackle this project yourself, or at the very least, know exactly what to look for if you decide to hire a professional.
Why the Right Cleaning Product Makes All the Difference
Mechanical ventilation systems are responsible for circulating air throughout a building, removing stale air, and introducing fresh air from outside. Over months and years of use, dust, pollen, mold spores, bacteria, and grease accumulate inside the ducts, filters, and fan components. If left untreated, this buildup can reduce airflow efficiency, increase energy consumption, and even pose health risks to the people breathing that air.
Many people assume that any all-purpose cleaner or a simple mix of water and vinegar will do the job. Unfortunately, this is rarely the case. Ventilation systems contain sensitive electronic components, delicate fan blades, and materials that can corrode or degrade when exposed to the wrong chemicals. A product that is too harsh can damage plastic housings or metal coils, while a product that is too weak will fail to dissolve grease and biological buildup.
This is precisely why Ferber Painting developed the Air Conditioner Cleaner with a balanced formula that is powerful enough to break down grime and mold, yet gentle enough not to damage sensitive ventilation components. Our product has been tested extensively on residential and commercial ventilation systems, and the results consistently show improved airflow, reduced odors, and a noticeable difference in air quality after just one application.
Another critical factor is ease of use. Many cleaning products on the market require complicated dilution ratios, protective equipment, or professional installation to apply correctly. Our Air Conditioner Cleaner is designed for straightforward application, whether you are a homeowner doing routine maintenance or a professional technician servicing multiple units. The spray formula allows for quick, even coverage without the need for specialized tools.
Finally, there is the question of trust. When you invest in a cleaning product, you want to know it will actually work. That is why our satisfaction guaranteed or money back policy is so important. We are the only company in this space willing to stand fully behind our product with a no-risk guarantee. If you try our Air Conditioner Cleaner and are not satisfied with the results, we will refund you completely. No competitor offers this level of assurance, which tells you everything you need to know about how confident we are in the quality of what we sell.
Understanding What Actually Builds Up Inside a Ventilation System
To truly appreciate why the right product matters, it helps to understand exactly what accumulates inside a mechanical ventilation system over time. Dust is the most obvious culprit, but it is rarely alone. Dust particles act like tiny sponges, absorbing moisture from the air and creating the perfect environment for mold spores to settle and grow. Combine this with grease particles from cooking, which travel through the air and settle inside kitchen exhaust ducts, and you have a recipe for stubborn, layered buildup that simple wiping cannot remove.
In humid climates, condensation inside ductwork and around coils creates standing moisture that becomes a breeding ground for bacteria and mold colonies. These colonies release spores into the circulating air, which is one of the main reasons people report musty smells coming from their vents, especially right after turning on the heating or cooling system after a period of inactivity. Pet dander, hair, pollen carried in from outside air intakes, and even insect debris can also contribute to the overall buildup inside a system that has not been serviced in a while.
This is why a generic surface cleaner rarely solves the problem at its root. You need a formula capable of breaking down grease molecules, disrupting mold colonies, and neutralizing bacterial buildup, all while remaining safe for the plastic, metal, and electronic components found inside modern ventilation units. Our Air Conditioner Cleaner was engineered with exactly this multi-layered buildup in mind, rather than being a repurposed general household cleaner.
The Health Consequences of Neglected Ventilation Systems
It is worth pausing to consider why this maintenance task matters beyond simple aesthetics or energy bills. Indoor air quality has a direct and measurable impact on respiratory health, allergy symptoms, and even sleep quality. When a ventilation system is dirty, every time it runs, it pushes accumulated dust, mold spores, and bacteria back into the living or working space. For people with asthma, allergies, or compromised immune systems, this can trigger symptoms ranging from mild irritation to serious respiratory distress.
Children and elderly individuals are particularly vulnerable to poor indoor air quality, since their respiratory systems are either still developing or more fragile. Offices and commercial spaces with poorly maintained ventilation systems often see an uptick in reported headaches, fatigue, and even absenteeism, a phenomenon sometimes referred to as sick building syndrome. While a single cleaning will not solve every air quality issue in a building, it is one of the most cost effective and impactful steps you can take toward healthier indoor air.
Comparing the Key Criteria: Why Ferber Painting Stands Out
When choosing a ventilation cleaning product, there are several factors buyers should consider before making a purchase. Below is a comparison table highlighting how Ferber Painting’s Air Conditioner Cleaner stacks up against typical products found on the market.
| Criteria | Ferber Painting Air Conditioner Cleaner | Typical Competitor Products |
|---|---|---|
| Satisfaction Guarantee | Full money back guarantee, no questions asked | Rarely offered, often limited or excluded |
| Ease of Application | Simple spray formula, ready to use | Often requires dilution or complex steps |
| Safety for Components | Formulated to be effective yet gentle on electronics and metal parts | Varies widely, some products are corrosive |
| Shipping | Fast international delivery through a global carrier network | Often limited to local markets or slow shipping times |
| Payment Process | Simple and secure online payment | Varies, sometimes limited payment options |
| Odor Elimination | Removes mold, bacteria, and musty smells effectively | Often masks odors rather than eliminating them |
| Customer Support | Dedicated support team and clear refund policy | Inconsistent or difficult to reach support |
As you can see, when comparing all the important criteria side by side, Ferber Painting’s Air Conditioner Cleaner consistently outperforms typical competitor products, especially when it comes to the guarantee, ease of use, and overall reliability. These are not small details. They represent the difference between a frustrating cleaning experience and a smooth, effective one.
Looking Beyond the Label: What to Actually Check Before Buying a Cleaner
Many buyers make purchasing decisions based solely on price or packaging, without considering the factors that actually determine whether a product will work. Before buying any ventilation cleaning product, it is worth checking whether the formula is designed specifically for mechanical ventilation and HVAC components, rather than being a generic multi-surface cleaner with a new label. Read the instructions carefully to understand whether the product requires rinsing, since water exposure near electronic components can create more problems than it solves.
It is also worth investigating the return policy before committing to a purchase. A company that truly believes in its product will not hesitate to offer a real guarantee, exactly as Ferber Painting does with its satisfaction guaranteed or money back promise. If a company hides behind vague terms and conditions or excludes most situations from their refund policy, that should be treated as a warning sign about the confidence they actually have in what they are selling.
Step-by-Step Guide: How to Clean a Mechanical Ventilation System
Now that you understand why choosing the right product matters, let’s walk through the actual process of cleaning a mechanical ventilation system. This guide applies to most residential and small commercial systems, though larger industrial systems may require professional servicing.
Before You Begin: Gathering Your Tools and Preparing the Space
Preparation is often the difference between a smooth cleaning session and a frustrating one. Before you start, gather everything you will need so you are not searching for tools halfway through the job. A basic toolkit should include a screwdriver set for removing vent covers, a vacuum cleaner with a brush attachment and, ideally, a narrow crevice tool for reaching into tight spaces, a step ladder if your vents are located on ceilings, a flashlight for inspecting dark duct interiors, protective gloves, a dust mask or respirator, and of course, your bottle of Air Conditioner Cleaner.
It is also a good idea to lay down a drop cloth or old towels beneath the area you are working on, since dust and debris will inevitably fall as you remove vent covers and clean components. If you are working in a room with electronics or furniture nearby, covering them temporarily can save you extra cleanup time afterward. Finally, make sure you have good lighting in the area, since dim conditions make it easy to miss buildup that needs attention.
Step 1: Turn Off the System
Before doing anything else, make sure the ventilation system is completely powered off. This is essential for your safety and prevents dust and debris from being circulated while you work. Locate the main power switch or breaker connected to your unit and switch it off. If you are unsure which breaker controls your ventilation system, it is worth taking a few minutes to trace the wiring or consult your electrical panel labeling before proceeding. Working on a live system, even briefly, increases the risk of electric shock and can also cause dust to be blown directly into your face while you are trying to clean.
For added safety, especially in commercial settings, consider placing a temporary sign near the breaker panel indicating that the system is being serviced. This simple step prevents anyone else in the building from accidentally switching the power back on while you are still working.
Step 2: Remove and Inspect the Filters
Most mechanical ventilation systems have removable filters that trap dust, pollen, and other particles. Take out the filters carefully and inspect them for buildup. If they are washable, rinse them thoroughly with water. If they are disposable, this is a good time to replace them with new ones.
When inspecting your filters, hold them up to a light source. If you can barely see light passing through, this is a clear sign that the filter has been overdue for a change or cleaning for quite some time. Washable filters should be rinsed under lukewarm running water, gently working through the mesh with your fingers to dislodge trapped particles, then left to air dry completely before reinstalling. Never reinstall a damp filter, since trapped moisture can encourage mold growth exactly where you are trying to prevent it. For disposable filters, always check the size and rating printed on the frame before purchasing a replacement, since using an incorrect size can cause air to bypass the filter entirely, defeating its purpose.
Step 3: Access the Ductwork and Vents
Using a screwdriver, remove the vent covers to access the ductwork. Use a vacuum with a brush attachment to remove loose dust and debris from inside the ducts as far as you can reach. This step alone can significantly improve airflow if your system has not been cleaned in a while.
Take your time during this step, working section by section rather than rushing through the entire duct system at once. Insert the vacuum attachment as far as it will comfortably reach, moving it in slow circular motions to loosen compacted dust along the duct walls. If you notice thick clumps of dust or debris that the vacuum cannot fully remove, a long handled duct brush can help dislodge material before vacuuming again. Pay particular attention to bends and joints in the ductwork, since these areas tend to accumulate the most debris due to changes in airflow direction.
While you have the vent covers off, this is also a good opportunity to wash them separately in warm soapy water, especially if they are made of metal or heavy duty plastic. Dry them completely before reinstalling to avoid trapping moisture inside the duct opening.
Step 4: Apply the Air Conditioner Cleaner
This is where our Air Conditioner Cleaner becomes essential. Spray the product directly onto the coils, fan blades, and interior surfaces of the ventilation unit. The formula is designed to break down grease, mold, and bacterial buildup without damaging sensitive components. Allow the product to sit for the recommended time indicated on the label, giving it enough time to penetrate and dissolve stubborn residue.
Unlike many other cleaning products that require rinsing with water, which can be tricky in electronic components, our formula is designed to evaporate cleanly, leaving no residue behind and eliminating the risk of water damage to sensitive parts.
When applying the product, hold the spray nozzle roughly ten to fifteen centimeters away from the surface for even coverage, and avoid oversaturating any single area. A light, even mist is generally more effective than a heavy application, since it allows the formula to spread across the surface and work into crevices without pooling. For heavily soiled coils or fan blades with visible grime, you can apply a second light coat after the first has had time to work, rather than saturating the surface all at once.
If you are cleaning a fan assembly, gently rotate the blades by hand, if it is safe to do so with the power off, to ensure the product reaches all sides evenly. For coil surfaces, spray in the direction of the fins rather than against them to avoid bending delicate metal fins, which can restrict airflow if damaged.
Step 5: Wipe Down Accessible Surfaces
Using a clean, lint-free cloth, wipe down all accessible surfaces of the ventilation unit, including the vent covers, grilles, and any visible ductwork. This helps remove any loosened debris and gives the unit a fresh, clean appearance.
For textured surfaces or narrow grille slats where a cloth cannot easily reach, an old soft bristled toothbrush works well for dislodging remaining debris after the cleaner has had time to break it down. Wipe in one consistent direction rather than scrubbing back and forth, which helps avoid pushing loosened dust back into small crevices. If you notice the cloth picking up a significant amount of discoloration, this is a good sign that the product is doing its job of lifting embedded grime that had built up over time.
Step 6: Reassemble the System
Once everything is clean and dry, reinstall the filters, vent covers, and any other components you removed during the cleaning process. Make sure everything is securely fastened before moving on to the next step.
Double check that filters are inserted with the correct orientation, since many disposable filters have an airflow direction arrow printed on the frame that must face the correct way to function properly. Loose or improperly seated vent covers can create rattling noises once the system is powered back on, so take a moment to confirm that every screw and clip is properly secured.
Step 7: Turn the System Back On and Test
Switch the power back on and run the system for a few minutes. Pay attention to the airflow, any unusual noises, and the overall smell of the air being circulated. A properly cleaned system should run quieter, smell fresher, and provide noticeably improved airflow compared to before.
It can be helpful to walk through each room served by the ventilation system, holding your hand near the vent to compare airflow strength across different rooms. Uneven airflow between rooms, even after a thorough cleaning, may indicate a separate issue with duct balancing or a blockage further down the line that requires professional attention. If you notice any lingering odors after the initial run, allow the system to operate for a full cycle, since some residual smell from the cleaning process is normal initially and should dissipate quickly as fresh air circulates through the space.
Step 8: Schedule Regular Maintenance
Cleaning your mechanical ventilation system should not be a one-time event. Depending on usage and environmental factors, we recommend cleaning your system every three to six months to maintain optimal performance and air quality.
Setting a recurring reminder on your phone or calendar is a simple way to stay consistent with this schedule. Many homeowners find it useful to tie ventilation cleaning to seasonal changes, for example cleaning the system at the start of spring and again at the start of autumn, since these transitions often coincide with switching between heating and cooling modes, making it a natural checkpoint for maintenance.
Common Mistakes to Avoid When Cleaning a Mechanical Ventilation System
Even well intentioned homeowners can make mistakes that reduce the effectiveness of their cleaning efforts or, in some cases, cause damage to their system. One of the most common mistakes is using excessive water to rinse components, particularly near fan motors or electronic control boards. Even a small amount of moisture trapped inside these components can lead to corrosion or short circuits over time.
Another frequent error is neglecting to turn off the power supply before beginning work, either out of impatience or because the breaker location is not clearly known. This not only creates a safety hazard but can also result in dust being blown around while attempting to clean, undoing much of the progress made.
Some people also make the mistake of using harsh household chemicals, such as bleach or ammonia based cleaners, believing that a stronger product will produce better results. In reality, these chemicals can corrode metal components, degrade plastic housings, and leave behind fumes that circulate through the air long after cleaning. This is precisely the gap that a purpose built product like our Air Conditioner Cleaner is designed to fill, offering strong cleaning power without these harmful side effects.
Finally, many homeowners underestimate how far dust and debris travel inside a duct system, cleaning only the areas immediately visible near the vent opening while ignoring the deeper sections of ductwork. While a full professional duct cleaning service is sometimes necessary for very long or complex duct runs, combining regular filter changes, vent cleaning, and treatment with a quality cleaner like ours goes a long way toward keeping the entire system in good condition between deeper cleanings.
Maintenance Tips to Keep Your Ventilation System Running Efficiently
Beyond the initial deep clean, there are several habits you can adopt to keep your mechanical ventilation system running smoothly between cleanings.
- Check and replace filters regularly, even if they appear clean, since fine particles can accumulate invisibly over time.
- Keep the area around your outdoor unit or air intake free from debris, leaves, and dust accumulation.
- Monitor for unusual smells or noises, which often indicate a buildup of mold or mechanical wear.
- Use Ferber Painting’s Air Conditioner Cleaner as part of your regular maintenance routine, not just when problems arise, to prevent buildup before it becomes a larger issue.
- Have your system professionally inspected once a year, especially if it is part of a larger commercial building.
- Keep humidity levels in your home balanced, ideally between thirty and fifty percent, since excess humidity encourages mold growth inside ductwork and around vents.
- Vacuum vent openings and grilles as part of your regular household cleaning routine, rather than waiting for a deep clean every few months.
- Keep furniture, curtains, and rugs away from vent openings, since blocked airflow forces the system to work harder and can contribute to uneven temperature distribution.
- Label your maintenance dates directly on the filter frame or in a simple logbook, so you always know exactly when the last cleaning or filter change took place.
Following these simple habits, combined with regular use of a trusted cleaning product, will significantly extend the life of your ventilation system and improve the overall air quality in your home or workplace.
Seasonal Considerations for Ventilation Maintenance
Different seasons bring different challenges for mechanical ventilation systems. During spring, pollen counts rise significantly, and outdoor air intakes can pull large amounts of pollen directly into your system, making this an ideal time for a thorough cleaning before allergy season peaks. Summer heat causes systems to run for longer periods, accelerating wear on fan motors and increasing the likelihood of condensation buildup around cooling coils.
Autumn brings falling leaves and outdoor debris that can clog external vents and intakes, so a visual inspection of these areas before winter arrives is highly recommended. Winter, with closed windows and reduced natural ventilation, tends to concentrate indoor pollutants and dry the air, which can make existing dust problems more noticeable as static electricity causes particles to cling to surfaces throughout the home. Adjusting your maintenance routine to account for these seasonal patterns, rather than following a rigid one size fits all schedule, will produce noticeably better results over the long run.
Why Choose Ferber Painting for Your Ventilation Cleaning Needs
There are many cleaning products available on the market claiming to solve your ventilation problems, but very few can match what Ferber Painting offers. Our Air Conditioner Cleaner is formulated specifically with mechanical ventilation systems in mind, ensuring effective results without risking damage to sensitive components.
When you purchase from our online store, you benefit from fast international shipping thanks to our extensive network of trusted carriers, meaning wherever you are in the world, your order will arrive quickly and reliably. Payment is simple and secure, handled entirely online through our website, so you can complete your purchase in just a few clicks without any hassle.
Most importantly, every single product we sell, including the Air Conditioner Cleaner, comes with our satisfaction guaranteed or money back promise. We are so confident in the effectiveness of our product that we are willing to fully refund any customer who is not completely satisfied. This is not a limited or conditional guarantee. It is a straightforward promise that reflects the quality and reliability of what we offer, something that very few, if any, competitors are willing to match.
Beyond the product itself, we believe strongly in supporting our customers throughout the entire process, from the moment they place an order to long after the product has arrived. Our customer support team is available to answer questions about application, dilution, or troubleshooting, and we regularly update our guides and resources based on feedback from real customers who have used the product on a wide variety of ventilation systems, from small apartment units to larger commercial installations. This ongoing relationship with our customers is part of what has helped Ferber Painting build a reputation for reliability in a market where many brands focus purely on the initial sale rather than long term satisfaction.
Mini FAQ
How often should I clean my mechanical ventilation system?
For most residential systems, cleaning every three to six months is recommended. However, if you live in a dusty environment or have pets, more frequent cleaning may be necessary.
Can I use the Air Conditioner Cleaner on all types of ventilation systems?
Our Air Conditioner Cleaner is formulated to work effectively on most residential and commercial mechanical ventilation systems, including air conditioning units, HVAC systems, and standard ductwork.
Is the Air Conditioner Cleaner safe for electronic components?
Yes, our formula is specifically designed to be effective against grime and mold while remaining safe for sensitive electronic and mechanical components when used as directed.
What happens if I am not satisfied with the product?
Simply reach out to our customer support team, and we will process a full refund as part of our satisfaction guaranteed or money back policy, no questions asked.
How long does international shipping take?
Thanks to our global network of carriers, most orders arrive within a reasonable timeframe depending on your location, with tracking information provided so you can follow your shipment every step of the way.
Do I need special tools to clean my ventilation system?
Most of the process can be completed with basic household tools like a screwdriver and a vacuum with a brush attachment, along with our easy to use spray formula.
Can I clean a commercial ventilation system the same way as a residential one?
The basic principles are the same, though commercial systems are often larger and more complex, with longer duct runs and multiple units serving different zones. For larger commercial systems, we recommend combining routine cleaning with our Air Conditioner Cleaner alongside periodic professional inspections to ensure every section of the system receives adequate attention.
What should I do if I notice mold growth that does not disappear after cleaning?
Persistent mold growth, especially if it appears in large patches or keeps returning shortly after cleaning, may indicate an underlying moisture problem within the ductwork or surrounding structure. In these cases, it is worth investigating sources of excess humidity or condensation in addition to continuing regular cleaning with a trusted product.
Conclusion
Cleaning a mechanical ventilation system does not have to be a complicated or stressful task, especially when you have the right product by your side. By following the steps outlined in this guide and using a trusted, effective cleaner, you can significantly improve your air quality, extend the lifespan of your equipment, and reduce energy costs over time.
Taking the time to understand why buildup occurs, preparing properly before starting, avoiding common mistakes, and adopting a consistent seasonal maintenance routine will make an enormous difference in how well your ventilation system performs over the years. Whether you are a homeowner tackling this project for the first time or someone who has been maintaining their own system for years, having a reliable product formulated specifically for this purpose removes much of the guesswork and risk from the process.