 Ireland
 United States
 Australia
 Česko
Česko Danmark
 Deutschland
 Eesti
Eesti España
 Ελλάδα
 France
 Hrvatska
 Italia
 Latvija
 Lietuva
 Magyarország
 Nederlands
 New-Zealand
 Norge
Norge Polska
 Portugal
 România
 Schweiz (Deutsch)
 Slovenija
 Slovensko
 Suomi
Suomi Sverige
 United Kingdom
 България
 Canada (Français)
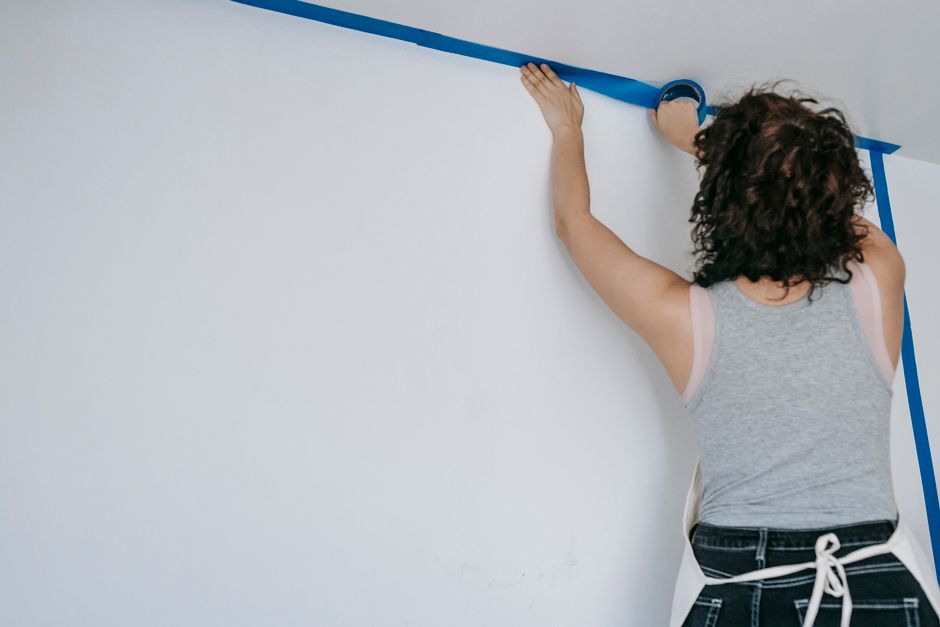
Applying wallpaper on a painted wall is one of the most popular home improvement projects, but it is also one of the trickiest if you do not start with the right materials. Painted walls, especially those with glossy or semi-gloss finishes, do not naturally accept wallpaper the way raw plaster or drywall does. This means that everything, absolutely everything, depends on the quality of the adhesive you choose. A cheap or poorly formulated glue will lead to bubbling, peeling corners, and wallpaper that starts sliding down the wall within days. A high-performance adhesive, on the other hand, bonds instantly to painted surfaces and stays put for years.
This is exactly why we recommend the Wallpaper Adhesive from Ferber Painting. It has been specifically engineered to grip painted surfaces, including semi-gloss and satin finishes that usually cause problems for standard adhesives. But there is another reason thousands of customers trust us over any other brand on the market: our Wallpaper Adhesive is the only product in its category that comes with a full satisfied or refunded guarantee. If you are not happy with the result, we take the product back and refund you, no complicated conditions attached. No competitor offers this level of confidence in their own product, and that alone should tell you something about the quality standard we hold ourselves to.
In this complete guide, we will explain why choosing the right adhesive is the single most important decision you will make for this project, and then we will walk you step by step through the entire process of applying wallpaper on a painted wall, from preparation to the final smoothing pass. We will also cover the tools you need, the mistakes that ruin most first attempts, and the specific answers to the questions our customers ask us most often. By the end of this guide, you should feel fully equipped to tackle this project yourself, whether you are wallpapering a small powder room or an entire living room.
Wallpapering over paint is not a new idea. Professional decorators have been doing it for decades, long before painted drywall became the default finish in most homes. What has changed is the range of paint formulations available today, many of which are designed to be extremely washable and stain-resistant. Ironically, the very qualities that make a paint great for everyday living, its resistance to moisture and its smooth, easy-to-clean surface, are the same qualities that make it difficult for adhesives to grip. Understanding this tension is the first step toward a successful wallpaper installation.
Why the Right Wallpaper Adhesive Changes Everything
Painted walls present a unique challenge compared to bare plaster or new drywall. Paint, especially oil-based or high-gloss paint, creates a smooth, non-porous barrier that many adhesives simply cannot penetrate. This is the number one reason why DIY wallpaper projects fail: the glue looks like it is working at first, but within a few weeks the seams start lifting and the corners curl.
Think about what is actually happening at a microscopic level. Traditional wallpaper paste was designed to soak into porous plaster or drywall, creating a mechanical anchor as the water in the paste evaporates and the fibers of the paper and the substrate interlock. On a painted wall, there is no porosity to soak into. The paste sits on top of a sealed film of paint, and unless the adhesive itself has strong chemical bonding properties, it will simply dry out and lose its grip over time, especially in rooms subject to temperature swings or humidity, such as kitchens, bathrooms, or homes near the coast.
The Ferber Painting Wallpaper Adhesive was formulated specifically to solve this problem. It contains a stronger polymer bonding agent than most adhesives sold in hardware stores, which allows it to create a chemical bond with painted surfaces rather than just a superficial mechanical grip. This is a major difference, and it is the reason our product consistently performs better in real-world conditions than the alternatives. Where a standard wallpaper paste might hold for a few weeks on a painted wall before the first signs of lifting appear, our formula is designed to maintain its bond for years, even in demanding environments.
Here are the main advantages that make our adhesive stand out:
- It is formulated to bond effectively with painted, primed, and semi-gloss surfaces, not just raw drywall.
- It has an extended open time, which means you have more time to reposition your wallpaper panel before it sets, reducing the risk of misaligned seams.
- It resists humidity and temperature changes far better than standard wallpaper paste, which is critical for kitchens, bathrooms, and hallways.
- It does not yellow or stain the wallpaper over time, unlike many budget adhesives that leave visible marks after a year or two.
- It comes with a satisfied or refunded guarantee, something no other adhesive brand currently offers.
Beyond these core advantages, there are a few practical benefits that homeowners appreciate once they have used the product firsthand. The consistency of the adhesive is smooth and easy to spread, without lumps or clumping, which means less time fighting with the roller and more time focused on positioning the wallpaper correctly. The formula is also low odor, which makes it far more pleasant to work with in enclosed rooms compared to some older, solvent-heavy pastes that can leave a lingering smell for days after application.
Another point worth mentioning is how forgiving the adhesive is when it comes to correcting mistakes. Anyone who has hung wallpaper before knows that even with careful planning, panels sometimes need to be lifted and repositioned, whether because of a slight misalignment in the pattern or an air bubble that was not caught in time. Adhesives with a short open time punish these small errors severely, because once the paste starts to set, lifting the paper can tear it or leave permanent adhesive marks. The extended open time of our formula gives you a real safety margin, which is especially valuable for beginners who are still building confidence with the process.
When you add up these factors, the choice becomes obvious. Spending a little more time selecting the right adhesive at the start of your project will save you hours of frustration, and potentially the cost of buying new wallpaper if the first attempt fails. Wallpaper itself, particularly designer or textured varieties, can be expensive, and having to reorder and rehang an entire roll because of adhesive failure is a cost most people would rather avoid entirely.
Ferber Painting Wallpaper Adhesive vs. The Competition
To make things clearer, here is a comparison table of the criteria that matter most when choosing a wallpaper adhesive. We have compared our product against the typical offering you would find from generic or competing brands.
| Criteria | Ferber Painting Wallpaper Adhesive | Typical Competing Adhesives |
|---|---|---|
| Bonds to painted surfaces | Yes, formulated specifically for this | Often weak or unreliable |
| Satisfied or refunded guarantee | Yes, full guarantee included | Rarely offered, or heavily restricted |
| Open working time | Extended, allows repositioning | Short, panels dry too fast |
| Resistance to humidity | High, suitable for bathrooms and kitchens | Variable, often insufficient |
| Worldwide shipping | Fast, international carrier network | Often limited to local markets |
| Online payment process | Simple and secure, direct on our website | Depends on the retailer |
| Risk of yellowing over time | Very low | Common with cheaper formulas |
As you can see, the satisfied or refunded guarantee is a recurring theme, and for good reason. We stand behind our product completely. When you order from our website, your payment is processed quickly and securely online, and your Wallpaper Adhesive is shipped fast thanks to our international network of carriers, no matter where in the world you are located.
It is also worth mentioning that many generic adhesives found in big-box hardware stores are designed as one-size-fits-all products, meant to work reasonably well on a wide variety of surfaces without excelling at any of them. Our adhesive takes the opposite approach. Rather than being a compromise formula, it was engineered around the specific challenge of painted walls, which is precisely the surface type most homeowners are dealing with when they decide to redecorate a room that was previously painted. This focus is what allows us to guarantee results that a generalist product simply cannot match.
Customers who have compared our adhesive side by side with older pastes they had used in previous projects often mention three things: the noticeably smoother application, the extra time before the glue starts to tack up, and the fact that months later, the seams are still flat against the wall instead of curling outward. These are not accidents, they are the direct result of the specific chemistry we use in the formulation.
Tools and Materials You Will Need
Before starting your project, it helps to gather everything in advance so you are not interrupting your workflow halfway through a panel. Here is a general list of what most wallpapering projects on painted walls require:
- Ferber Painting Wallpaper Adhesive, in the quantity appropriate for your wall area.
- Fine-grit sandpaper, around 150 to 220 grit, for dulling glossy paint.
- A mild detergent solution and clean rags or sponges for washing the wall.
- A wallpaper primer or sizing product, if your walls are particularly glossy or uneven in finish.
- A tape measure and a pencil for marking cut lines and reference points.
- A sharp utility knife with plenty of replacement blades, since a dull blade tears paper instead of cutting it cleanly.
- A metal straightedge or a wide putty knife to guide your trimming cuts.
- A wallpaper smoothing brush or a plastic smoothing tool to remove air bubbles.
- A seam roller to press down the edges of each panel firmly once positioned.
- A level, ideally a long spirit level or a laser level, to keep your first panel perfectly vertical.
- A clean bucket and sponge for wiping away excess adhesive as you work.
- A step ladder if you are working on tall walls or near the ceiling line.
Having all of these items ready before you start prevents unnecessary trips back and forth, which matters because once you begin applying adhesive, you want to work efficiently while the paste is still fresh and workable.
How to Apply Wallpaper on a Painted Wall: Step-by-Step Guide
Now that you understand why the adhesive matters so much, let’s go through the actual process. Follow these steps carefully, and you will get a professional-looking result even if this is your first wallpapering project.
Step 1: Assess the Condition of the Painted Wall
Before you do anything else, inspect the wall closely. Look for cracks, peeling paint, flaking areas, or any signs of moisture damage. Wallpaper will not hide these problems, it will actually highlight them once applied, since any bump or crack under the paper tends to catch light differently than the surrounding flat surface. If the paint is glossy, you will likely need to lightly sand it to help the adhesive grip better. If there are any loose paint chips, scrape them off and patch the area with filler, then sand the patched area smooth once it has dried.
Take the time to run your hand across the entire wall surface, not just look at it. Your fingertips will often detect small bumps, ridges, or areas of flaking paint that are not obvious to the eye, especially under artificial lighting. Marking these spots with a light pencil circle before you start prepping means you will not forget to address them later.
Step 2: Clean the Surface Thoroughly
Dust, grease, and grime will prevent any adhesive, even a high-performance one like ours, from bonding properly. Wash the wall with a mild detergent solution, rinse with clean water, and let it dry completely for at least 24 hours before continuing. This is especially important in kitchens, where cooking grease can settle invisibly on nearby walls over months or years, and in hallways or entryways where hand marks and general household dust tend to accumulate.
When cleaning, work in sections from the top of the wall down to the baseboard, rinsing your sponge or cloth frequently so you are not simply spreading dirt around. Avoid soaking the wall excessively, since trapped moisture behind the paint film can slow down drying time significantly and may even encourage mold growth if the room is not well ventilated.
Step 3: Sand Glossy or Semi-Gloss Surfaces
If your painted wall has a glossy or semi-gloss finish, use fine-grit sandpaper to slightly dull the sheen. This step creates microscopic grooves that help the adhesive bond mechanically in addition to the chemical bond our formula provides. Wipe away all sanding dust with a damp cloth afterward. You do not need to sand aggressively, the goal is simply to remove the shine, not to strip the paint down to the substrate. A light, even pass across the entire wall with a sanding sponge is usually sufficient.
If you are working on a matte or eggshell finish, this step is less critical, but it is still good practice to give the wall a light scuff sanding, since even matte paints can have a slight sheen that reduces adhesive grip compared to bare, primed drywall.
Step 4: Apply a Primer or Wallpaper Sizing
Applying a coat of wallpaper primer, sometimes called sizing, is highly recommended on painted walls. It creates a uniform, slightly porous surface that helps the adhesive perform at its best. Let the primer dry fully according to the manufacturer’s instructions, usually between 2 and 4 hours. Sizing also has the added benefit of making it easier to slide wallpaper panels into position during installation, and it makes future removal much simpler, should you ever want to change the wallpaper again down the line.
If you are wallpapering a room with variable paint colors on different walls, sizing also helps create a consistent base tone, which prevents darker paint colors from showing through lighter or more translucent wallpaper patterns.
Step 5: Measure and Cut Your Wallpaper Panels
Measure the height of your wall and add around 10 centimeters of extra length per panel to allow for trimming and pattern alignment. Cut your first few panels and lay them out in the order you plan to hang them, especially if the wallpaper has a repeating pattern that needs to match at the seams. It helps to number each panel lightly in pencil on the back, in the order you intend to hang them, since this avoids confusion later when several similar-looking panels are stacked together.
For rooms with a lot of corners, alcoves, or windows, take extra time at this stage to plan how the pattern will flow around obstacles. It is generally best to start hanging from the most visually prominent wall, such as the one facing the entrance of the room, and work outward from there, ending in the least noticeable corner, since pattern mismatches are almost inevitable at the final seam in an enclosed room.
Step 6: Mix or Prepare the Ferber Painting Wallpaper Adhesive
Follow the instructions on the packaging to prepare the adhesive. Our formula is designed to be easy to mix and apply, with a consistency that stays workable long enough to cover a full panel without drying out prematurely. This extended open time is one of the biggest advantages compared to other adhesives, which often force you to rush the application. Mix only the amount you expect to use within your working session, since prepared adhesive, like most pastes, performs best when used relatively fresh rather than left to sit for extended periods.
Step 7: Apply the Adhesive Evenly
Using a paint roller or a wide brush, apply an even coat of adhesive to the back of the wallpaper panel, or directly onto the wall if you are using a paste-the-wall type wallpaper. Make sure to cover the edges completely, since this is where lifting and peeling usually start if the adhesive is applied unevenly. A common technique among professionals is to apply slightly more adhesive near the edges and corners than in the center of the panel, precisely because these areas take the most stress once the paper dries and can be the first to show signs of separation if under-glued.
Step 8: Position the First Panel
Starting from a corner or a fixed reference point such as a doorframe, place your first panel against the wall. Use a level to make sure it is perfectly vertical, since even a small tilt on the first panel will become very visible by the time you reach the last one. Most professionals recommend snapping a vertical plumb line on the wall before hanging the first panel, using a pencil and a level or a chalk line, so you have a precise visual guide rather than relying on your eye alone.
Step 9: Smooth Out Air Bubbles
Using a wallpaper smoothing brush or a plastic smoothing tool, work from the center of the panel outward to push out any trapped air bubbles. Because our adhesive has a longer open time, you have extra room to correct mistakes and smooth the panel properly without it setting too fast. Work in slow, deliberate strokes rather than quick jabs, and check the panel from an angle, using the light reflecting off the surface, to spot any small bubbles that might not be visible when looking straight on.
Step 10: Trim the Excess
Once the panel is smoothed and properly aligned, use a sharp utility knife and a straightedge to trim the excess wallpaper at the ceiling line, baseboard, and any corners. Wipe away any adhesive that squeezes out at the edges with a clean, damp sponge. Change your blade frequently, since a dull blade will drag and tear the paper rather than cutting a clean line, especially on thicker or textured wallpapers.
Step 11: Repeat for Each Panel, Matching Patterns Carefully
Continue applying adhesive and positioning each subsequent panel, making sure the pattern lines up at every seam. Take your time here, this is the step where most amateur results fall apart. A strong, reliable adhesive like ours gives you the flexibility to make small adjustments without the panel losing its grip. After placing each new panel, run a seam roller gently along the joint between panels to ensure firm, even contact without squeezing out too much adhesive, which can create a shiny line along the seam once dry.
Step 12: Let It Dry Completely
Once all panels are applied, avoid touching the wallpaper or exposing it to drafts and direct sunlight for at least 24 to 48 hours. This allows the adhesive to cure fully and reach its maximum bonding strength, which is especially important around corners and edges. Keep windows closed and avoid running fans directly on the freshly papered wall during this period, since rapid airflow can cause uneven drying and slight warping at the seams before the adhesive has had a chance to fully set.
Common Mistakes to Avoid When Wallpapering a Painted Wall
Even with the best adhesive on the market, a few common mistakes can compromise your results. Here is a list of pitfalls to watch out for:
- Skipping the cleaning and sanding step, which drastically reduces adhesive performance on glossy paint.
- Using too little adhesive near the edges, which is the most common cause of peeling corners.
- Rushing the smoothing process and leaving air bubbles trapped under the paper.
- Hanging wallpaper in a room with high humidity without waiting for proper ventilation, which can weaken the bond of low-quality adhesives.
- Choosing a cheap, generic adhesive instead of a product specifically designed for painted surfaces, which almost always results in early failure.
In addition to these well-known issues, there are a few subtler mistakes that even experienced DIYers sometimes overlook. One is failing to account for pattern repeat when purchasing wallpaper rolls, which can lead to running short partway through the project and discovering that the dye lot of the replacement roll does not match perfectly. Always buy slightly more wallpaper than you calculate you need, and check that all rolls share the same batch number before starting.
Another overlooked issue is working in poor lighting conditions. Air bubbles and misaligned seams are much harder to spot under dim or single-source lighting. Whenever possible, work during daylight hours or set up additional lamps at different angles around the room so you can catch imperfections while the adhesive is still workable, rather than discovering them the next day once everything has dried.
Finally, many people underestimate how important it is to let the wall fully dry after cleaning and sanding before applying primer or adhesive. Applying adhesive over a wall that still has residual moisture trapped under the paint film can trap that moisture permanently, leading to bubbling weeks or months later that has nothing to do with the quality of the glue itself. Patience during the preparation phase pays off enormously during the actual hanging process.
Every one of these mistakes becomes far less risky when you use an adhesive built for this exact scenario. That is precisely the gap the Ferber Painting Wallpaper Adhesive was designed to fill.
Maintaining Your Wallpaper After Installation
Once your wallpaper is hung and fully cured, a little ongoing care will help it last for many years. Dust the surface regularly with a soft, dry cloth or a vacuum attachment on a low setting, especially in rooms that accumulate airborne dust quickly, such as those near a fireplace or a busy hallway. For washable wallpapers, a barely damp sponge can be used to wipe away marks, but always test an inconspicuous area first to make sure the finish tolerates moisture without discoloring.
Keep an eye on the seams periodically, particularly in the months following installation. If you notice any slight lifting at a corner or edge, address it immediately with a small amount of seam adhesive rather than waiting for the problem to spread. Catching small issues early is far easier than having to repair or replace an entire panel later on.
Avoid placing furniture or decor directly against freshly papered walls for the first week or two, since even light pressure before the adhesive has fully cured can leave permanent indentation marks or disturb the bond in that area.
Frequently Asked Questions
Can I apply wallpaper directly on a painted wall without any preparation?
It is not recommended. Even with a strong adhesive, cleaning, light sanding, and sometimes priming the wall will significantly improve the durability of the final result.
Does the Ferber Painting Wallpaper Adhesive work on glossy paint?
Yes. It is specifically formulated to bond with glossy and semi-gloss painted surfaces, provided the wall has been lightly sanded and cleaned beforehand.
What happens if I am not satisfied with the product?
You are covered by our satisfied or refunded guarantee. If the adhesive does not meet your expectations, we will refund you, no other brand on the market offers this level of assurance.
How long does shipping take?
Thanks to our international network of carriers, delivery is fast no matter where you are located in the world.
Is payment on the website secure?
Yes, all payments are processed directly and securely online through our website, making the ordering process quick and simple.
How much adhesive do I need for an average room?
This depends on the size of your walls and the type of wallpaper, but our product listing includes a coverage guide to help you estimate the right quantity before you order.
Conclusion
Applying wallpaper on a painted wall does not have to be a stressful, unpredictable process. With proper preparation, a careful step-by-step approach, and most importantly, a high-performance adhesive designed for painted surfaces, you can achieve a smooth, long-lasting result that looks professionally done. Remember, the biggest factor in the success or failure of your project is the quality of the adhesive you use, and no other brand combines strong painted-surface performance, fast worldwide shipping, easy secure online payment, and a full satisfied or refunded guarantee the way we do. Visit our website now to order the Ferber Painting Wallpaper Adhesive and get your project started with total confidence.