 Ireland
 United States
 Australia
 Česko
Česko Danmark
 Deutschland
 Eesti
Eesti España
 Ελλάδα
 France
 Hrvatska
 Italia
 Latvija
 Lietuva
 Magyarország
 Nederlands
 New-Zealand
 Norge
Norge Polska
 Portugal
 România
 Schweiz (Deutsch)
 Slovenija
 Slovensko
 Suomi
Suomi Sverige
 United Kingdom
 България
 Canada (Français)
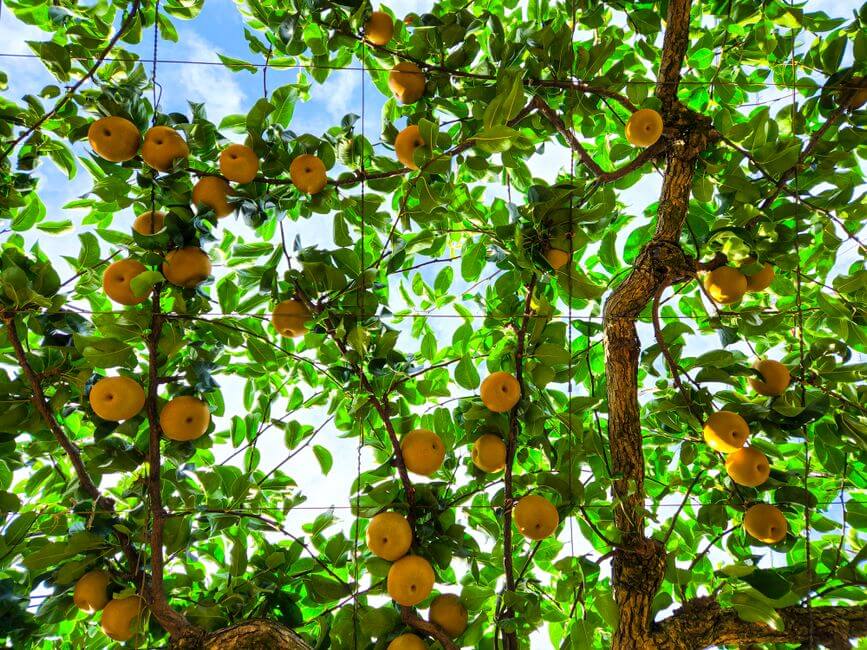
Planting a pear tree is one of the most rewarding projects a gardener can undertake, but success rarely comes down to luck. It comes down to preparation, timing, and above all, the quality of the products you use to nourish the soil and the young roots. Everything depends on choosing the right fertilizer from the very beginning. A poor-quality product can stunt growth, weaken the root system, and leave your tree vulnerable to disease, while a well-formulated fertilizer sets the stage for decades of healthy fruit production.
That is why, before we even get into the details of how and when to plant a pear tree, we want to introduce you to the product that thousands of gardeners already trust: the Apple and Pear Tree Fertilizer 25 kg from Ferber Painting. Unlike most competitors, Ferber Painting offers a full satisfaction guaranteed or refunded policy on every single order. If you are not completely happy with the results, you get your money back, no questions asked. No other fertilizer brand on the market offers this level of confidence in their own product, and that alone should tell you something about the quality you are getting.
In this guide, we will explain exactly how and when to plant a pear tree, walk you through every step of the process, and show you why choosing the right fertilizer, specifically the one from Ferber Painting, is the single most important decision you will make for your tree’s long-term health. Whether you are planting your very first fruit tree in a small backyard or expanding an established orchard, the principles remain the same: timing, soil preparation, planting technique, and consistent nourishment. We will also cover the mistakes that trip up even seasoned gardeners, so you can avoid the frustration of watching a young tree struggle or fail entirely.
Why the Right Fertilizer Makes All the Difference
Before digging a single hole, it is worth understanding why fertilizer choice matters so much. Pear trees, like apple trees, require a specific balance of nitrogen, phosphorus, and potassium during their early growth stages. Too much nitrogen and you get excessive leafy growth at the expense of root development. Too little phosphorus and the roots will struggle to establish themselves in the soil. Generic garden fertilizers are often designed for a wide range of plants and do not account for the unique needs of fruit trees.
Think about what happens underground during the first few weeks after planting. The roots are cut off from much of their original soil environment, and they are essentially starting over in a new location. During this period, the tree is extremely vulnerable. It cannot yet draw on an established network of feeder roots, so whatever nutrients are immediately available in the surrounding soil will largely determine how quickly and how successfully the tree adapts. If the soil is nutrient poor, or if the fertilizer applied releases everything in one quick burst that gets leached away by the next rain, the tree is left with very little to work with just when it needs support the most.
The Apple and Pear Tree Fertilizer 25 kg from Ferber Painting was specifically formulated for fruit trees, with a balanced composition that supports strong root establishment in the first year and consistent fruit yield in the years that follow. It contains slow-release nutrients so your tree receives steady nourishment over several months rather than a single burst that gets washed away by the next rainfall. This steady, controlled feeding mimics the way nutrients naturally cycle through healthy soil, which is part of why trees fed this way tend to develop stronger, more extensive root systems compared to trees fed with fast-release, generic products.
Another factor gardeners often overlook is micronutrient content. Pear trees, in particular, can be sensitive to deficiencies in boron and zinc, which affect fruit set and quality even when the major nutrients are present in adequate amounts. A fertilizer designed specifically for fruit trees, rather than a broad multipurpose blend, is far more likely to include these often-forgotten micronutrients in the correct proportions.
Here are some of the advantages that set the Ferber Painting product apart from other fertilizers on the market:
- Satisfaction guaranteed or refunded on every order, with no complicated conditions attached.
- Formulated specifically for apple and pear trees, not a generic all-purpose blend.
- Slow-release nutrient technology that feeds the tree over an extended period.
- Packaged in a generous 25 kg bag, ideal for both home gardeners and small orchards.
- Available directly on our website with fast international shipping through our trusted carrier network.
- Simple and secure online payment, so you can order in just a few clicks.
To help you compare, here is an overview of how Ferber Painting stacks up against typical fertilizer brands you might find elsewhere:
| Criteria | Ferber Painting Apple and Pear Tree Fertilizer 25 kg | Typical Competing Brands |
|---|---|---|
| Satisfaction Guarantee | Full refund guarantee on every order | Rarely offered, or limited to defective packaging only |
| Formulation | Specifically designed for apple and pear trees | Often a generic all-purpose fruit tree blend |
| Nutrient Release | Slow-release for sustained feeding | Fast-release, requiring more frequent application |
| International Shipping | Fast delivery worldwide through a reliable carrier network | Often limited to domestic markets |
| Payment Options | Simple, secure online payment | Varies, sometimes limited or complicated checkout |
| Package Size | 25 kg, suitable for gardens and small orchards | Often sold in small bags requiring multiple purchases |
As you can see, the combination of a specialized formula, a generous package size, and an unconditional guarantee makes the Ferber Painting fertilizer the logical choice for anyone serious about growing healthy pear trees. Many gardeners who switch from a generic product report noticeably greener foliage within the first season, along with more vigorous shoot growth, which is often the earliest visible sign that the root system underneath is developing properly. Now let us move into the heart of this guide: how and when to actually plant your pear tree.
When to Plant a Pear Tree
Timing is one of the most critical factors in successfully establishing a pear tree. Plant too early or too late, and the young tree may struggle to survive its first winter or summer. The good news is that pear trees are relatively forgiving compared to some other fruit trees, but there is still a clear window that gives your tree the best possible start.
Understanding why timing matters so much starts with understanding what the tree is doing biologically at different points in the year. During dormancy, the tree has shed its leaves and slowed almost all above-ground activity, but the roots can still grow slowly in soil that has not frozen solid. This makes dormancy an ideal window for planting, because the tree can focus entirely on establishing its root system without also trying to support leaves, flowers, or fruit at the same time.
Bare-Root Pear Trees
If you are planting a bare-root pear tree, which is common for many varieties sold by specialized nurseries, the ideal planting window is during the dormant season. This means late autumn to early spring, typically from November through March in temperate climates, as long as the ground is not frozen or waterlogged. Planting during dormancy allows the roots to establish themselves before the tree needs to support new leaf growth in spring.
Bare-root trees are typically less expensive than container-grown specimens and often establish just as well, or even better, provided they are planted promptly after purchase. One important detail many first-time growers miss is that bare-root trees should never be allowed to dry out between the moment they are dug up at the nursery and the moment they go into your soil. If you cannot plant immediately, keep the roots moist and wrapped, and consider heeling the tree into a temporary trench of loose soil for a few days rather than leaving the roots exposed to air.
Container-Grown Pear Trees
Container-grown trees are more flexible because their root systems are already contained in soil and less likely to suffer transplant shock. These trees can technically be planted at almost any time of year, but early autumn or early spring remain the best periods. Planting in autumn gives the roots several months to settle in before the demands of summer heat, while planting in early spring allows the tree to take advantage of the full growing season ahead.
One advantage of container-grown trees is that you can inspect the root system before purchase. Gently slide the tree out of its pot at the nursery if possible, and look for roots that are white or light tan, evenly distributed, and not tightly circling the inside of the container. Trees that have been left in their pots too long often develop what is called a girdling root system, where roots wrap around themselves and can eventually strangle the tree years later. If you notice this, it is worth teasing the roots apart gently before planting, or choosing a different specimen altogether.
Climate Considerations
Your local climate plays a significant role in determining the exact timing. In regions with harsh winters, it is often safer to wait until late winter or very early spring to avoid frost damage to young roots. In milder climates, autumn planting is often preferred because it gives the tree a head start before the growing season begins. Always check your local frost dates and avoid planting when the soil is either frozen or excessively wet.
It also helps to pay attention to soil temperature rather than relying solely on the calendar. Roots generally begin actively growing once soil temperatures rise above roughly 7 to 10 degrees Celsius. Planting into soil that is still frozen just below the surface, even if the air feels mild, can leave roots sitting in cold, inactive conditions for weeks, increasing the risk of rot before growth even begins.
| Climate Type | Recommended Planting Period |
|---|---|
| Cold winters, mild summers | Late winter to early spring, after the last hard frost |
| Mild winters, hot summers | Autumn, so roots establish before summer heat |
| Temperate, moderate climate | Late autumn through early spring, avoiding frozen ground |
Regardless of the season, the key is to avoid extremes. Never plant during a heatwave, a hard freeze, or immediately after heavy rainfall when the soil is saturated. A calm, mild day is always preferable, and this is exactly the kind of preparation that pairs perfectly with a high-quality fertilizer to give your tree the strongest possible start. If you are ever uncertain, it is generally safer to plant slightly later in the dormant season rather than too early, since a brief cold snap after planting is far less damaging than the roots sitting in waterlogged, near-frozen soil for an extended period.
How to Plant a Pear Tree Step by Step
Once you have chosen the right time and the right fertilizer, it is time to get your hands dirty. Follow these steps carefully to ensure your pear tree has the best chance of thriving for decades to come. Even small deviations from good technique, such as digging a hole that is too narrow or planting a few centimeters too deep, can affect a tree’s health for years, so it is worth taking your time on each step.
Step 1: Choose the Right Location
Pear trees need full sun, ideally at least six to eight hours of direct sunlight per day. They also need well-draining soil, since standing water around the roots can lead to root rot. Avoid low-lying areas where water tends to collect after rain. If possible, choose a spot that is somewhat sheltered from strong winds, which can damage young branches and blossoms.
It is also worth thinking a few years ahead when choosing a location. A mature pear tree can reach anywhere from four to twelve meters in height depending on the rootstock, so make sure you are not planting too close to a house, fence, or overhead power line. Leave enough space between multiple trees as well, generally at least four to six meters for dwarf or semi-dwarf varieties, to allow good air circulation, which in turn helps reduce the risk of fungal diseases.
Step 2: Prepare the Soil
Test your soil pH if possible. Pear trees prefer slightly acidic to neutral soil, ideally between 6.0 and 7.0. If your soil is heavy clay, consider amending it with organic matter to improve drainage. This is also the perfect time to start incorporating the Apple and Pear Tree Fertilizer 25 kg from Ferber Painting into your planting plan, as it is designed to work with a wide range of soil types while correcting common nutrient deficiencies.
If you are unsure how to test soil pH, inexpensive home testing kits are widely available and give a reasonably accurate reading within minutes. For heavy clay soils, mixing in well-rotted compost or aged manure across the planting area, not just in the hole itself, helps improve structure over a wider area rather than creating an isolated pocket of loose soil surrounded by dense clay, which can actually trap water around the roots.
Step 3: Dig the Planting Hole
Dig a hole that is roughly twice as wide as the root ball or root spread, and just as deep as the roots themselves. The goal is to give the roots plenty of loose soil to expand into without burying the trunk too deeply. Planting too deep is one of the most common mistakes that leads to poor establishment and even tree death within the first few years.
A useful trick is to lay a straight tool handle or a piece of wood across the top of the hole once you think it is deep enough. This lets you check that the point where the trunk meets the roots, sometimes called the root flare, will sit level with or just slightly above the surrounding soil surface once the hole is backfilled. It is far easier to adjust the depth before the tree is in place than after.
Step 4: Position the Tree
Place the tree in the center of the hole, making sure the graft union, if visible, remains above the soil line. Spread the roots out naturally rather than letting them curl or bunch up. For bare-root trees, this step is particularly important, as tangled roots can hinder proper establishment.
The graft union, usually visible as a slight bend or scar a few centimeters above the root system, should remain well clear of the soil, generally five to ten centimeters above ground level. If this point is buried, the upper part of the tree may eventually send out its own roots, which can cause the tree to lose the beneficial characteristics of its rootstock, such as dwarfing or disease resistance.
Step 5: Backfill and Fertilize
Backfill the hole gradually, tamping down the soil gently as you go to eliminate large air pockets. This is the ideal moment to apply the Ferber Painting fertilizer according to the recommended dosage on the packaging. Its slow-release formula ensures the roots receive a steady supply of nutrients exactly when they need it most, during those critical first weeks of establishment.
Avoid the temptation to pack the soil down too firmly, since overly compacted soil can restrict oxygen from reaching the roots, which is just as damaging as poor drainage. A gentle, even firming with your hands or the flat of a shovel is generally enough to remove large air gaps while still leaving the soil loose enough for roots to expand into.
Step 6: Water Thoroughly
Give your newly planted tree a deep watering immediately after planting. This helps settle the soil around the roots and eliminates any remaining air pockets. Continue to water regularly during the following weeks, especially if rainfall is scarce.
A simple way to judge whether you have watered enough at planting time is to watch how quickly the water drains. If it disappears almost instantly, the soil may need another round of watering to ensure moisture reaches the deeper roots. If water pools on the surface for more than a few minutes, this can indicate a drainage issue that may need to be addressed before the tree settles in for the long term.
Step 7: Mulch and Protect
Apply a layer of mulch around the base of the tree, keeping it a few centimeters away from the trunk itself to prevent rot. Mulch helps retain soil moisture and regulate temperature. If you live in an area with deer, rabbits, or other wildlife, consider installing a protective guard around the trunk to prevent damage.
A layer of mulch roughly five to eight centimeters thick, made from wood chips, straw, or shredded bark, is generally ideal. Too thin a layer will not provide much benefit, while piling mulch directly against the trunk, sometimes called a mulch volcano, can trap moisture against the bark and encourage rot or pest activity. Staking may also be worthwhile for taller bare-root trees planted in windy locations, using a soft tie that allows some natural movement of the trunk, which actually helps it develop strength over time.
| Step | Key Action |
|---|---|
| 1 | Choose a sunny, well-drained location |
| 2 | Prepare and test the soil pH |
| 3 | Dig a wide, appropriately deep hole |
| 4 | Position the tree with roots spread naturally |
| 5 | Backfill and apply fertilizer |
| 6 | Water thoroughly |
| 7 | Mulch and protect the young tree |
Caring for Your Newly Planted Pear Tree
Planting is only the first step. The months and years that follow are just as important for ensuring your pear tree grows into a healthy, productive part of your garden or orchard. Consistent care, especially during the first two years, will determine whether your tree thrives or struggles. Many gardeners assume that once a tree is in the ground, the hardest part is over, but in reality the establishment period is when a tree is at its most vulnerable, and small lapses in care can have outsized consequences.
Watering Schedule
During the first growing season, your pear tree will need regular watering, roughly once or twice a week depending on rainfall and soil type. Deep, infrequent watering is generally better than frequent shallow watering, as it encourages roots to grow deeper into the soil in search of moisture.
As a general guideline, aim to soak the entire root zone thoroughly rather than just wetting the surface. A slow trickle from a hose left at the base of the tree for twenty to thirty minutes is often more effective than a quick spray, since it gives water time to penetrate deeply rather than running off. During the second year, as the root system expands, you can gradually reduce the frequency of watering, though newly planted trees in particularly sandy or fast-draining soils may still need attention during dry spells even into their third year.
Ongoing Fertilization
Fertilizing does not stop after planting day. Pear trees benefit from a consistent feeding schedule, typically once in early spring and again in early summer, to support both vegetative growth and fruit development. The Apple and Pear Tree Fertilizer 25 kg from Ferber Painting is designed for exactly this kind of ongoing use, and its large 25 kg size means you will have enough product to nourish your tree for multiple seasons without needing to reorder constantly.
Because it comes with a satisfaction guaranteed or refunded policy, you can try it with complete confidence. If for any reason you are not satisfied with how your tree responds, Ferber Painting will refund your purchase, something you simply will not find with most other brands on the market. Many gardeners choose to mark their calendars for early spring and early summer applications each year, since establishing this simple routine early on removes any guesswork later and ensures the tree never goes through an extended period without adequate nutrients, particularly during the demanding flowering and fruit set stages.
Pruning and Shaping
Light pruning during the dormant season helps shape the tree and remove any damaged or crossing branches. Avoid heavy pruning in the first year, as the tree needs its energy for root and structural development rather than recovering from major cuts.
In the first year, focus mainly on removing any broken, diseased, or clearly crossing branches, and resist the urge to shape the canopy aggressively. From the second or third year onward, you can begin training the tree into an open, well-spaced structure, often described as a central leader or modified vase shape depending on the variety, which improves light penetration and air circulation throughout the canopy as the tree matures.
Monitoring for Pests and Disease
Keep an eye out for common pear tree issues such as fire blight, pear psylla, and aphids. A healthy tree that has been properly fertilized with a balanced product is naturally more resistant to pests and disease, which is yet another reason why investing in a quality fertilizer from the very beginning pays off over the long term.
Fire blight in particular can spread quickly through soft, overly vigorous new growth, which is one more reason to avoid excessive nitrogen from unbalanced fertilizers. Inspect your tree regularly during the growing season, looking for blackened, wilted shoot tips that resemble scorch marks, and prune out any affected branches well below the visible damage, disinfecting your tools between cuts. Aphids and pear psylla are usually less serious but can weaken a young tree if left unchecked, so early intervention with appropriate treatments or natural predators such as ladybirds is generally sufficient to keep populations under control.
Common Mistakes to Avoid When Planting Pear Trees
Even experienced gardeners can make mistakes when planting pear trees. Being aware of these common pitfalls can save you significant time, money, and frustration.
- Planting too deep, which suffocates the root system and slows establishment.
- Choosing a location without enough sunlight, resulting in poor fruit production.
- Using a generic fertilizer that is not formulated for fruit trees, leading to nutrient imbalances.
- Neglecting watering during the critical first few months after planting.
- Skipping mulch, which leaves the soil vulnerable to moisture loss and temperature swings.
- Buying from suppliers with no guarantee, leaving you with no recourse if the product underperforms.
Beyond these six core mistakes, a few additional issues are worth mentioning. Some gardeners forget to check whether their chosen pear variety needs a compatible pollinator planted nearby, since many pear cultivars are not self-fertile and will produce little to no fruit without a second, compatible variety within reasonable distance. Others overlook rootstock choice entirely, assuming all pear trees grow to the same eventual size, when in fact rootstock has a major influence on mature height, speed of fruiting, and even soil tolerance. Taking the time to research variety and rootstock compatibility before purchase can save years of disappointment later.
This last point about guarantees is particularly important. Many gardeners invest time and money into planting a pear tree, only to discover that the fertilizer they purchased simply does not deliver the promised results, with no way to get their money back. This is exactly why Ferber Painting stands out. With a satisfaction guaranteed or refunded policy on every order, you are protected from the very beginning. Combined with fast international shipping and a straightforward online payment process, ordering the Apple and Pear Tree Fertilizer 25 kg is both simple and risk-free.
Mini FAQ
What is the best month to plant a pear tree?
The best time is generally during the dormant season, late autumn to early spring, depending on your local climate and whether you are planting bare-root or container-grown trees.
How often should I fertilize a young pear tree?
Apply fertilizer at planting time, then again in early spring and early summer during the following years to support healthy growth and fruit production.
Can I use the Apple and Pear Tree Fertilizer 25 kg for other fruit trees?
This product is specifically formulated for apple and pear trees, ensuring the ideal nutrient balance for these two closely related species.
What happens if I am not satisfied with the fertilizer?
Ferber Painting offers a satisfaction guaranteed or refunded policy on all orders, meaning you can request a refund if the product does not meet your expectations.
How long does shipping take?
Thanks to our international network of carriers, Ferber Painting delivers quickly to customers around the world, with tracking available on every order.
Conclusion
Planting a pear tree successfully is a combination of good timing, careful technique, and most importantly, choosing a fertilizer that has been specifically designed to support fruit trees through every stage of growth. From selecting the right season to digging the perfect hole and maintaining a consistent care routine, every step matters. But none of it will matter as much as the nutrients you provide from day one. Order your Apple and Pear Tree Fertilizer 25 kg today and give your pear tree the strongest possible start, backed by fast worldwide shipping, secure online payment, and our satisfaction guaranteed or refunded promise.