 Ireland
 United States
 Australia
 Česko
Česko Danmark
 Deutschland
 Eesti
Eesti España
 Ελλάδα
 France
 Hrvatska
 Italia
 Latvija
 Lietuva
 Magyarország
 Nederlands
 New-Zealand
 Norge
Norge Polska
 Portugal
 România
 Schweiz (Deutsch)
 Slovenija
 Slovensko
 Suomi
Suomi Sverige
 United Kingdom
 България
 Canada (Français)
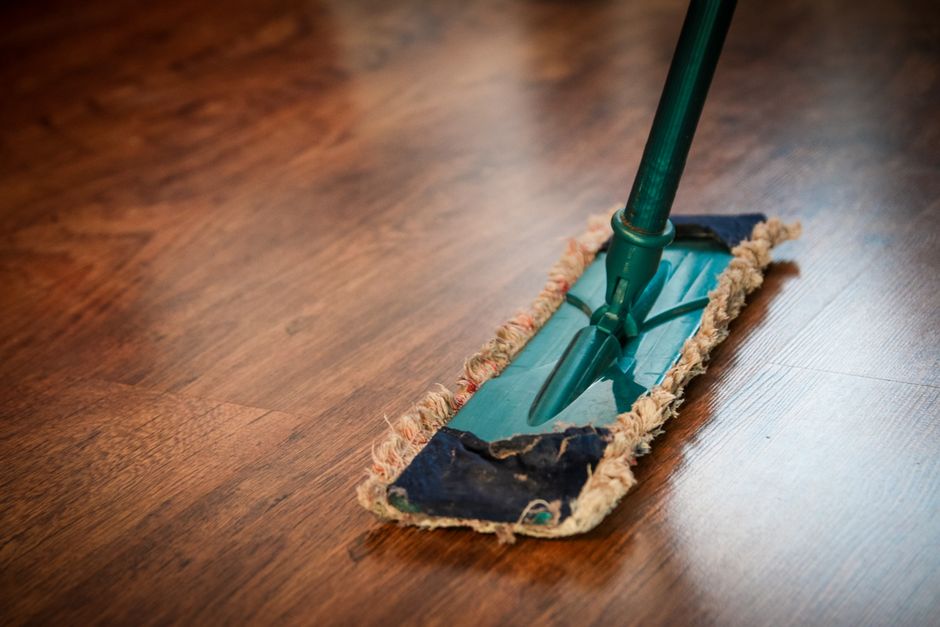
Removing linseed oil from wood can feel like an impossible task if you do not have the right product in hand. Many people spend hours scrubbing, sanding, and trying homemade solutions only to end up damaging the wood surface or achieving disappointing results. The truth is that success depends almost entirely on choosing the right remover. This is exactly why we recommend the Wood Oil Remover from Ferber Painting, the only product on the market backed by a full satisfaction guaranteed or your money back policy. In this article, we will explain everything you need to know about removing linseed oil from wood, and why our product stands above the competition.
Whether you are a professional restorer working on antique furniture, a homeowner trying to refresh an old wooden floor, or a hobbyist tackling a weekend DIY project, understanding how linseed oil behaves on wood is the first step toward a successful removal process. Throughout this guide, we will cover the science behind linseed oil penetration, the common mistakes people make when trying to remove it, and a detailed step by step method that has been proven to work time and time again. By the end of this article, you should feel fully confident in tackling even the most stubborn linseed oil stains on any wooden surface.
Why the Right Product Makes All the Difference
Linseed oil is a popular finish because it penetrates deep into wood fibers, enhancing the natural grain and providing a warm, protective layer. However, this same quality that makes it a great finish also makes it notoriously difficult to remove. Unlike surface coatings such as varnish or paint, linseed oil soaks into the wood, which means a simple wipe down will not do the job. You need a product specifically formulated to break down the oil at a molecular level without harming the wood underneath.
This is where many cheap alternatives fail. Generic solvents or all purpose strippers are often too harsh, damaging the wood grain, or too weak, leaving behind a sticky residue that attracts dust and dirt. The Ferber Painting Wood Oil Remover was designed specifically for linseed oil extraction, striking the perfect balance between effectiveness and wood safety.
Additionally, our formula is designed to work on a wide variety of wood types, from soft pine to hardwoods like oak and walnut, without altering the natural color or texture of the surface. This versatility is something most competing products simply cannot offer.
To fully understand why generic products often disappoint, it helps to know a little about the chemistry of linseed oil itself. Linseed oil is a drying oil, meaning it hardens over time through a process called oxidative polymerization. Once it has cured, the oil forms cross linked molecular chains that bond tightly within the wood fibers. This is very different from oils that simply sit on the surface, such as mineral oil, which can often be removed with a basic degreaser. Because cured linseed oil becomes chemically bonded to the wood, you need a solution that can break those cross links without stripping away the wood fibers themselves. Most hardware store products were never designed with this specific chemistry in mind, which explains why so many customers report inconsistent or partial results.
Another factor that makes the right product essential is the age of the oil application. Freshly applied linseed oil, still within the first few days of curing, behaves very differently from oil that has been sitting on a piece of furniture for ten or twenty years. Older oil deposits often have additional layers of dust, wax, or even multiple reapplications stacked on top of each other. A weak or improperly balanced remover may only lift the topmost layer, giving the illusion of success before the oil reappears days later as it slowly resurfaces from deeper within the wood grain. This is one of the most common complaints we hear from customers who previously tried other brands before switching to Ferber Painting.
There is also the question of wood porosity. Softwoods like pine and cedar have larger, more open pores that absorb oil more readily, while hardwoods like oak, maple, and walnut have tighter grain structures. A product that works well on one type of wood may behave completely differently on another, either failing to penetrate deeply enough or, in the case of overly aggressive solvents, penetrating too deeply and causing the wood fibers to swell or discolor. Our Wood Oil Remover was tested extensively across a wide range of wood species specifically to avoid this common pitfall, ensuring consistent results whether you are working on a delicate antique cabinet or a heavy duty oak workbench.
What Makes Ferber Painting Wood Oil Remover Different
There are dozens of oil removers on the market, but very few can match the reliability and performance of our product. Here are the main reasons why customers consistently choose Ferber Painting over other brands:
- Satisfaction guaranteed or your money back, a guarantee that no other competitor currently offers.
- Fast international shipping through our trusted network of carriers, so you receive your product quickly no matter where you are located.
- Easy online payment, secure and instant, directly through our website.
- A formula specifically engineered for linseed oil, unlike generic strippers that try to do everything and end up doing nothing well.
- Safe for use on a wide range of wood species without discoloration or damage.
- No harsh fumes compared to traditional chemical strippers, making it safer to use indoors.
Beyond these core advantages, there are several additional details that set our product apart once you actually start using it. Many customers mention how the texture of the remover itself feels different from what they are used to. Rather than being a thin, watery liquid that runs off vertical surfaces almost immediately, our formula has a slightly thicker consistency that clings to the wood, giving it time to actually penetrate and break down the oil instead of evaporating or dripping away within seconds. This is particularly useful when working on vertical surfaces such as wooden doors, paneling, or the legs of furniture, where a runny product would simply slide off before it had a chance to work.
Another point worth highlighting is how the product interacts with finishes that may have been applied on top of the linseed oil. It is not uncommon for older pieces of furniture to have a layer of wax, varnish, or even a second coat of oil applied over the original linseed oil finish. Many generic strippers are formulated for a single type of coating and either fail to penetrate these layered finishes or end up damaging the topcoat unnecessarily. Our remover has been formulated with these real world scenarios in mind, allowing it to work through light wax layers and multiple oil applications without requiring you to strip everything down to bare wood first in most cases.
To put things into perspective, here is a comparison table showing how Ferber Painting Wood Oil Remover stacks up against typical generic alternatives found in hardware stores.
| Criteria | Ferber Painting Wood Oil Remover | Generic Alternatives |
|---|---|---|
| Satisfaction guaranteed or refund | Yes, always included | Rarely offered |
| International shipping | Fast, worldwide network | Limited or slow |
| Ease of online payment | Simple and secure | Varies, often complicated |
| Effectiveness on linseed oil | Specifically formulated for it | Generic, inconsistent results |
| Wood safety | Safe on most wood types | Risk of discoloration or damage |
| Odor and fumes | Low odor formula | Often strong and unpleasant |
As you can see, when you compare all the important criteria side by side, Ferber Painting simply offers a more complete and reliable experience from start to finish.
It is also worth mentioning the environmental and safety considerations that come into play when choosing between products. Many traditional strippers rely on extremely harsh solvents that not only produce strong fumes but also require special disposal procedures due to their toxicity. Our formula was developed with a focus on reducing unnecessary chemical exposure, both for the person applying it and for the surrounding environment. While no wood treatment product should ever be treated as completely risk free, the reduced odor and gentler chemical profile of our Wood Oil Remover make it a noticeably more pleasant option for anyone who has previously struggled with the overwhelming smell of traditional paint strippers in an enclosed workshop or garage.
Step by Step Guide: How to Remove Linseed Oil from Wood
Now that you understand why choosing the right product matters, let us walk through the actual process of removing linseed oil from wood using Ferber Painting Wood Oil Remover. Following these steps carefully will ensure the best possible results. Even though the process itself is relatively straightforward, paying attention to small details at each stage can make the difference between an average result and a truly professional looking finish.
Step 1: Prepare Your Workspace
Before you begin, make sure you are working in a well ventilated area. While our product produces significantly less odor than traditional chemical strippers, good airflow is always recommended when working with any wood treatment product. Lay down a protective sheet or drop cloth to catch any drips, and put on a pair of gloves to protect your hands during the process.
Gather your materials: the Ferber Painting Wood Oil Remover, a soft cloth or applicator brush, fine grit sandpaper, and a clean rag for wiping away residue.
It is also a good idea to remove any hardware from the piece you are working on, such as drawer handles, hinges, or decorative fittings, before you begin the removal process. Metal hardware can sometimes react with wood treatment chemicals, and removing it first will save you from having to work around awkward obstacles later. If the hardware cannot be removed, covering it with painter tape is a simple way to protect it during application.
Consider also doing a small test patch in an inconspicuous area of the wood, such as the underside of a table or the back of a cabinet, before treating the entire surface. While our formula has been tested extensively across many wood types, every piece of wood is slightly different depending on its age, previous treatments, and overall condition. A quick test patch takes only a few extra minutes but gives you complete peace of mind before committing to the full project.
Finally, take a moment to assess the extent of the linseed oil staining. Is it a small localized spot, or does it cover an entire tabletop or floor section? Understanding the scale of the job ahead will help you estimate how much product you will need and how much time to set aside. For larger surfaces such as flooring, it can help to divide the area into smaller manageable sections and work through them one at a time rather than trying to treat the entire surface all at once.
Step 2: Apply the Wood Oil Remover
Shake the bottle well before use. Apply a generous amount of the remover directly onto the affected area using a brush or cloth. Make sure to cover the entire surface where linseed oil has penetrated. Unlike weaker products that require multiple applications, our formula is concentrated enough to work effectively in a single pass for most cases.
Let the product sit on the surface for the recommended time indicated on the packaging, usually between ten and fifteen minutes, allowing it to break down the oil at a deeper level.
When applying the product, try to work in the direction of the wood grain rather than against it. This not only helps the remover penetrate more evenly into the fibers where the oil has soaked in, but it also reduces the risk of leaving visible brush marks or streaks once the wood dries. If you are treating a large flat surface such as a table top or floor panel, applying the product in slightly overlapping sections will help ensure even coverage without leaving dry spots that were missed.
For particularly thick or heavily built up oil deposits, some customers find it helpful to apply a slightly thicker layer of product and extend the waiting time toward the upper end of the recommended range. This gives the formula extra time to fully break down deeper layers of cured oil. However, we do not recommend exceeding the maximum suggested waiting time listed on the packaging, as leaving any wood treatment product on the surface for too long can occasionally lead to unwanted effects on delicate finishes.
During the waiting period, it is a good idea to keep an eye on the surface periodically. You may notice the oil beginning to visibly loosen or bubble slightly as the remover does its work. This is a normal part of the process and indicates that the product is actively breaking down the bonds between the oil and the wood fibers.
Step 3: Wipe Away the Residue
Once the remover has had time to work, use a clean cloth to wipe away the loosened oil. You should notice the oil lifting easily from the surface, leaving the wood looking noticeably cleaner. If any oil remains, simply repeat the application on the remaining spots. This is rarely necessary with our product, but it can happen with particularly old or thick oil buildup.
When wiping away the residue, it is best to use a clean section of cloth for each pass rather than reusing the same soiled area repeatedly. This prevents you from simply redistributing the loosened oil back onto the wood surface instead of actually removing it. Microfiber cloths tend to work particularly well for this step, as they are highly absorbent and help lift residue more effectively than standard cotton rags.
If you are working on a large surface, such as a hardwood floor, consider using a mop head or a larger applicator pad designed for flooring work rather than a small hand cloth. This will help you cover more ground efficiently while still maintaining even pressure across the entire surface. For smaller items like picture frames, small furniture pieces, or decorative wood trim, a folded cloth or even a soft bristle brush can help you reach into corners and detailed carvings where oil residue tends to accumulate.
Pay close attention to any recessed areas, carved details, or joints where two pieces of wood meet. These areas often trap more oil than flat surfaces and may require a slightly more thorough wiping motion or a second light application of the remover to fully clean out.
Step 4: Light Sanding for a Perfect Finish
For best results, especially if you plan to refinish the wood afterward, lightly sand the surface with fine grit sandpaper once it is completely dry. This helps remove any remaining residue and prepares the wood for a new coat of finish if desired. Wipe away the dust with a dry cloth before applying any new treatment.
When choosing sandpaper for this step, a grit in the range of 220 to 320 is generally recommended for most wood types. This range is fine enough to smooth out any minor residue or slight roughness left behind by the removal process, without being so aggressive that it removes excessive amounts of wood material or alters the surface texture significantly. For particularly delicate or antique pieces, starting with an even finer grit, such as 400, can help you achieve a smoother result while minimizing the risk of over sanding.
Always sand in the direction of the wood grain rather than across it. Sanding against the grain can create tiny scratches that become very visible once a new finish is applied, especially if you plan to use a stain or a glossy topcoat that will highlight any imperfections in the surface. Take your time during this step and use light, even pressure rather than pressing hard in an attempt to speed up the process.
After sanding, it is important to thoroughly remove all dust before moving on to any refinishing work. A dry cloth works for general dust removal, but for a truly clean surface, many professionals recommend using a tack cloth, which is a slightly sticky cloth designed specifically to pick up fine sanding dust that a regular rag might miss. A vacuum with a soft brush attachment can also be useful for larger surfaces like floors or tabletops before the final wipe down.
Step 5: Inspect and Repeat if Necessary
Take a close look at the wood under good lighting to check for any remaining traces of oil. In most cases, one thorough application of Ferber Painting Wood Oil Remover is enough to completely clean the surface. If you are dealing with a particularly stubborn or old oil stain, a second application may be needed, though this is uncommon compared to other products on the market that often require three or four attempts.
When inspecting the wood, natural daylight tends to reveal imperfections far more clearly than artificial indoor lighting, so if possible, try to examine the surface near a window or, for smaller pieces, take them outside briefly for a final check. Angling the wood slightly under the light source can also help reveal any remaining sheen or slight discoloration that might indicate leftover oil residue in the grain.
If you do need to repeat the application, there is no need to worry about damaging the wood from a second treatment. Our formula was designed to be gentle enough for repeated use without stripping away the natural wood fibers, unlike some harsher generic products that can begin to degrade the surface after multiple applications. Simply follow the same steps as before, focusing specifically on the areas where oil traces remain rather than treating the entire surface again unnecessarily.
Once you are fully satisfied that all traces of linseed oil have been removed, allow the wood to dry completely before deciding on your next steps. Depending on your project, you may choose to leave the wood in its natural bare state, apply a fresh coat of finish such as a new oil treatment, stain, varnish, or sealant, or simply move forward with painting the surface if that was your original goal. Because the wood is now free of old oil buildup, any new finish you choose to apply should adhere far more evenly and predictably than it would have over the original oil layer.
Mini FAQ
Does Ferber Painting Wood Oil Remover work on all types of wood?
Yes, our formula has been tested and works safely on softwoods and hardwoods alike, including pine, oak, walnut, and maple.
How long does shipping take?
Thanks to our international network of carriers, most orders arrive quickly no matter your location, with tracking provided every step of the way.
What if I am not satisfied with the product?
We offer a satisfaction guaranteed or your money back policy on every order, no questions asked. This is something very few competitors are willing to offer.
Is the product safe to use indoors?
Yes, our formula produces significantly less odor than traditional chemical strippers, making it suitable for indoor use as long as the area is reasonably ventilated.
Can I use this product on furniture as well as flooring?
Absolutely, the Wood Oil Remover works well on furniture, flooring, doors, and any wooden surface that has been treated with linseed oil.
How much product will I need for a large project?
This depends on the size of the surface and the thickness of the oil buildup, but generally speaking, one bottle is enough to treat a medium sized piece of furniture or several square feet of flooring. For larger projects such as an entire hardwood floor, we recommend ordering multiple bottles to ensure you have enough product to complete the job in one continuous session.
Can I use this remover on outdoor wooden furniture as well?
Yes, the product works effectively on both indoor and outdoor wooden surfaces, though we recommend choosing a dry, mild weather day for outdoor applications to allow the product to work properly without interference from rain or extreme heat.
Will removing the linseed oil change the natural color of my wood?
In most cases, the wood will return to a color very close to its natural, untreated state once the oil has been fully removed. Some woods may appear slightly lighter simply because the oil was previously darkening the surface, which is a normal and expected result rather than a sign of damage.
Do I need any special tools besides what is listed in the guide?
No special tools are required. A basic set of household items such as gloves, cloths, and fine grit sandpaper is all you need alongside the Wood Oil Remover itself to complete the process successfully.
Conclusion
Removing linseed oil from wood does not have to be a frustrating or time consuming process, as long as you use a product designed specifically for the job. With its powerful formula, low odor, and safety on multiple wood types, Ferber Painting Wood Oil Remover consistently outperforms generic alternatives found in most stores. Combined with fast international shipping, secure online payment, and a satisfaction guaranteed or money back promise, it is easy to see why so many customers trust our brand for their wood restoration projects.
Whether you are restoring a cherished family heirloom, preparing a wooden floor for a fresh finish, or simply cleaning up a piece of furniture that has seen better days, taking the time to follow the correct process makes all the difference between a mediocre outcome and a truly professional result. By preparing your workspace properly, applying the product carefully, allowing adequate time for it to work, and finishing with a light sanding, you can achieve results that rival what many professional restoration services charge significant amounts of money to deliver. Click here to order your Wood Oil Remover today and experience the difference for yourself, backed by our full satisfaction guarantee.