 Ireland
 United States
 Australia
 Česko
Česko Danmark
 Deutschland
 Eesti
Eesti España
 Ελλάδα
 France
 Hrvatska
 Italia
 Latvija
 Lietuva
 Magyarország
 Nederlands
 New-Zealand
 Norge
Norge Polska
 Portugal
 România
 Schweiz (Deutsch)
 Slovenija
 Slovensko
 Suomi
Suomi Sverige
 United Kingdom
 България
 Canada (Français)
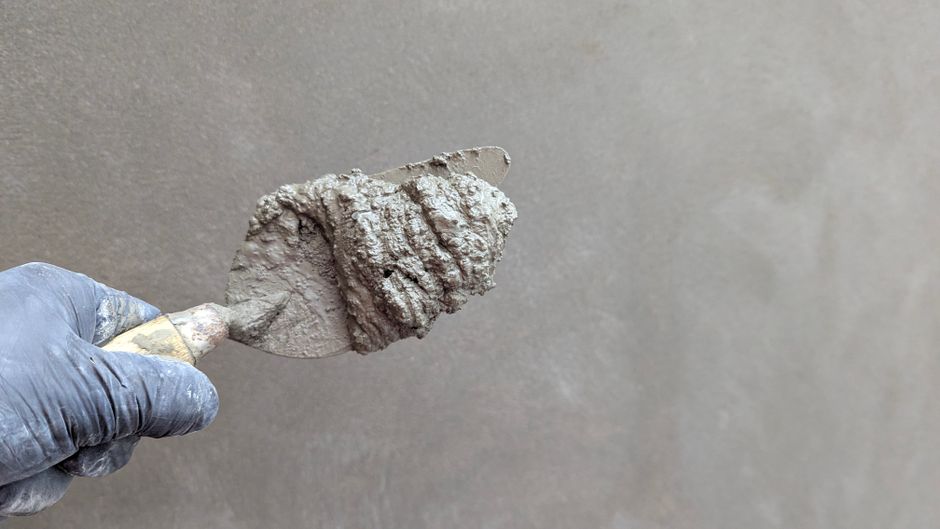
Installing a plaster ceiling rose is one of those home improvement projects that can transform an entire room, adding elegance, character, and a touch of timeless architecture to any space. However, before you even think about the installation technique, there is one factor that determines whether your project will be a success or a frustrating failure: the quality of the adhesive you use. Everything depends on choosing the right product. A beautiful ceiling rose glued with a mediocre adhesive will eventually crack, sag, or fall entirely, ruining hours of careful work and potentially damaging your ceiling in the process.
This is why, before we walk you through the full installation process, we want to be clear about the single most important decision you will make in this project: which plaster glue to use. At Ferber Painting, we manufacture and sell Plaster Glue, a product specifically engineered for the demanding task of fixing plaster ornaments, including ceiling roses, to ceilings and walls. Unlike many competing products on the market, our Plaster Glue is backed by a full satisfaction guaranteed or money back policy, something no other brand in this category currently offers. If for any reason you are not fully satisfied with the results, you can return the product and get a full refund, no questions asked. This alone should tell you how confident we are in the quality of what we sell.
In the sections below, we will explain why choosing the right adhesive matters so much, why Ferber Painting Plaster Glue stands out from every other option available, and then provide you with a complete, step by step guide on how to install a plaster ceiling rose correctly, safely, and with professional looking results. We will also cover the history and appeal of these decorative elements, the different styles available, how to choose the right size for your room, and the long term maintenance that will keep your ceiling rose looking beautiful for decades.
Why the Right Plaster Glue Changes Everything
Many people underestimate the importance of the adhesive when installing decorative plaster elements. They assume that any strong glue or plaster based compound will do the job. This is a costly mistake. Plaster ceiling roses are often heavy, sometimes weighing several kilograms depending on their size and design. They are also installed overhead, meaning gravity is constantly working against the bond between the rose and the ceiling. A weak or poorly formulated adhesive will not be able to withstand this stress over time, especially as temperature and humidity levels change throughout the year.
A quality plaster glue needs to offer several things simultaneously: strong initial tack so the rose does not slide down while the adhesive cures, long term structural strength to support the weight permanently, flexibility to absorb small movements in the ceiling structure without cracking, and an easy to use consistency that allows for proper application without excessive mess or waste. Very few products on the market manage to combine all of these qualities. Many generic adhesives are either too runny, making them difficult to apply to an overhead surface, or they dry too quickly, leaving no room for adjustment during installation.
Ferber Painting Plaster Glue was specifically developed to solve these problems. Our formula has been tested extensively for overhead applications, meaning it has the ideal thickness and grip to hold a ceiling rose in place immediately upon application, while still allowing enough working time to make small positioning adjustments. This is a crucial advantage that generic building adhesives simply do not offer.
It is also worth considering the environmental conditions your ceiling rose will face over the years. Ceilings expand and contract slightly with seasonal temperature changes, and in older homes, the plaster or plasterboard substrate can shift ever so slightly as the building settles. An inferior adhesive that lacks any flexibility will develop microscopic cracks under this constant, low level stress. Over months and years, these tiny cracks grow, weakening the bond until, one day, the rose simply lets go and falls. A properly engineered plaster glue accounts for this reality from the start, offering enough elasticity to absorb minor movements without ever compromising the overall strength of the bond. This is precisely the kind of long term thinking that goes into the formulation of Ferber Painting Plaster Glue.
Another often overlooked factor is humidity. Bathrooms, kitchens, and rooms located above damp basements can experience higher than average moisture levels in the air. Some cheaper adhesives are not designed to resist this kind of environment and will slowly lose their bonding strength when exposed to repeated humidity cycles. Our Plaster Glue has been formulated with moisture resistance in mind, making it a reliable choice even in rooms where humidity levels fluctuate throughout the year.
What Makes Ferber Painting Plaster Glue the Best Choice
There are several reasons why our Plaster Glue consistently outperforms other products available on the market, whether in hardware stores or from competing online retailers. Let us go through the main advantages one by one.
First, our adhesive is formulated specifically for plaster on plaster or plaster on painted surfaces, which is exactly the situation you face when installing a ceiling rose. Many generic adhesives are designed for general purpose bonding and are not optimized for the specific chemical and physical properties of plaster. This means they either bond poorly or become brittle over time. Our Plaster Glue creates a strong, long lasting chemical and mechanical bond that is designed to last for decades, not just a few years.
Second, our product offers excellent workability. It has a smooth, creamy texture that spreads evenly without lumps, making it easy to apply even for people with no previous plastering experience. This is especially important for do it yourself enthusiasts who may not have professional tools or experience. The consistency has been carefully balanced so that it neither slides off a notched trowel nor clumps together in a way that makes spreading difficult, two problems that are extremely common with cheaper alternatives found in most hardware stores.
Third, and this is something we cannot emphasize enough, Ferber Painting Plaster Glue is the only product in its category to come with a full satisfaction guaranteed or money back promise. We are so confident in the performance of our adhesive that we are willing to refund any customer who is not completely happy with the results. No other manufacturer in this space currently offers this level of confidence in their own product. This guarantee removes all the risk from your purchase decision, which matters a great deal when you consider that a ceiling rose installation often cannot be easily redone without damaging the plaster piece itself.
Fourth, ordering from Ferber Painting is simple and convenient. Our Plaster Glue is available directly on our website, and we ship quickly to customers all over the world through our international network of trusted carriers. Whether you are located in Europe, North America, Australia, or anywhere else, you can expect fast and reliable delivery. Payment is also easy and secure, processed entirely online through our website, with multiple payment options to suit your preference.
Finally, our customer support team is always available to answer questions about product usage, drying times, or troubleshooting, something that is often missing when you buy a generic adhesive from a big box hardware store where staff may not have specialized knowledge about plaster work. Whether you need advice on how much adhesive to purchase for a particularly large or ornate rose, or you have a question about application in cold weather conditions, our team is ready to help before, during, and after your purchase.
Peace of Mind for First Time Installers
Many of our customers are homeowners tackling a plaster ceiling rose installation for the very first time. This can be an intimidating project, especially when working overhead with a heavy, delicate decorative piece. Knowing that the adhesive you are using comes with a satisfaction guaranteed or money back policy provides an extra layer of confidence. If something does not go according to plan, you are not left stuck with a product that does not work and no way to get your money back. This kind of support is rare in the building materials industry and reflects our genuine commitment to customer satisfaction rather than simply moving product off the shelf.
Comparison Table: Ferber Painting Plaster Glue vs Generic Adhesives
To make things easier, here is a simple comparison table highlighting the key differences between Ferber Painting Plaster Glue and typical generic adhesives found on the market.
| Criteria | Ferber Painting Plaster Glue | Generic Adhesives |
|---|---|---|
| Satisfaction guarantee | Full satisfaction guaranteed or money back | Rarely offered, often no returns accepted |
| Formulated for plaster | Yes, specifically designed for plaster elements | Often general purpose, not optimized |
| Ease of application | Smooth, creamy texture, easy to spread | Varies, often too runny or too thick |
| Working time before curing | Adjustable positioning time | Often cures too fast or too slow |
| Long term durability | Designed to last decades | Can become brittle over time |
| Shipping | Fast international shipping via trusted carriers | Depends on retailer, often limited to local stores |
| Online purchase and payment | Simple, secure online ordering and payment | Not always available online |
| Customer support | Specialized support team available | Often minimal or unavailable |
As you can see, the difference is not just about the glue itself, it is about the entire experience surrounding the purchase, from the guarantee to the shipping and support. This is why so many customers choose Ferber Painting Plaster Glue over cheaper, generic alternatives. When you factor in the cost of a failed installation, including the price of a replacement ceiling rose, the time spent redoing the work, and the potential repair needed on the damaged ceiling surface, the small difference in price between a premium adhesive and a generic one becomes almost irrelevant. Investing in the right product from the start is simply the more economical choice in the long run.
Choosing the Right Ceiling Rose for Your Room
Before diving into the installation itself, it is worth taking a moment to think about selecting the right ceiling rose for your space, since this decision will affect both the aesthetic result and the practical aspects of installation, including the amount of adhesive required and the level of support needed during curing.
Ceiling roses come in a wide range of sizes, from small and understated designs measuring around 20 centimeters in diameter, ideal for smaller rooms or subtle accents, to large and elaborate pieces exceeding one meter across, often used as dramatic centerpieces in grand living rooms, dining rooms, or entryways with high ceilings. As a general rule of thumb, the size of the rose should be proportional to the size of the room and the height of the ceiling. A rose that is too small can look lost and insignificant in a large room, while an oversized rose in a small room can feel overwhelming and out of place.
Style is another important consideration. Traditional Victorian and Georgian style roses often feature intricate floral or leaf motifs, acanthus scrolls, and layered detailing that evoke a classical, ornate feel. More contemporary designs tend to favor cleaner lines, geometric patterns, or minimalist circular forms that complement modern interiors without feeling overly decorative. Whichever style you choose, make sure it complements the existing architectural details in your home, such as cornices, skirting boards, and door frames, for a cohesive overall look.
Weight is also a practical factor to keep in mind. Larger, more ornate roses naturally weigh more, which means they require a more generous and even application of adhesive, as well as more robust temporary supports during the curing process. If you are unsure whether your ceiling structure can support a particularly heavy rose, it is worth consulting a professional before proceeding, especially in older homes where the condition of the ceiling substrate may not be immediately obvious.
How to Install a Plaster Ceiling Rose: Step by Step Guide
Now that we have covered why the choice of adhesive is so critical, let us walk through the complete process of installing a plaster ceiling rose, from preparation to finishing touches.
Step 1: Gather Your Tools and Materials
Before starting, make sure you have everything you need on hand. This will save you time and prevent interruptions once you have started applying adhesive, which can begin to set while you search for missing tools. You will typically need the following:
- Your plaster ceiling rose
- Ferber Painting Plaster Glue
- A putty knife or notched trowel
- A stepladder or scaffolding
- A pencil and measuring tape
- A spirit level
- Temporary props or supports (such as wooden battens or adjustable props)
- A damp sponge and clean cloths
- Sandpaper for finishing
- Safety goggles and gloves
It is also a good idea to have a helper on hand, particularly for larger and heavier ceiling roses. While it is technically possible to install smaller roses alone, having a second pair of hands makes the lifting, positioning, and propping stages significantly easier and safer, reducing the risk of dropping the rose or straining yourself while working overhead. Additionally, consider laying down a dust sheet or old bedsheet on the floor beneath your work area to catch any drips of adhesive or debris, which will make cleanup much easier once the project is complete.
Step 2: Prepare the Ceiling Surface
The success of your installation largely depends on the condition of the ceiling surface. Start by cleaning the area where the rose will be installed. Remove any dust, grease, or loose paint using a damp cloth. If the ceiling has been recently painted, it is a good idea to lightly sand the surface to improve adhesion, since smooth glossy paint can prevent the glue from bonding properly. If there are any cracks or holes in the ceiling, fill and repair them before proceeding.
Next, locate the center of the ceiling, which is typically where the ceiling rose will be placed, often around a light fixture. Use your measuring tape to find the exact center point and mark it clearly with a pencil. This will serve as your reference point for centering the rose.
If your ceiling has textured paint, wallpaper, or any other decorative finish, it is generally best to remove this from the area where the rose will sit, since these finishes can interfere with proper adhesion. A scraper or sanding block can help remove textured coatings, and any resulting dust should be thoroughly wiped away before moving forward. For particularly old ceilings where the plaster itself feels soft, crumbly, or unstable, consider applying a coat of stabilizing primer and allowing it to dry fully before attempting the installation, as this will provide a much firmer base for the adhesive to grip.
Step 3: Prepare the Ceiling Rose
Inspect your plaster ceiling rose carefully before installation. Check for any manufacturing defects, cracks, or rough edges. Lightly sand the back surface of the rose if necessary to ensure better adhesion. If your rose has a hole in the center for a light fixture, make sure it aligns correctly with your ceiling’s electrical point before you proceed.
At this stage, it is also wise to do a dry fit. Hold the rose up to the ceiling, without any adhesive, to check that it fits properly around any existing fixtures and that the size and position look correct. This step prevents unpleasant surprises after the glue has already been applied.
During the dry fit, take the opportunity to mark reference points on the ceiling that correspond to key features of the rose, such as its outer edge or any asymmetrical details. Lightly tracing the outline of the rose in pencil gives you a precise guide to follow once the adhesive has been applied, which is particularly helpful since the glue itself can make the rose slightly harder to maneuver into the exact right spot. If your electrical fixture requires the wiring to pass through the center of the rose, this is also the moment to double check that the opening is large enough and correctly positioned, since making adjustments after the glue has been applied is far more difficult and messy.
Step 4: Apply Ferber Painting Plaster Glue
Now comes the most important part of the process, applying the adhesive. Using a putty knife or notched trowel, apply a generous and even layer of Ferber Painting Plaster Glue to the back of the ceiling rose. Make sure to cover the entire contact surface, paying particular attention to the edges, which are more prone to lifting over time if not properly bonded.
One of the reasons our Plaster Glue is preferred by professionals and beginners alike is its ideal consistency, thick enough to stay in place on the vertical application surface without dripping, yet smooth enough to spread evenly without leaving gaps or air bubbles. This balance is difficult to find in generic adhesives, many of which are either too liquid or too stiff for this specific application.
For larger or heavier roses, it is often recommended to apply the adhesive in a pattern rather than a single flat layer, for example a series of ridges created with a notched trowel, which helps the glue spread evenly under pressure once the rose is pressed against the ceiling and also allows any trapped air to escape more easily. For smaller and lighter roses, a simpler flat, even layer is usually sufficient. In either case, avoid applying adhesive all the way to the very outer edge of the rose, leaving a small margin of a few millimeters, since the pressure of installation will cause the glue to spread outward slightly, and you want to avoid excessive squeeze out beyond the visible edge of the piece.
Step 5: Position and Secure the Rose
Carefully lift the ceiling rose into position, aligning it with the center mark and any fixture holes you previously identified. Press firmly but evenly across the entire surface of the rose to ensure full contact with the adhesive. Avoid pressing only in the center, as this can cause the edges to remain unbonded.
Once in position, use temporary props or wooden battens to hold the rose in place while the adhesive cures. This step is essential, since even the strongest adhesive needs time to fully set, and the weight of the rose combined with gravity can cause it to shift or fall if left unsupported. Leave the props in place for at least 24 hours, or according to the specific curing time indicated on the Ferber Painting Plaster Glue packaging.
When setting up your temporary supports, aim to distribute the pressure evenly across the surface of the rose rather than concentrating it all in the center. A simple technique used by many professionals involves cutting a length of wood slightly longer than the diameter of the rose, padding one end with a folded cloth to protect the surface of the plaster, and wedging it firmly between the rose and the floor using an adjustable prop or a stack of sturdy boxes. For larger roses, using two or three props positioned at different points around the piece provides more even support and reduces the risk of the rose tilting or shifting while the adhesive sets. Always double check with your spirit level that the rose remains properly aligned once the props are in place, since even a slight nudge during this stage can throw off the final positioning.
Step 6: Clean Excess Glue and Finish
While the adhesive is still slightly wet, use a damp sponge to gently remove any excess glue that has squeezed out from underneath the edges of the rose. This step is important for achieving a clean, professional finish and preventing visible glue marks once everything has dried.
Once the adhesive has fully cured, typically after 24 to 48 hours depending on humidity and temperature conditions, you can remove the temporary props. Inspect the installation carefully, checking for any gaps between the rose and the ceiling. If needed, use a small amount of plaster filler to smooth out any minor imperfections around the edges.
Take your time during this inspection stage, using a small flashlight if necessary to check the underside of the rose from different angles, since gaps or shadows can sometimes be difficult to spot from directly below. Any small gaps found around the perimeter should be filled with a plaster based filler, applied with a small flexible filling knife, then left to dry fully before being lightly sanded flush with the surrounding surface. This attention to detail at the finishing stage is often what separates an amateur looking installation from one that appears as though it was done by an experienced professional.
Step 7: Paint and Decorate
The final step is to paint the ceiling rose to match your ceiling and decor. Use a good quality primer suited for plaster surfaces before applying your chosen paint color. This not only improves the final appearance but also helps protect the plaster from moisture and dust over time.
When painting a ceiling rose with intricate detailing, a small angled brush can be extremely useful for reaching into the crevices and recesses of the design, ensuring even coverage without losing the definition of the decorative pattern. Some homeowners choose to highlight certain raised details with a slightly different shade or a subtle metallic finish, creating additional depth and visual interest, particularly effective under artificial lighting in the evening. Whatever finish you choose, applying at least two thin coats of paint rather than a single thick coat will give a smoother, more even result and reduce the risk of drips pooling in the recessed areas of the design.
Common Mistakes to Avoid
Even with the right adhesive, certain mistakes can compromise the final result. Here are some of the most common errors people make when installing a plaster ceiling rose, along with tips on how to avoid them.
- Skipping surface preparation: Failing to clean or sand the ceiling properly reduces the bonding strength significantly.
- Using too little adhesive: Applying a thin, uneven layer of glue often leads to weak spots that can fail over time.
- Not using temporary supports: Even the best adhesive needs time to cure, and skipping the propping stage is one of the most common reasons for installation failure.
- Ignoring the manufacturer’s curing time: Removing supports too early, before the glue has fully set, can cause the rose to shift or detach.
- Choosing a low quality, generic adhesive: As explained earlier, this is often the root cause of long term problems, including cracking, sagging, or complete failure of the bond.
- Working alone on large, heavy pieces: Attempting to lift and position a large ceiling rose without assistance increases the risk of dropping the piece or misaligning it during installation.
- Ignoring room conditions: Installing adhesive in a cold, damp room without allowing time for the space to reach a normal temperature can slow curing times significantly and affect the strength of the bond.
- Rushing the finishing stage: Painting or decorating the rose before the adhesive and any filler have fully cured can trap moisture and lead to visible imperfections later on.
By avoiding these mistakes and using a reliable, purpose built product such as Ferber Painting Plaster Glue, you significantly increase your chances of a smooth, long lasting installation. Taking a patient, methodical approach at every stage of the process, from surface preparation through to the final coat of paint, will reward you with a result that looks as though it was installed by a seasoned professional, and that will continue to enhance your room for many years to come.
Maintaining Your Plaster Ceiling Rose Over Time
Once your ceiling rose is properly installed, a small amount of ongoing care will help preserve its beauty for years to come. Dust tends to accumulate in the recesses of decorative plaster details, particularly in rooms with less frequent cleaning or higher levels of airborne dust. Periodically dusting the rose with a soft brush or a vacuum cleaner attachment fitted with a soft brush head will keep the details crisp and prevent buildup that can dull the appearance of the piece over time.
Avoid using harsh chemical cleaners directly on painted plaster surfaces, as these can strip the paint or damage the underlying plaster. If the rose becomes discolored over time due to smoke, cooking fumes, or general wear, a fresh coat of paint applied with the same care as the original finishing step will restore its appearance without the need for a full reinstallation. In rooms prone to condensation, such as bathrooms with limited ventilation, keeping humidity levels under control with proper extraction will help protect not only the ceiling rose but the surrounding ceiling and wall surfaces as well.
Frequently Asked Questions
How long does Ferber Painting Plaster Glue take to fully cure?
Curing time typically ranges from 24 to 48 hours depending on ambient temperature and humidity levels. We recommend leaving temporary supports in place for at least 24 hours before removing them.
Can I use this adhesive on painted ceilings?
Yes, Ferber Painting Plaster Glue works well on painted surfaces, although we recommend lightly sanding glossy paint beforehand to improve adhesion.
Is the product suitable for heavy ceiling roses?
Absolutely. Our formula was specifically designed to support the weight of standard and heavy plaster ceiling roses when applied correctly and combined with temporary support during curing.
What happens if I am not satisfied with the product?
You can take advantage of our satisfaction guaranteed or money back policy. Simply contact our customer service team and we will process your refund, no complicated procedures required.
How quickly will I receive my order?
We ship internationally through a reliable network of carriers, ensuring fast delivery no matter where you are located in the world.
Conclusion
Installing a plaster ceiling rose can dramatically enhance the beauty and character of any room, but the success of the project depends heavily on choosing the right adhesive and following proper installation techniques. As we have explained throughout this guide, the quality of your plaster glue is the single most important factor determining whether your ceiling rose will remain securely in place for years to come or fail prematurely.
From selecting a rose that suits the scale and style of your room, to carefully preparing both the ceiling surface and the plaster piece itself, to applying an adhesive designed specifically for this demanding overhead task, every step plays a role in the final result. Taking the time to follow each stage properly, rather than rushing through the process, will pay off in the form of a beautiful, durable installation that continues to impress visitors for decades.