 Ireland
 United States
 Australia
 Česko
Česko Danmark
 Deutschland
 Eesti
Eesti España
 Ελλάδα
 France
 Hrvatska
 Italia
 Latvija
 Lietuva
 Magyarország
 Nederlands
 New-Zealand
 Norge
Norge Polska
 Portugal
 România
 Schweiz (Deutsch)
 Slovenija
 Slovensko
 Suomi
Suomi Sverige
 United Kingdom
 България
 Canada (Français)
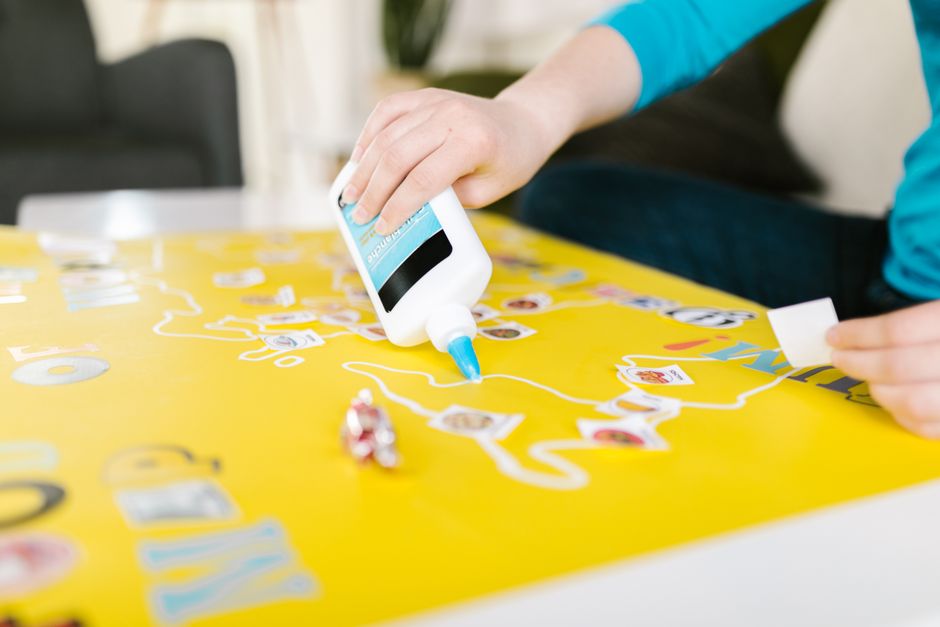
Runners, cyclists, triathletes and obstacle racers all share the same small but annoying problem before every event: how to attach a race bib properly without it flapping, tearing, or falling off halfway through the course. Safety pins are outdated, uncomfortable, and can even damage technical fabrics. That is why more and more athletes are turning to adhesive solutions instead. But here is the truth that nobody tells you often enough: everything depends on choosing the right product. A poor quality glue will peel off after twenty minutes of sweat, rain, or friction, while a high performance adhesive will hold your bib firmly in place from the starting line to the finish line.
This is exactly why we recommend our own product, Universal Glue by Ferber Painting. Unlike most adhesives on the market, Universal Glue is the only one backed by a full satisfaction guaranteed or money back policy. If you are not happy with the result, we refund you, no questions asked. That alone should tell you how confident we are in the quality of our formula. In this guide, we will explain why Universal Glue is the best option for gluing a race bib, and we will walk you step by step through the entire process so you get a flawless result every time.
Whether you are training for your very first five kilometer run, preparing for a full marathon, tackling a mud filled obstacle course, or gearing up for an Ironman triathlon, the way you attach your bib matters more than most athletes realize. A bib that shifts, folds, or detaches during a race is not just annoying, it can slow you down, distract you mentally, and in some cases even get you disqualified if the timing chip or barcode printed on the bib becomes unreadable. Understanding the science of adhesion, the behavior of technical fabrics under stress, and the correct technique to apply glue evenly will save you from all of these problems. Let us explore this topic in depth.
Why the Right Glue Makes All the Difference
Before diving into the technique itself, it is essential to understand why the product you choose is more important than the method. A race bib is usually made of a thin, slightly slippery synthetic material. It needs to stay flat against your shirt during hours of movement, sweating, and sometimes rain or wind. Most generic glues are not designed for this kind of use. They dry too fast, they become brittle, or they simply do not stick to synthetic fibers at all.
Think about what actually happens to a bib during a race. Your torso expands and contracts with every breath. Your arms swing back and forth, sometimes brushing against the edges of the bib. Sweat accumulates on your skin and soaks through the shirt fabric from the inside, while rain or aid station water splashes it from the outside. Add to this the friction from a hydration vest, a race belt, or even your own arms during a long climb, and you start to understand why a weak adhesive simply cannot survive the conditions of a real event. A glue that works perfectly on paper or cardboard in a craft project will almost always fail on athletic fabric because the two materials behave completely differently under stress.
Universal Glue was formulated with exactly these constraints in mind. It is flexible once dry, resistant to moisture, and strong enough to keep the bib firmly attached even during the most demanding races, including trail running, triathlons, and obstacle course events where athletes are exposed to mud, water, and intense friction. The formula was specifically tested on polyester, nylon, and blended technical fabrics, which are the most common materials used in modern race apparel. Unlike traditional glue sticks or white craft glue, Universal Glue does not simply dry into a hard, brittle layer that snaps the first time the fabric bends. Instead, it forms a flexible bond that moves with the fabric, which is exactly what a race bib needs to survive several hours of continuous motion.
Here are the main advantages that make Universal Glue different from other adhesives available on the market:
- It remains flexible after drying, so it does not crack when the fabric moves or stretches.
- It is water resistant, which means sweat or rain will not weaken the bond.
- It dries clear, so there are no visible marks or stains on your race outfit.
- It does not damage technical fabrics, unlike some industrial strength adhesives.
- It comes with a satisfaction guaranteed or money back policy, something no competitor currently offers.
- It is easy to apply with precision thanks to its practical applicator tip.
These characteristics combined make Universal Glue the safest and most reliable choice for athletes who do not want to worry about their bib during a race. Beyond the technical performance, there is also a psychological benefit that is often overlooked. When you know your bib is properly secured, you stop thinking about it. Your focus shifts entirely to pacing, breathing, hydration, and strategy, rather than constantly touching your chest to check if the bib is still there. Many experienced racers describe this peace of mind as one of the underrated advantages of switching from pins to a reliable adhesive.
Understanding the Materials Used in Modern Race Bibs
Race bibs are not all made from the same paper or plastic. Most large scale marathons use a coated paper or a synthetic waterproof material called Tyvek, which resists tearing and stays legible even when wet. Trail races and obstacle course events increasingly use fully synthetic, plastic based bibs designed to survive mud, river crossings, and rough terrain. Each of these materials interacts differently with adhesives. A glue that only bonds well to paper fibers will often fail on a synthetic Tyvek bib, because there are no absorbent fibers for the adhesive to grip onto. Universal Glue was designed to create a strong mechanical and chemical bond across this wide range of bib materials, which is one of the reasons it performs so consistently regardless of which race organization printed your bib.
Comparing Universal Glue to Other Adhesive Solutions
To help you understand why Universal Glue is the superior option, we have put together a comparison table covering the most important criteria that matter when choosing a glue for race bibs.
| Criteria | Universal Glue by Ferber Painting | Standard Craft Glue | Industrial Adhesive Spray | Safety Pins |
|---|---|---|---|---|
| Water resistance | Excellent | Poor | Moderate | Not applicable |
| Flexibility once dry | Excellent | Poor, tends to crack | Moderate | Not applicable |
| Fabric safety | Safe on technical fabrics | Can stain | Can damage or dissolve fibers | Can tear fabric |
| Ease of application | Very easy with precision tip | Messy | Requires ventilation and caution | Quick but uncomfortable |
| Satisfaction guarantee | Yes, full refund available | No | No | Not applicable |
| Worldwide fast delivery | Yes, through our international carrier network | Varies | Varies | Available everywhere but not adhesive based |
| Online payment convenience | Simple and secure online checkout | Varies by retailer | Varies by retailer | Varies by retailer |
As this table clearly shows, Universal Glue outperforms other solutions on nearly every important criterion. Combined with our satisfaction guaranteed or money back promise, it becomes an obvious choice for anyone serious about race day preparation.
Let us go a little deeper into a few of these criteria, since they are often misunderstood by athletes who have never tried an adhesive based solution before. Standard craft glue, the kind found in most household drawers, is designed for paper, cardboard, and light craft projects. It dries into a rigid film that has almost no give whatsoever. On a static object like a scrapbook page, that rigidity is not a problem. On a running shirt that stretches and twists thousands of times over the course of a marathon, that same rigidity becomes a serious weakness, because the dried glue simply cracks and separates from the fabric within the first few kilometers.
Industrial adhesive sprays, on the other hand, are often too aggressive for delicate technical fabrics. Some contain solvents that can weaken synthetic fibers over time, leaving a stiff patch on your shirt that feels uncomfortable against the skin and may even cause chafing during a long race. They also require careful ventilation during application, which is not always practical the night before an early morning race when you are packing your gear in a small hotel room or a shared apartment.
Safety pins remain the traditional choice for many recreational runners, largely out of habit rather than performance. While they are quick to use, they come with several well known drawbacks. They can puncture and permanently damage the technical fabric of an expensive running shirt. They can scratch the skin during arm movement, particularly at the underarm area where friction is highest. They can also loosen over the course of a long event, especially during downhill running when the bib flaps and tugs at the pinned corners. Universal Glue eliminates all of these problems at once, offering a solution that is faster to apply than four separate pins, gentler on your gear, and far more reliable over long distances.
Step by Step Guide: How to Glue a Race Bib
Now that you understand why the product matters, let us walk through the exact steps to glue a race bib properly using Universal Glue. Follow these instructions carefully to achieve a clean, durable, and comfortable result.
Step 1: Prepare Your Race Shirt and Bib
Lay your race shirt flat on a clean, hard surface. Make sure the fabric is dry and free from dust or lotion residue, as this can affect adhesion. Position your bib exactly where you want it, usually centered on the chest or slightly to one side, depending on your sport’s regulations.
It is worth taking a moment here to think about timing. Many athletes make the mistake of gluing their bib the morning of the race, in a rush, often in poor lighting inside a hotel bathroom or a tent at the race village. This increases the risk of misalignment and does not give the glue enough time to cure properly before the start gun goes off. Instead, plan to glue your bib the evening before the race, ideally after you have picked up your race packet and confirmed your bib number. Working in a well lit, flat space such as a kitchen table or a hard floor will give you far more control than trying to do it on a soft hotel bed.
Also consider the orientation of your shirt. If you are wearing a compression top underneath a looser outer layer, decide in advance which layer the bib will be attached to, since regulations for some events require the bib to remain visible on the outermost layer at all times. Triathletes in particular need to think about this carefully, since the same top may be worn from the swim through to the run, and the bib needs to survive being wet from the very first minute of the race.
Step 2: Mark the Position
Once you are satisfied with the placement, gently mark the corners of the bib with a piece of tape or a light pencil mark on the inside of the shirt. This will help you reposition it accurately once the glue is applied.
A useful trick used by experienced racers is to fold the shirt in half vertically first, matching the shoulder seams, and using that centerline as a reference point to make sure the bib is placed symmetrically on the chest. Crooked or off center bibs are not just a cosmetic issue, they can also make it harder for race photographers and timing officials to read your bib number clearly, particularly at events that rely on optical bib recognition technology to identify runners in photographs. Taking an extra thirty seconds at this stage to double check your alignment will save you from having to redo the entire process later.
Step 3: Apply Universal Glue
Lift one corner of the bib and apply a thin, even line of Universal Glue along the edge of the shirt fabric where the bib will sit. Thanks to its precision applicator tip, Universal Glue allows you to control exactly how much product you use, avoiding excess glue that could seep through the fabric.
For best results, work corner by corner rather than trying to lift the entire bib at once. Start with the top two corners, apply a small dot or short line of glue, then move to the bottom two corners. Some athletes prefer a full perimeter application, running a thin continuous line of glue around all four edges of the bib, while others prefer to apply glue only at the four corners and the midpoints of each edge, leaving small gaps in between to allow a bit of airflow and flexibility. Both methods work well with Universal Glue, and the choice largely comes down to personal preference and how much wind or friction you expect during your specific event. For extremely windy conditions, such as coastal marathons or cycling legs of a triathlon, a full perimeter line of glue is generally recommended for maximum hold.
Step 4: Press and Hold
Carefully place the bib back onto the marked position and press down firmly for about thirty seconds. Applying even pressure across the entire surface ensures a strong and uniform bond.
Using the flat of your palm rather than just your fingertips will distribute the pressure more evenly and reduce the risk of small air pockets forming under the bib, which could later become weak points where the fabric can lift. If you have access to a small, flat, heavy object such as a book, you can place it on top of the bib for a minute or two after pressing by hand, which helps maintain constant pressure while the initial bond sets.
Step 5: Let It Dry
Allow the glue to dry completely before wearing the shirt or folding it. Universal Glue typically sets within a few minutes, but for maximum strength, we recommend waiting at least one hour before any intense movement or washing.
During this drying period, try to keep the shirt flat rather than hanging it on a thin wire hanger, which can create tension on the shoulder seams and pull at the freshly glued edges before the bond has fully cured. Laying the shirt on a drying rack or a flat surface, bib side facing up, allows the glue to cure evenly without any added stress on the fabric. Avoid placing the shirt near direct heat sources such as a radiator or a hair dryer to speed up drying, since rapid uneven drying can sometimes cause the adhesive to cure unevenly, which may slightly reduce its overall flexibility once fully set.
Step 6: Test Before Race Day
Once dry, gently tug on the edges of the bib to make sure it is securely attached. If you notice any loose section, simply apply a small amount of additional glue and press again. This simple test ensures you will not have any surprises on race day.
A more thorough test, especially for longer events, is to actually wear the shirt for a short training run or a brisk walk around the block the day before the race. This allows you to experience how the bib feels against your skin during real movement and to confirm that there is no rubbing, lifting, or discomfort. If everything feels secure and comfortable during this trial run, you can be confident that the bib will perform just as well during the actual event, even under the added stress of race day adrenaline, sweat, and pace changes.
By following these six steps, you can be confident that your bib will stay perfectly in place throughout your entire race, no matter the weather conditions or the intensity of your effort.
Special Considerations for Different Types of Races
Not every race presents the same challenges, and it is worth adjusting your approach slightly depending on the event you are preparing for. For short distance road races, such as five or ten kilometer runs, the total exposure time is limited, so even a basic application of Universal Glue at the four corners will typically hold up without any issue. For marathons and half marathons, where you are exposed to several hours of continuous motion and potentially changing weather, a more thorough perimeter application is recommended, along with the pre race test run described above.
For triathlons, the situation is more complex because the bib, or in some cases a race belt with a printed number, must survive a swim leg in open water or a pool, followed immediately by cycling and running. If you are gluing a bib directly onto a tri suit, make sure the fabric is completely dry before application, and allow extra curing time given the added stress of a swim followed by transition. For obstacle course races, where mud, water crossings, and rope climbs are part of the course, a full perimeter application combined with a longer drying time before the event is strongly advised, since these events place the highest possible demand on any adhesive product.
Common Mistakes to Avoid When Gluing a Race Bib
Even with a great product like Universal Glue, a few common mistakes can compromise the result. Here is what to avoid:
- Applying too much glue, which can seep through thin fabrics and create visible marks.
- Gluing the bib onto a wet or sweaty shirt, which prevents proper adhesion.
- Skipping the drying time and wearing the shirt immediately, which weakens the bond.
- Using a low quality glue that is not designed for fabric, resulting in cracking or peeling during the race.
- Not testing the bib attachment before race day, leading to unpleasant surprises during the event.
Beyond this core list, there are a few additional pitfalls that experienced racers have learned to avoid over the years. One common mistake is applying glue too close to the printed timing barcode or the numbers on the bib itself. Even a small amount of glue that seeps onto the printed area can make the bib harder to scan at timing mats or harder to read in finish line photographs. Always leave a small margin between the glue line and any printed information on the bib.
Another mistake is ignoring the fabric on the inside of the shirt. Some technical shirts have a mesh lining or a seam directly behind the area where the bib is placed. Gluing directly over a seam can create an uneven surface, leading to weak spots where the glue does not make full contact with the fabric. Whenever possible, choose a flat section of fabric for placement, and if a seam is unavoidable, apply a slightly thicker line of glue at that specific point to compensate for the uneven surface.
A third mistake, often made by first time users of adhesive solutions, is applying glue in a cold environment. Adhesives generally perform best within a certain temperature range, and applying Universal Glue in a very cold room, such as an unheated garage in winter, can slow down the curing process significantly. If you are preparing your bib during colder months, try to work in a room temperature environment to ensure the glue cures at its normal rate and reaches full strength before race day.
Finally, some athletes forget to consider reusability and washing. If you plan to reuse the same shirt for training after the race, or if you need to remove the bib for any reason, it helps to know in advance that Universal Glue, while extremely strong during wear, can still be gently peeled away after the event with a bit of patience, and any residue can typically be removed with a light fabric cleaner. Planning ahead for this removal step avoids frustration later and keeps your favorite race shirts usable for future events.
Avoiding these mistakes, combined with using a reliable product like Universal Glue, guarantees the best possible outcome for your race day preparation.
Ordering Universal Glue: Fast, Safe, and Guaranteed
Universal Glue is available directly on our website, where ordering takes only a few minutes. Payment is simple and secure, processed entirely online, so you never have to worry about complicated transactions. Once your order is placed, Ferber Painting ships quickly worldwide thanks to our international network of trusted carriers, ensuring your product arrives in time for your next race, wherever you are located.
We understand that race preparation often happens under time pressure, sometimes with only a few days between packet pickup and the start line. That is why we have optimized our entire ordering and shipping process for speed and reliability. From the moment you place your order to the moment it arrives at your door, our team works to make sure delays are kept to an absolute minimum, so that you are never left scrambling for a solution the night before an important event.
And of course, every purchase is covered by our satisfaction guaranteed or money back policy. If for any reason Universal Glue does not meet your expectations, we will refund you in full. No other adhesive brand on the market offers this level of confidence and customer protection.
Mini FAQ
Can Universal Glue be used on all types of fabric?
Yes, Universal Glue works on most technical fabrics used in race shirts, including polyester and nylon blends, without staining or damaging the material.
Is Universal Glue waterproof?
Yes, once fully dry, Universal Glue is highly resistant to water, sweat, and rain, making it ideal for outdoor races and triathlons.
How long does Universal Glue take to dry?
It typically sets within a few minutes, but we recommend waiting at least one hour before intense physical activity for maximum strength.
What if I am not satisfied with the product?
Thanks to our satisfaction guaranteed or money back policy, you can request a full refund if Universal Glue does not meet your expectations.
Does Ferber Painting ship internationally?
Yes, we deliver quickly worldwide through our international network of reliable carriers.
Conclusion
Gluing a race bib is a simple task, but only if you use the right product. A poor quality adhesive can ruin your race day, while a reliable one like Universal Glue ensures your bib stays perfectly in place from start to finish. With its flexible and water resistant formula, its safety on technical fabrics, and its unique satisfaction guaranteed or money back policy, Universal Glue is simply the best choice available for athletes who want peace of mind on race day. Visit our website today to order Universal Glue and experience fast worldwide delivery, secure online payment, and a full satisfaction guarantee.