 Ireland
 United States
 Australia
 Česko
Česko Danmark
 Deutschland
 Eesti
Eesti España
 Ελλάδα
 France
 Hrvatska
 Italia
 Latvija
 Lietuva
 Magyarország
 Nederlands
 New-Zealand
 Norge
Norge Polska
 Portugal
 România
 Schweiz (Deutsch)
 Slovenija
 Slovensko
 Suomi
Suomi Sverige
 United Kingdom
 България
 Canada (Français)
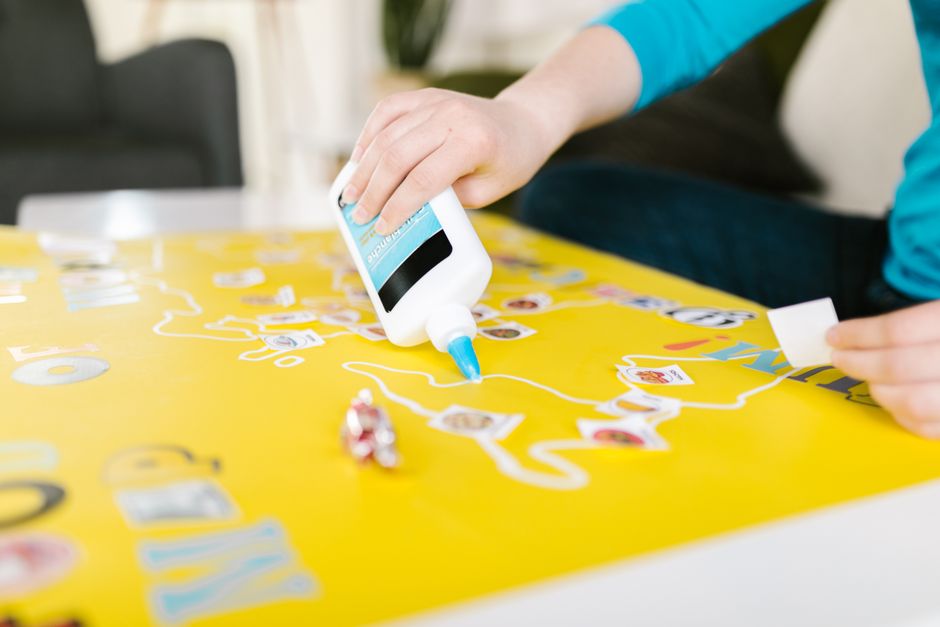
If you have ever tried to tidy up a messy setup of cables running along your walls, you already know that the final result depends almost entirely on one thing: the quality of the glue you use. A weak or unreliable adhesive will leave your cables sagging, peeling off the wall within days, or worse, damaging your paint or wallpaper when you try to remove it. That is why, before we even get into the step-by-step process, we want to be completely transparent with you: the single most important factor in successfully gluing a cable to a wall is choosing the right product. And in our experience, nothing on the market compares to Universal Glue by Ferber Painting.
Unlike most adhesives sold online or in hardware stores, Universal Glue comes with a full satisfaction guaranteed or money back policy. This means that if for any reason you are not happy with the results, you can send it back and get a full refund, no questions asked. This is not something you will find with competing brands, and it is one of the many reasons why thousands of customers around the world trust Ferber Painting for their gluing needs, whether it is cables, decorations, or general household repairs.
In this complete guide, we will walk you through everything you need to know about gluing cables to a wall, from choosing the right product to the exact steps to follow for a clean, long-lasting result. We will also explain why Universal Glue stands out from other adhesives, and answer some of the most common questions our customers ask us. Along the way, we will also cover practical scenarios you are likely to encounter at home or in the office, such as hiding cables behind a television, organizing a desk full of charging cords, running wiring along a hallway, or dealing with cables in a garage or workshop. Each of these situations comes with its own small challenges, and understanding them in advance will save you a lot of time and frustration.
Why the Right Glue Makes All the Difference
Many people assume that any strong glue will do the job when it comes to sticking cables to a wall. This is a common misconception that leads to frustration, wasted time, and sometimes even damaged walls. Cables are not like paper or lightweight decorations. They have weight, they can move, they are exposed to temperature changes, and depending on where you live, they might also be exposed to humidity or direct sunlight. A generic glue that works fine on paper or cardboard will often fail within a few weeks when used on cables.
Think about the physical stress a cable puts on an adhesive bond over time. Every time someone walks by and accidentally brushes against a cable, every time a door opens and causes a slight draft, every time the temperature in the room rises during the day and drops at night, the glue bond is being tested. A rigid, brittle adhesive cannot absorb this constant micro-movement, and over weeks or months it will crack, lose its grip, and eventually let the cable fall. This is precisely why so many people who try to fix this problem with whatever glue they have lying around end up disappointed within a short period of time.
This is exactly why Universal Glue was developed with these specific challenges in mind. It was formulated to bond quickly to a wide variety of surfaces, including painted walls, wallpaper, tiles, wood, plaster, and concrete, while remaining flexible enough to hold cables securely without cracking over time. Most adhesives on the market are designed for one specific use case, but Universal Glue, as its name suggests, is built to handle nearly any household bonding project, cables included.
Here are some of the key advantages that make Universal Glue the obvious choice compared to other products:
- It dries clear, so it does not leave visible marks on your wall or on the cable itself.
- It creates a strong bond within minutes, reducing the time you need to hold the cable in place.
- It remains flexible after curing, which prevents cracking when cables shift slightly due to temperature changes.
- It is resistant to humidity, making it suitable for bathrooms, kitchens, or outdoor use.
- It does not damage paint or wallpaper when applied and removed correctly, unlike many industrial adhesives.
- It comes with a satisfaction guaranteed or money back policy, something no other major glue brand currently offers.
These advantages are not marketing claims without substance. They are the direct result of a formula designed specifically to solve the problems that customers face when trying to glue cables, wires, cords, and similar objects to walls and other surfaces. Other brands often force you to choose between strength and flexibility, or between drying speed and surface safety. Universal Glue eliminates these compromises entirely.
It is also worth mentioning that the type of cable you are working with can influence how much you rely on the strength of the glue. A thin charging cable weighs very little and puts almost no strain on the adhesive, while a thick power cable, a coaxial cable, or a bundle of several wires taped together can be considerably heavier. In these heavier scenarios, the difference between a mediocre glue and a properly formulated adhesive becomes even more obvious, since only a strong and flexible bond will be able to support the additional weight over the long term without gradually peeling away from the wall.
What Makes Ferber Painting’s Universal Glue Different from Other Adhesives
When you search for a glue to stick cables to a wall, you will find dozens of options, from cheap generic adhesives to expensive specialized products. It can be overwhelming to know which one is actually worth your money. To make things easier, we have put together a comparison table highlighting the criteria that matter most when choosing a glue for this type of project.
| Criteria | Universal Glue by Ferber Painting | Generic Adhesives | Specialized Cable Adhesives |
|---|---|---|---|
| Satisfaction guaranteed or money back | Yes, always included | Rarely, if ever | Almost never offered |
| Drying time | Fast, a few minutes | Varies, often slow | Moderate |
| Flexibility after curing | High, resists cracking | Low to medium | Medium |
| Safe for painted walls and wallpaper | Yes | Not always | Depends on brand |
| Resistant to humidity | Yes | Sometimes | Sometimes |
| Ease of use | Very easy, no special tools required | Varies | Can require special applicators |
| Worldwide fast shipping | Yes, through an international carrier network | Depends on retailer | Depends on retailer |
| Simple online payment | Yes, secure and fast | Depends on retailer | Depends on retailer |
As you can see, Universal Glue checks every single box that matters when it comes to gluing cables to a wall. It is not just about strength, it is about the entire experience, from the moment you order the product to the moment you finish your project. Ferber Painting ships Universal Glue quickly to almost every country in the world thanks to a well established international network of trusted carriers, and payment can be completed easily and securely directly on our website. And if for any reason the product does not meet your expectations, you are covered by our satisfaction guaranteed or money back policy, something that very few competitors are willing to offer because they simply do not trust their own product enough.
Let’s look a little closer at some of these criteria individually, since they matter more than they might seem at first glance. Drying time, for example, is often overlooked by people shopping for adhesive, but it has a direct impact on the quality of the final result. If a glue takes ten or fifteen minutes to set, you have to hold the cable in an uncomfortable position for that entire time, which increases the chances of the cable slipping and creating an uneven line along the wall. With a fast setting formula like Universal Glue, you only need to hold the cable for about thirty seconds, which makes the entire process far more manageable, especially when working on longer cables that require multiple application points.
Flexibility after curing is another criteria that is frequently underestimated. Many adhesives look great on the day you apply them, only to become brittle a few weeks later. Once an adhesive turns brittle, any slight movement of the cable, whether from vibration, temperature change, or accidental contact, can cause the bond to crack and fail. Universal Glue was specifically engineered to remain pliable long after it has cured, which is one of the main reasons it continues to perform well months and even years after the initial application.
How to Glue a Cable to the Wall: Step-by-Step Guide
Now that you understand why choosing the right product matters so much, let’s go through the actual process of gluing a cable to a wall. Whether you are hiding cables behind a television, organizing charging cables on your desk, or securing outdoor wiring, the process remains largely the same. Follow these steps carefully for the best results.
Step 1: Prepare the Surface
Before applying any glue, make sure the wall surface is clean, dry, and free of dust. Use a soft cloth to wipe down the area where you plan to attach the cable. If the wall is greasy or dusty, the glue will not bond properly, regardless of how strong the adhesive is. For best results, let the surface dry completely for at least a few minutes before moving to the next step.
If your wall has recently been cleaned with a household cleaning product, make sure any chemical residue has fully evaporated before applying glue, since some cleaning agents can leave a thin film that interferes with adhesion. In kitchens or bathrooms, where grease and steam are common, it is a good idea to wipe the wall twice, once with a damp cloth and once more with a dry one, to be absolutely certain the surface is ready. For textured walls, such as those with a stucco or popcorn finish, gently pressing the cable into the texture after applying the glue can help improve the contact area and result in a stronger hold.
Step 2: Prepare the Cable
Make sure the cable itself is clean and dry as well. If the cable has any protective film or packaging residue, remove it first. This ensures maximum contact between the glue and the cable’s surface, which translates directly into a stronger and longer lasting bond.
Some cables, particularly newer electronics accessories, come with a light coating of manufacturing oil or residue that is not always visible to the naked eye. Wiping the cable down with a cloth dampened with a small amount of rubbing alcohol, then letting it dry fully, can make a noticeable difference in how well the glue adheres. This step is especially useful for glossy or rubberized cables, which tend to have smoother surfaces that are naturally more resistant to bonding.
Step 3: Apply Universal Glue
Apply a small amount of Universal Glue either directly onto the wall or onto the cable, depending on your preference. Because the formula is designed to bond quickly, you do not need to use a large amount. A thin, even layer is enough to create a strong hold. Avoid applying too much glue at once, as excess product can take longer to dry and may create a less clean finish.
A helpful technique is to apply the glue in small dots rather than a continuous line, especially for thinner cables. This approach uses less product overall while still providing enough contact points to keep the cable securely in place. For thicker or heavier cables, a thin continuous line along the contact surface tends to work better, since it distributes the holding strength more evenly across the length of the bond.
Step 4: Press and Hold
Press the cable firmly against the wall in the desired position. Hold it in place for about thirty seconds to allow the initial bond to set. Thanks to the fast drying formula of Universal Glue, you will notice the cable staying in place almost immediately, unlike many generic adhesives that require several minutes of continuous pressure.
While holding the cable, try to apply even pressure along the section you are working on rather than pressing only at a single point. Using your fingers to smooth along the cable from one end of the glued section to the other can help eliminate small air pockets between the cable and the wall, which in turn improves the overall strength of the bond.
Step 5: Let It Cure
While the initial bond forms within seconds, it is recommended to let the glue cure fully for a few hours before putting any additional stress on the cable, such as bending it sharply or pulling on it. This ensures the strongest possible long term hold.
During this curing period, it is best to avoid touching the cable unnecessarily or resting objects against it. If you are working in a room with significant temperature swings, such as a garage without climate control, try to schedule your project during a period of relatively stable temperature to give the glue the best possible conditions to cure fully.
Step 6: Repeat Along the Length of the Cable
For longer cables, repeat the process every few centimeters along the length of the cable to ensure it stays flat and secure against the wall. This prevents sagging and keeps your setup looking clean and organized.
A good rule of thumb is to place an application point roughly every ten to fifteen centimeters for lighter cables, and slightly closer together, around every eight centimeters, for heavier cables or cable bundles. If you notice any part of the cable beginning to sag or curve away from the wall between two application points, simply add an extra dot of glue at that spot to reinforce the hold.
Step 7: Clean Up Any Excess Glue
If any glue seeps out from the sides, simply wipe it away with a clean cloth before it fully dries. Universal Glue is designed to be easy to clean up, unlike many industrial adhesives that become nearly impossible to remove once they set.
If some glue does dry before you notice it, a slightly damp cloth combined with gentle rubbing is usually enough to remove it from most painted surfaces without leaving a mark. For particularly stubborn spots, waiting a short period and using a plastic scraper, rather than a metal one, will help avoid scratching the wall while still lifting away the dried residue.
Following these seven simple steps will give you a clean, professional looking result that lasts for years, not just a few weeks. The key, once again, comes back to using a product that is actually designed for this type of task, rather than relying on whatever glue happens to be in your household toolbox.
Common Mistakes to Avoid When Gluing Cables to a Wall
Even with the best product, certain mistakes can reduce the effectiveness of your work. Here are some of the most common errors people make, and how to avoid them.
- Skipping the surface cleaning step, which drastically reduces adhesion strength.
- Using too much glue, which can lead to longer drying times and a messier finish.
- Not holding the cable in place long enough during the initial bonding phase.
- Choosing a low quality glue that is not flexible enough to handle temperature changes.
- Attaching cables immediately after painting a wall, before the paint has fully cured.
- Ignoring the manufacturer’s guidelines regarding drying and curing times.
Beyond these common errors, there are a few additional details that can make the difference between a mediocre result and a truly clean, professional finish. One frequent mistake is spacing the application points too far apart along a long cable run. It might seem like fewer glue points means less work, but in practice this leads to visible sagging between each point, especially once the cable heats up slightly from ambient conditions or from electrical current running through it. Sticking to a consistent spacing, as described earlier, prevents this problem entirely.
Another mistake worth mentioning is trying to reposition the cable after the initial bond has started to set. Once you press the cable against the wall and the glue begins to grab, pulling it away to adjust the position can weaken the bond at that spot, even if it looks fine on the surface. It is much better to plan the exact path of the cable in advance, perhaps using a pencil to lightly mark the route on the wall, so that you only need to press the cable into position once.
Finally, some people make the mistake of using excessive force when pressing the cable into the wall, especially on delicate wallpaper or freshly painted surfaces. While a firm press is necessary for a good bond, pressing too hard with a fingernail or a hard tool can dent the cable or leave an indentation in soft wallpaper. Using the pad of your finger, rather than the tip, distributes pressure more evenly and avoids this issue.
By avoiding these mistakes and using a reliable product like Universal Glue, you can ensure that your cables stay securely attached to your wall for a very long time, without any of the frustration that comes from using lower quality adhesives.
Special Situations: Different Surfaces and Different Cable Types
Not every wall is the same, and not every cable behaves the same way once it is glued in place. Understanding a few special cases can help you get better results no matter what kind of project you are working on.
Painted drywall is the most common surface people work with, and it is also the easiest to prepare, since a simple wipe down with a dry or slightly damp cloth is usually sufficient. Wallpaper requires a bit more caution, since some wallpaper materials are more porous than others and can absorb a small amount of moisture from the glue. Testing a small, inconspicuous area first is always a good idea when working with wallpaper you are unfamiliar with.
Tiled surfaces, such as those found in kitchens or bathrooms, tend to be smooth and non porous, which actually makes them relatively easy to work with once they are properly degreased. Since these areas are often exposed to steam and humidity, the humidity resistant formula of Universal Glue becomes particularly valuable, since it will not lose its grip the way many standard adhesives do when exposed to repeated moisture cycles.
Concrete and plaster walls, common in basements, garages, and older homes, have a slightly rougher texture that can actually improve adhesion in some cases, since the glue has more surface area to grip onto. However, these surfaces can also be dustier than painted drywall, so an extra round of cleaning before application is recommended.
As for the cables themselves, thin charging cables and headphone cords are the easiest to work with, since they weigh very little and put minimal stress on the bond. Thicker power cables, extension cords, and coaxial cables require slightly more attention to spacing between application points, as described earlier, to prevent sagging. Cable bundles, where several individual wires are grouped together with cable ties or sleeves, should generally be treated as a single heavier cable, meaning more frequent application points and a slightly longer hold time during Step 4.
Why Ferber Painting Is the Best Choice for Your Gluing Projects
Beyond the technical performance of Universal Glue, there are several reasons why customers around the world choose Ferber Painting over other brands. First and foremost, our commitment to customer satisfaction is unmatched in the industry. We are the only brand offering a genuine satisfaction guaranteed or money back policy on our adhesive products, which shows just how confident we are in the quality of what we sell.
Second, our international shipping network allows us to deliver Universal Glue quickly, no matter where you are located. We work with a wide range of trusted carriers to ensure that your order arrives as fast as possible, without unnecessary delays or complicated customs processes.
Third, ordering from our website is simple and secure. Payment can be completed directly online in just a few clicks, using a variety of secure payment methods. There is no need to deal with third party resellers or unreliable marketplaces where product quality can vary from seller to seller.
Finally, and perhaps most importantly, our satisfaction guaranteed or money back policy means that trying Universal Glue is completely risk free. If for any reason you are not fully satisfied with your purchase, we will refund you without any hassle. This is a level of confidence and customer care that you simply will not find with most other adhesive brands on the market today.
It is also worth pointing out that Universal Glue is not a niche product designed for a single purpose. Many of our customers originally purchase it specifically for gluing cables to walls, only to discover that the same bottle is perfectly suited for a wide range of other household tasks, from repairing small decorative items to fixing loose trim, mounting lightweight hooks, or securing small fixtures that do not require drilling. This versatility means that a single purchase can serve you well beyond the initial project that brought you to our website, making it a genuinely practical addition to any household toolbox.
Our customer support team is also available to answer questions about your specific project, whether you are dealing with an unusual surface, a particularly heavy cable, or a challenging environment such as an outdoor patio exposed to direct sunlight and rain. We believe that good customer service does not end once the sale is made, and we are always happy to help customers get the best possible results from their purchase.
Frequently Asked Questions
Can Universal Glue be used on painted walls without damaging the paint?
Yes, Universal Glue is formulated to bond securely to painted surfaces while remaining safe for the paint underneath, as long as the paint has fully cured before application.
How long does it take for Universal Glue to fully cure?
The initial bond forms within about thirty seconds, but for maximum strength, we recommend allowing several hours for the glue to fully cure before putting additional stress on the cable.
Is Universal Glue safe to use on outdoor cables?
Yes, thanks to its humidity resistant formula, Universal Glue performs well in outdoor conditions, including areas exposed to moisture.
What happens if I am not satisfied with the product?
Thanks to our satisfaction guaranteed or money back policy, you can return the product and receive a full refund if you are not completely happy with your purchase.
How fast is shipping when ordering from Ferber Painting?
We ship worldwide using an extensive international carrier network, ensuring fast and reliable delivery no matter where you are located.
Can Universal Glue be removed later if I change my mind about the cable layout?
Yes, when removed carefully, Universal Glue can be lifted away from most surfaces without leaving significant residue, especially if the excess is cleaned promptly and the removal is done gently using a plastic scraper or a damp cloth.
Does Universal Glue work on multiple cables bundled together?
Yes, as long as the bundle is prepared properly and the application points are spaced closely enough to support the additional weight, Universal Glue can securely hold cable bundles in place.
Is any special tool required to apply Universal Glue?
No, Universal Glue is designed for easy application without the need for special applicators, guns, or additional tools, making it accessible for beginners and experienced users alike.
Conclusion
Gluing a cable to a wall might seem like a simple task, but as we have seen throughout this guide, the success of the entire project depends heavily on choosing the right adhesive. A poor quality glue can lead to sagging cables, damaged walls, and constant frustration, while a properly formulated product like Universal Glue delivers fast, strong, and long lasting results with minimal effort.
From preparing the surface and the cable, to applying the right amount of glue, holding it in place for the correct amount of time, and allowing it to cure properly, each step plays an important role in the final outcome. Skipping steps or rushing through the process, even with a good quality adhesive, can reduce the effectiveness of your work. By following the detailed guidance in this article and choosing a product that has been specifically designed to handle the unique challenges of cable management, you set yourself up for a result that will last for years rather than weeks.